
The debate rages between champions of the old school Chevy small-block and fans of the new-school LS series. Which camp do you fall into? When you really take a look at both power plants they’re not that different in the component category. As a matter of fact, many of the rotating internals share the same dimensions if you decide to hop up one of them.
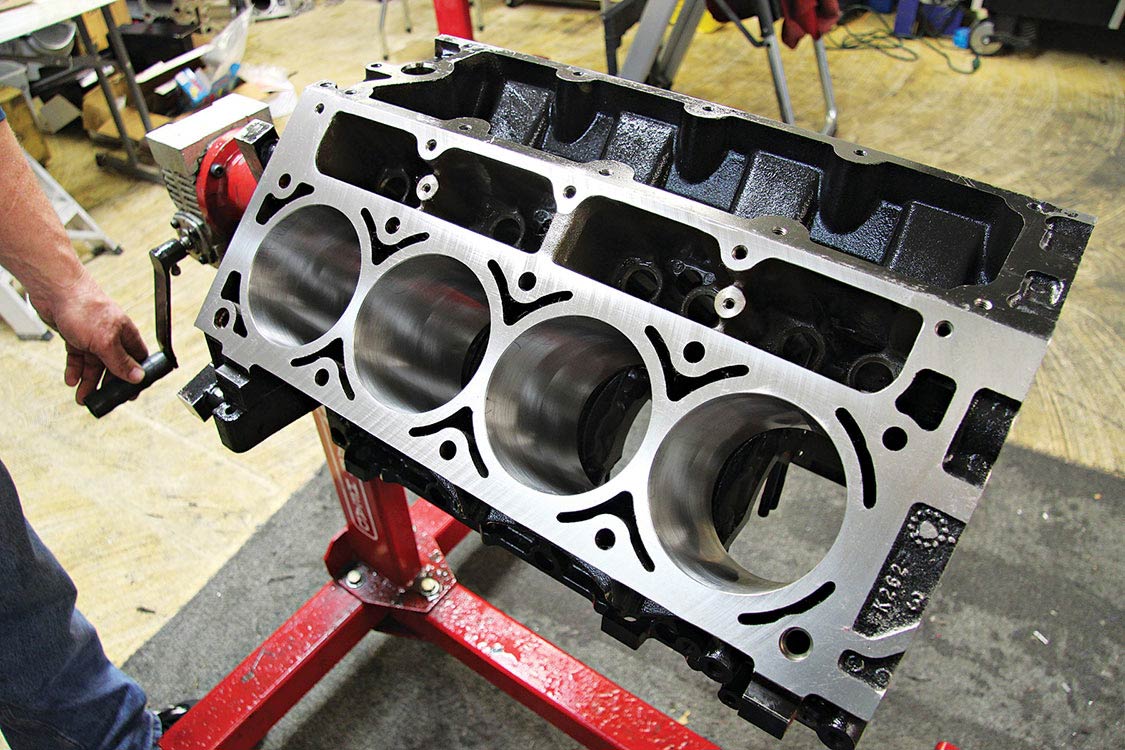
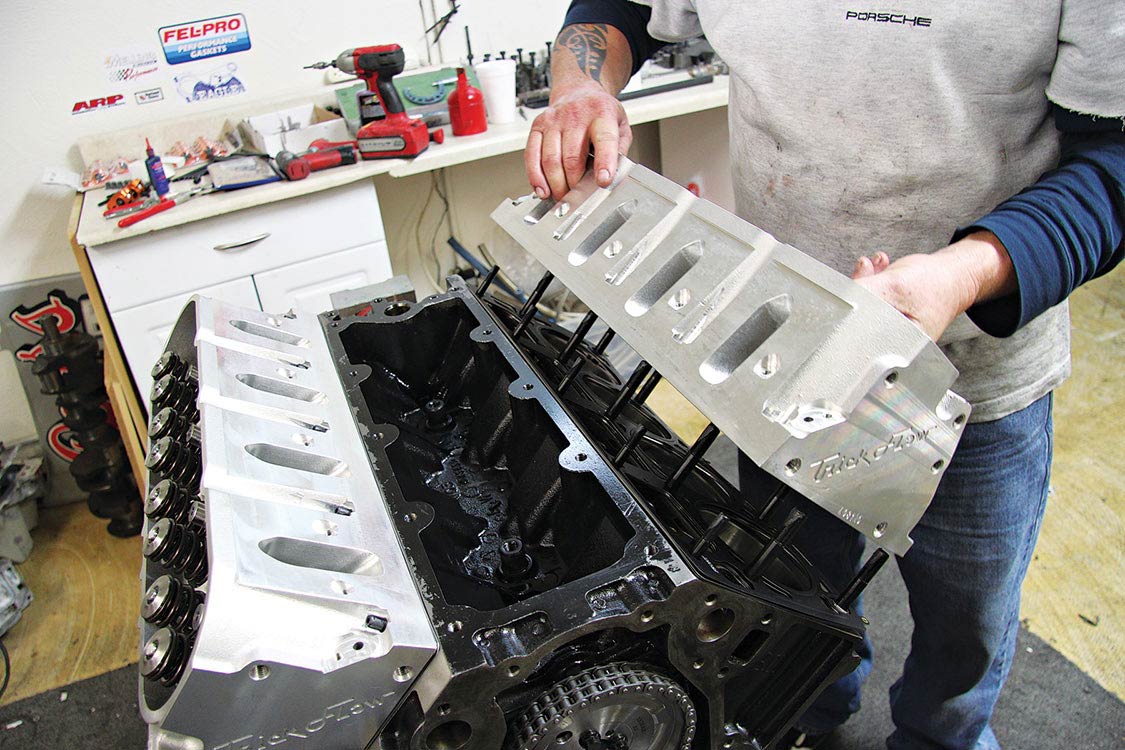
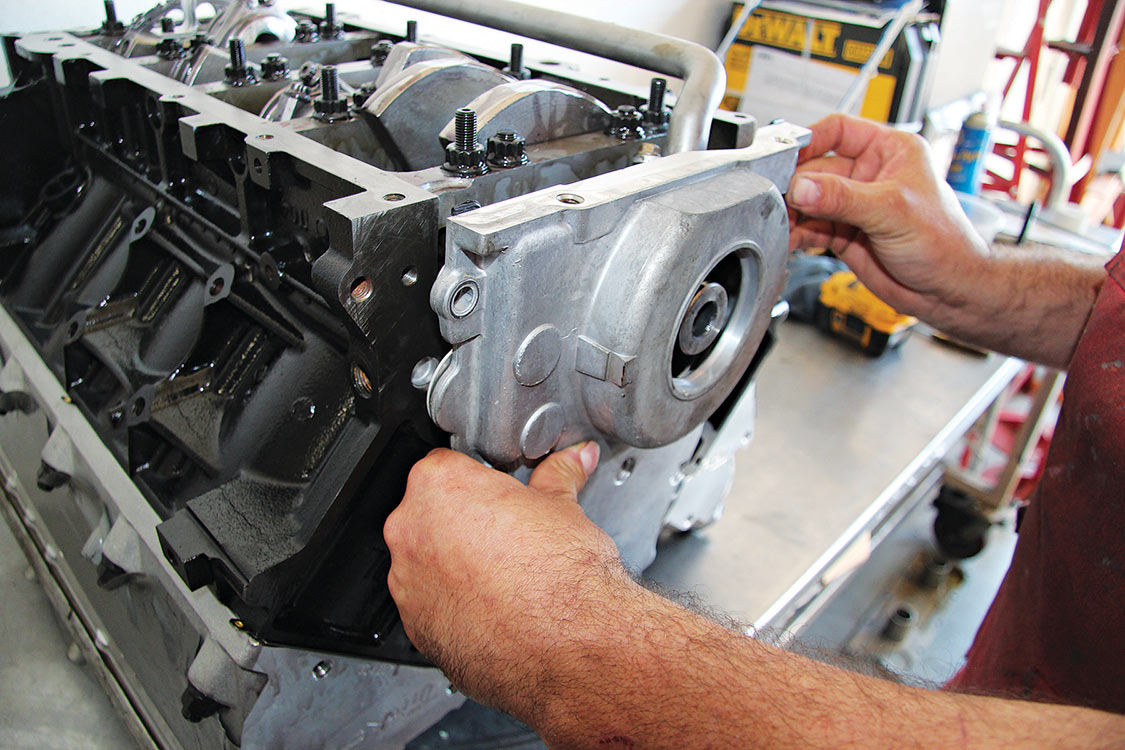
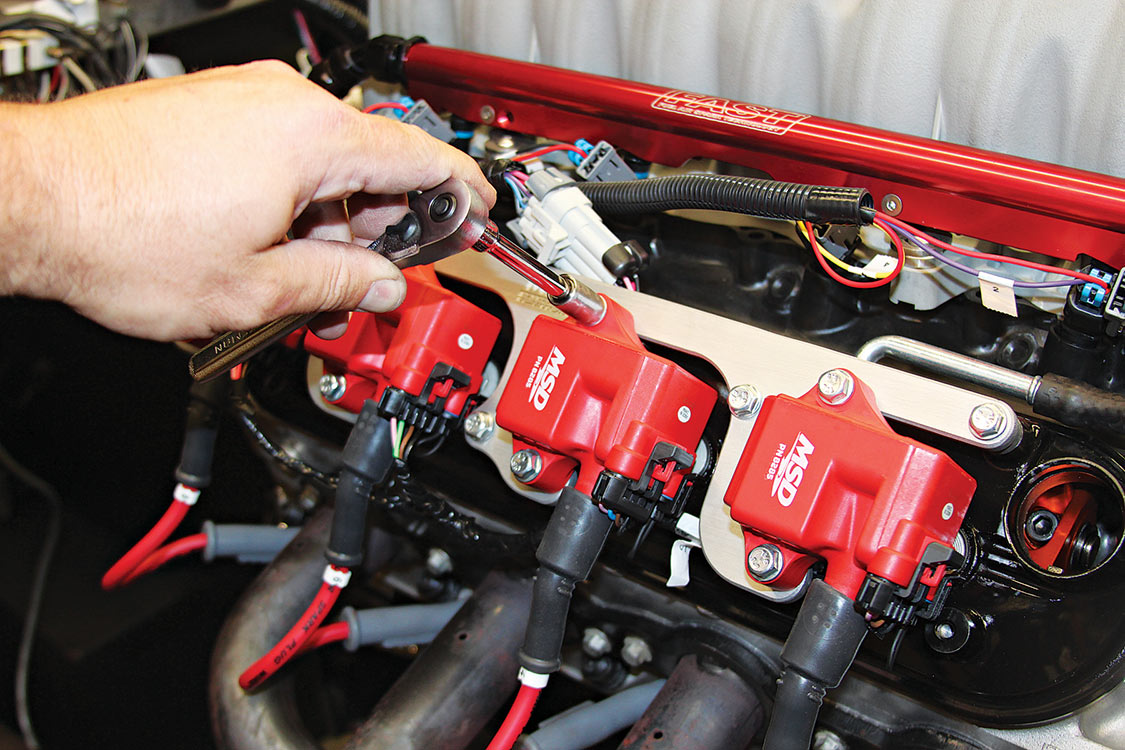
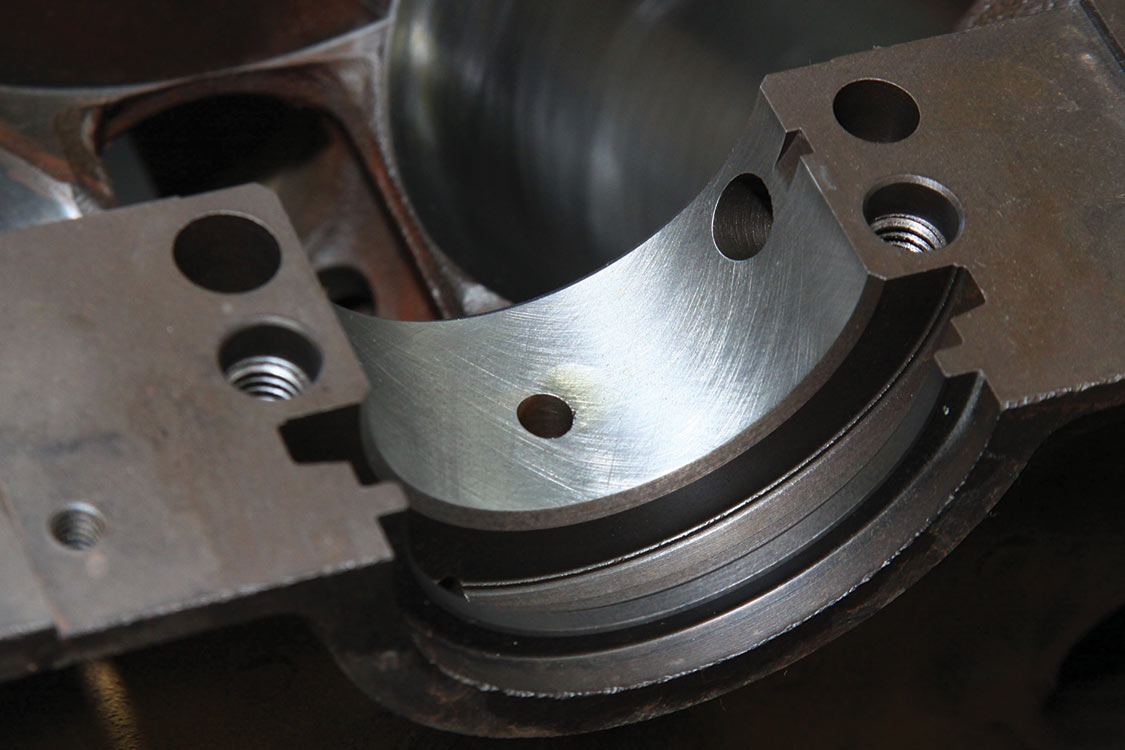
Obviously GM improved some key features when it introduced the LS series engine in late 1997. The redesigned main caps and side-loading bosses improved the block’s strength; and the noticeable lack of distributor, traded for the individual coil packs devoted to each cylinder, made the LS look completely different, and it took a few years for hot rodders to learn how to build power with it. However, hands down, the one major improvement that the LS series has over the small-block Chevy is improved cylinder head design.
So the debate continues: Is the LS series better thanks to more modern technology and engineering? Well, I wouldn’t count out the ol’ small-block Chevy just yet. There’s no question that this engine design has received more research than a NASA rocket ever did. The small-block Chevy is a freak of nature, and it’s surpassed its original design limitations 10 times over. From the days of 265 ci, to today’s 500-ci monster motors, the small-block Chevy is a tough competitor to beat.
OK, I know what you’re really thinking, which one is better, or which one can I make more power with? Well, the answer really is both, because each design is capable of making more power than anyone could ever use, or should have on the street, and because of their production numbers and the availability of aftermarket speed parts, building a performance GM-based engine is the easiest and most affordable option today.
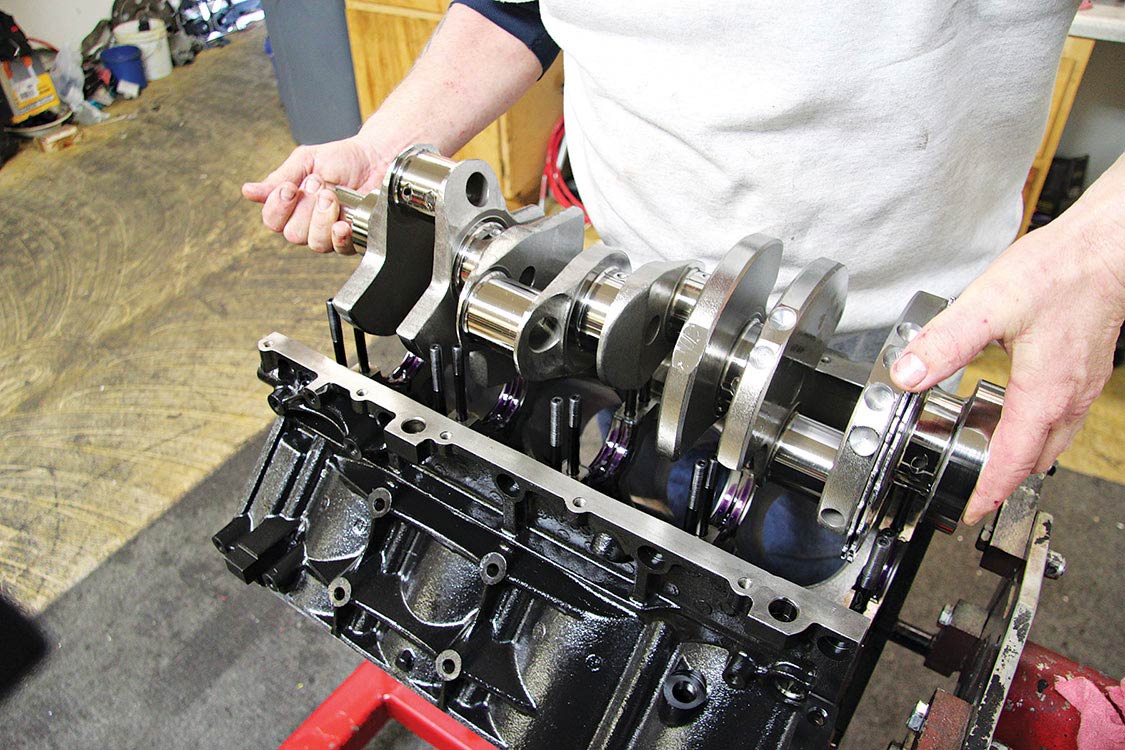
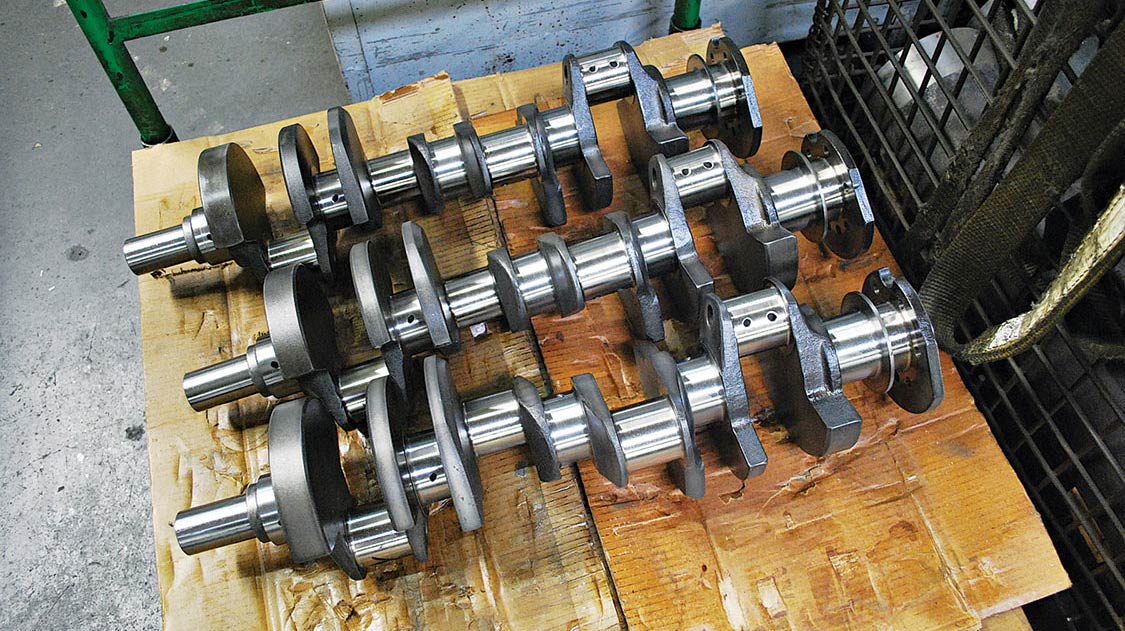
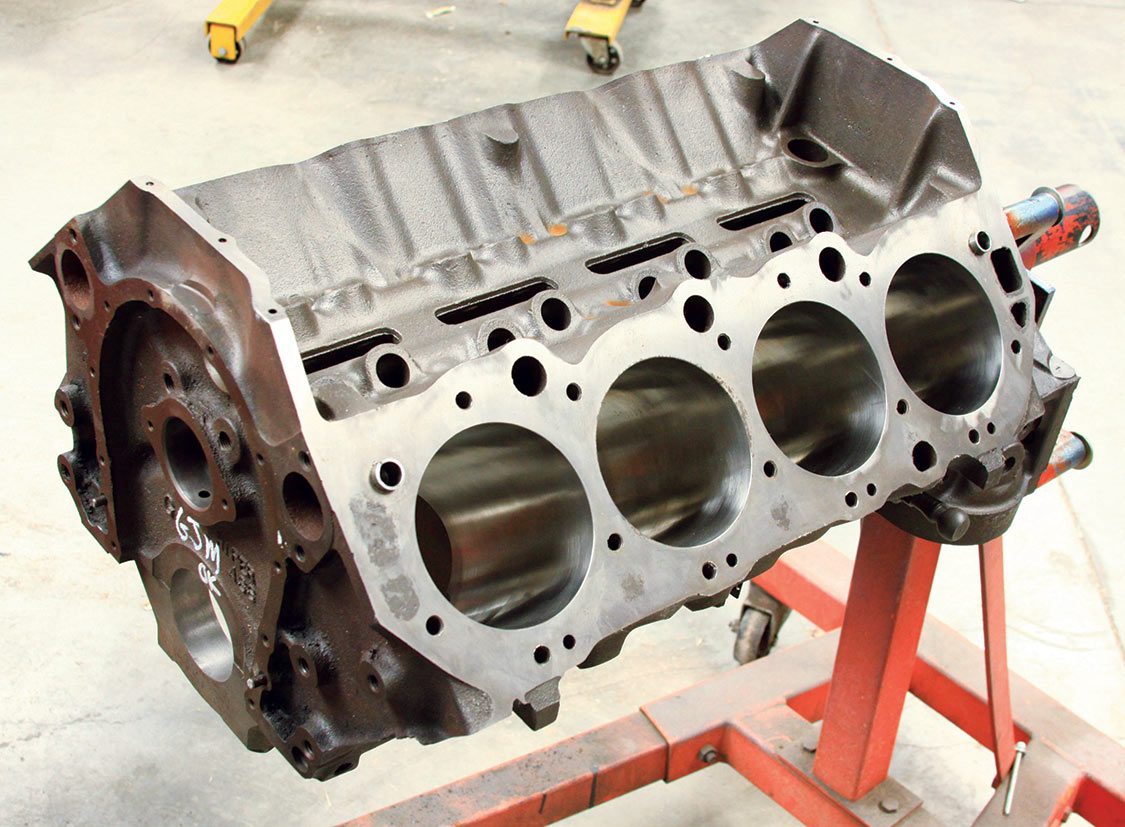
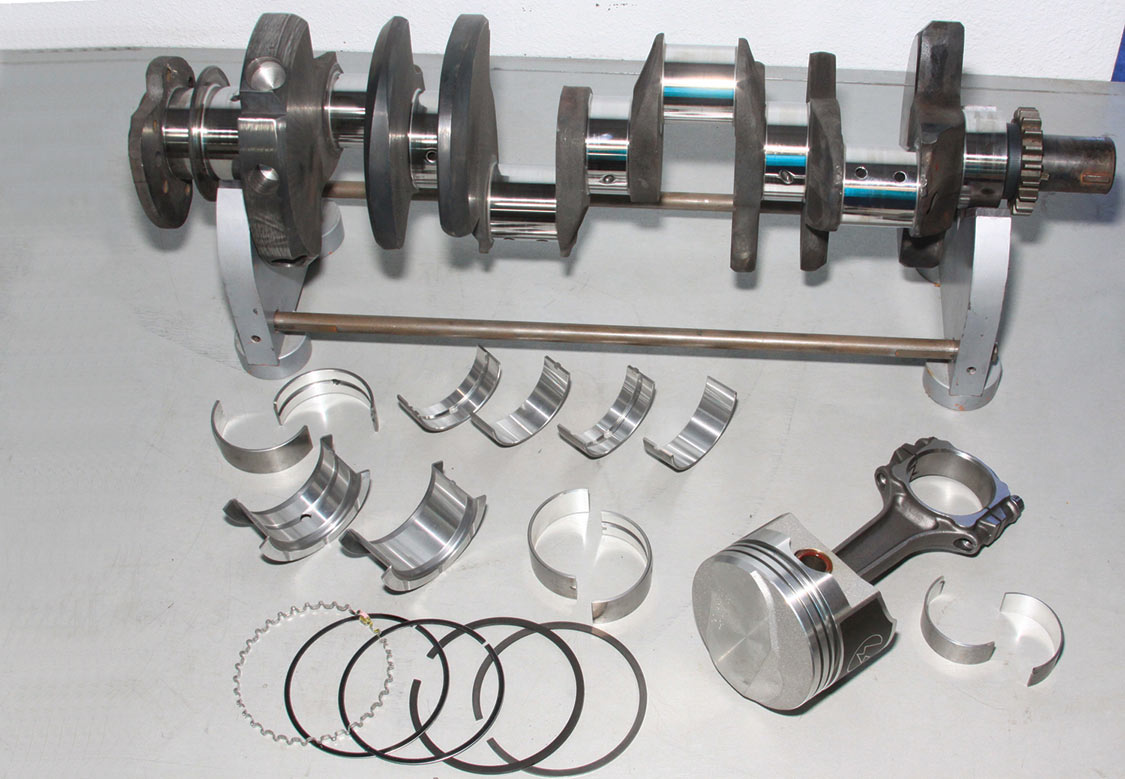
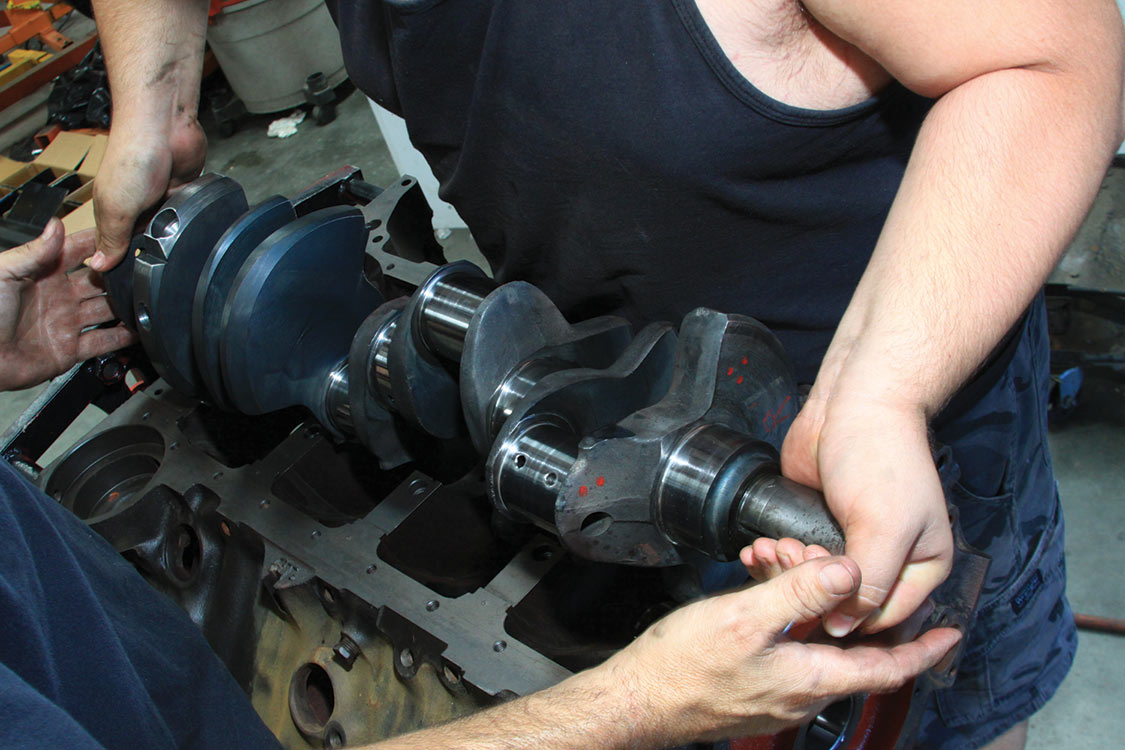
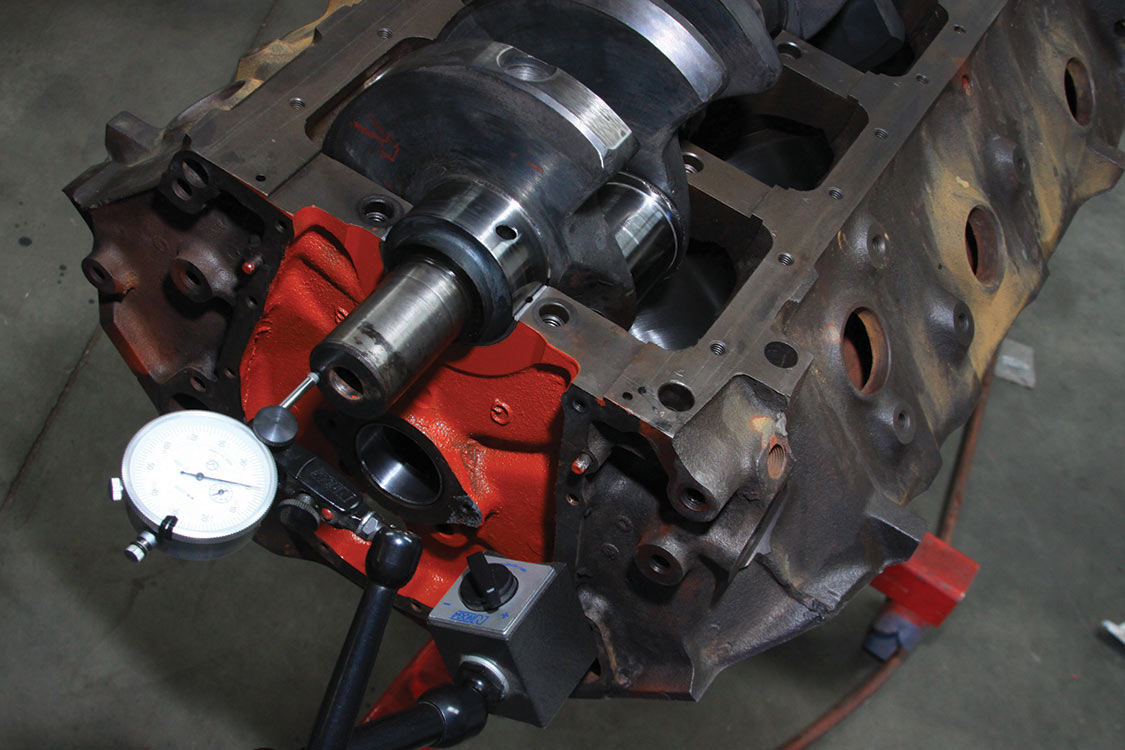
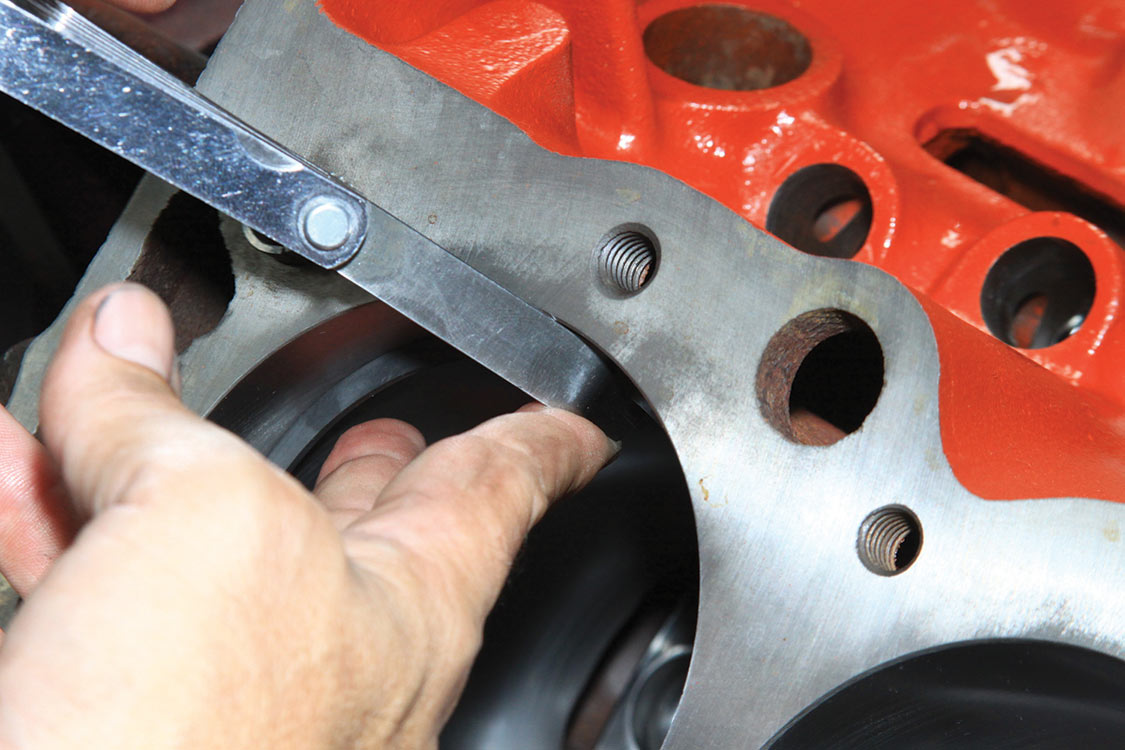
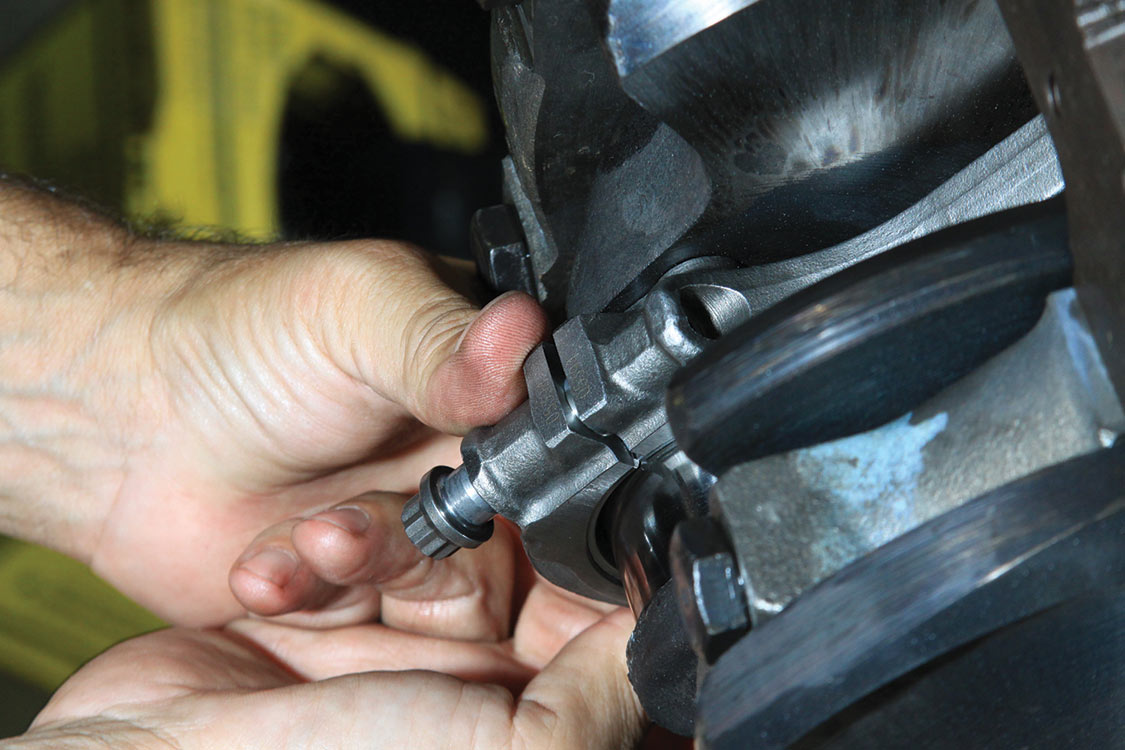
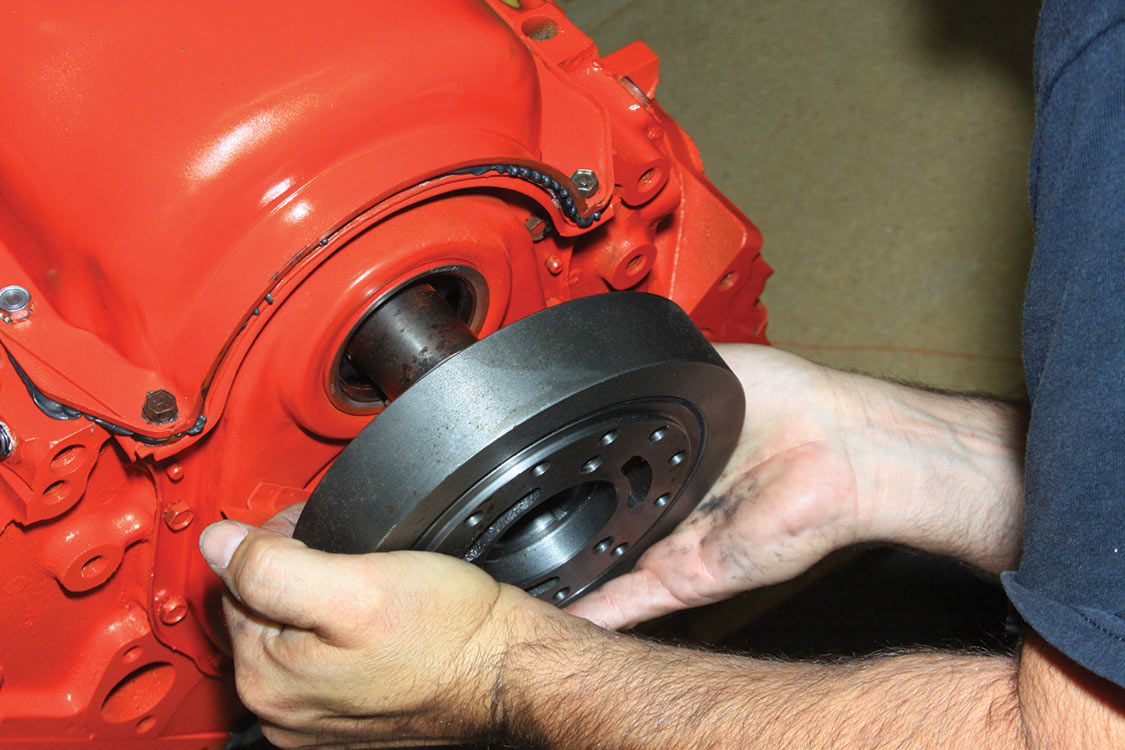
Now let’s focus on how to get the most out of a GM engine whether it’s based on a small-block Chevy or an LS. I’m sure that all of us motorheads know that increasing the displacement in any engine will benefit the horsepower output. There are many ways to increase engine displacement, but the least invasive method is to change the crankshaft’s stroke length. Referred to as “stroking the crank” or “building a stroker,” it’s by far the simplest way to increase the displacement of a performance engine and yield the biggest gains.
If you haven’t heard the term “stroker engine” before, then let me welcome you to world of the 21st century performance vehicle. But, I’ll bet that you have heard the term, so instead, here’s a little background information on one of the most popular engine modifications known to gearhead kind. Let’s start from the beginning: What is a stroker engine really, and why has it been so popular for most of the last 40 years.
Back in the day, drag racers and dirt track racers were in need of a low-buck way to increase horsepower. Racing is an expensive sport, and most spend a fortune on parts to make their vehicle faster. In the late-’60s and early-’70s, the Chevy small-block engine, or the SBC, was the reigning king of power plants in just about everything on four wheels. The SBC was offered in many different cubic inch sizes, including the ever-popular 350-cid passenger car model, as well as the 400-cid model found in some station wagon and truck models. The racer of this time had to be savvy and unafraid of experimentation to gain maximum horsepower from these engines.
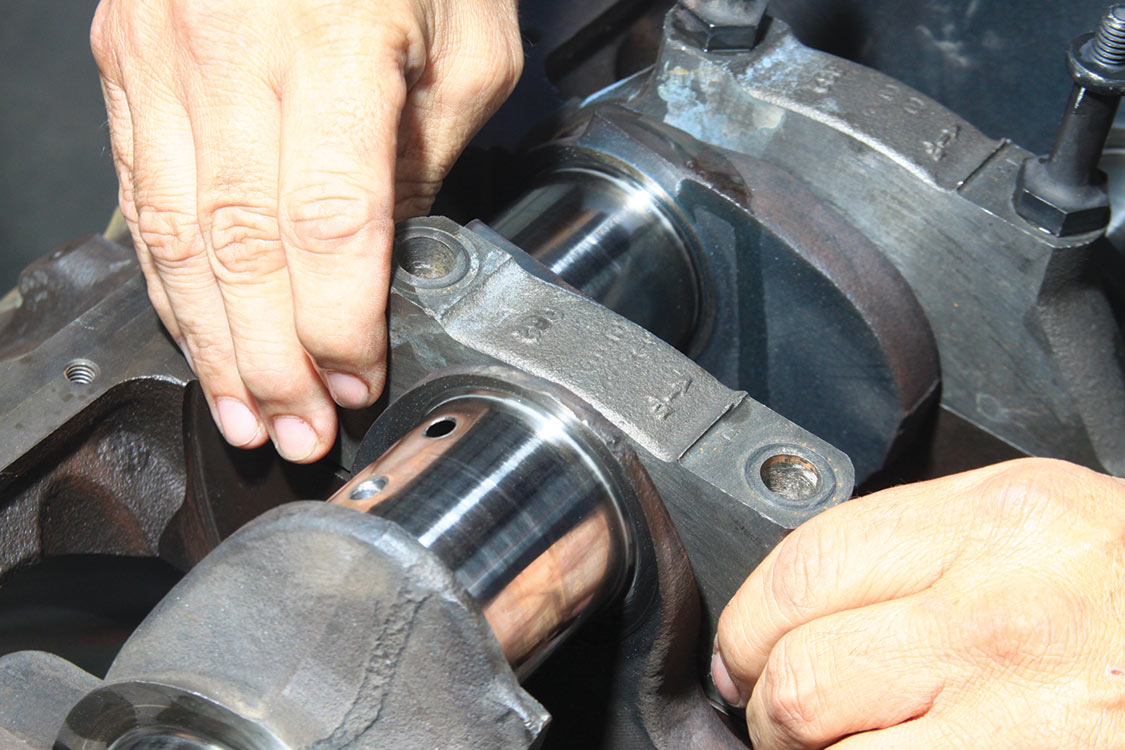
It didn’t take long to figure out how to merge the two engines together. The 400 crankshaft had a stroke length over the 350’s crank, when it was installed into the 350 block, it increased the overall displacement size from 350 to 382.7 ci, which when rounded up turned into what we know as the 383 stroker. The result was an increase in the distance that a piston has to travel up and down in the cylinder bore, which literally increases engine displacement or engine size, creating extra power. This changed everything. As the saying goes, there is no replacement for displacement. From that point on hundreds of thousands have been built. It wasn’t long after that other engines were stroked, like Fords, Mopars, imports and even diesel engines. The mod became the poor man’s race engine and started the street performance revolution.
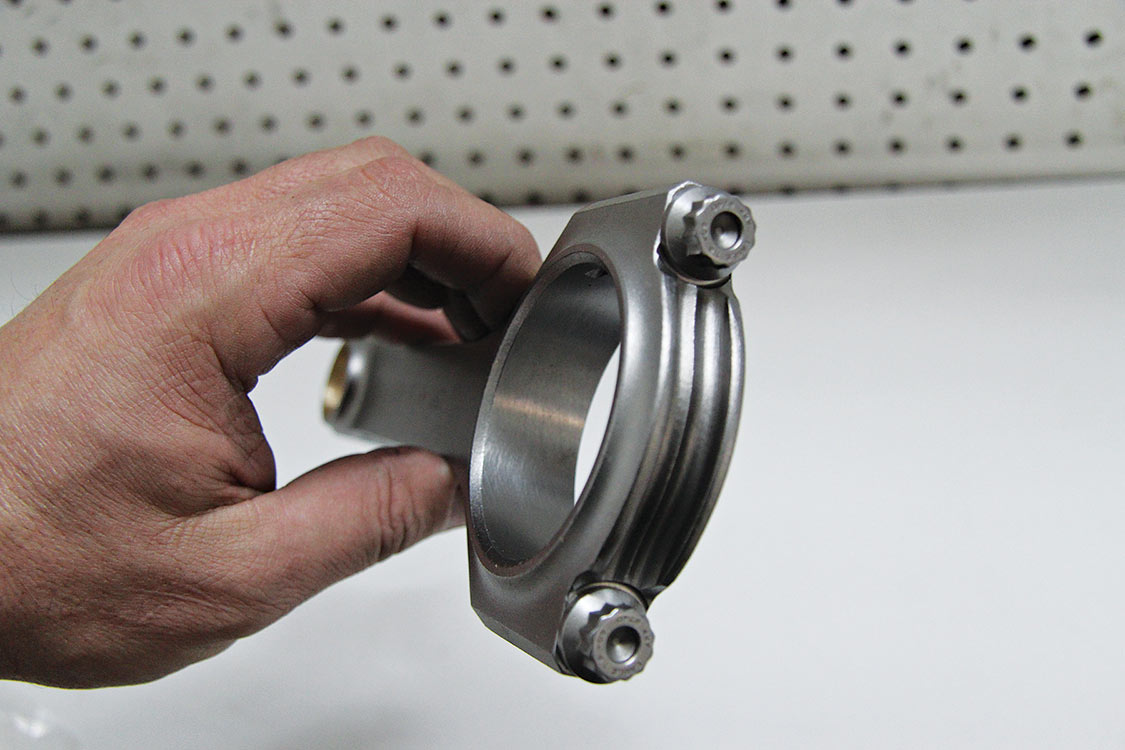
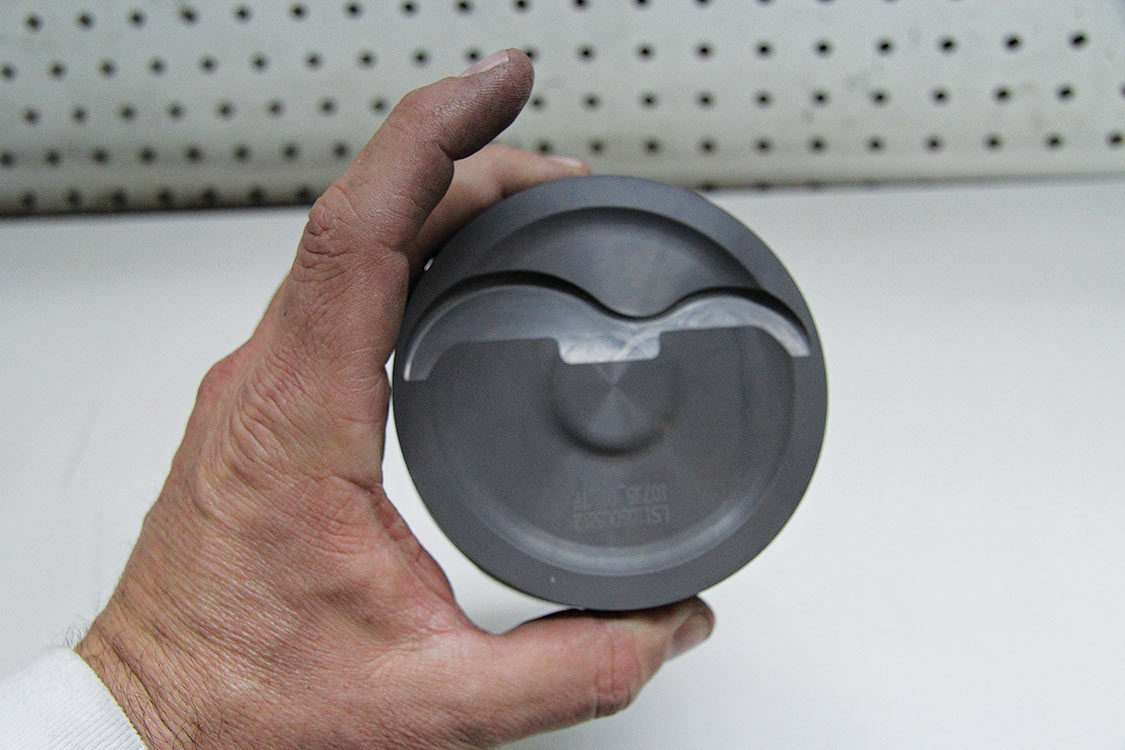
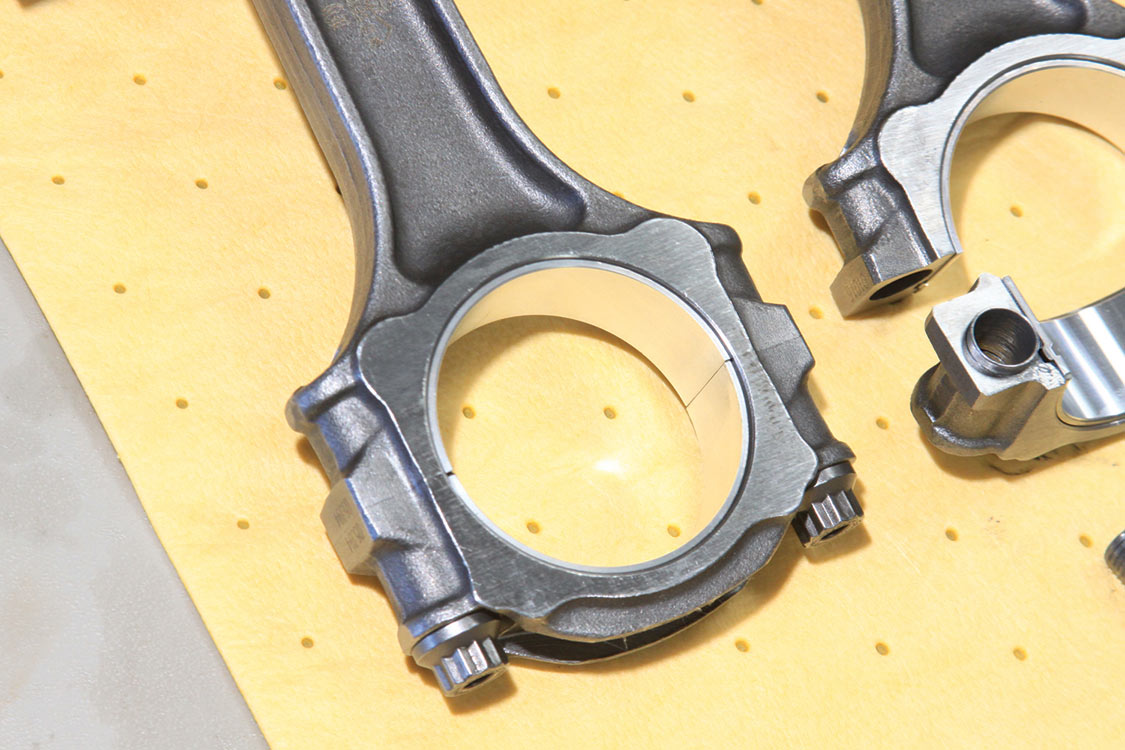
Throughout the years, many paid for the abuse they were inflicting onto their factory parts. Stock cast components were no match for the high rpm requirements. Parts began to fail, which opened the door for aftermarket companies to improve parts and increase the numbers of this sought-after combination. Stronger forged parts made their way into machine shops, as well as new piston and cylinder head designs, which increased numbers and soon surpassed the old square engine benchmark of 383 hp. In fact it’s not unheard of for engine numbers to surpass 500 hp, street driven on pump gas. The best part of this whole grand experiment is the fact that engine builders didn’t quit at 382.7 ci. It’s now pretty common to change bore size to a larger diameter or even increase the stroke to gain more cubic inches. Many aftermarket parts manufacturers now offer a variety of different sizes of crankshafts and connecting rod lengths that will change overall displacement size. One of the most popular engines to stroke today is the LS series engine which shares some of the same principles of the earlier SBC design.
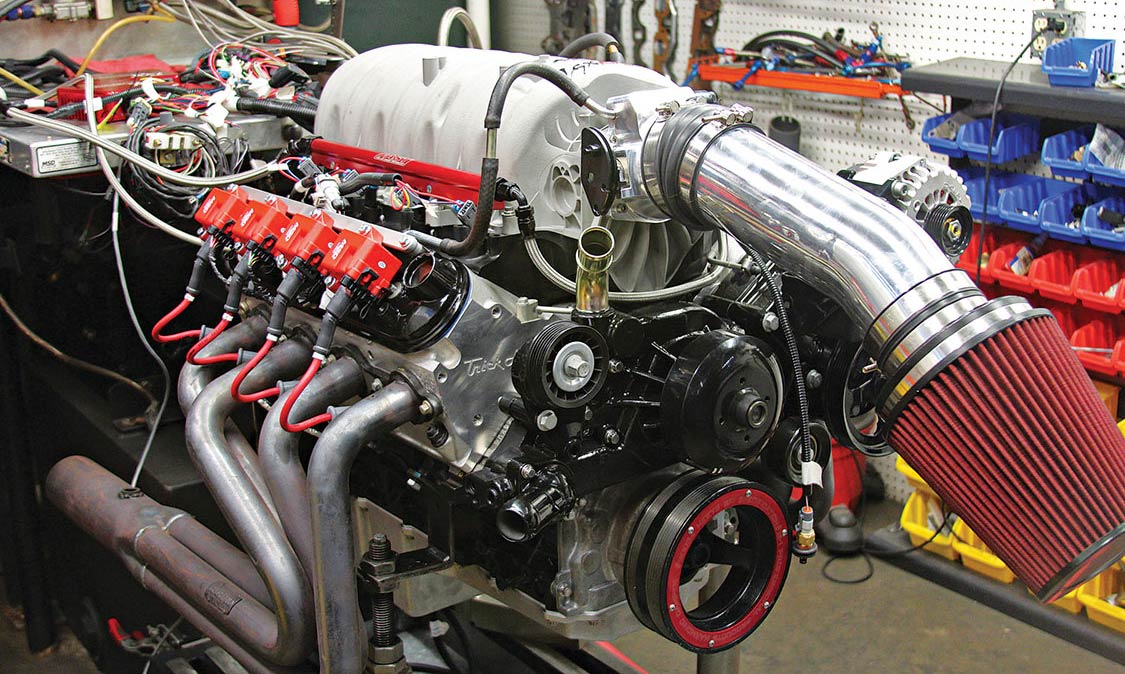
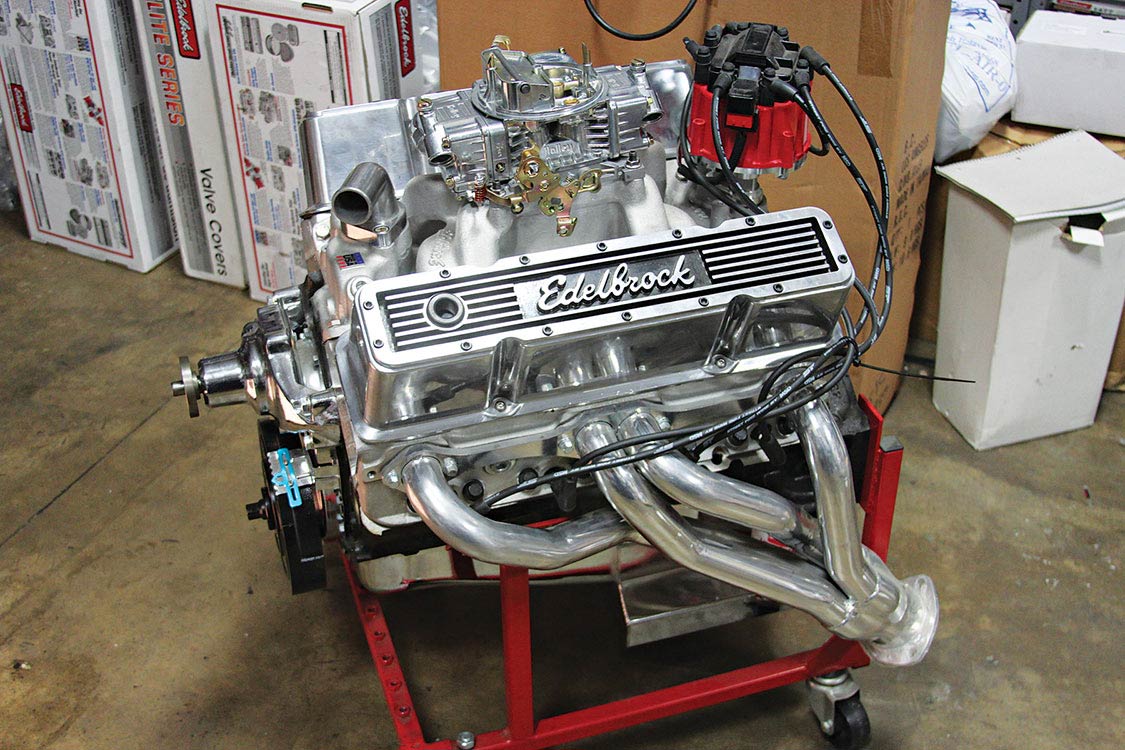
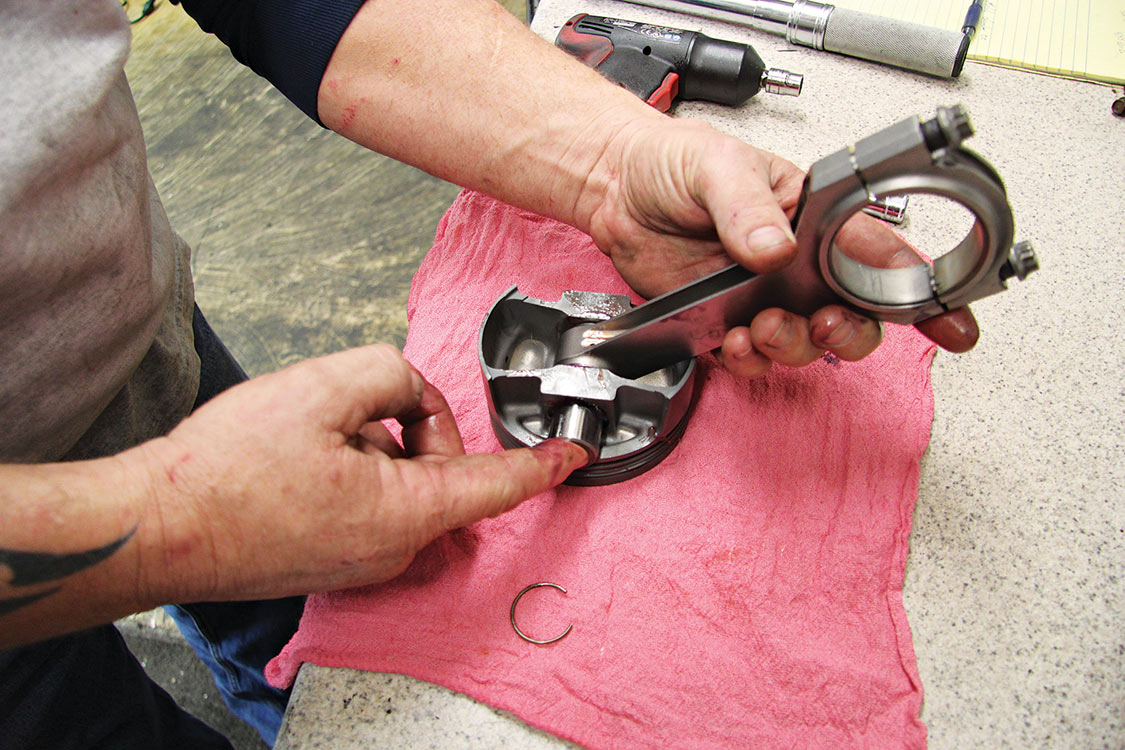
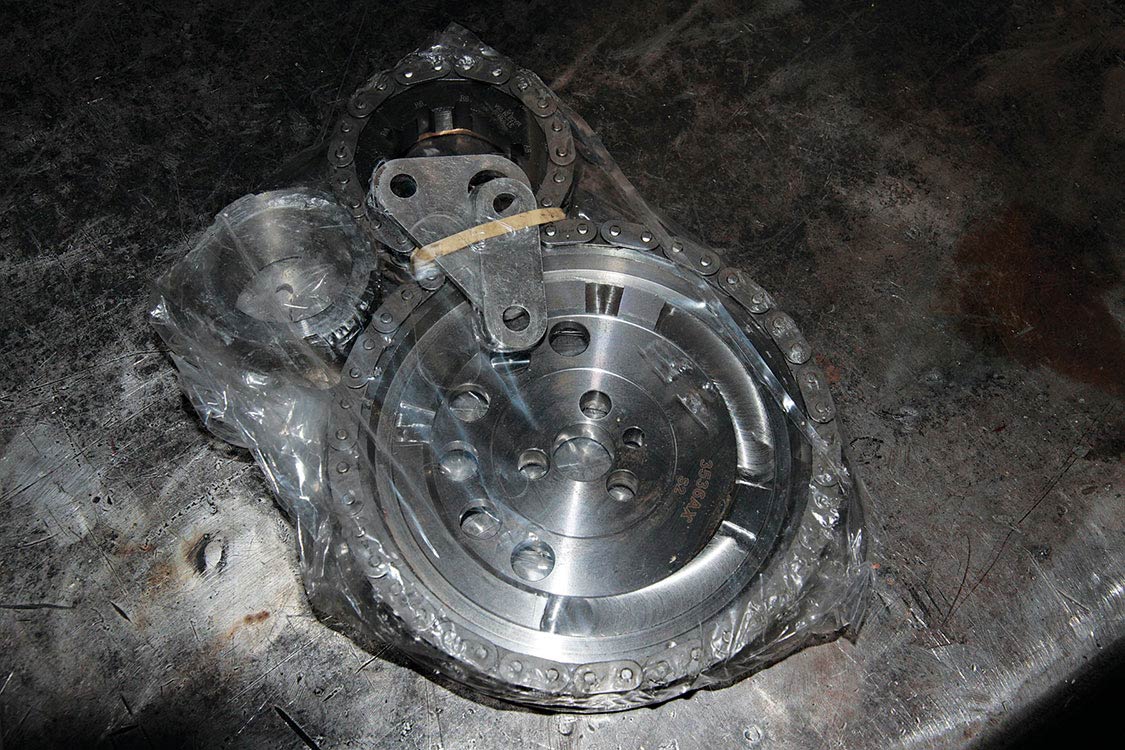
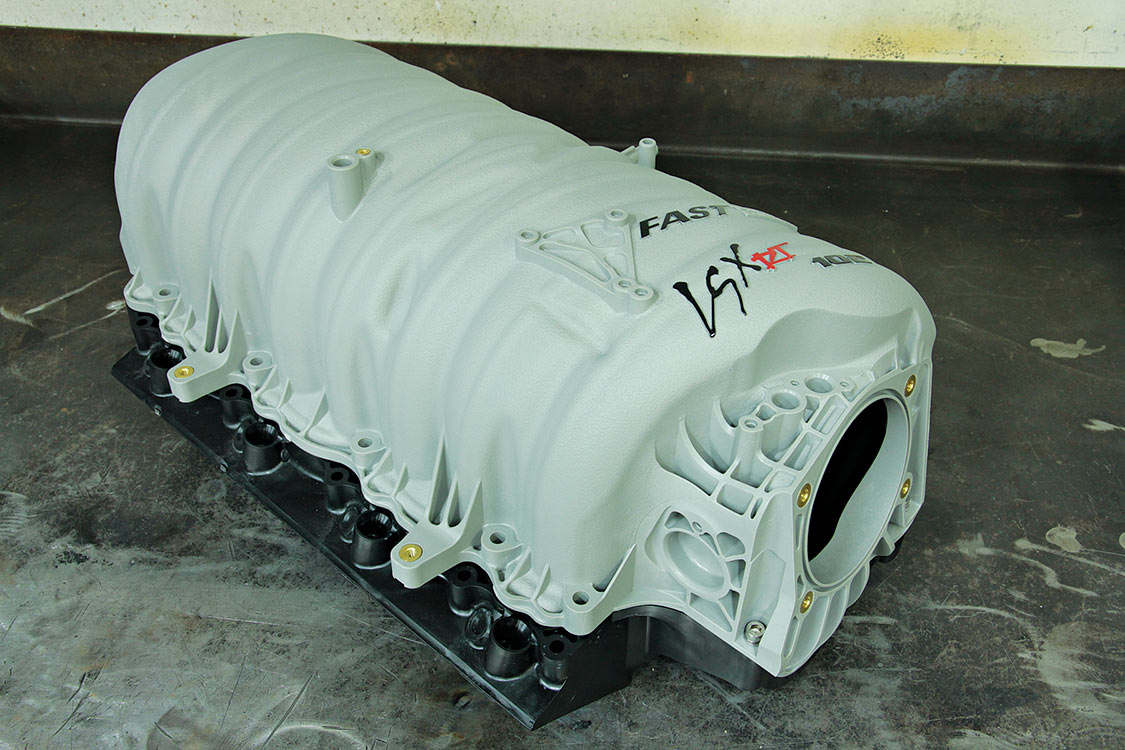
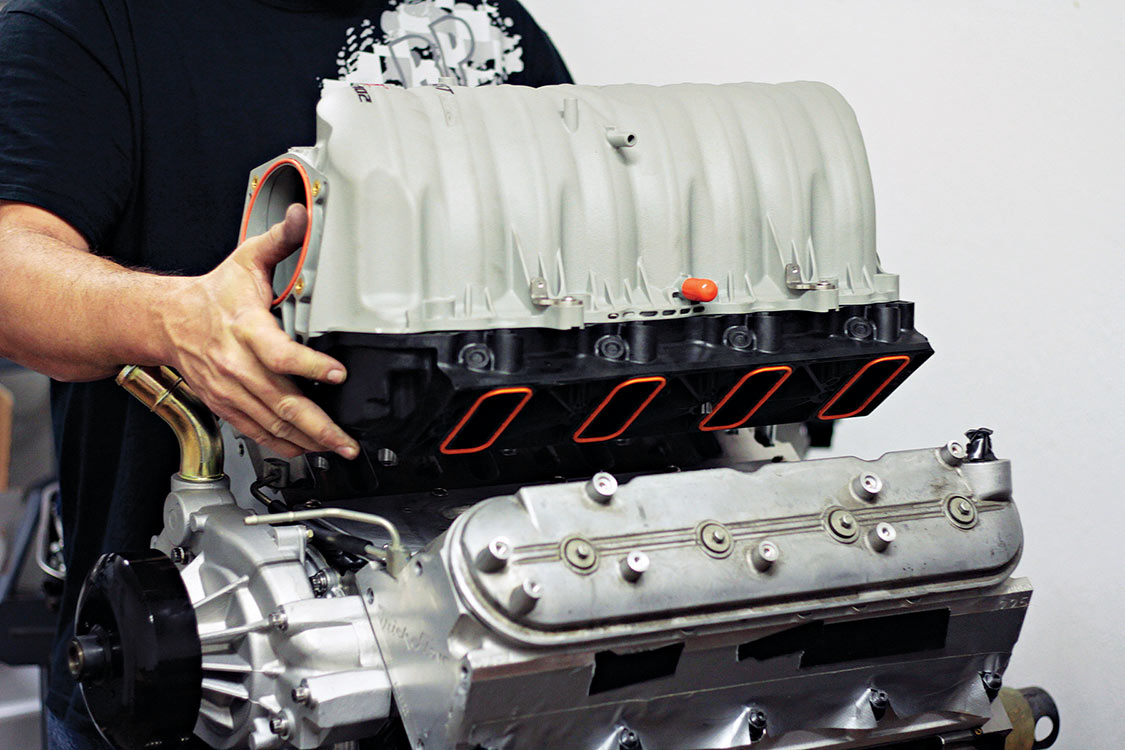
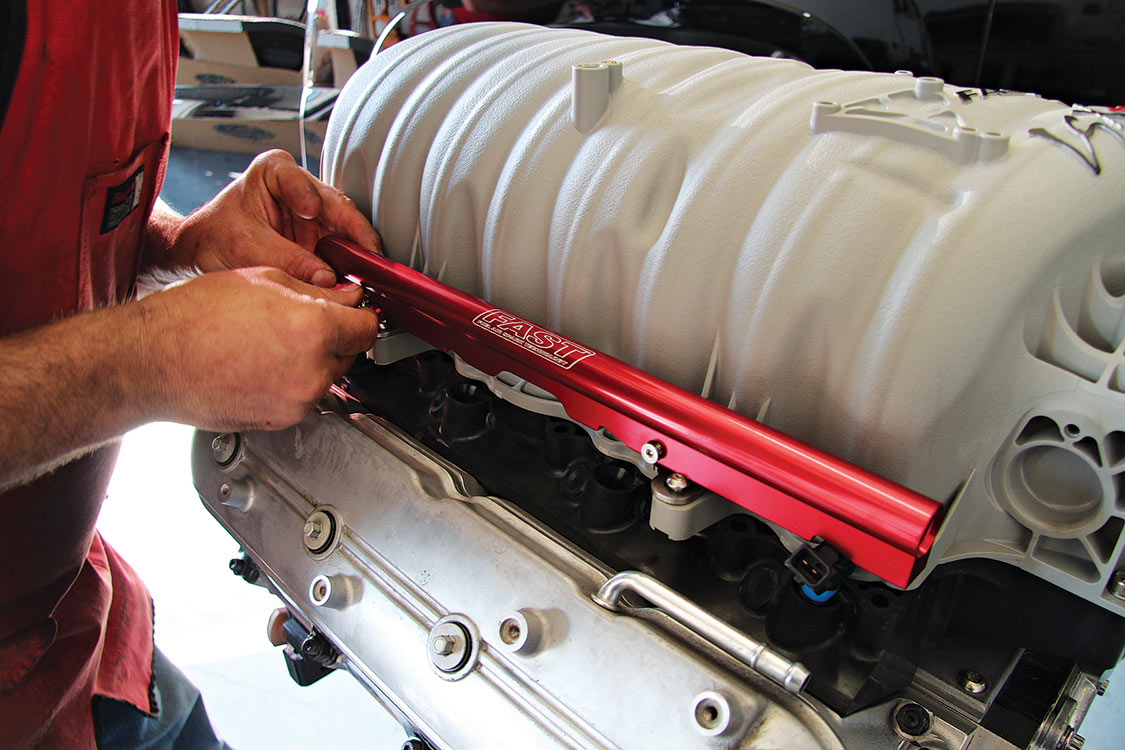
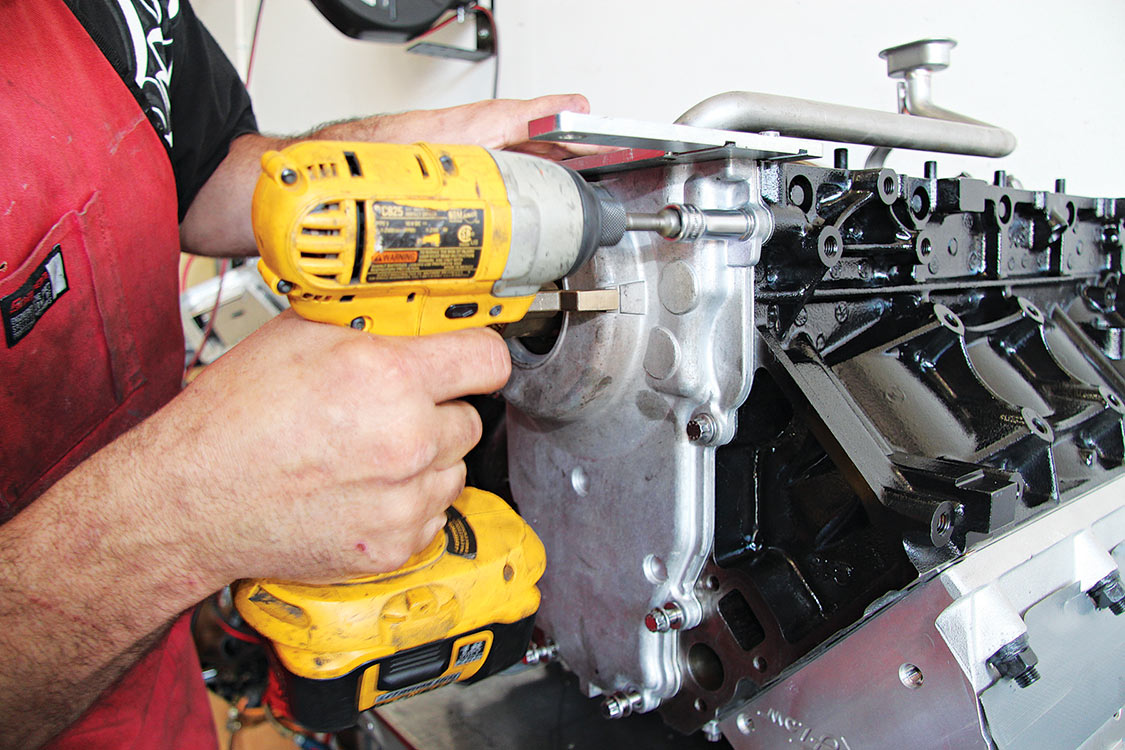
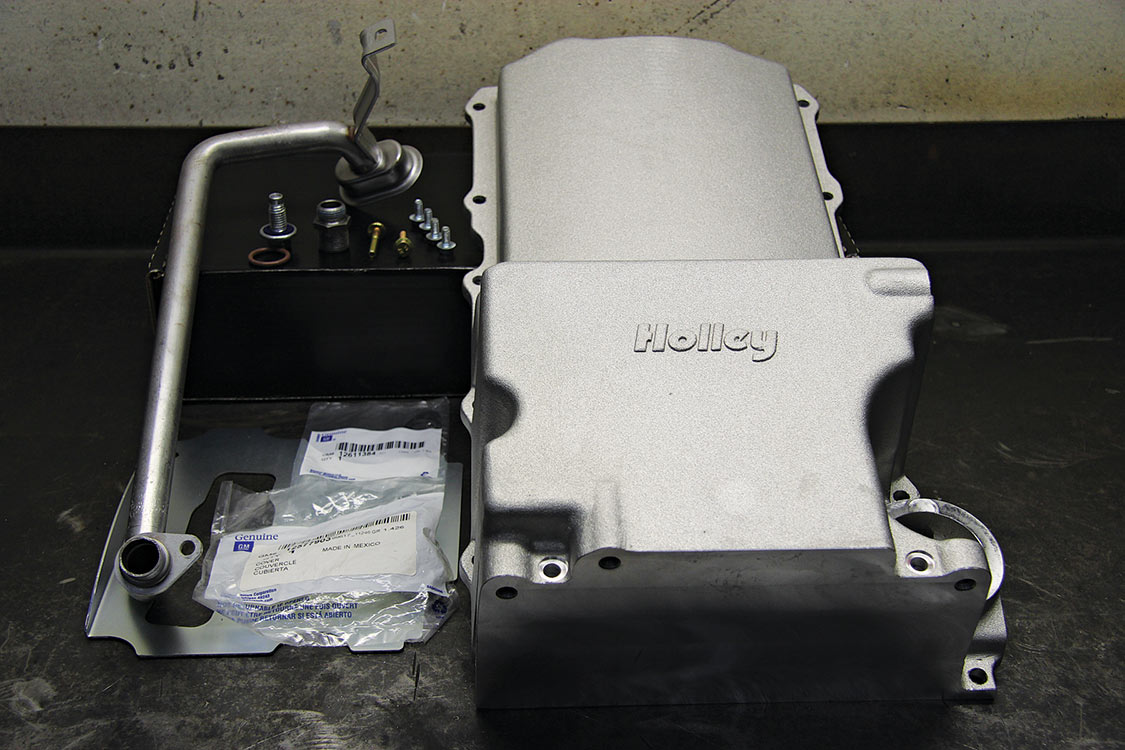
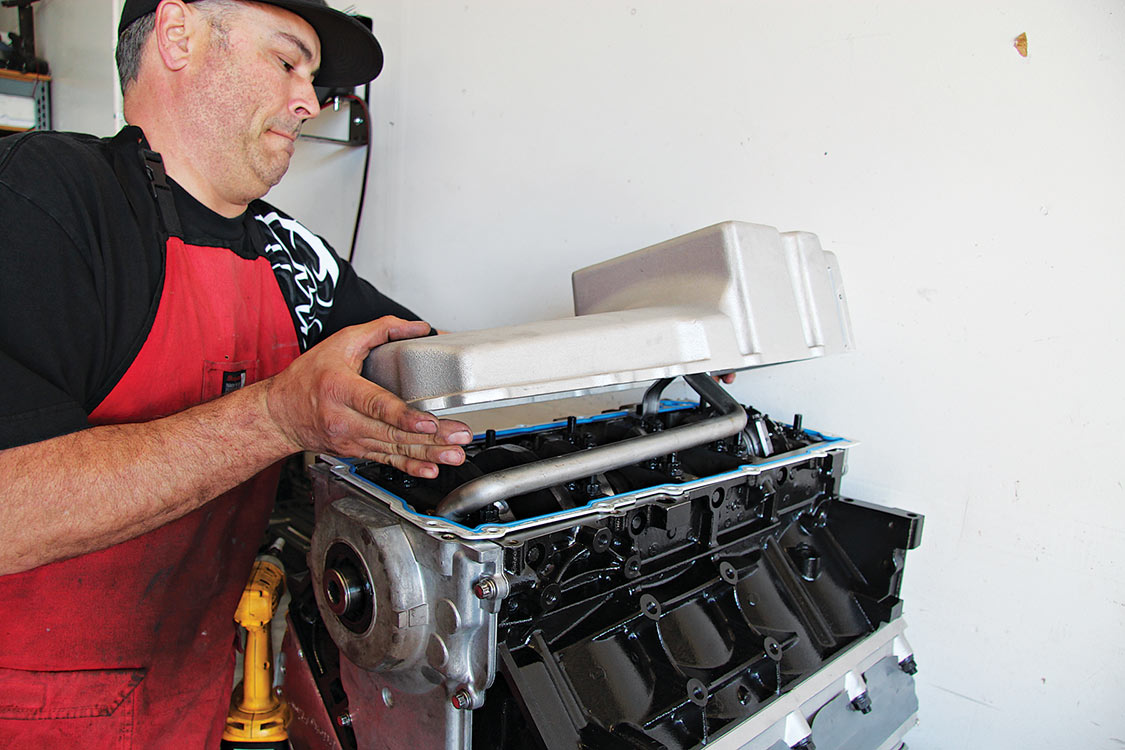
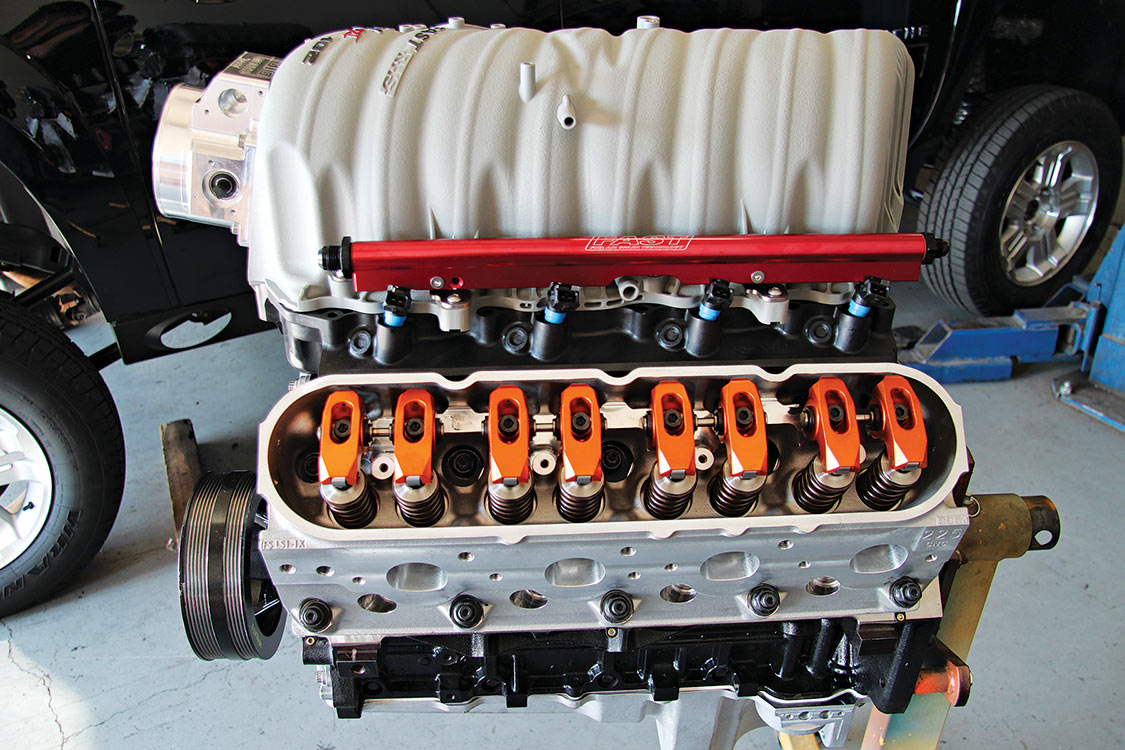
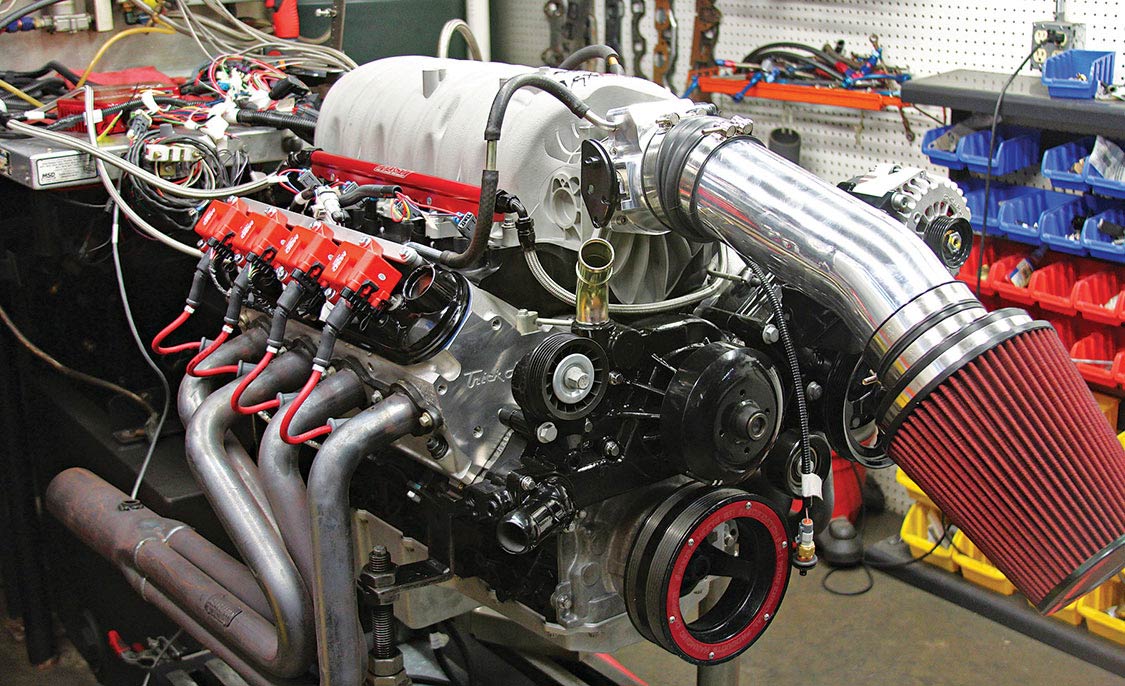
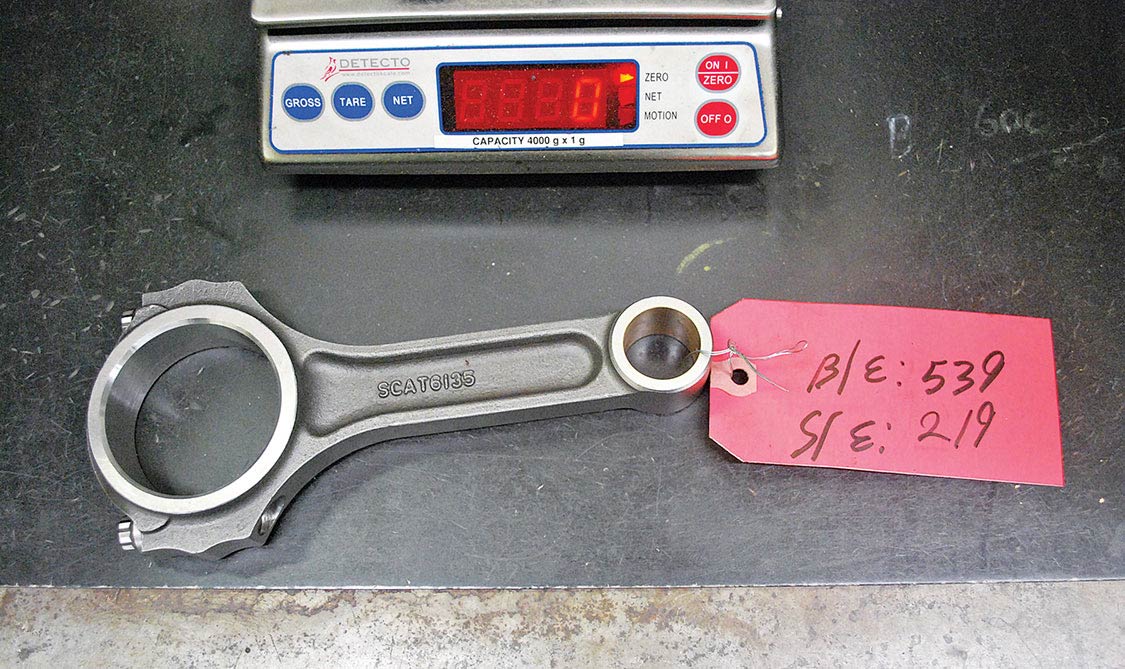
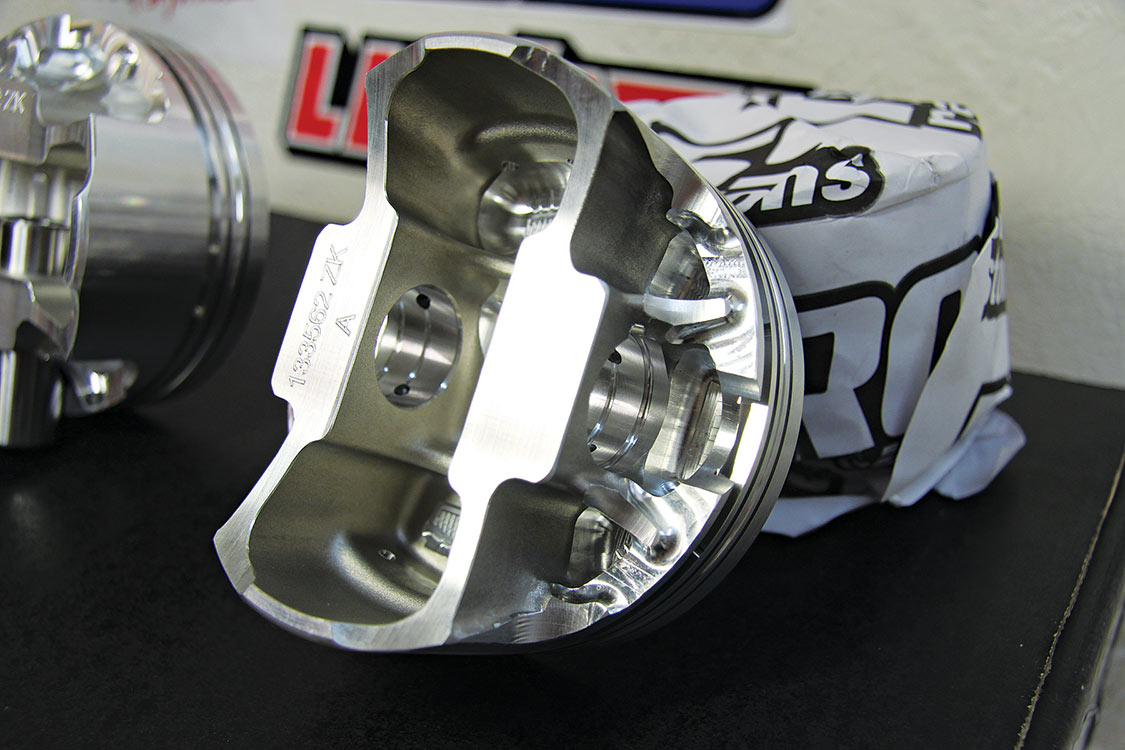
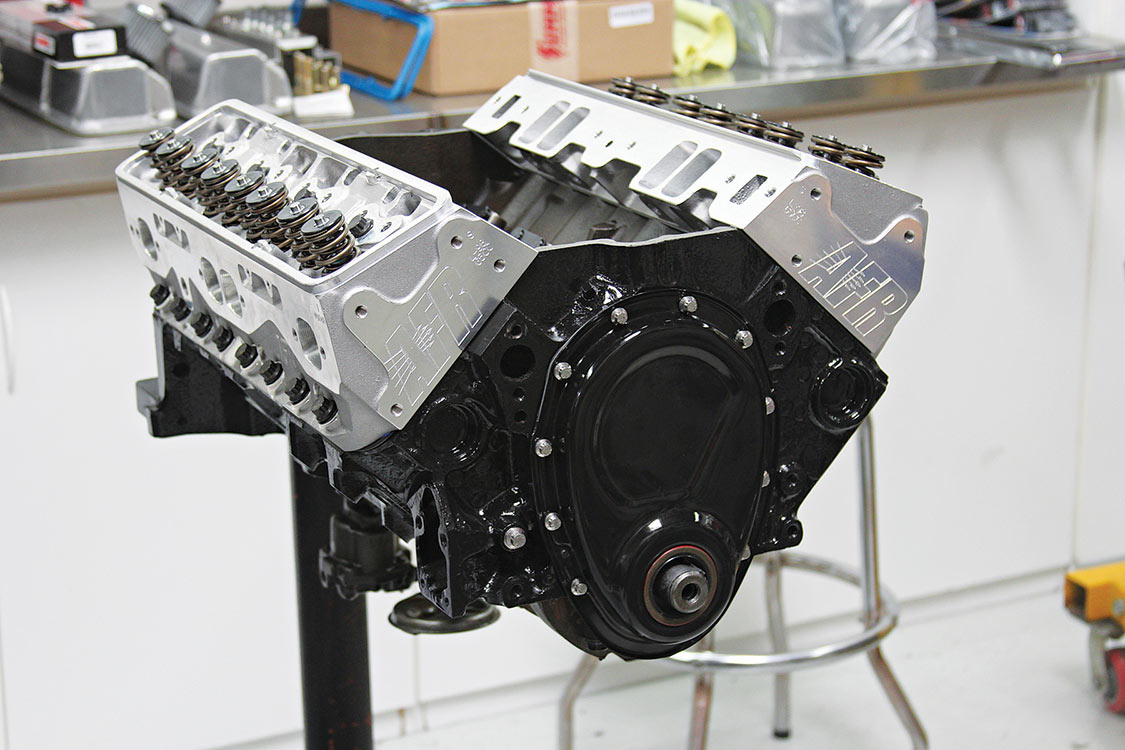
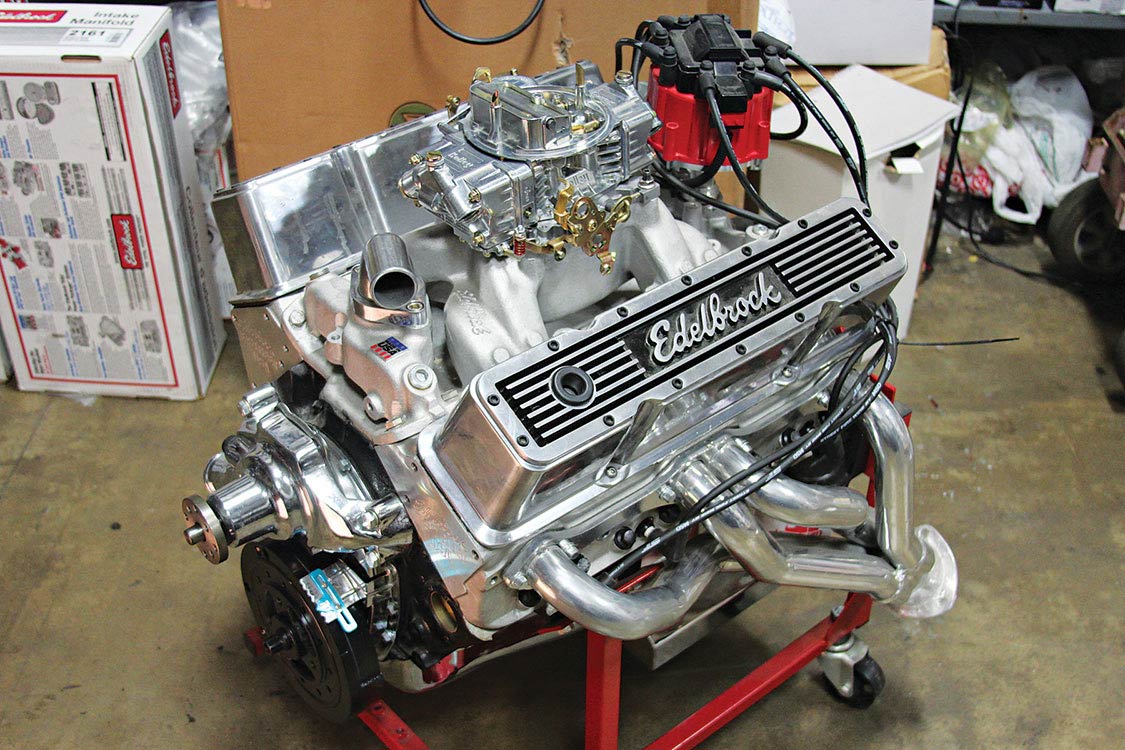
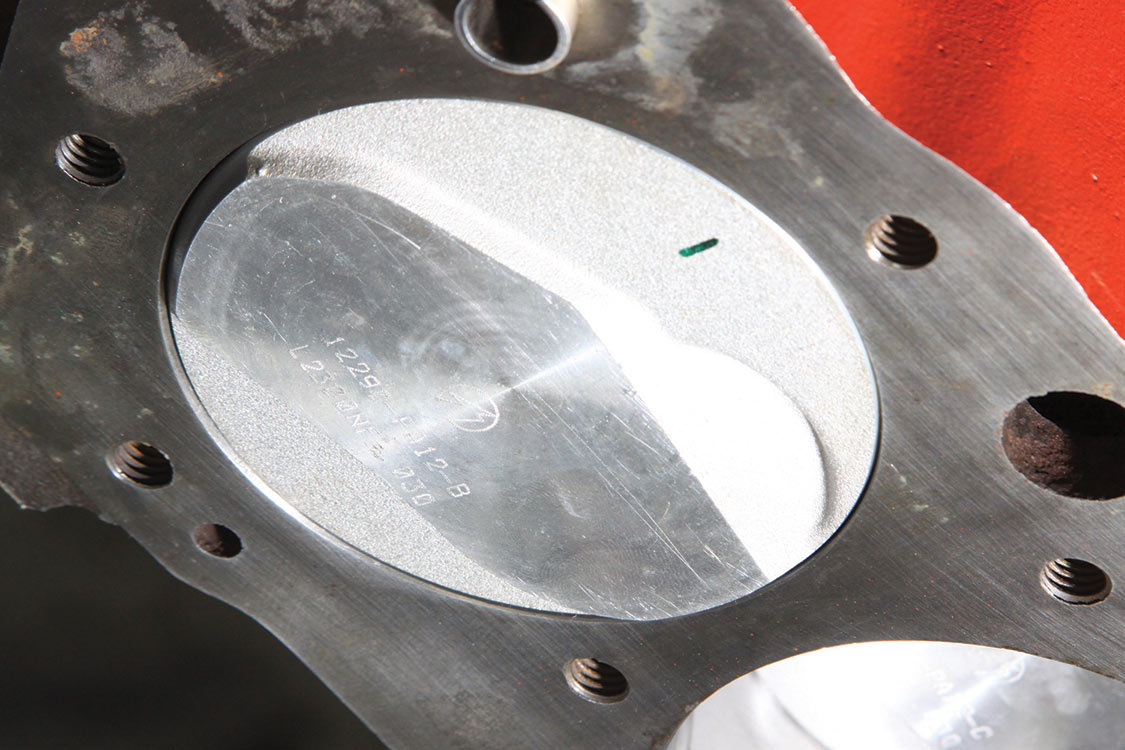
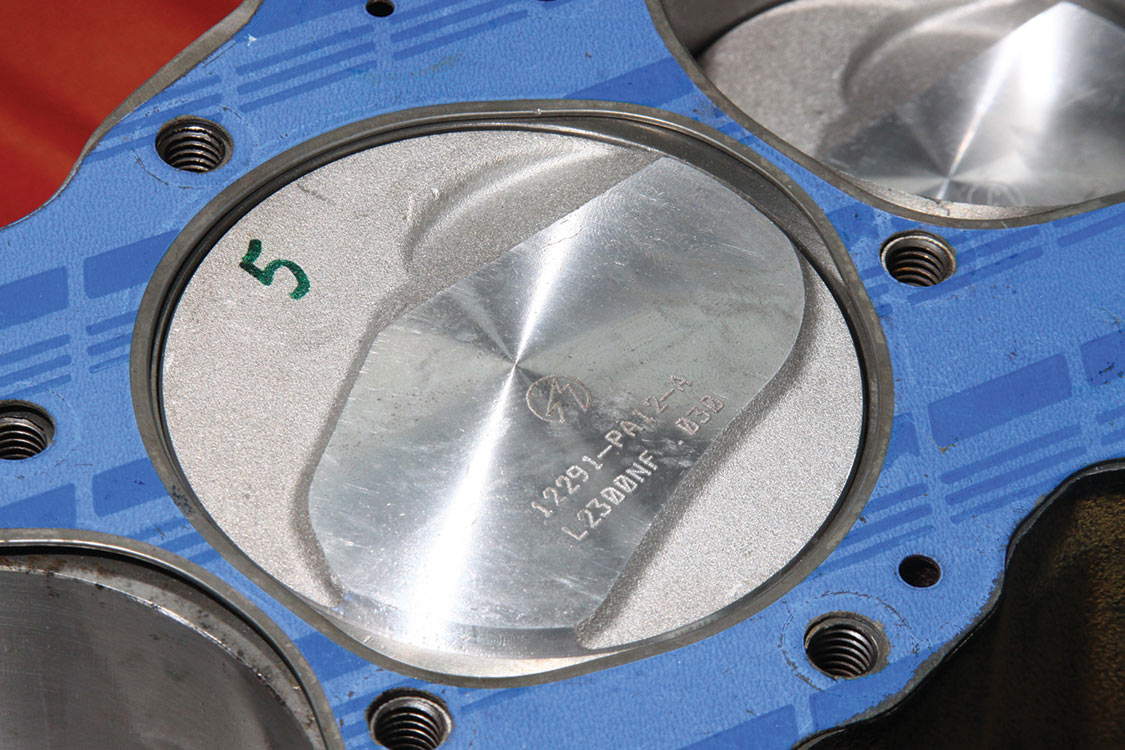
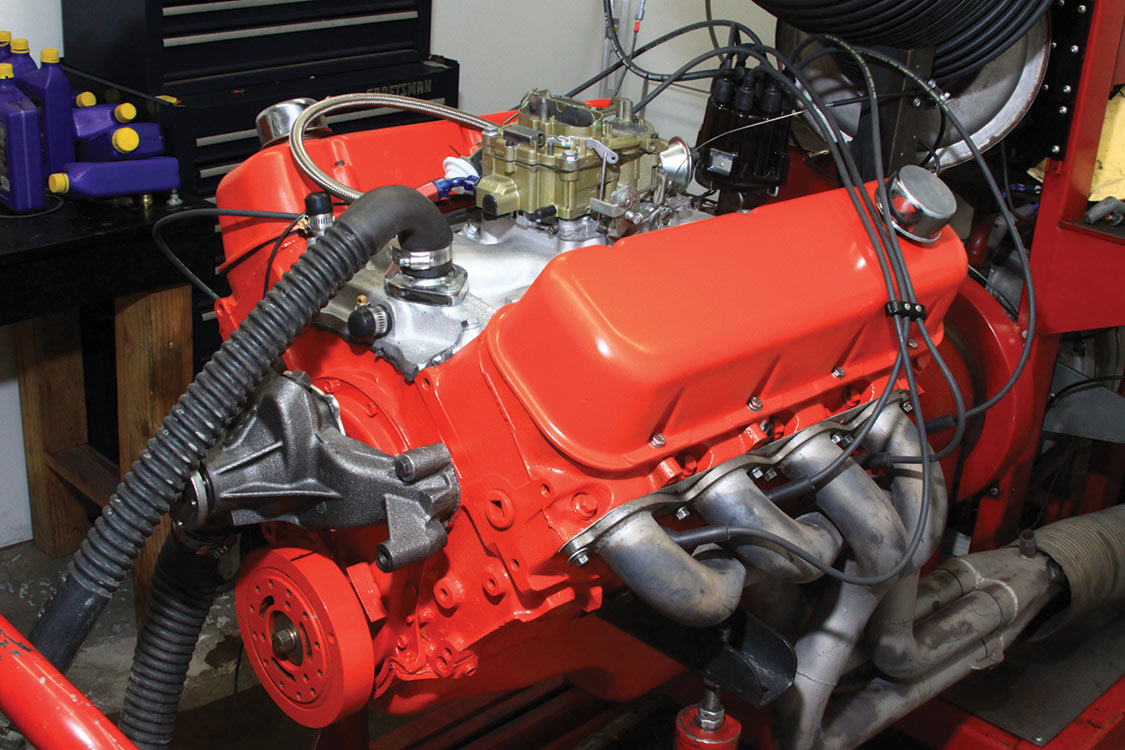
We wanted to get a better idea of what makes a good stroker combination, as well as what it takes to build one. What we discovered is that there is a ton of information out there to digest and a few different options depending on what your truck already has. To give our readers a better idea of the options that are available, we decided to look into building a pair of the most commonly stroked engines. One is the conventional SBC with 383 cubic inches, and the other is the latest popular stroker combination, a 6.0L LS truck engine stroked out to 408 ci.


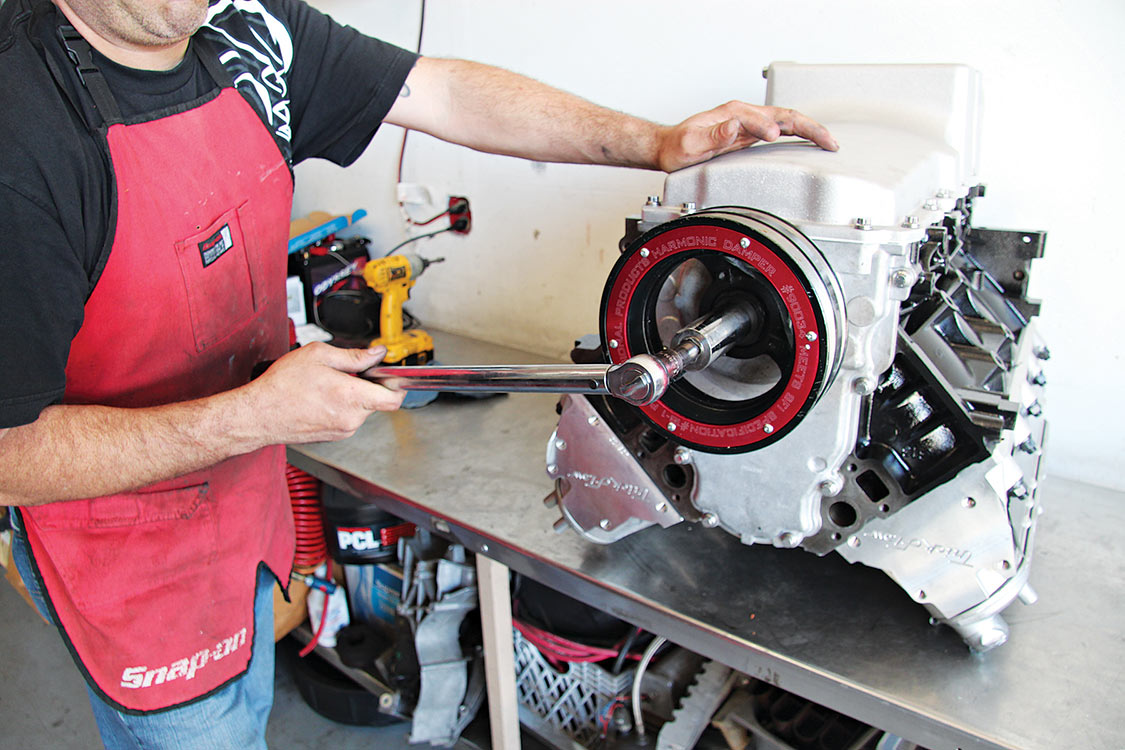


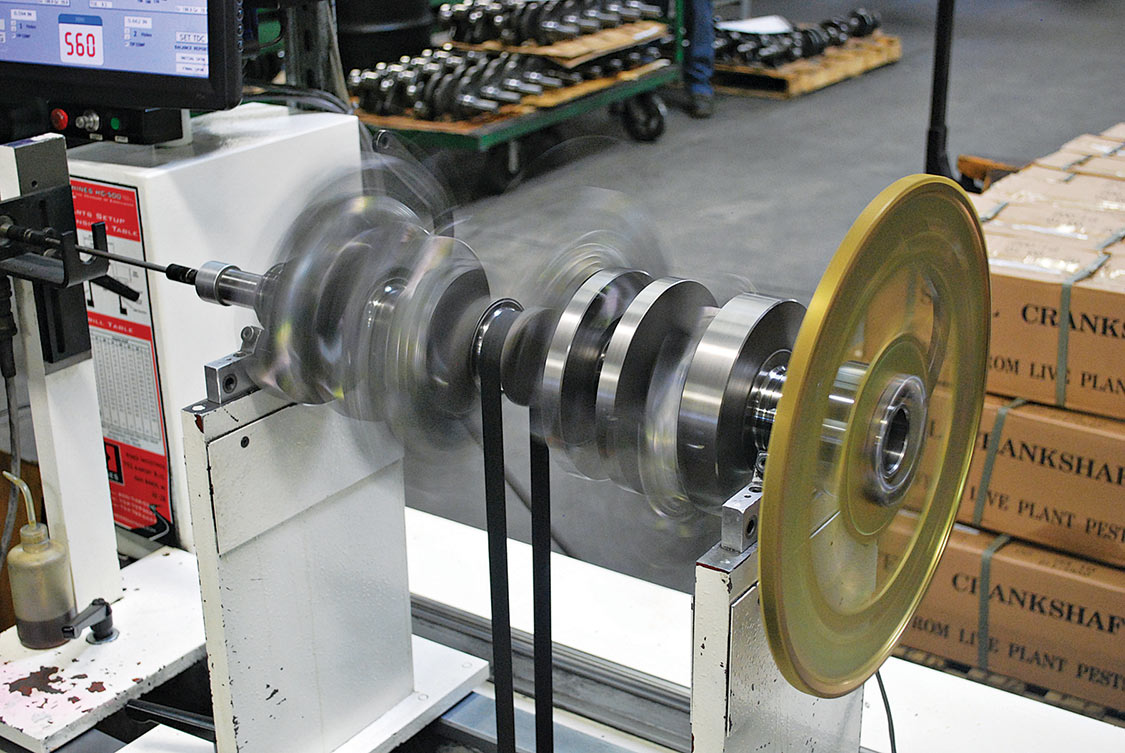
| LS | SBC | |
| 408 cid | Displacement | 383 cid |
| 4.030 | Bore size | 4.030 |
| 4.000 | Stroke | 3.75 |
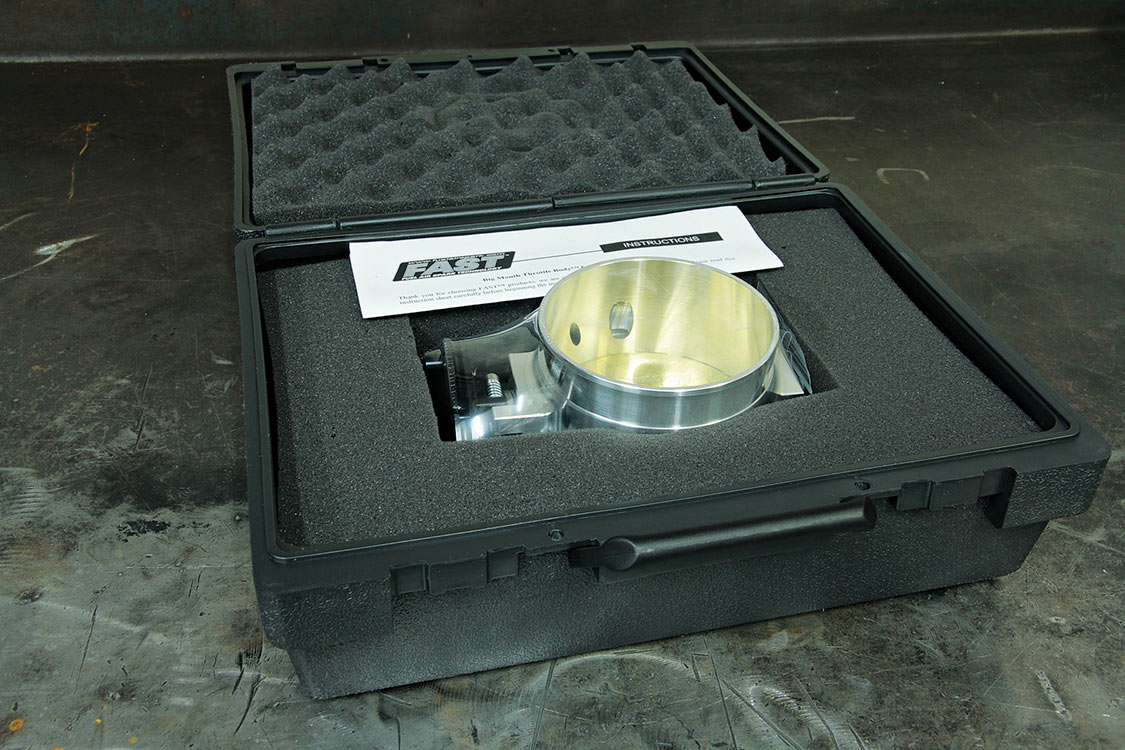
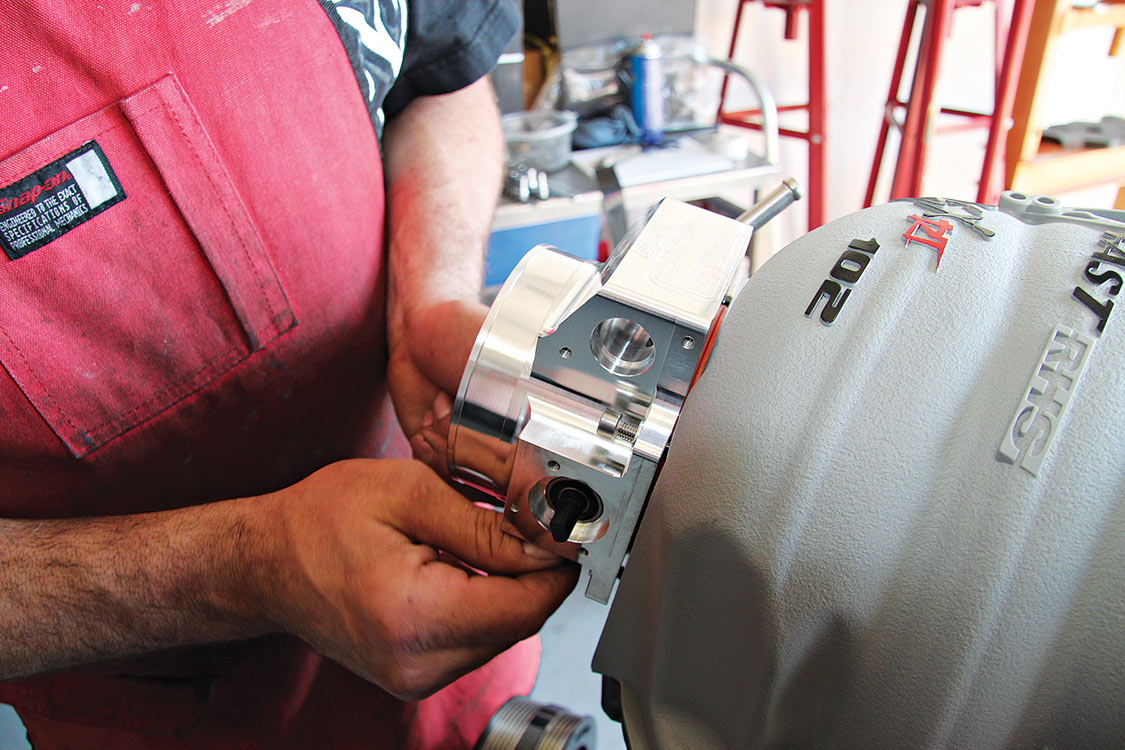
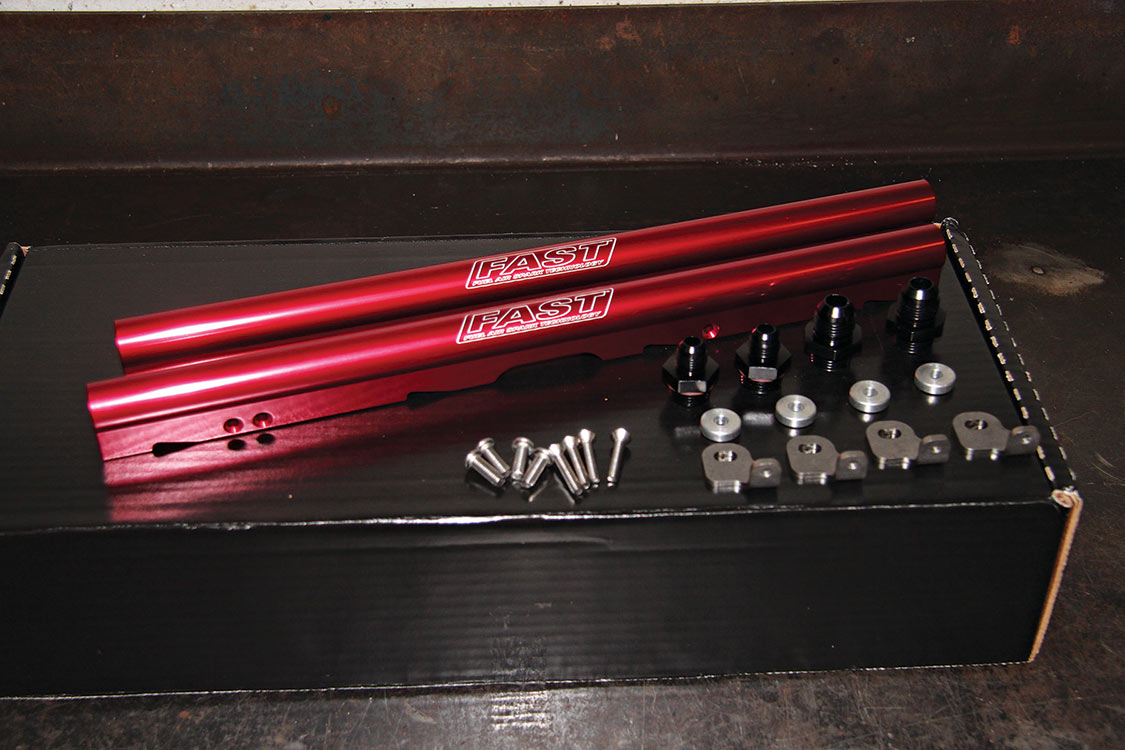
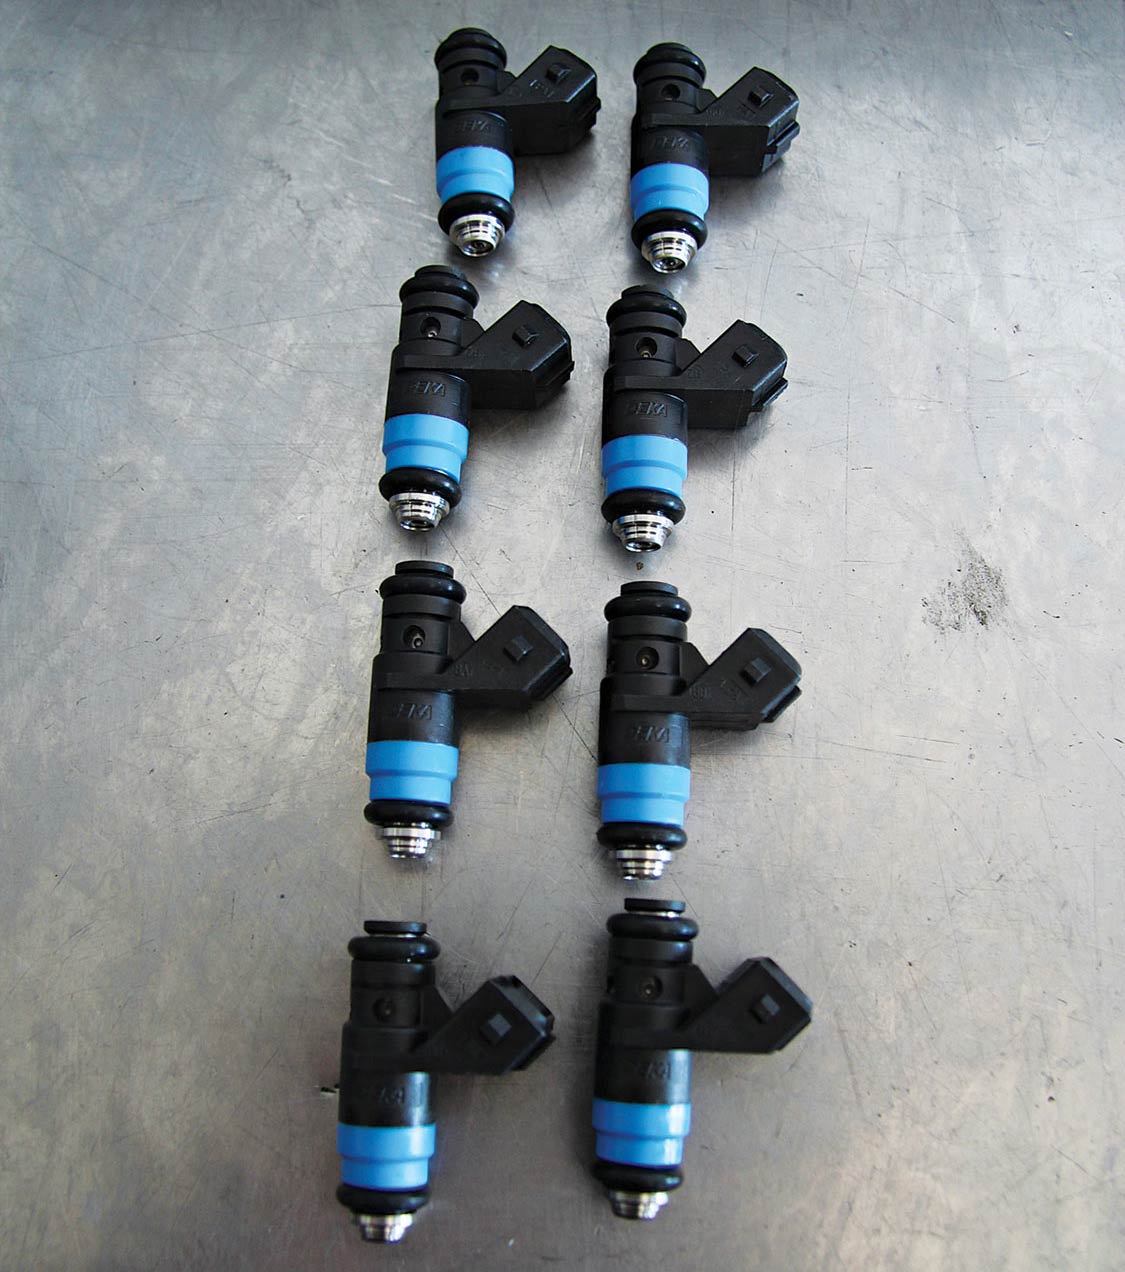
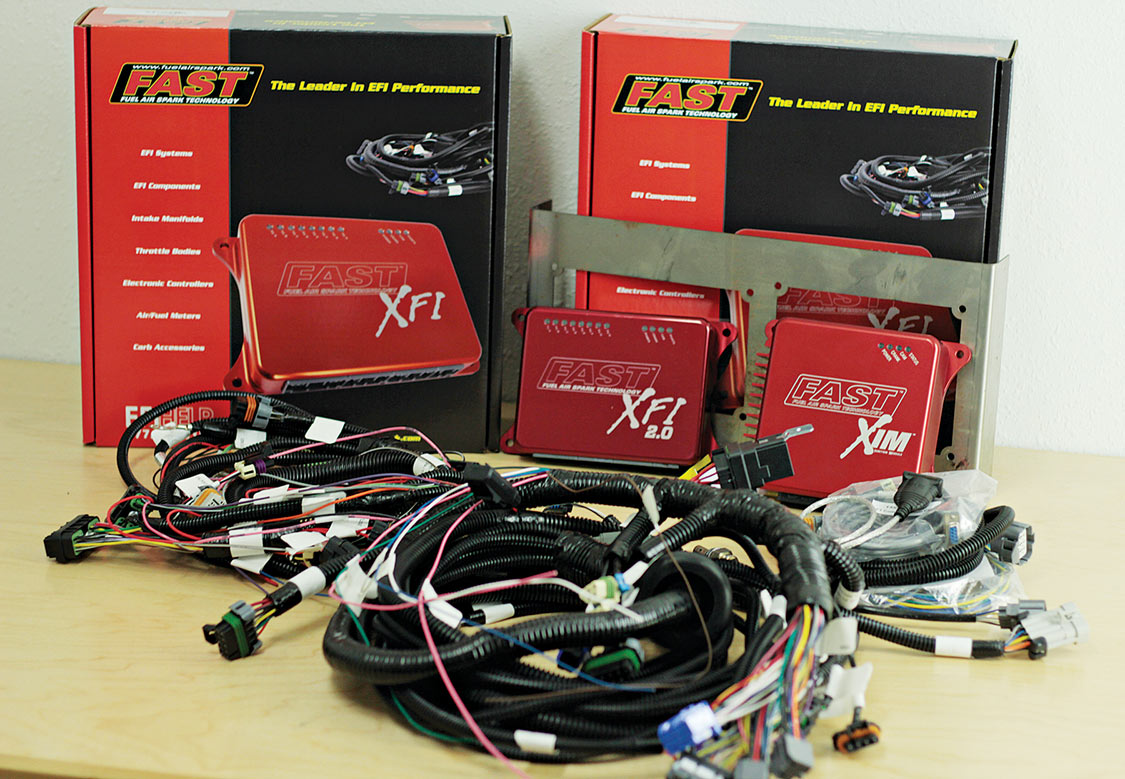
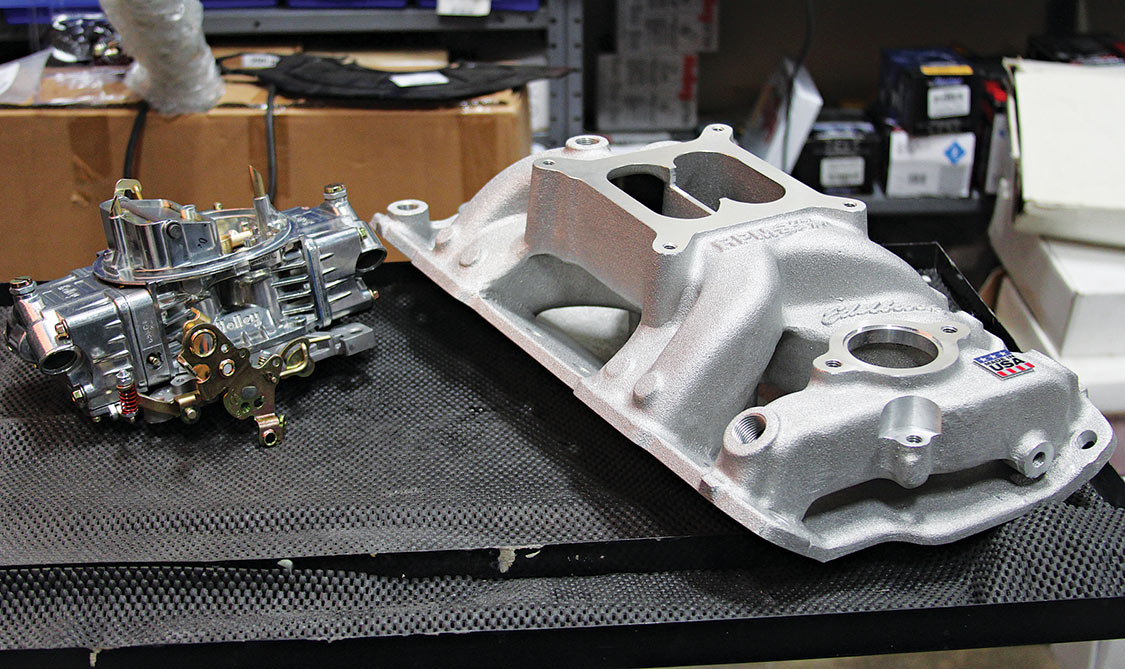
| FAST XFI electronic fuel injection | Fuel system | Holley 750-cfm carburetor |
| 560 at 5,800 rpm | Horsepower | 554 at 6,300 rpm |
| 557 at 4,600 rpm | Torque | 536 at 4,500 rpm |
| $12,941.26 | Cost (as shown | $9,698.80 |
Air Flow Research
Airflowresearch.com
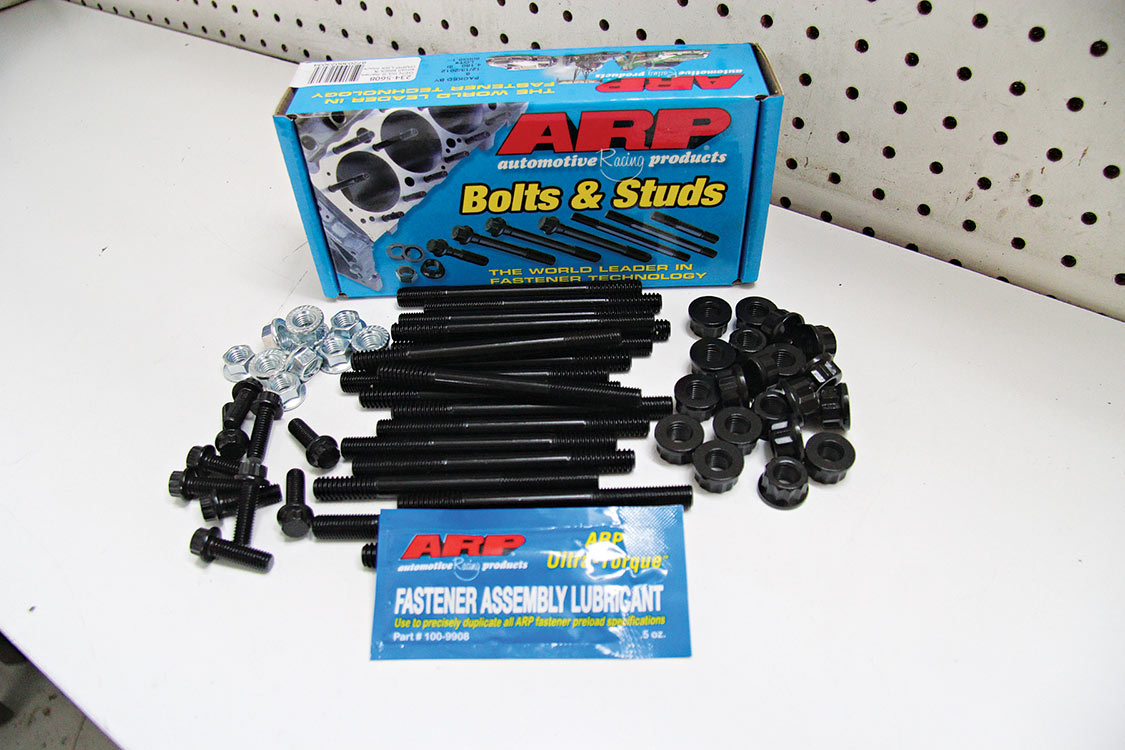
Automotive Racing Products (ARP)
Arp-bolts.com
Blueprint Engines
Blueprintengines.com
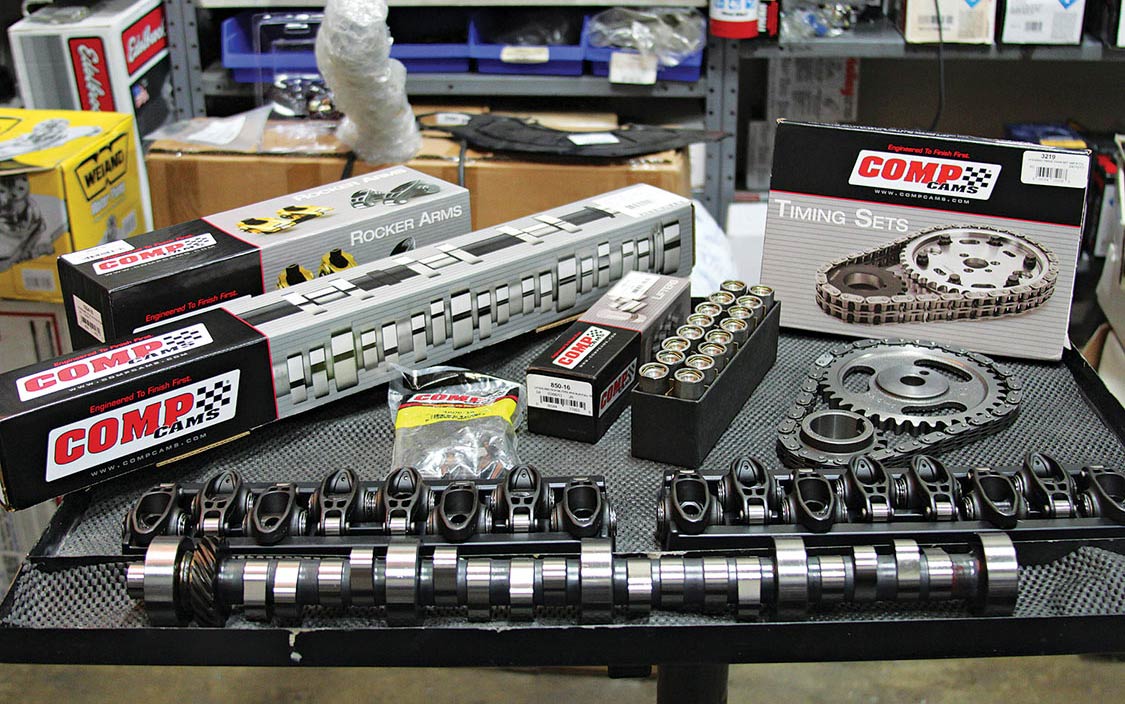
Comp Cams
Compcams.com
Eagle Specialty Products
Eaglerod.com
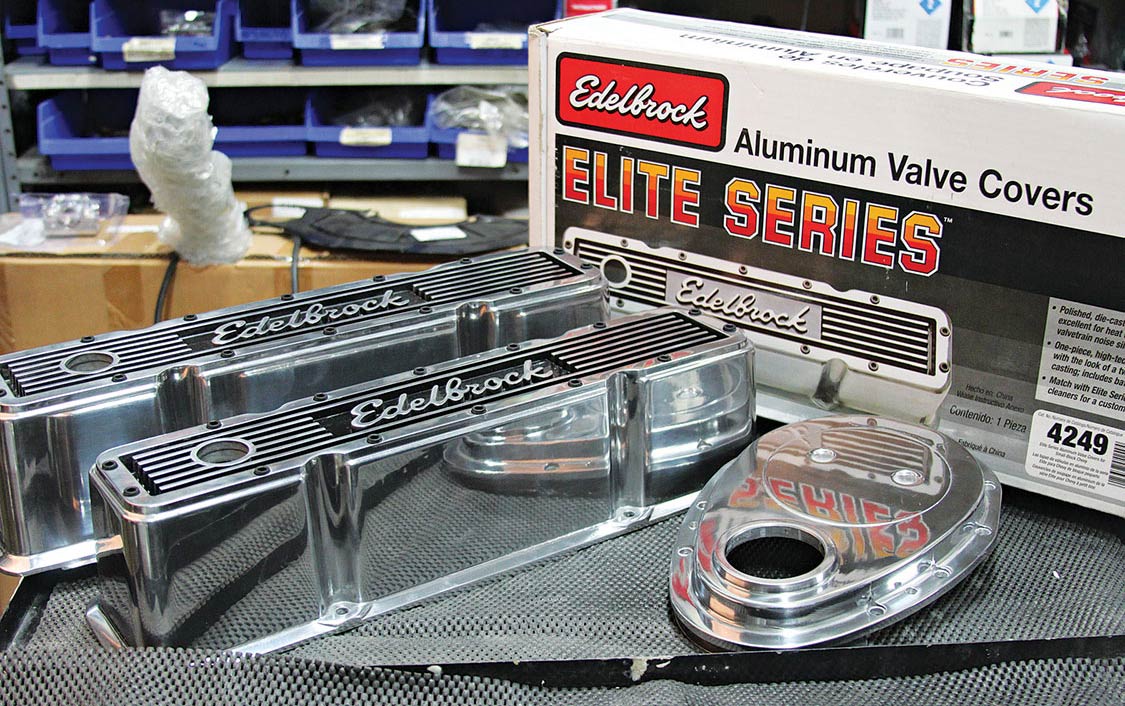
Edelbrock
Edelbrock.com
FAST
Fuelairspark.com
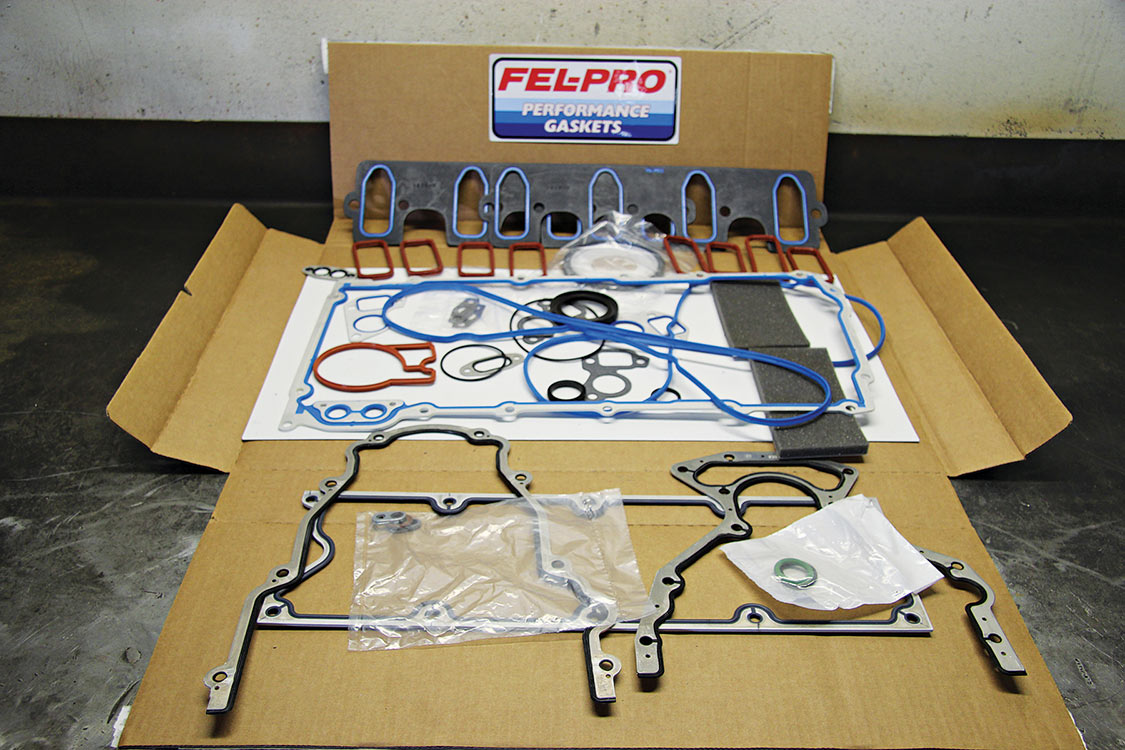
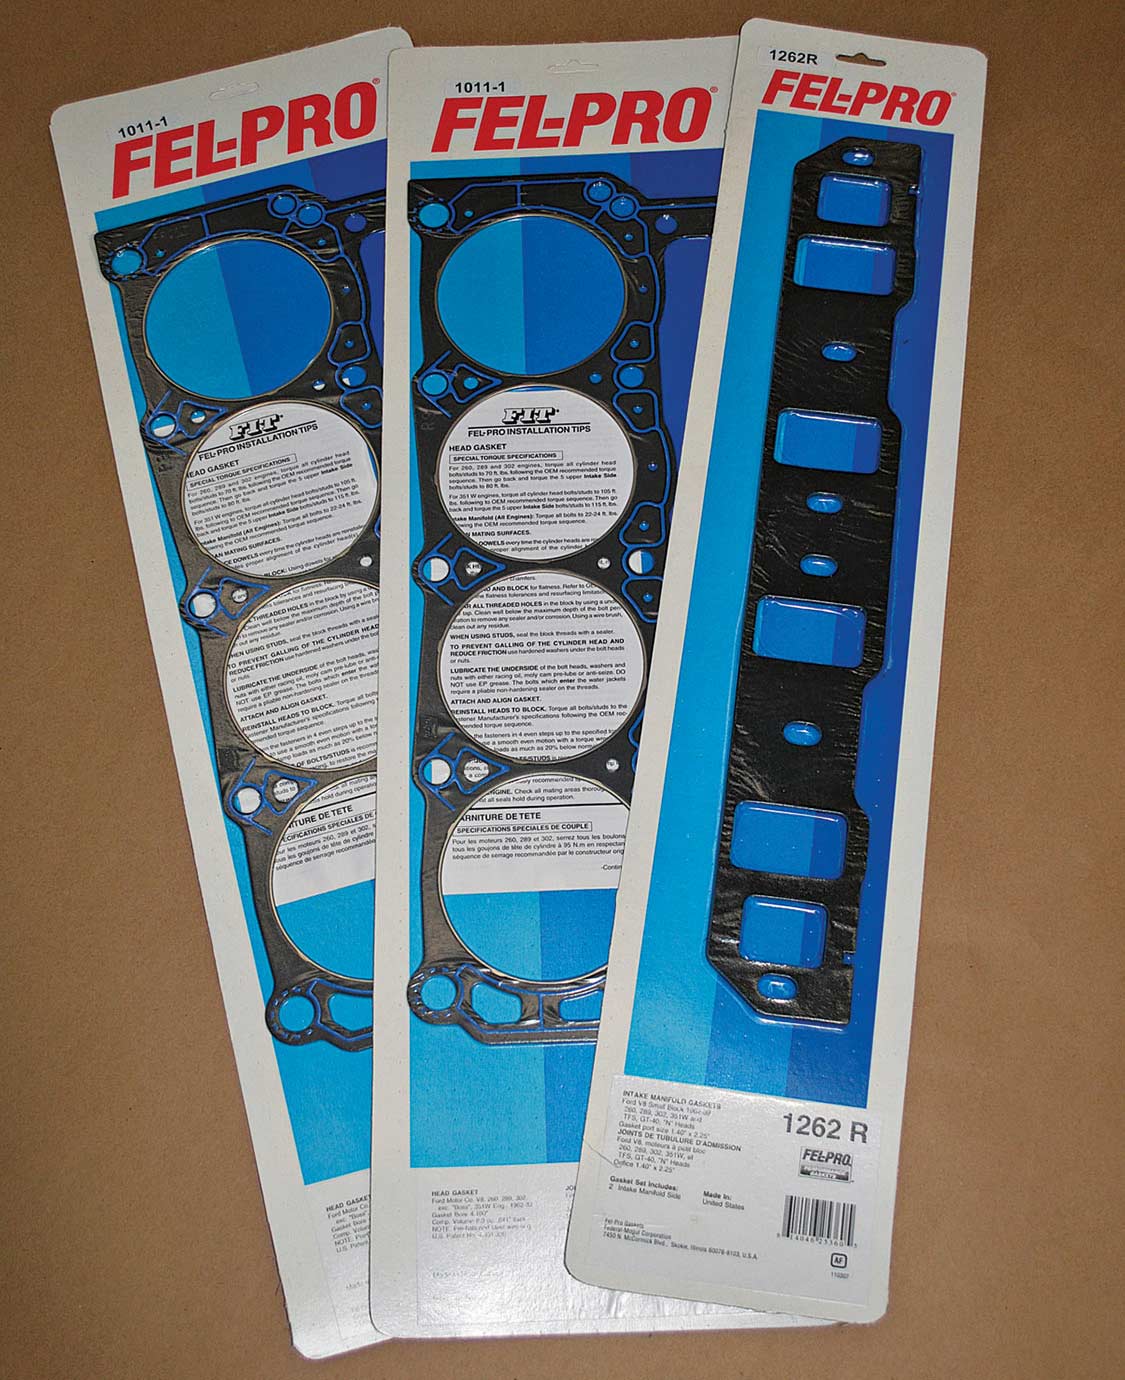
Fel Pro
Fel-progaskets.com
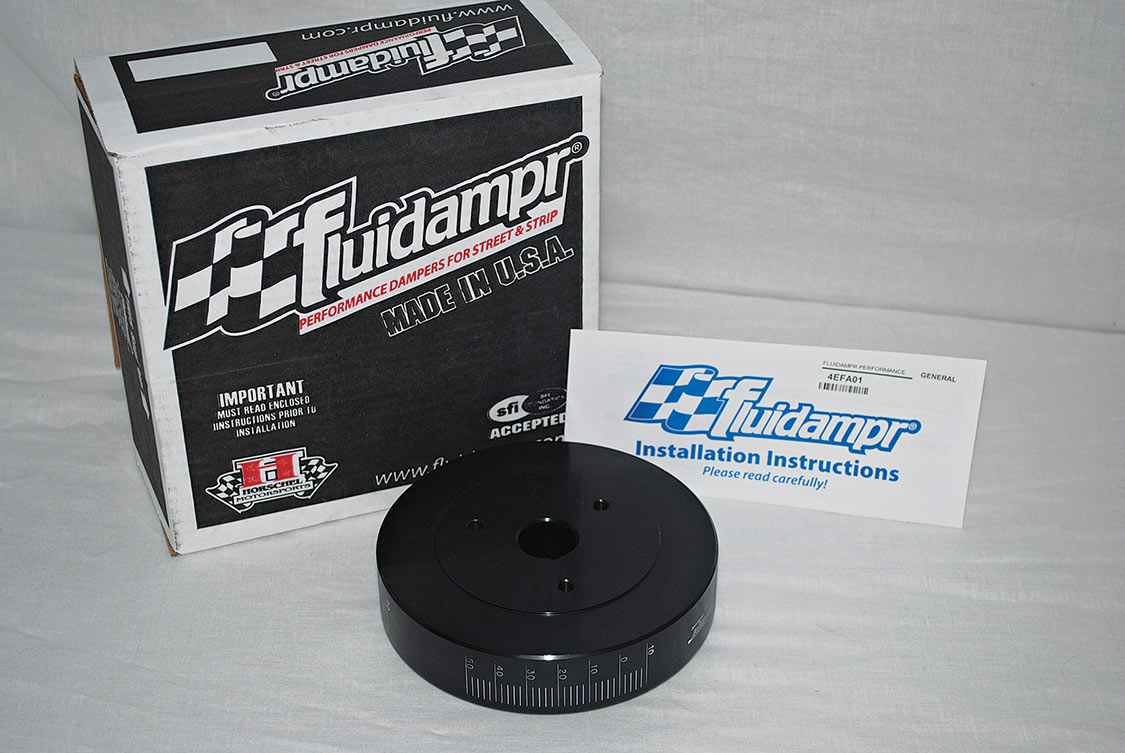
Fluildampr
Fluidampr.com
Holley Performance
Holley.com
JMS Racing Engines
Jmsracing.com
Mahle Pistons
Us.mahle.com
Maximum Speed Performance Parts
714.961.1402
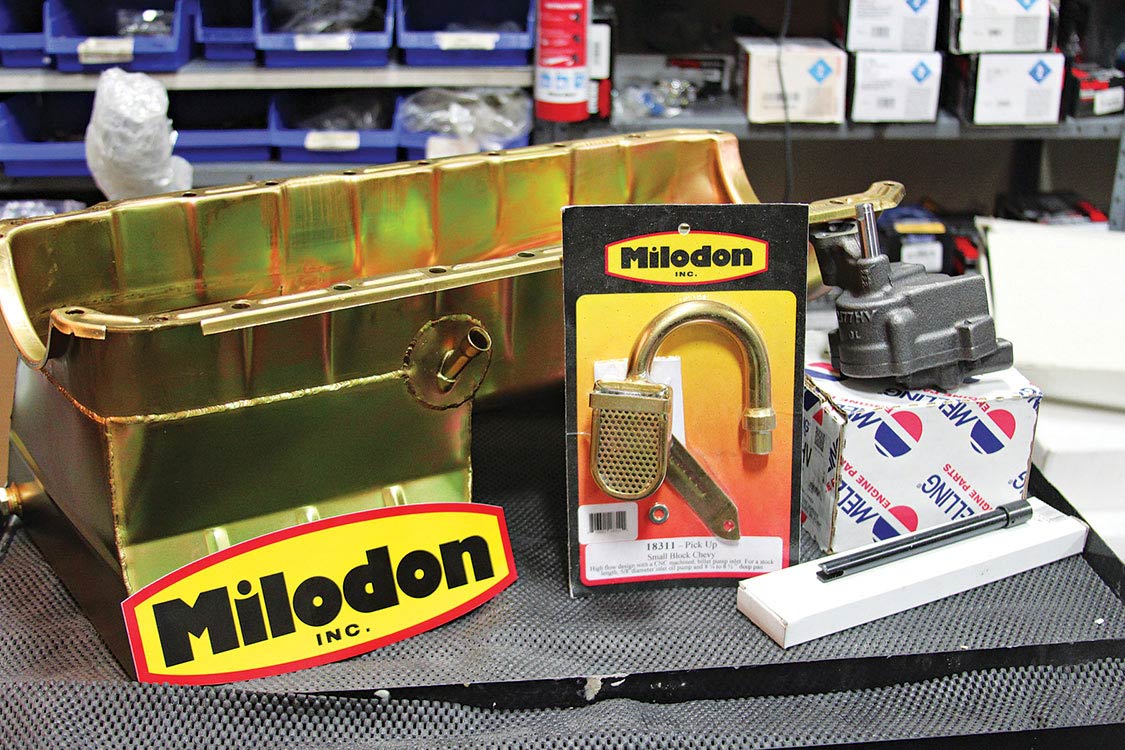
Milodon
Milodon.com
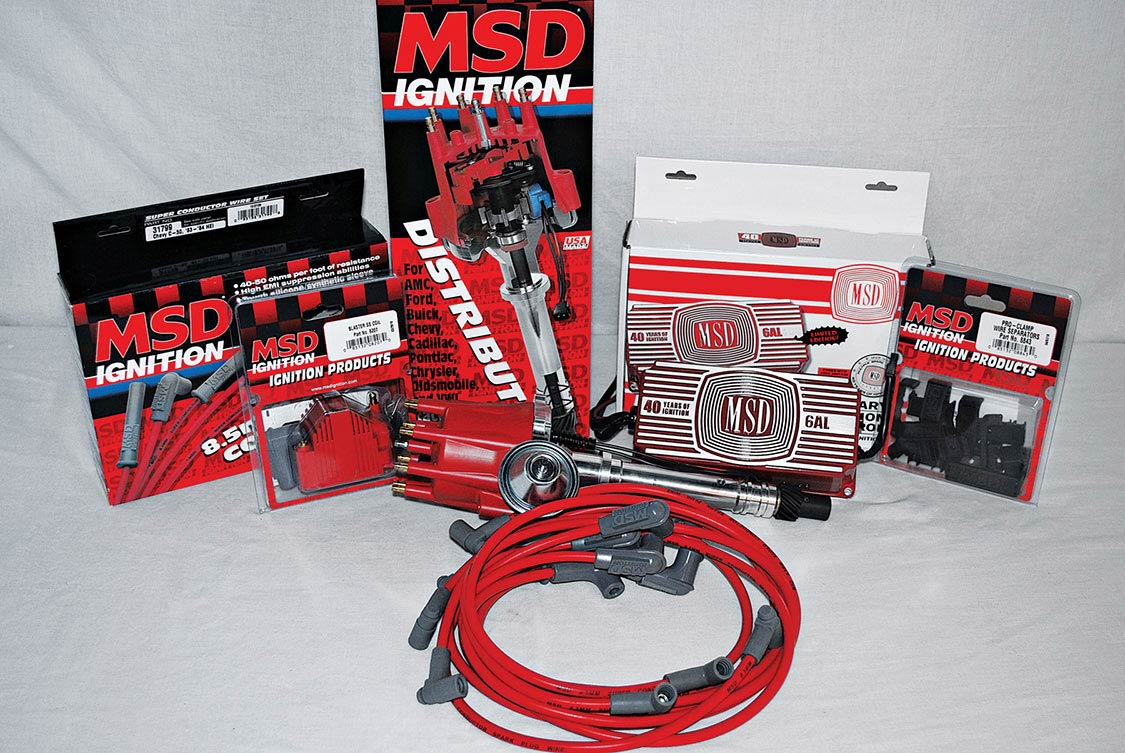
MSD Ignition
Msdignition.com
Peter Guy Racing Engines
559.240.1388
PPC Customs
559.281.8484
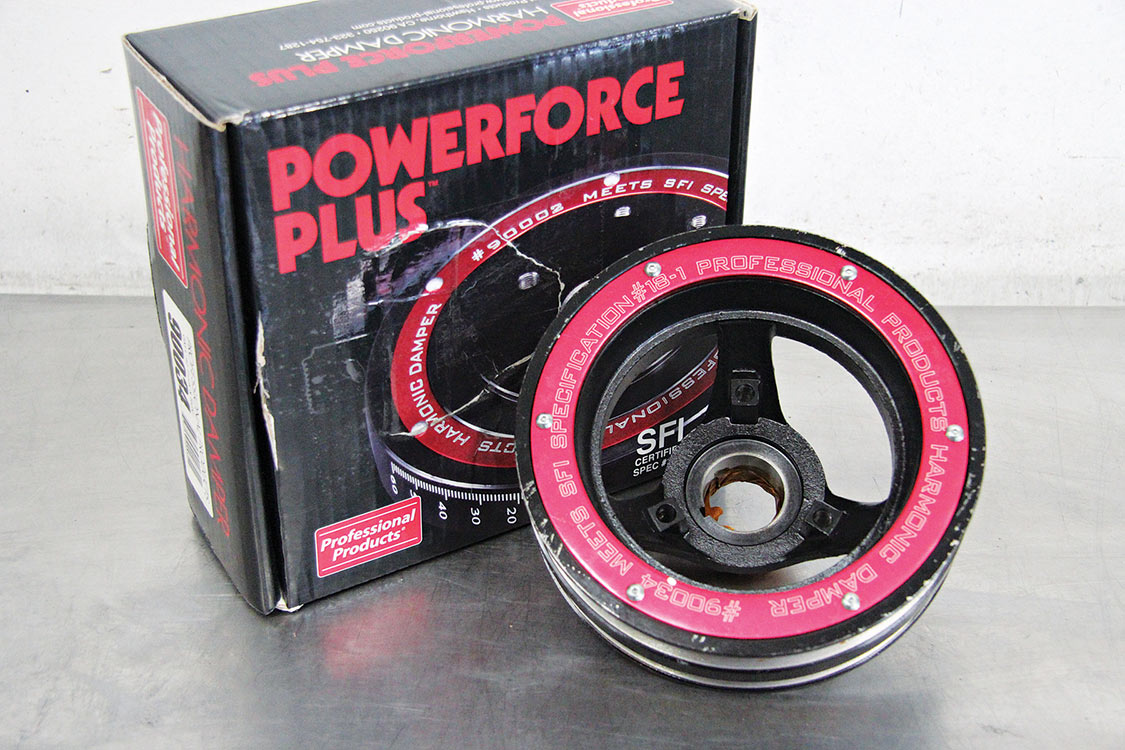
Professional Products
Professionalproducts.com
Rapp Racing
Rappracingengines.com
Ross Racing Pistons
Rosspistons.com
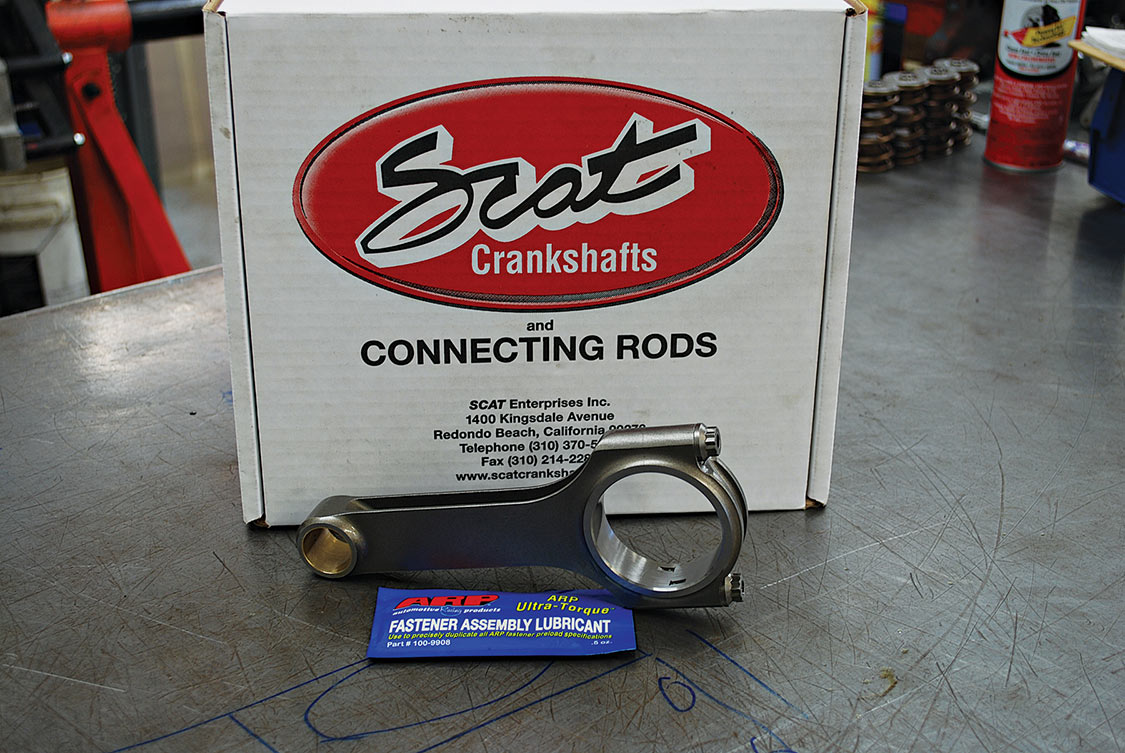
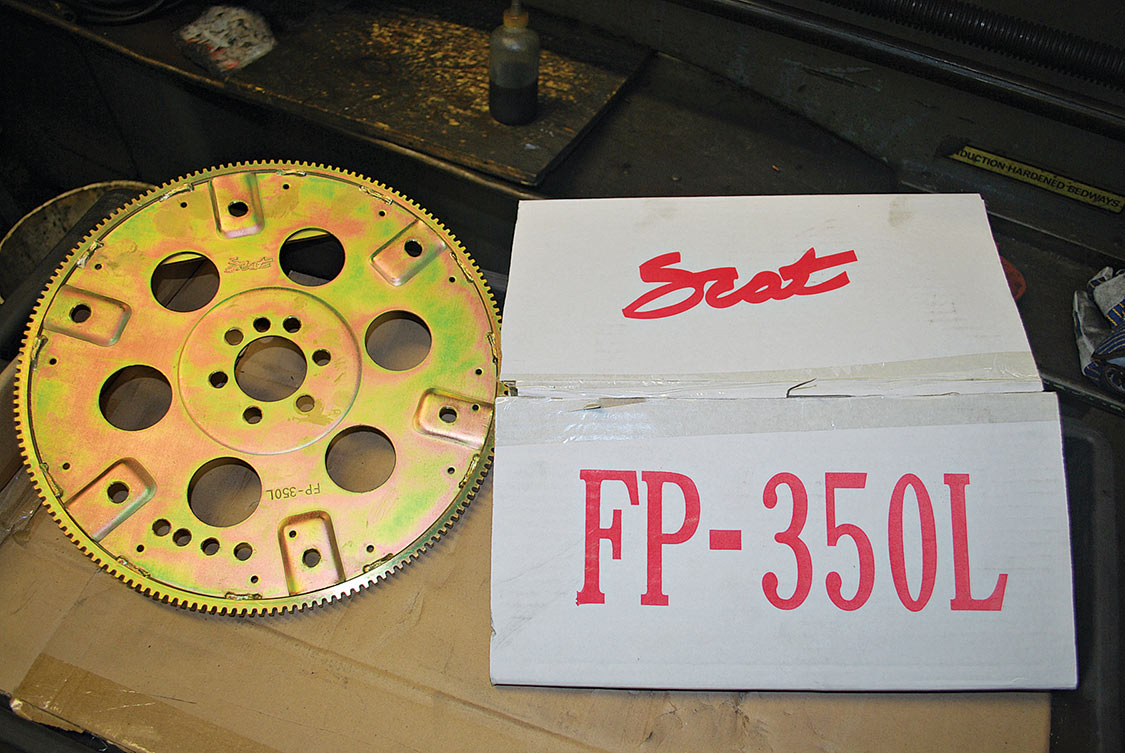
Scat Enterprises
Scatenterprises.com
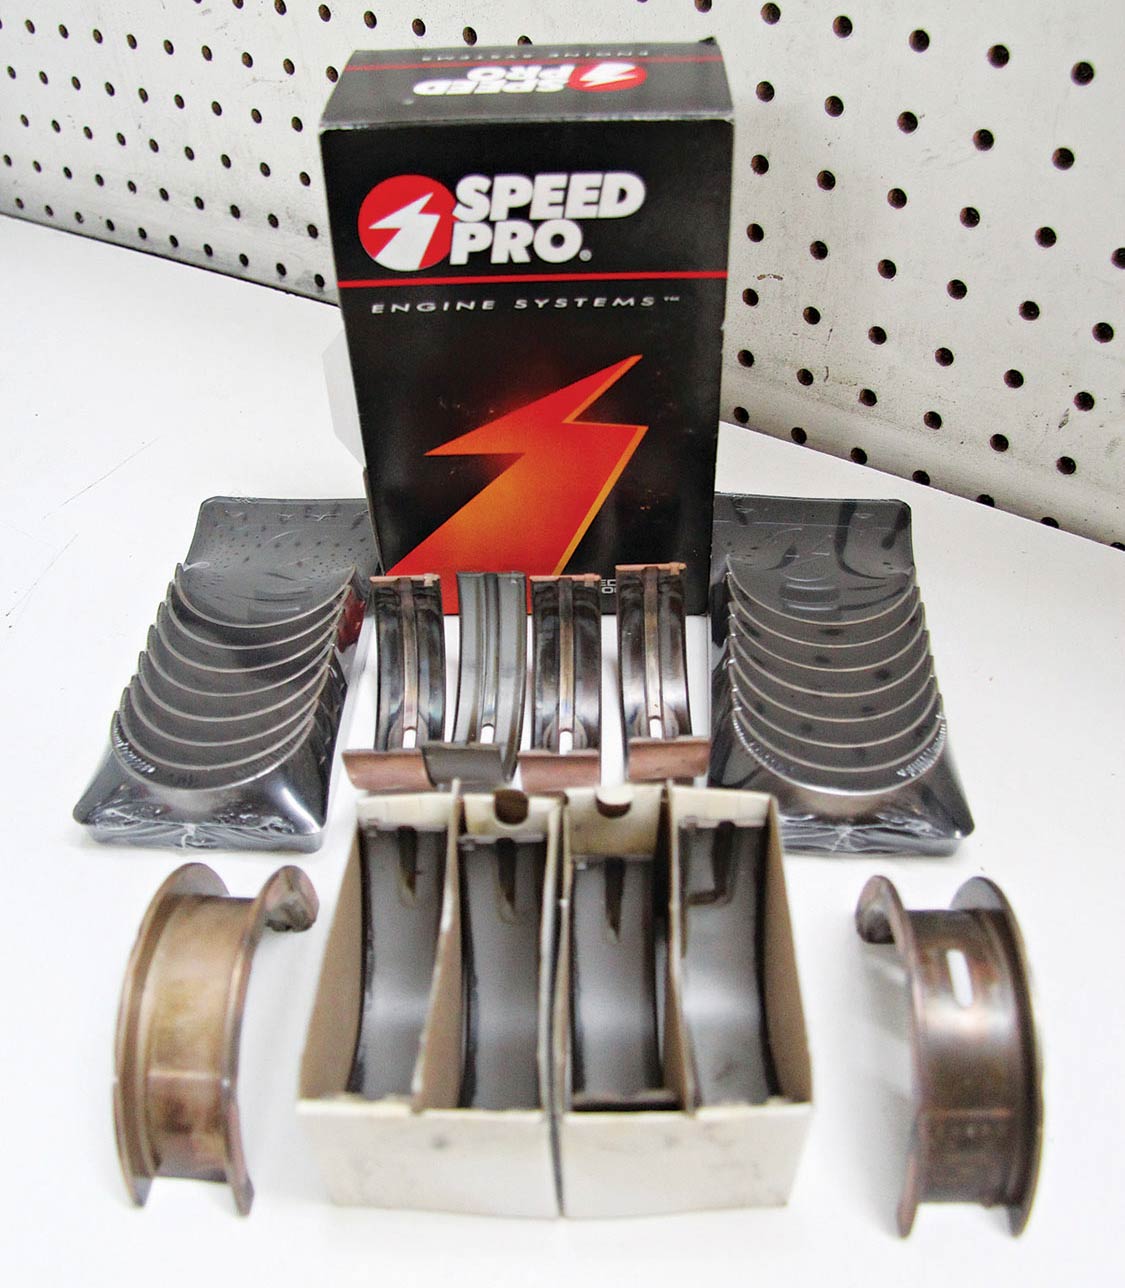
Speed Pro
Aftermarket.federalmogul.com
Summit Racing
Summitracing.com
Trick Flow Specialties
Trickflow.com
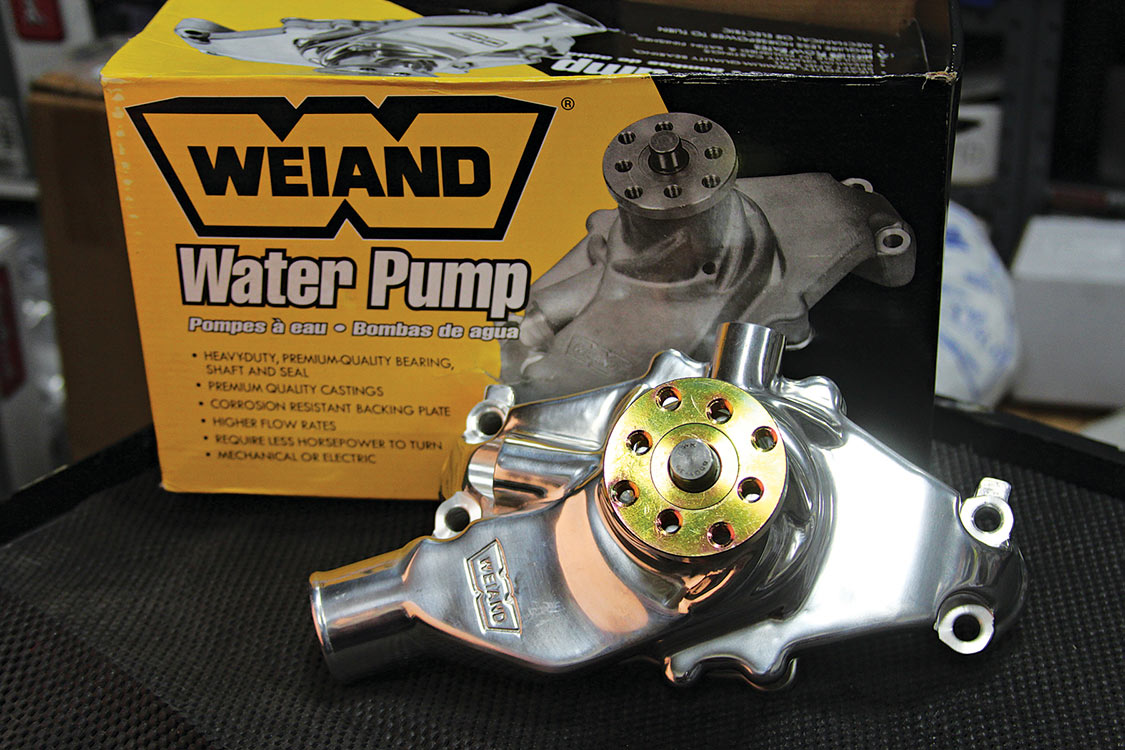
Weiand
Holley.com/division/weiand.asp
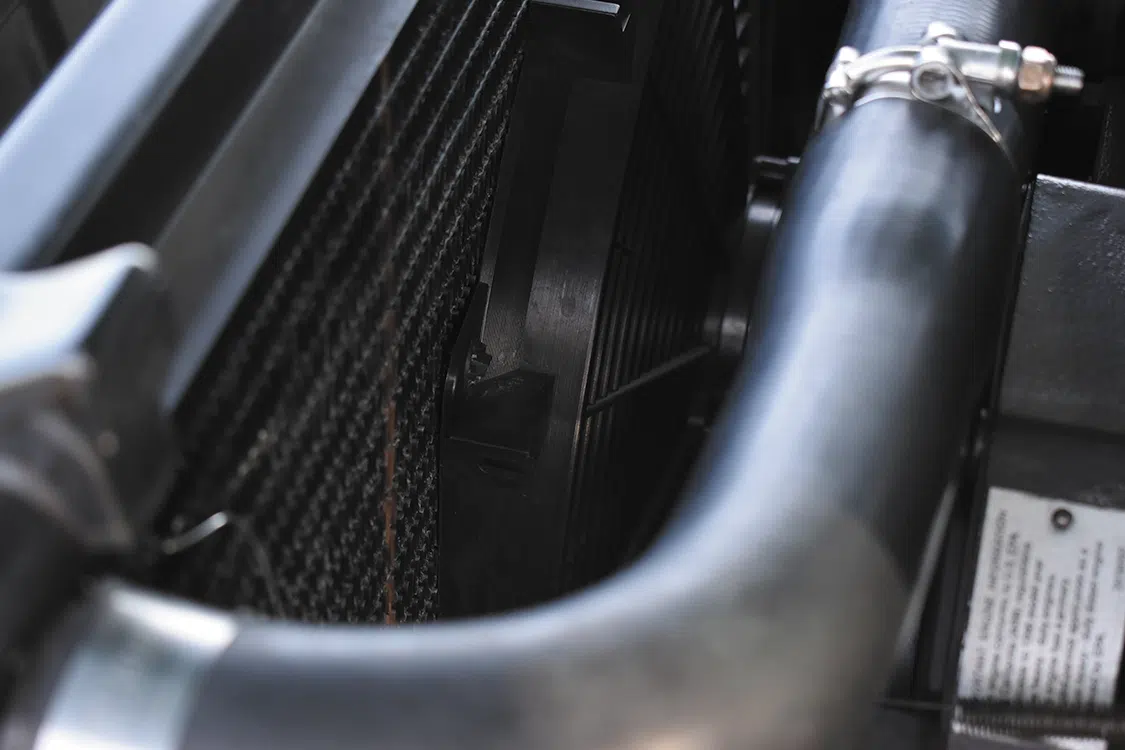
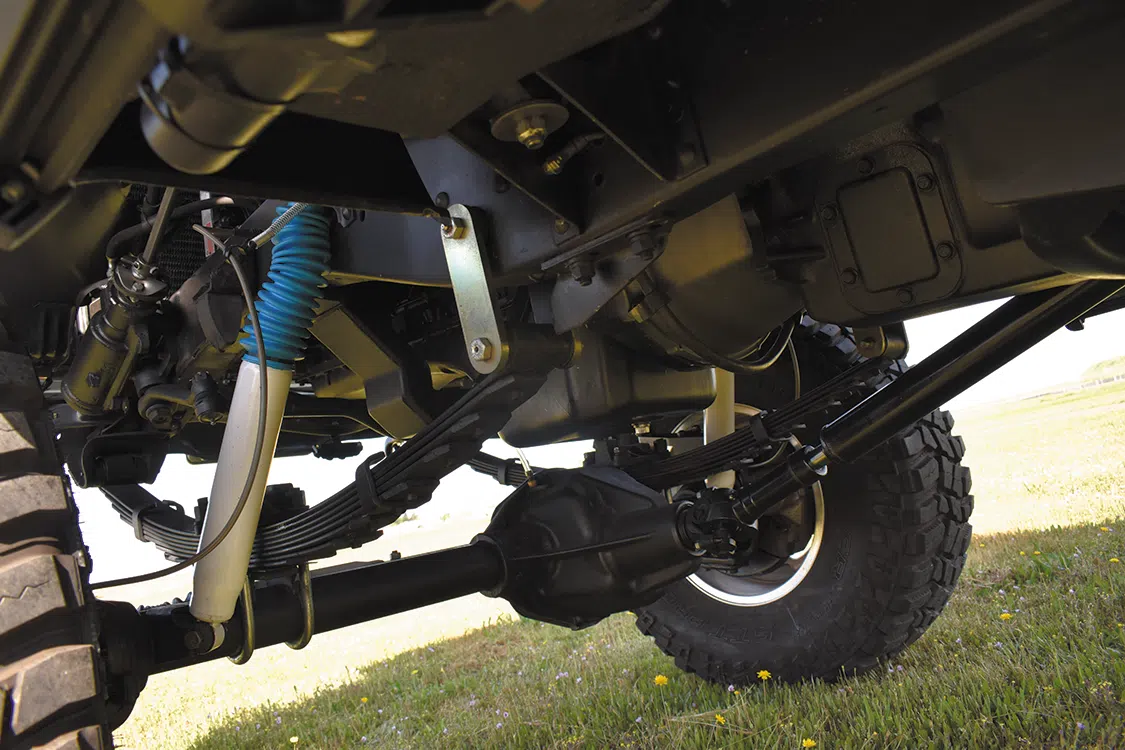
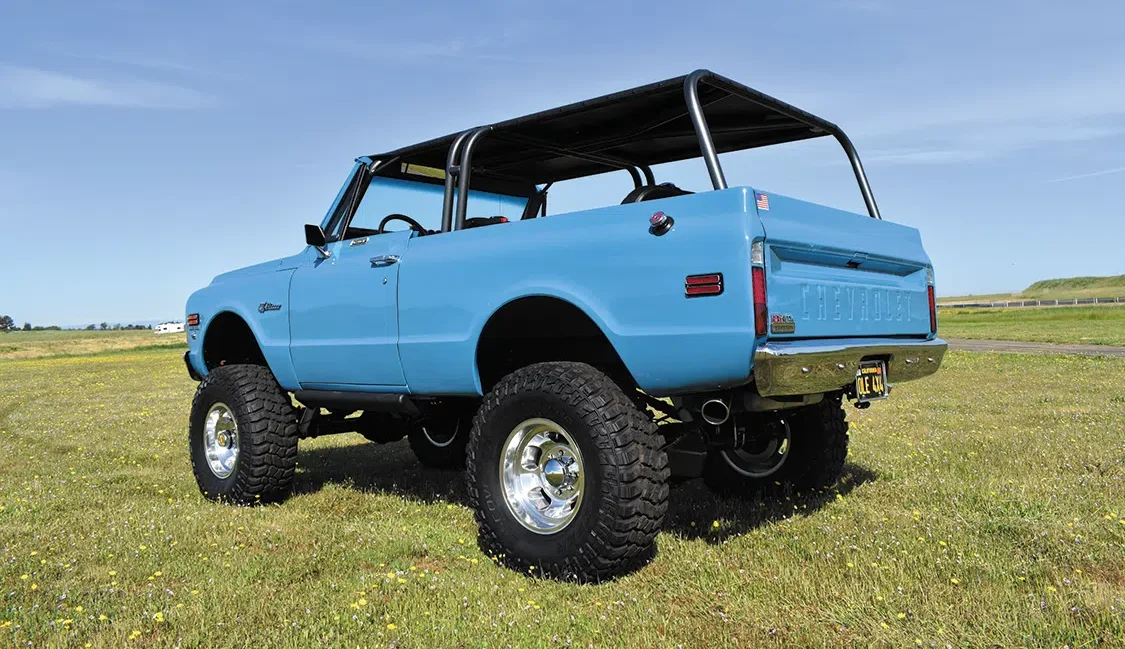
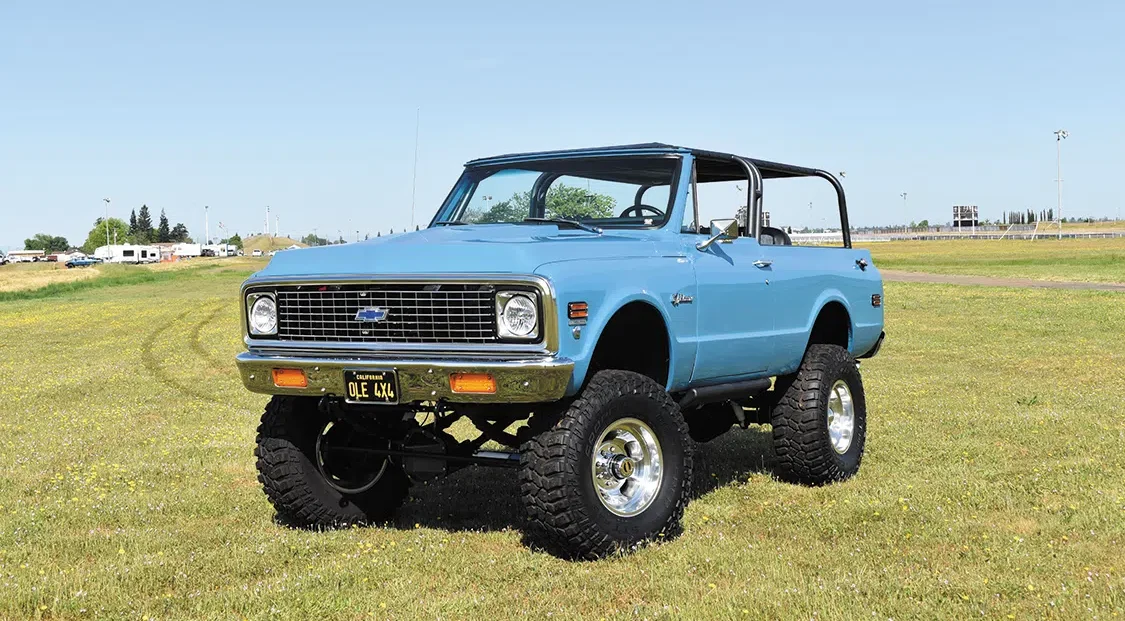
We’ve all heard the expression that something is so clean you could “eat off it,” but it’s hardly ever true. Even in show trucks, there’s usually parts that are dusty, or oily, or have secret rusted bolts. We can confidently say that this is not the case for Jim Martin’s ‘72 K5 Blazer from Northern California. The paint is gorgeous, the engine bay is pristine, and even the underside is absolutely immaculate. It’s probably one of the cleanest Cummins swaps we’ve ever seen, and that’s saying something.
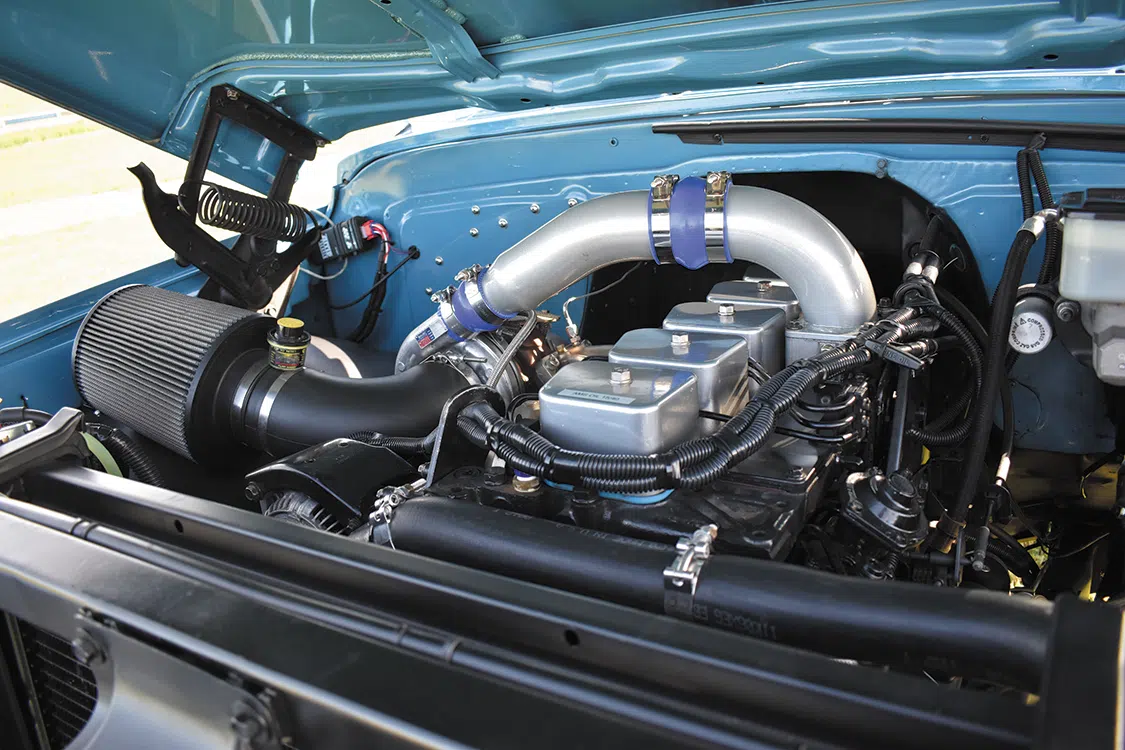
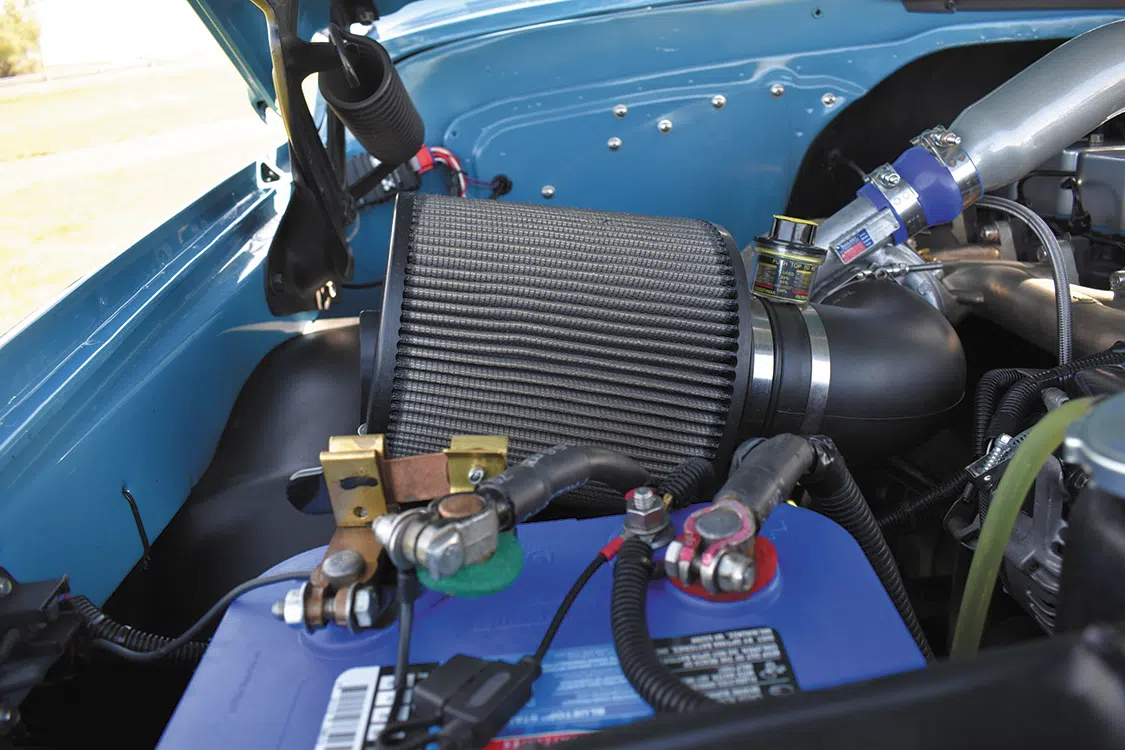
Now Blazers are classics, but they’re also known to not have a ton of power, and to get horrible fuel economy with the factory gas engine. Guess what solves all that, a diesel! Jim’s Blazer has been swapped with a classic 12-valve Cummins out of a ‘91 Dodge. The factory 160-hp engine is kind of a snoozer, so Jim’s Cummins has been upgraded with a turned-up fuel screw, governor spring kit, upgraded compressor wheel, and now makes approximately 300hp along with 800 lb-ft of torque. Reliability issues like the killer dowel pin have also been addressed. Power is routed out through a custom muffled dual 3-inch exhaust system.
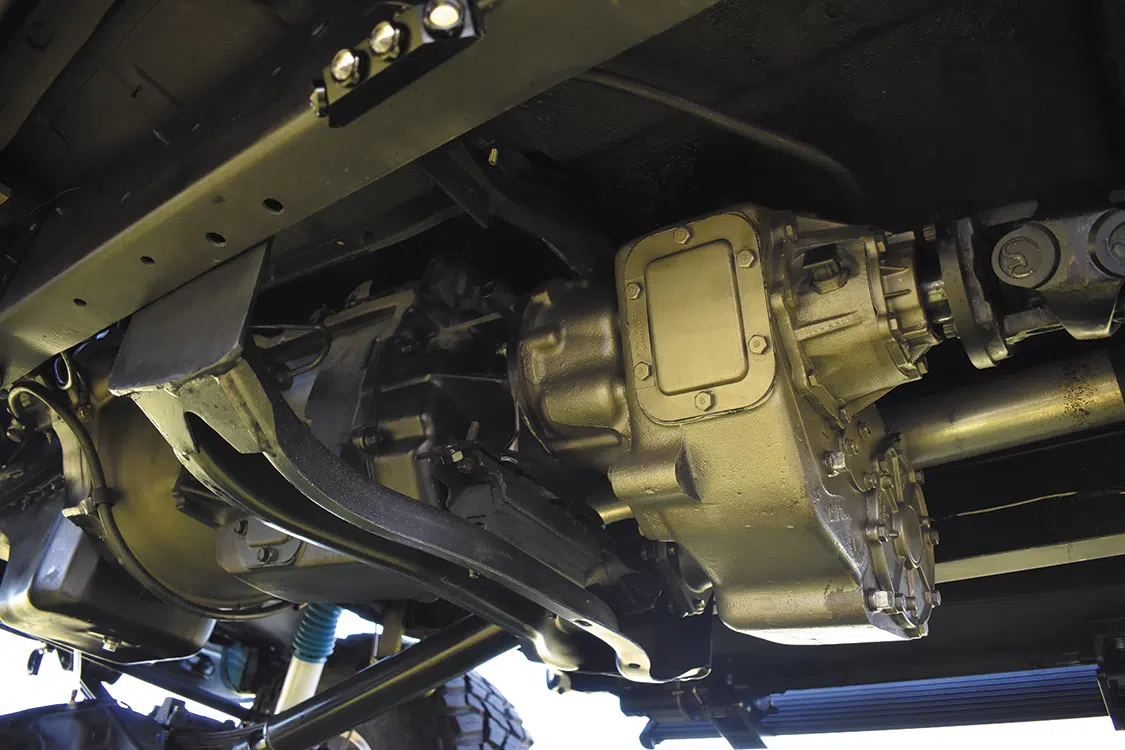
Jim likes to shift his own gears, so he chose an ultra-strong NV4500 out of a ‘94-’98 12-valve Dodge as a suitable manual box. The five-speed transmission was adapted to the First-Generation engine with a starter, engine plate, and flywheel out of a Second-Generation donor truck. This manual was then further adapted to an NP205 transfer case out of a First-Generation truck. As you can see the driveline is a mishmash of First and Second-Gen parts, but it works.
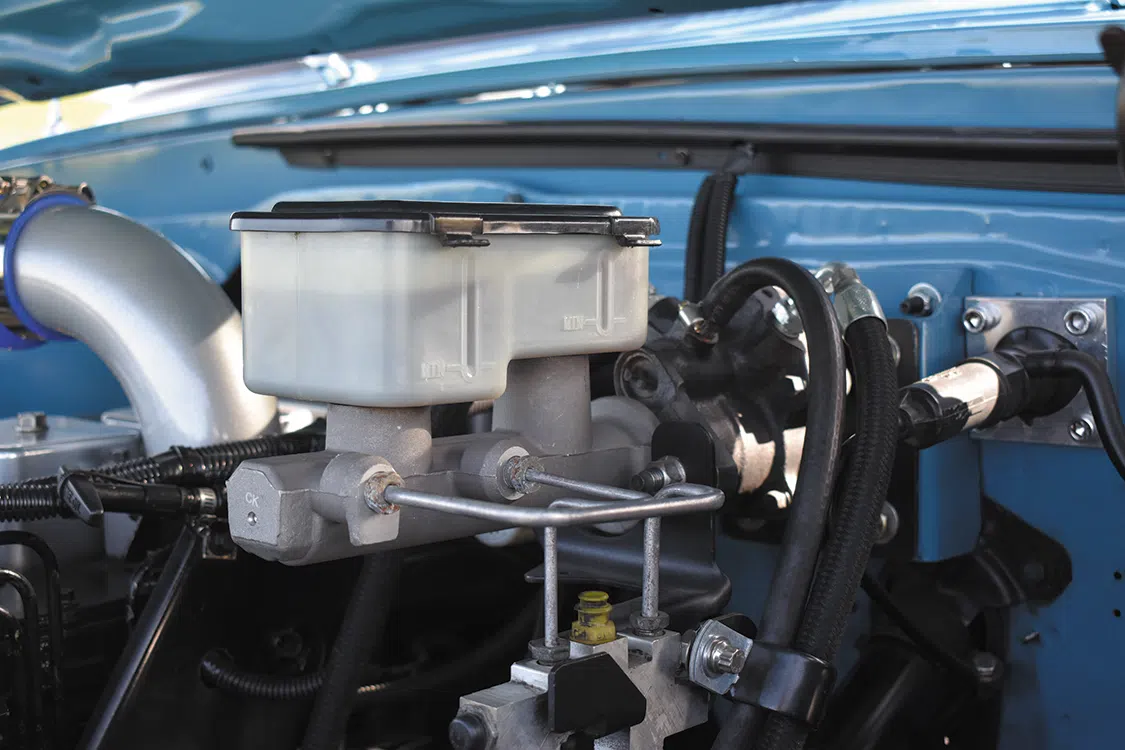
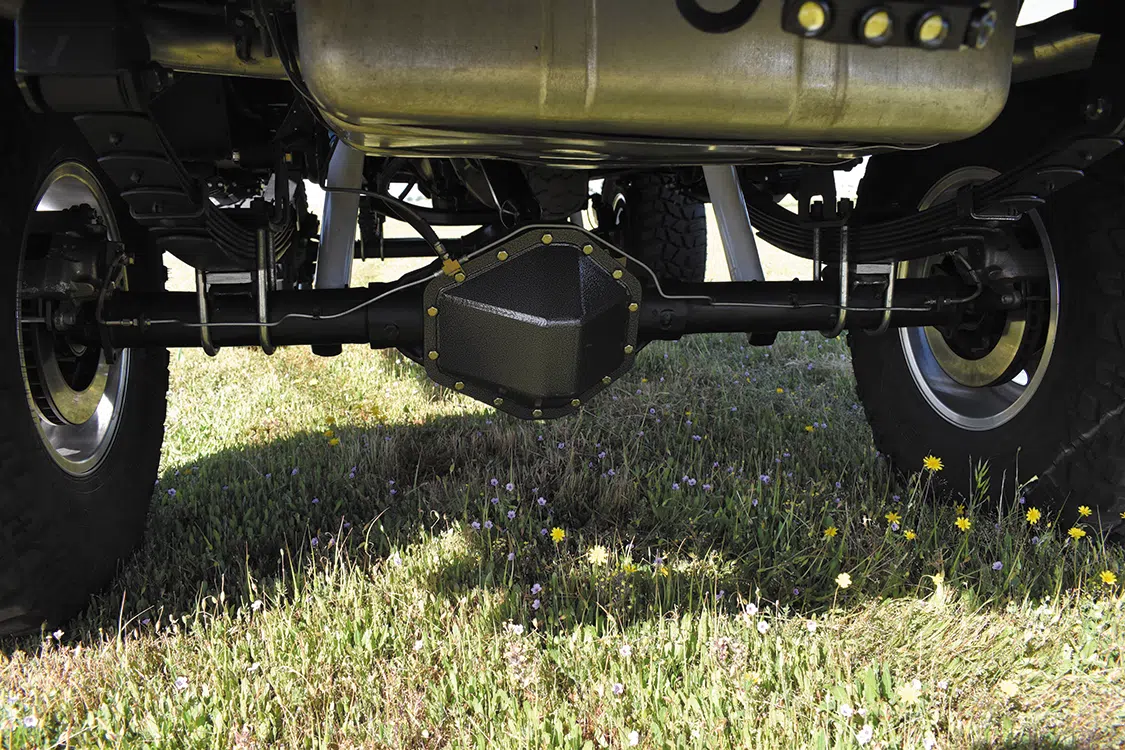
With the diesel engine and trans swapped in, there was still the issue of getting the truck to go down the road. Jim accomplished this with such niceties as a Readhead steering box with a crossover link, while the clutch and hydroboost braking system were adapted from a ‘94 Dodge donor truck. Axles that were study enough to handle the diesel power were swapped in too, with a GM 14 bolt in the rear, along with a Dana 60 out of a 1-ton truck up front.
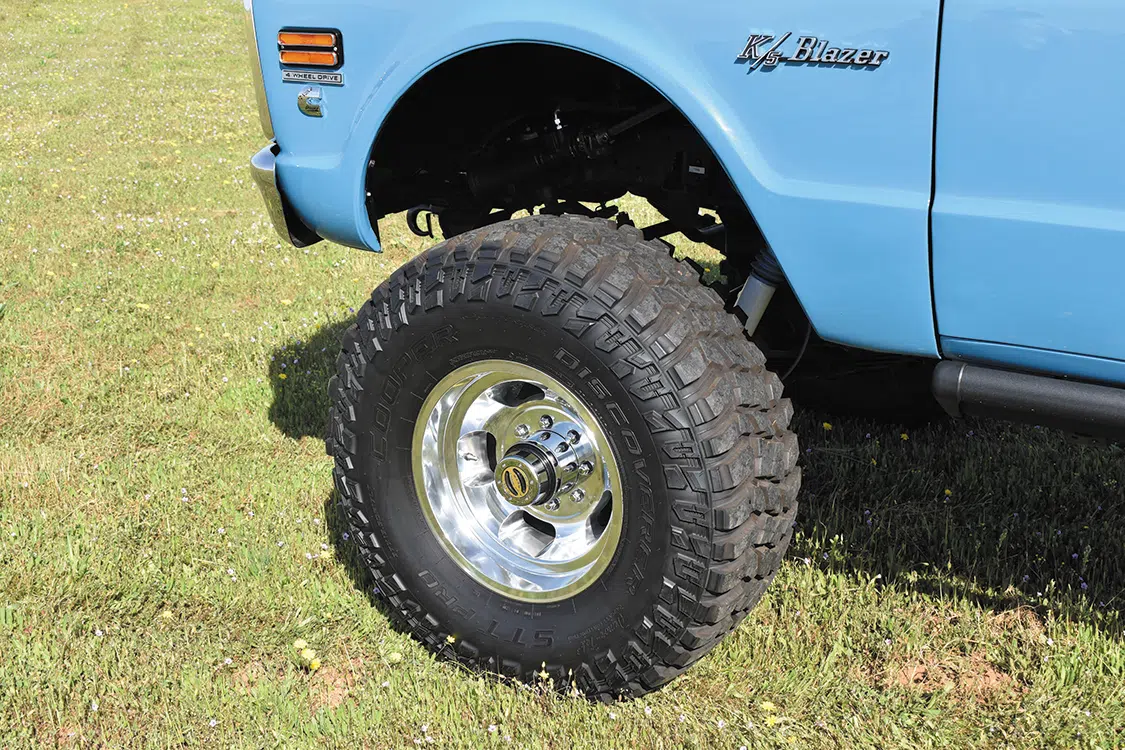
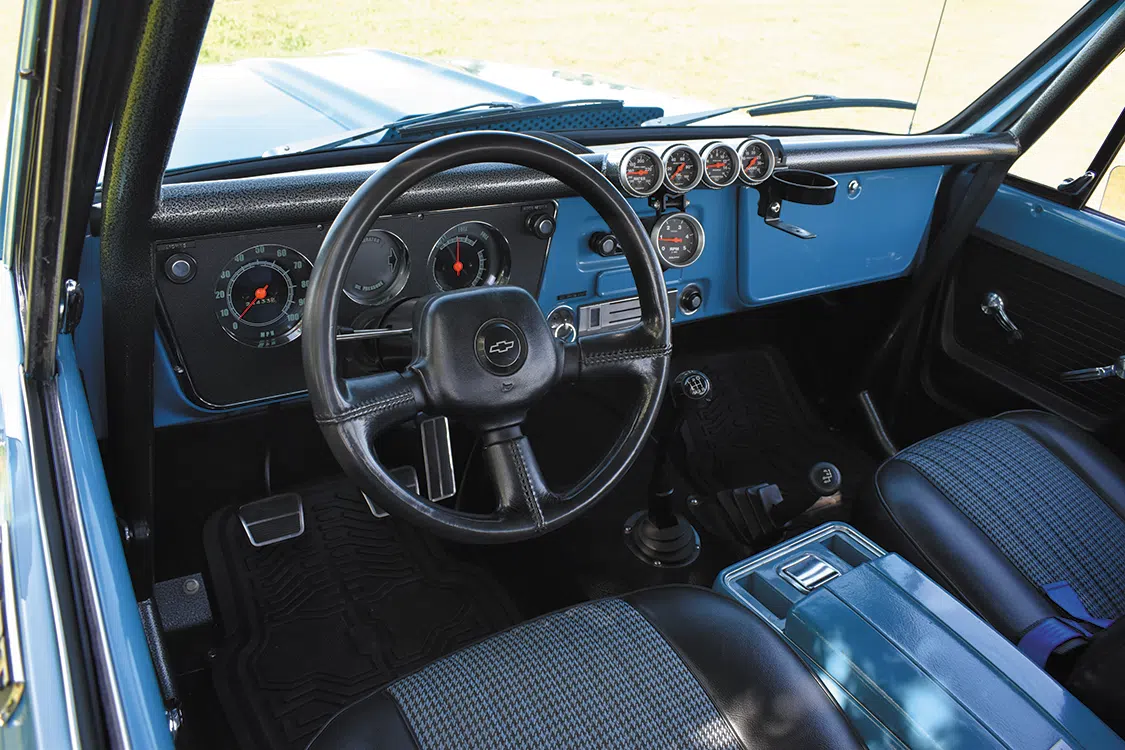
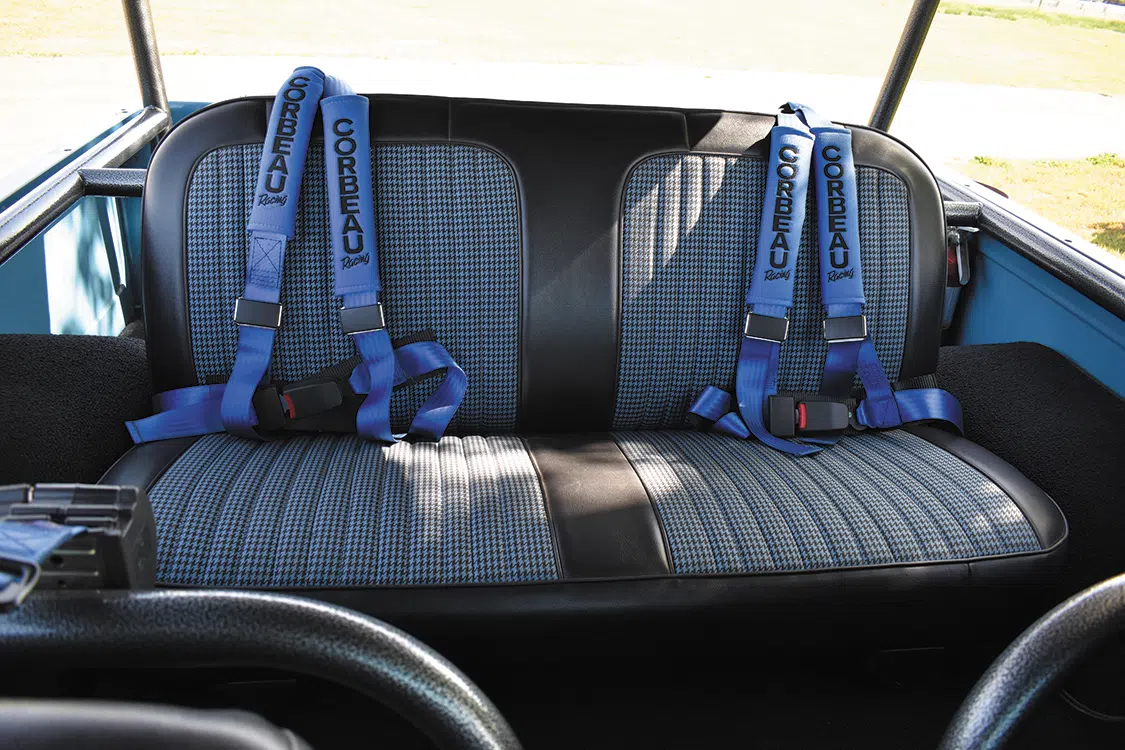
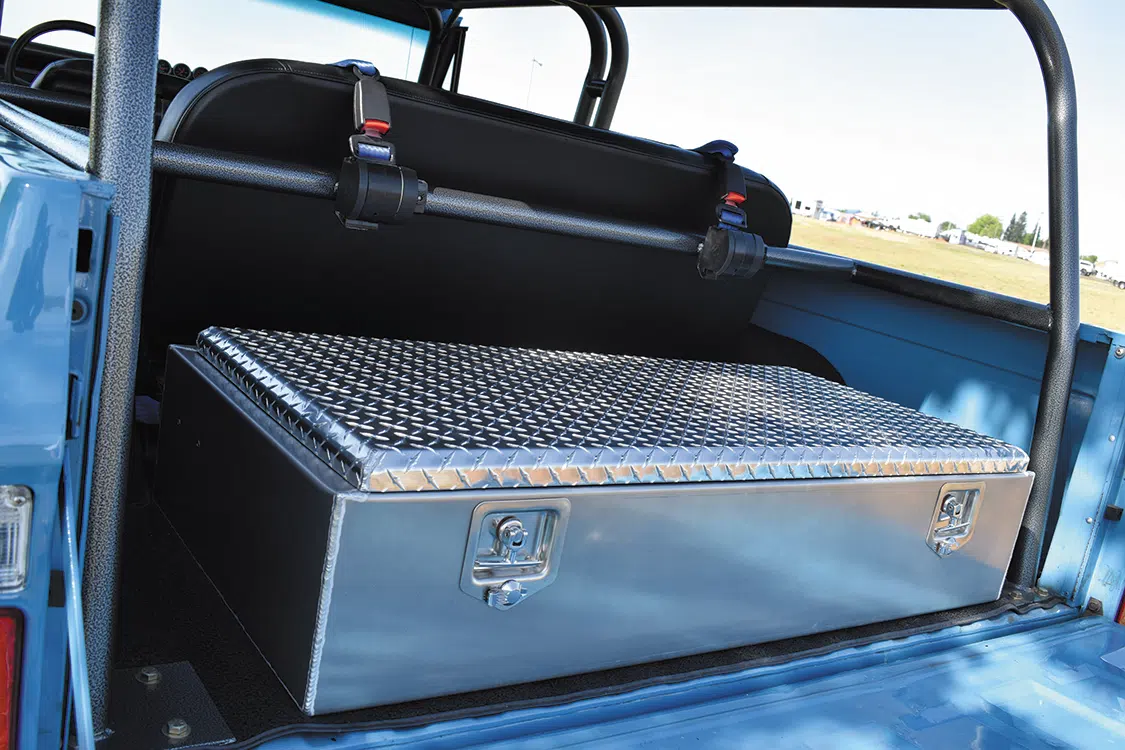
Now we get on to what Jim calls “the glitter stuff,” which makes the truck look the way it does. There’s 17-inch polished wheels by US Indy Wheels, and Ididit steering column, Car Tunes custom stereo, and Taylor Wings cargo box. A lot of it is functional too: like the Autometer gauges, and the Speed Hut Speed Box electric-to-mechanical conversion for the speedometer. The interior itself also has a 6-point rollcage built by David Virga and custom bikini top by West Coast Custom Interiors. Jim sits in comfy Corbeau seats, and there’s LED lightning throughout. You might also think the paint is custom but it’s actually a factory Medium Blue PPG hue.
You have to stand there for a minute to take Jim’s Blazer all in. It’s not just one thing that attracts your attention but everything that is so well-done. He’s modified virtually every part of the vehicle, but the fact that he’s retained a factory-style look is perhaps the best of all. Jim would also like to credit Ken Imler from Imler Diesel and the original owner Andy Byrne for their help. We’d like to credit Jim for building such an awesome ride, one that’s definitely worth featuring in the pages of Diesel World.
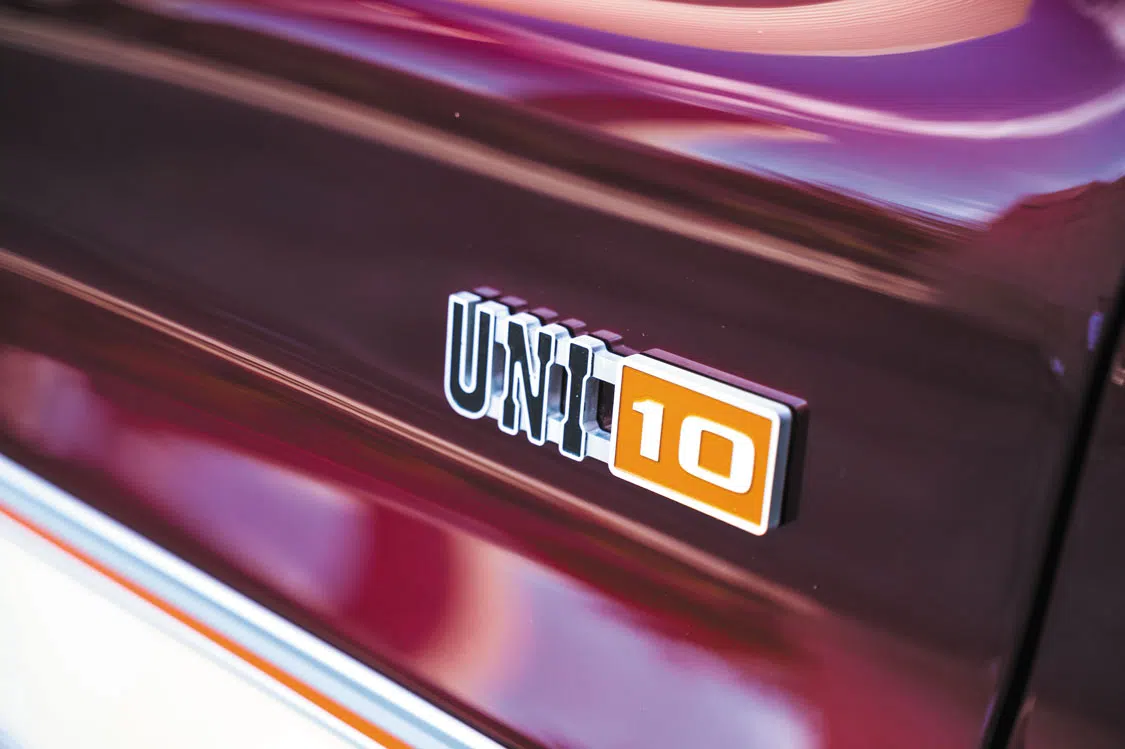
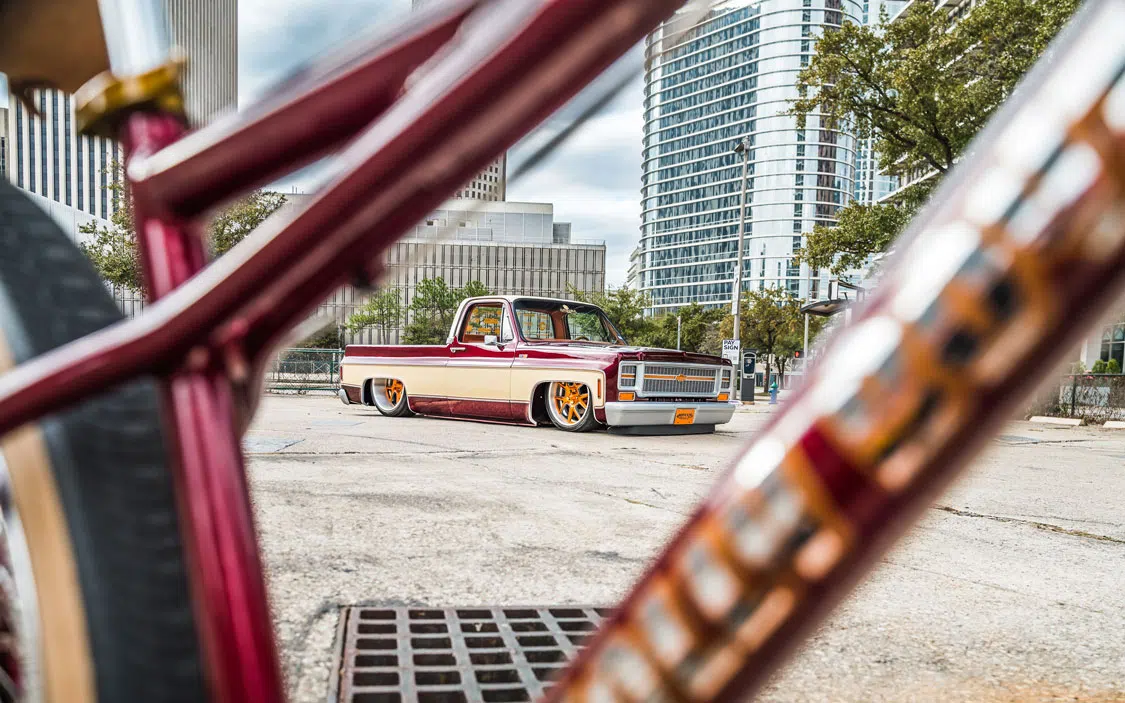
Ricky Holly is a name that we’ve all grown accustomed to hearing over the years. He’s been turning out the craziest vintage Chevy trucks that have only gotten better. You’ve seen his builds at the biggest shows across the country. You’ve seen his trucks on the covers and pages of the industry’s leading publications. You’ve seen pictures and videos of his creations posted and shared across all social media platforms. At this point, you have also most definitely been inundated with the praise surrounding his latest project—this ’79 Unibody Chevy pickup that has been the buzz of the custom pickup community since its grand unveiling at SEMA ’22. If for some reason you don’t already have every square inch of this truck ingrained in your memory bank, let’s get reacquainted with all its glory.
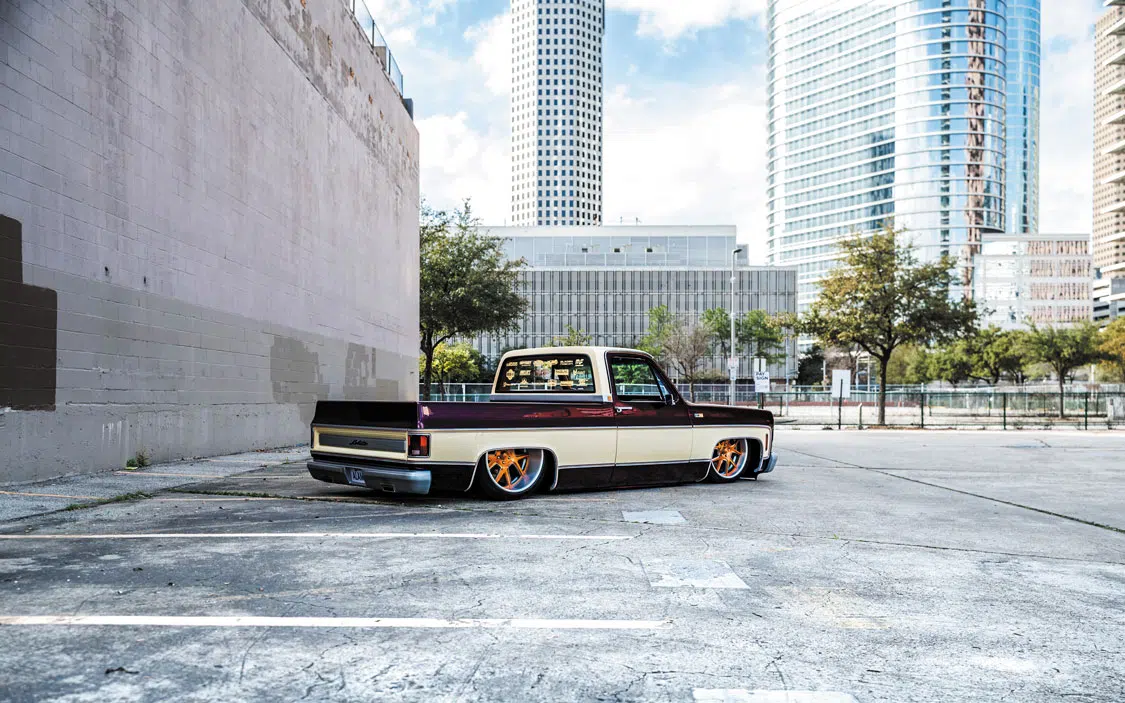
While it is rather difficult to look at this truck and select one characteristic to claim as its most notable, we’d have to say that the unibody design is the most eye-catching. His ultimate goal was to have this particular modification blend right in with the truck’s natural styling, but it does shine bright as a huge accomplishment to keen eyes.
To get this effect just right, Ricky entrusted the job to his longtime go-to paint and body shop, Alamo Customs in Alvin, Texas. Together, Ricky and the team at Alamo have produced some of the baddest classic Chevy truck projects out there, and this one might just sit at the top of the heap. The guys successfully fused the body of a ’79 Blazer with that of an ’85 Squarebody C10 pickup to create the well-proportioned unibody shell.
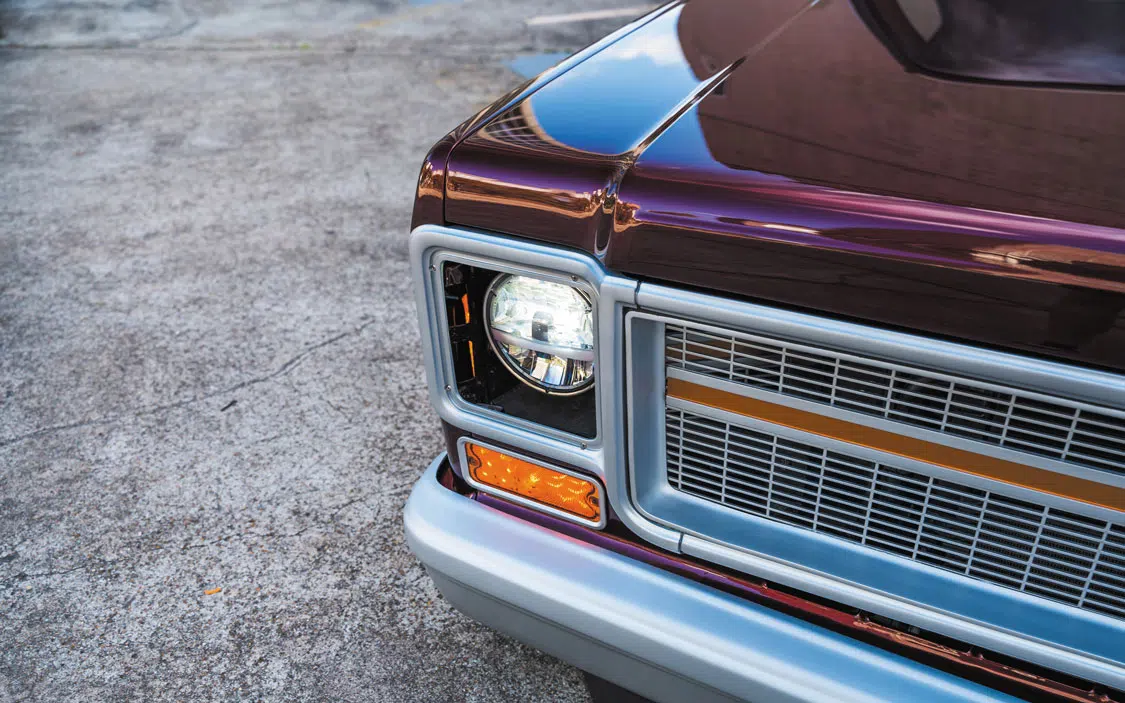
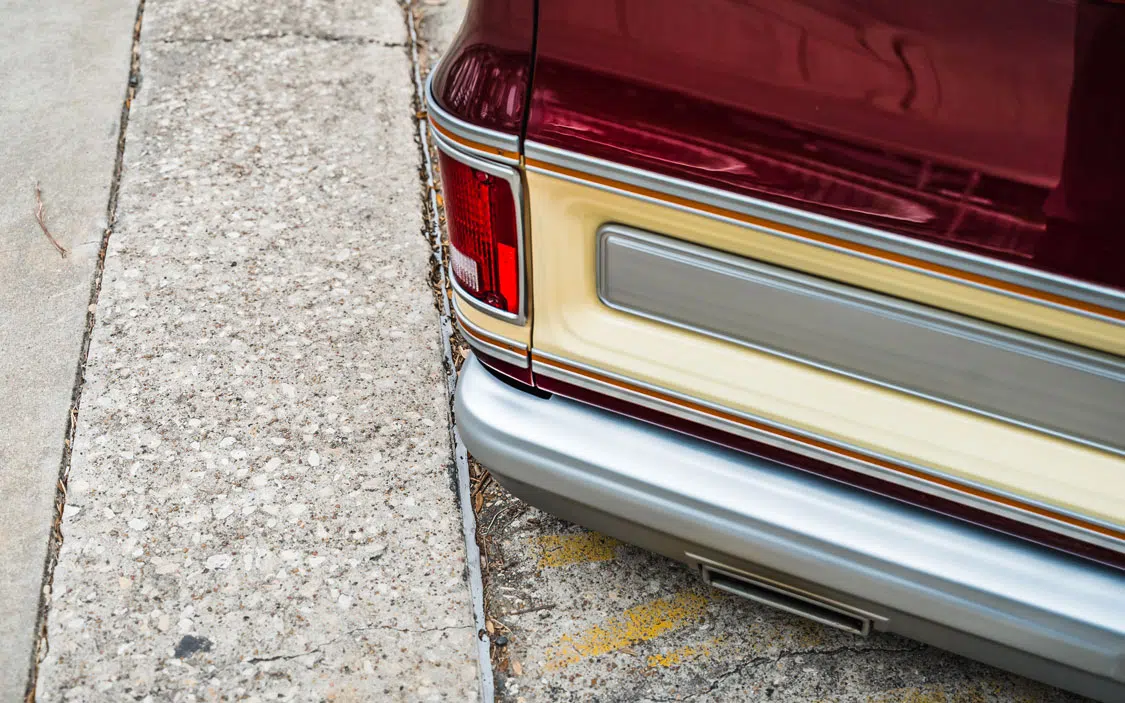
With that major portion of bodywork completed, the guys at Alamo then started creating more one-off touches to make Ricky’s truck, which gained the name Lolita around this point, that much more unique. At the front, a custom grille with motorized headlight panels was fabricated. At the rear, the guys came up with a tricked-out tailgate and bumper that elevate the truck’s subtle yet highly sophisticated restyling. United Pacific was sourced to provide fresh headlights, taillights, and mirrors for cleanliness sake, but it was ultimately the way these parts were painted that really changed things up.
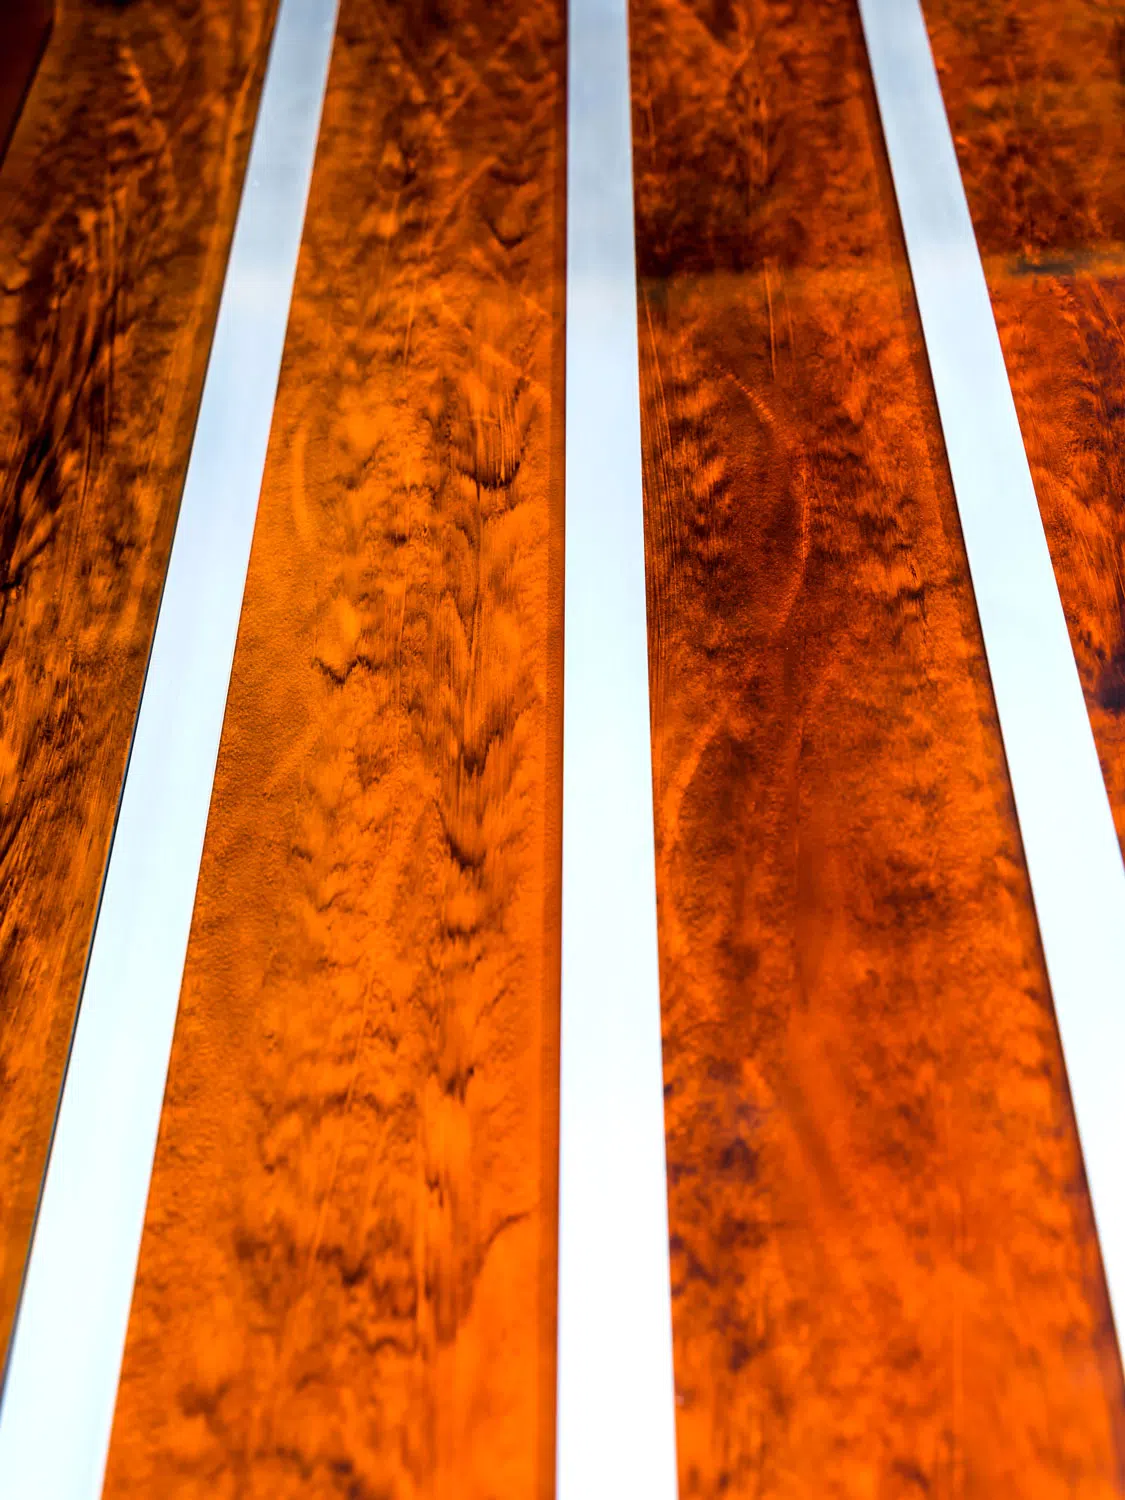
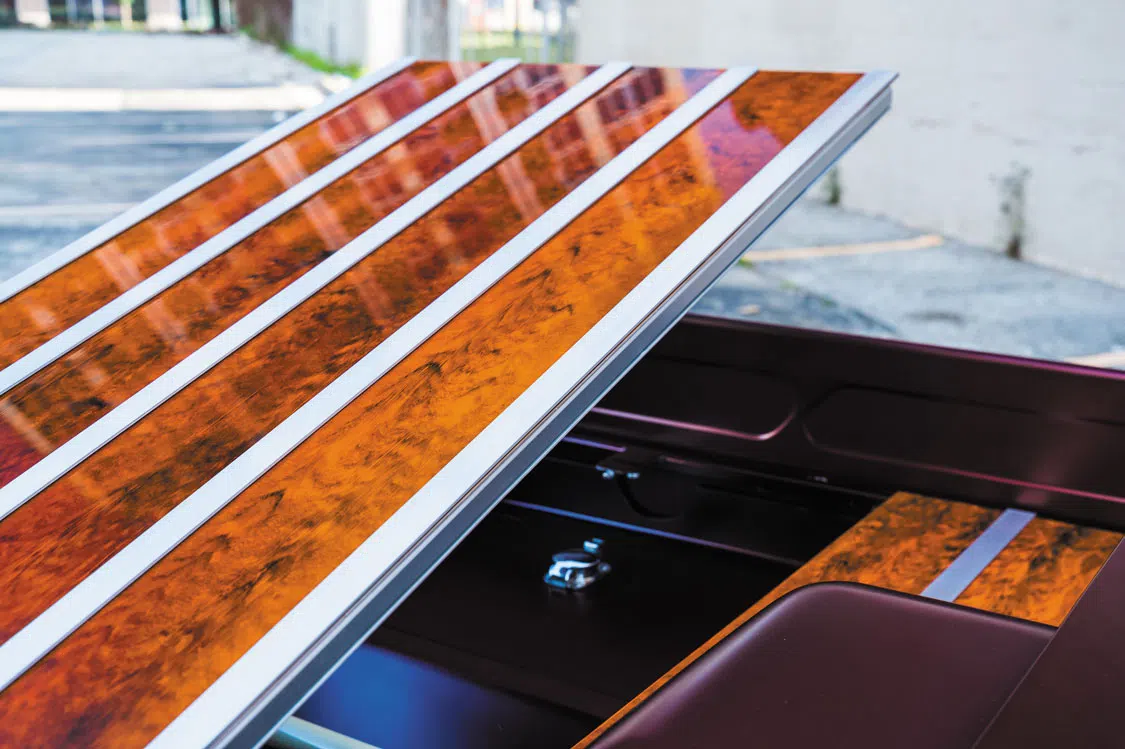
Custom-mixed PPG maroon and tan colors were stirred up to serve as the main two-tone paint scheme, which was to be broken up by replacement body molding from Mar-K. It was actually the other colors and effects used on the truck that made an equally if not more impactful impression. Both bumpers along with the side mirrors are not, in fact, brushed metal. The guys used paint to get the exact color and finish they had in mind, as there was no chance of running any piece of chrome on this truck per Ricky’s request. If you’ve been attempting to analyze the grain to figure out what type of wood was used for the flooring inside the full-custom bed, you might be surprised to know that it is also just paint—no planks. Actually, all of the wood trim found all throughout the truck has been specially painted to mimic the appearance of actual exotic lumber.
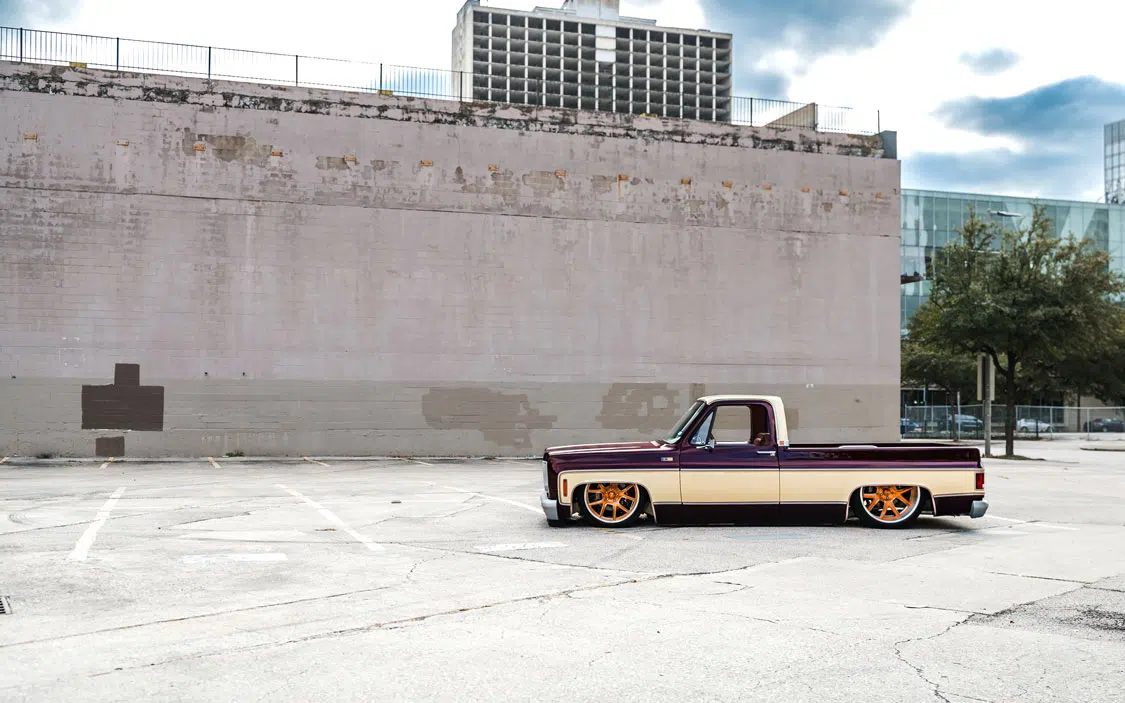
Just like the rest of Ricky’s previous high-profile Chevy truck builds, this custom unibody was slated to drive at the lowest altitude possible. Another Texas business, Acme Chassis Factory in South Houston, was contacted to create a custom frame for the build that would deliver on the low-slung appearance along with excellent ride quality. To assist in creating that ride quality, nothing but top shelf air-ride components were ordered from Slam Specialties ‘bags, Air Lift air management parts, Seamless air tanks, and more. While the pandemic did slow the delivery of certain items, DRU Custom Builds of Pasadena, Texas, was on-hand patiently waiting to piece and plumb the suspension system together as the parts steadily flowed in.
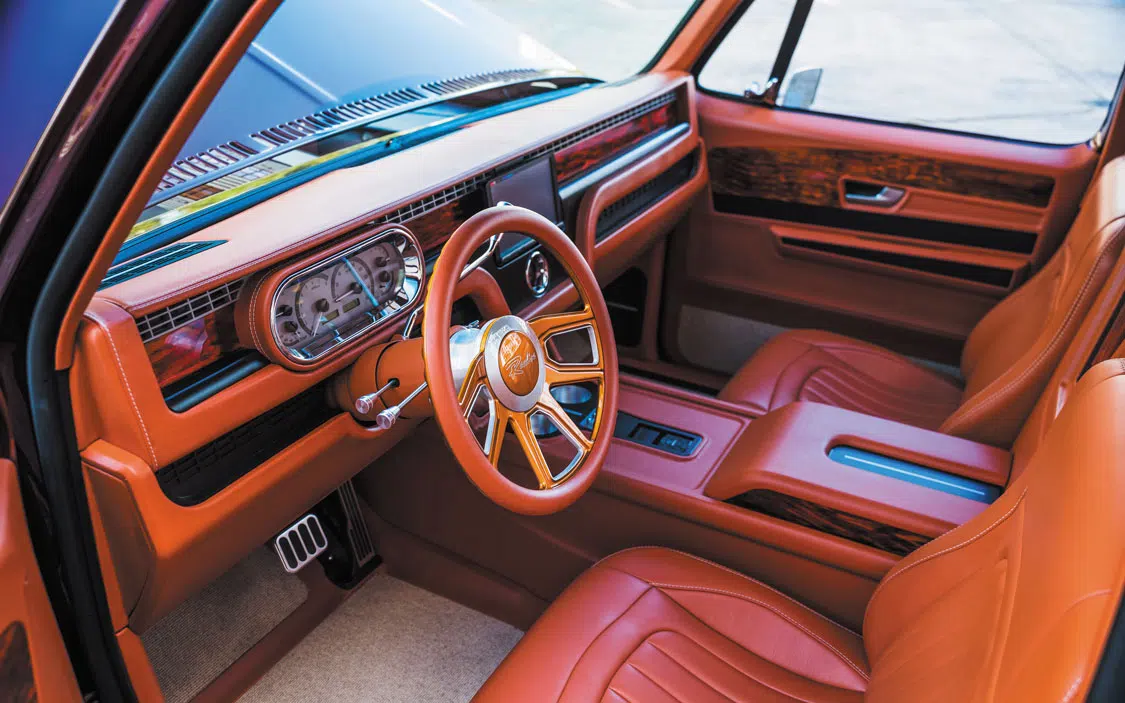
From the Snowden seats covered in Apex leather, the custom dash, flooring, door panels, and center console, the interior landscape has been kept very high-end at every turn.
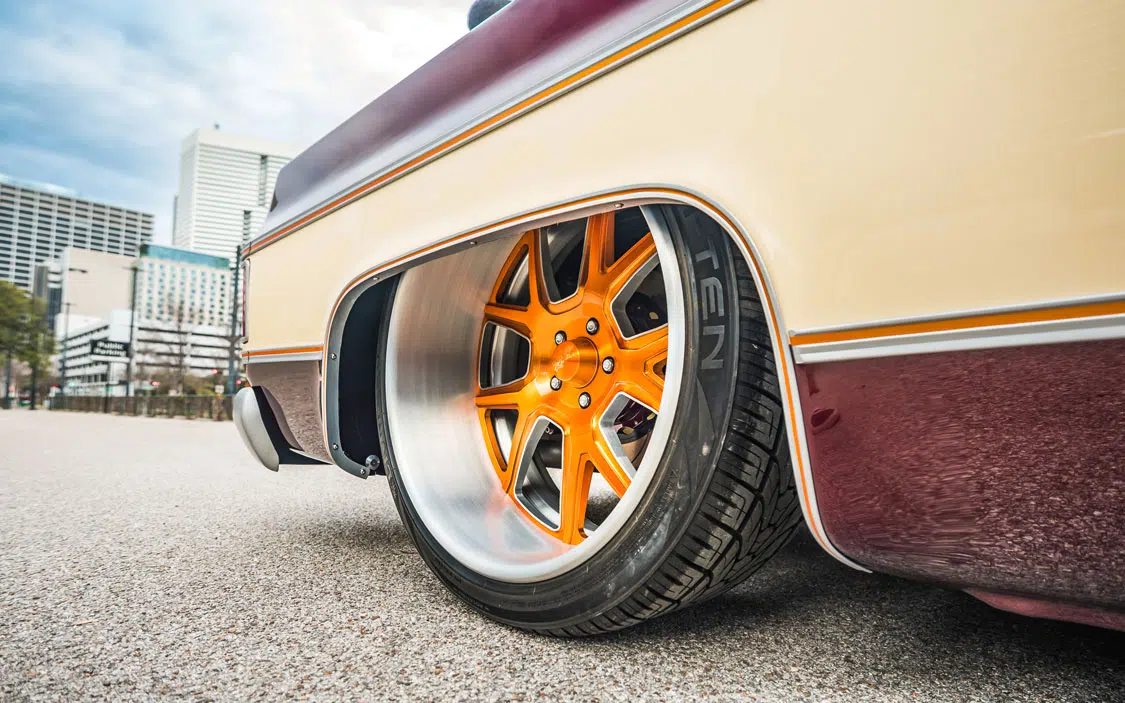
The all-important decision of which wheel to run is always a tough decision for Ricky. He knew the roundabout size he could get away with once the chassis was in place, and he usually tends to gravitate toward smooth, timeless designs. Well, he most definitely chose a winner once again with the set of 22×8.5 and 24×12 Raceline Newport wheels he picked for this project. The hoops have been brushed, and the spoke centers have been treated to a splash of color that really spices up the exterior color palette.
Ricky was interested in rooting down a big, powerful engine that he could really mash on when he gets the urge, which happens way more often than you’d realize. To make the most of the available space under the hood, LT Swap King in Crosby, Texas, was contacted to help lock down a supercharged 2018 LT4 from a ZL1 Camaro. This was the perfect powerplant for the situation, and once it was mounted, wired up, and outfitted with a Brian Tooley Racing camshaft, Sanderson headers, and a Magnaflow exhaust system, Ricky was looking at 750hp. This is an ideal horsepower count for the type of driving he likes to get down on at the track.
If you’ve paid attention over the years, all of Ricky’s trucks are designed and built to operate just as good as they look. To finish out the engine transplant, an amazing collection of panels and vents were fabricated and painted to elevate the whole vibe of the engine compartment, which is more posh and luxurious than should even be allowed under the cover of a hood.
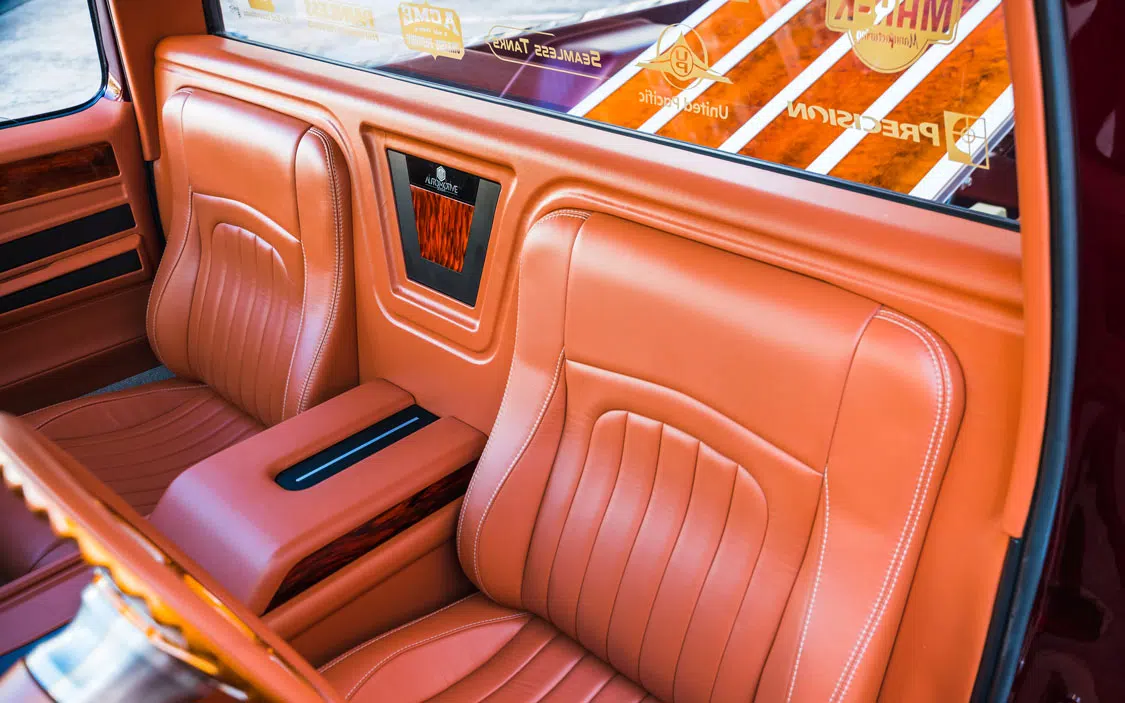
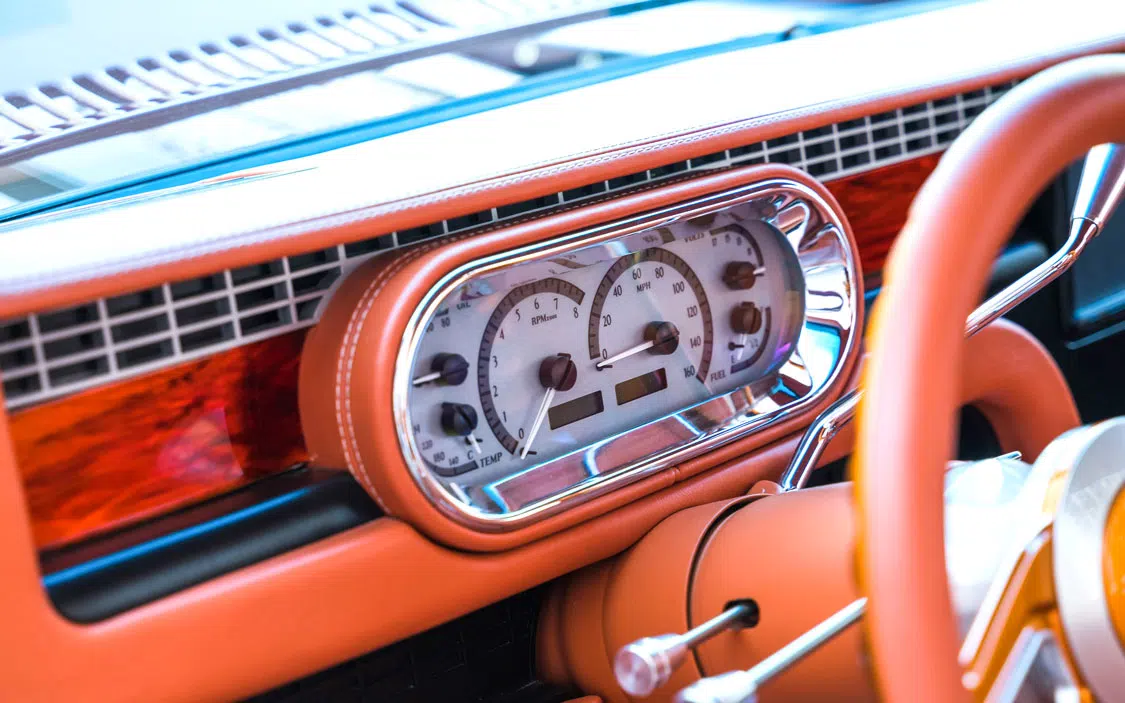
The next phase of the build is what actually earned the truck an award at last year’s SEMA show. Chris Pate at MTI (Mobile Toys Inc.) in College Station, Texas, poured his heart and soul into the creation of this Chevy’s cab space. From the Snowden seats covered in Apex leather, the custom dash, flooring, door panels, and center console, the interior landscape has been kept very high-end at every turn. Other noteworthy amenities include Dakota Digital gauges, a well-rounded sound system, Vintage Air A/C, a one-off Raceline steering wheel, and plenty of invaluable style and craftsmanship. All of this was good enough to take home Best Truck Interior honors at the largest automotive event on the planet!
To circle back to what was said at the beginning of this story, it’s incredibly hard to crown one single facet of this truck as most notable. This truck might just be a milestone for classic Chevy truck builds as a whole. While Ricky Holly is used to owning super high-quality pickups, this one has to feel a tad bit different. As always, his best truck is always the next one to come, so we are anxiously awaiting seeing what on Earth he could possibly top this build with. Until then, we’ll go ahead and leave the bar right where Ricky and his most trusted shops and fabricators have left it.

Owner
Ricky Holly
1979 Chevy Blazer
Houston
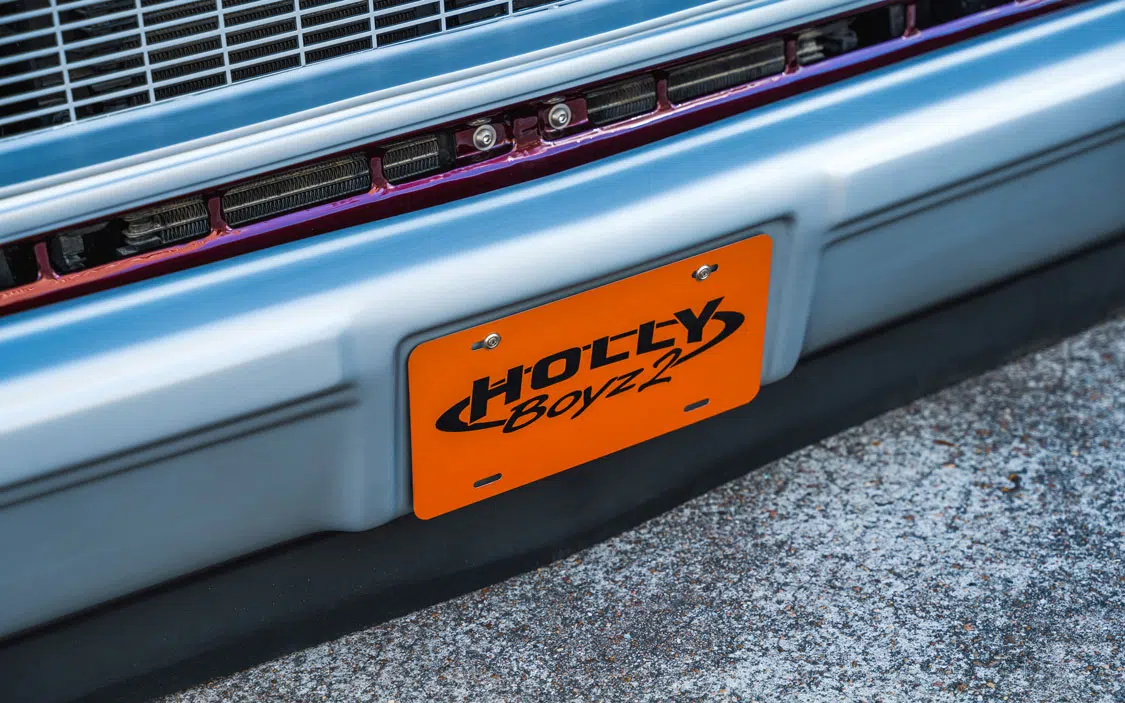
Holly Boyz
Engine & Drivetrain
Shop: LT Swap King, Crosby, TX
2018 Supercharged LT4 V-8
Brian Tooley Racing stage 2 camshaft
Sanderson headers
Magnaflow 2.5-inch exhaust system
2018 10L90 transmission
One-off paneling under the hood
Chassis & Suspension
Acme Chassis Factory, South Houston, TX
Custom-made frame
Custom fuel tank
Slam Specialties ‘bags, Air Lift air management, dual Viair compressors, Seamless air tanks and other air components installed by DRU Custom Builds (Drops ‘R Us), Pasadena, TX
Wheels, Tires & Brakes
22×8.5 and 24×12 Raceline Newport wheels
Lionhart tires
Wilwood 14- and 13-inch brakes (front and rear) and master cylinder
Body & Paint
Shop: Alamo Customs, Alvin, TX
Custom mix PPG maroon and tan paint
Made from a Blazer to a unibody truck
Mar-K bed flooring and body molding
Custom grille and headlight panels
United Pacific Industries headlights and mirrors
Mirror, bumpers and bed floor painted for effect
Custom wrapped details by Pixelwerks, Houston
Interior & Sound
Chris Pate @ Mobile Toys Inc. (MTI), College Station, TX
Snowden seats covered in tan Apex Leather
Dakota Digital gauges
Raceline steering wheel
Custom dash, floor, and center console
Sony receiver
Gladen/Mosconi audio components
Vintage Air A/C
Ididit steering column
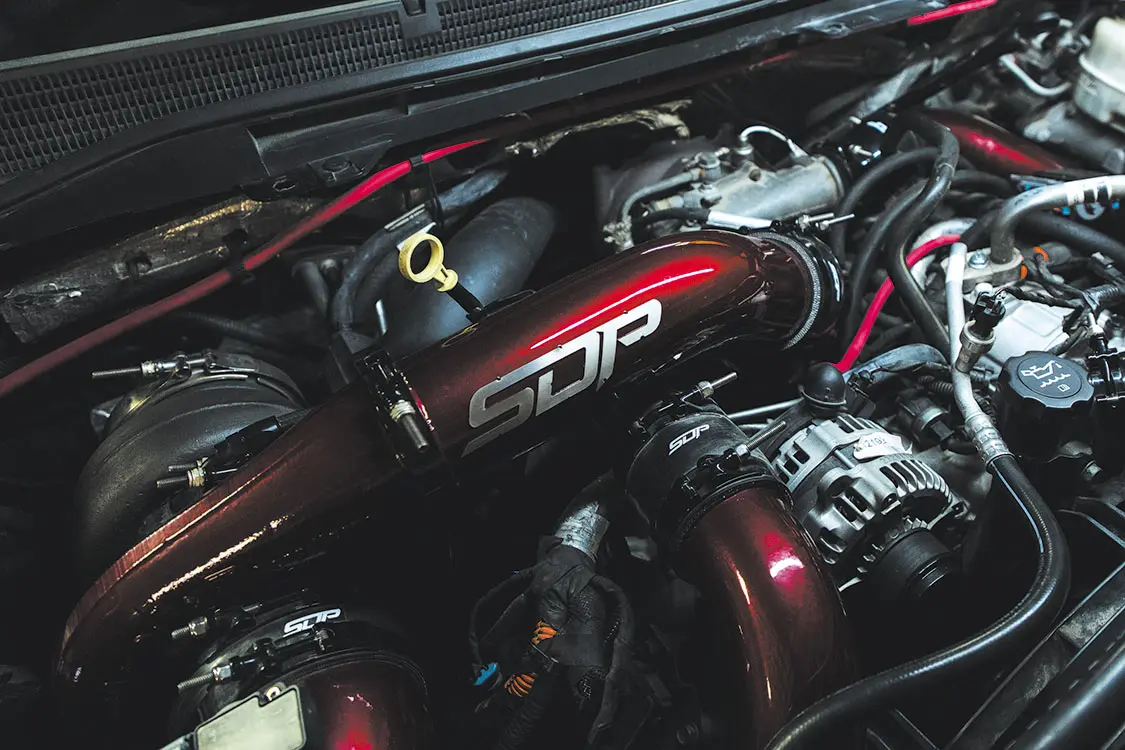
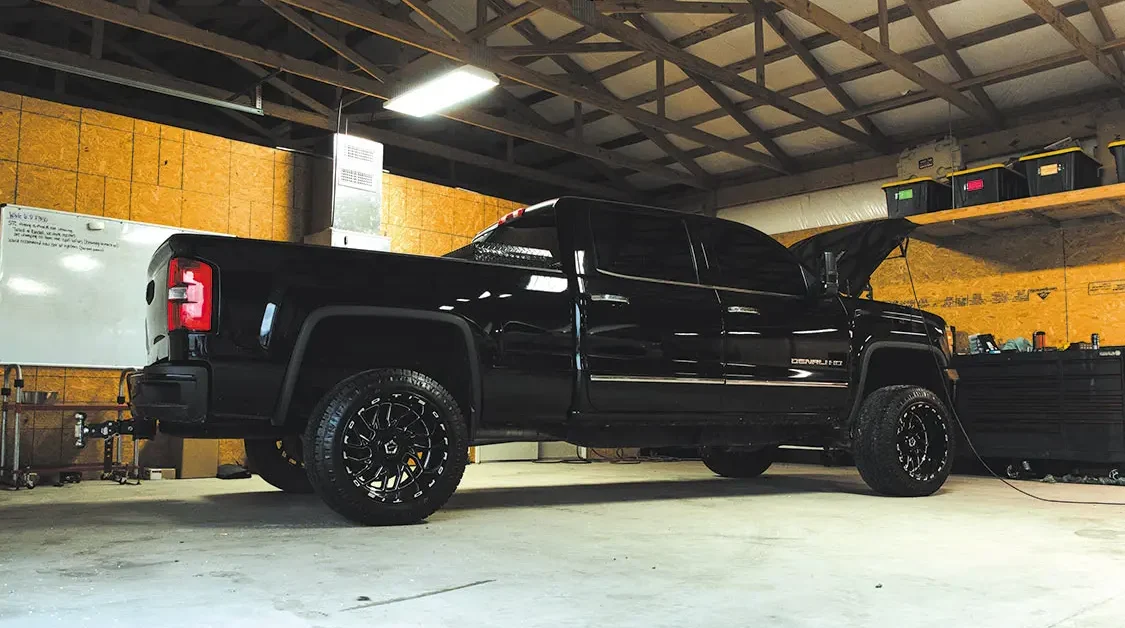
Unlocking the true potential of your 6.6L Duramax LML from 2011-2016 has never been more electrifying. Welcome to the world of Diesel Power, where the heart of performance lies beneath the hood and roars to life with every turn of the key. In this issue, we take you on a journey to unleash the untamed power of your diesel engine, all while keeping it true to its roots.
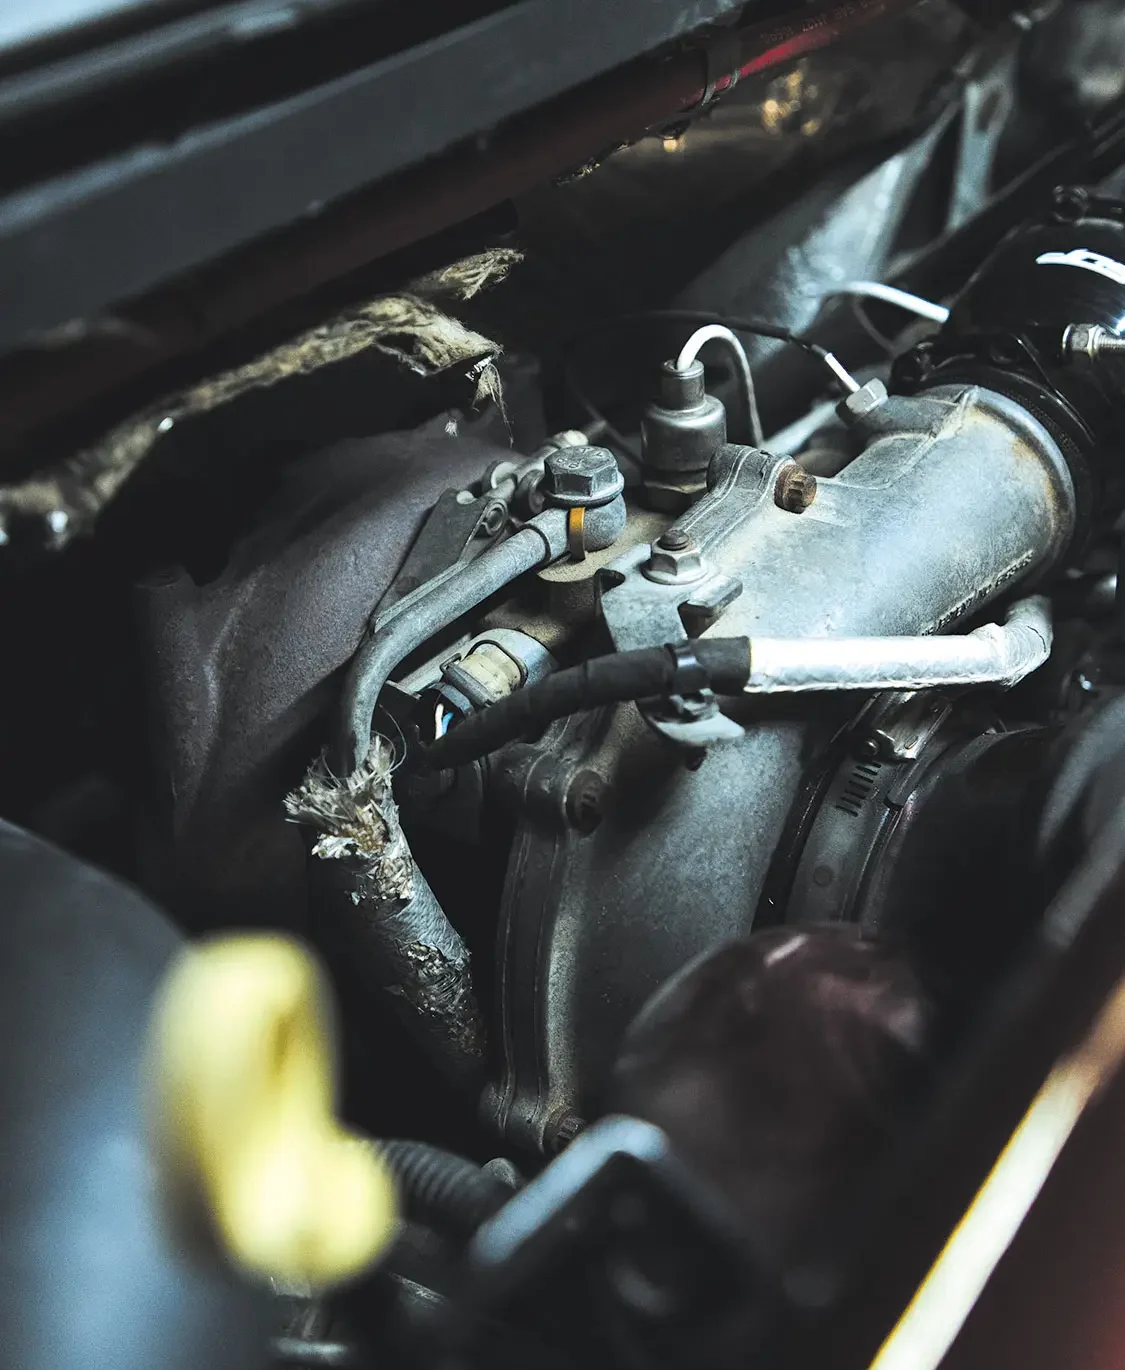
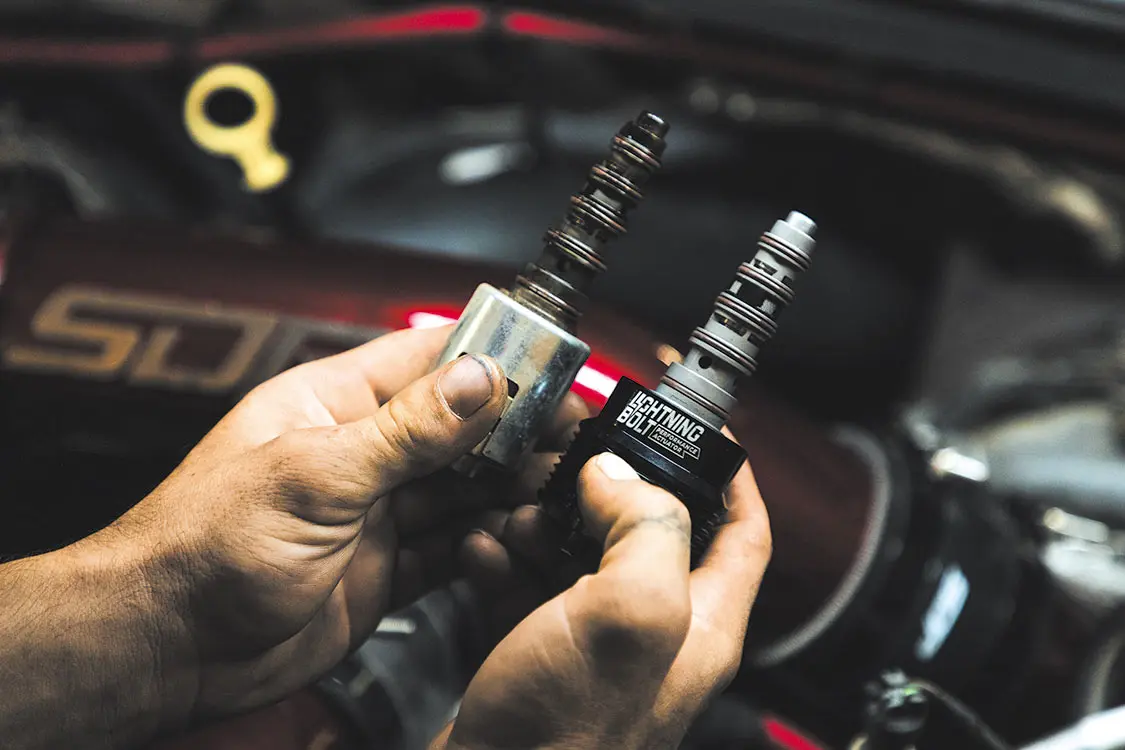
Introducing the TurboTime Lightning Bolt Performance Vgt Turbo Solenoid, the game-changer in diesel engine upgrades. This remarkable addition to your rig is designed to elevate your driving experience without resorting to artificial manipulation that mimics gas-powered vehicles. The secret lies in optimizing your turbocharger, the diesel engine’s powerhouse, for maximum efficiency and performance.
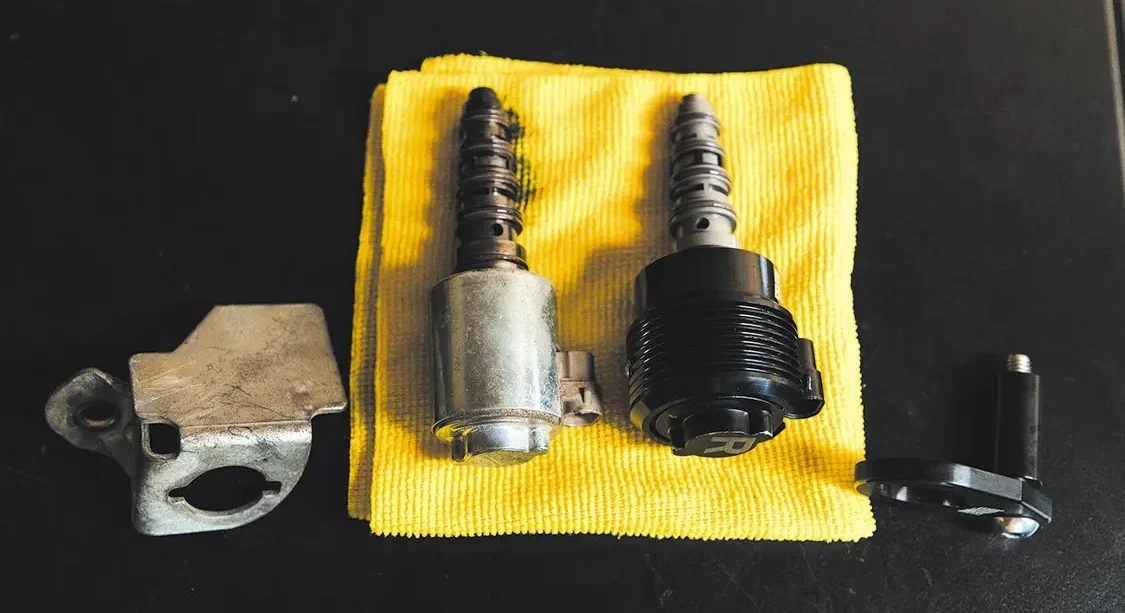
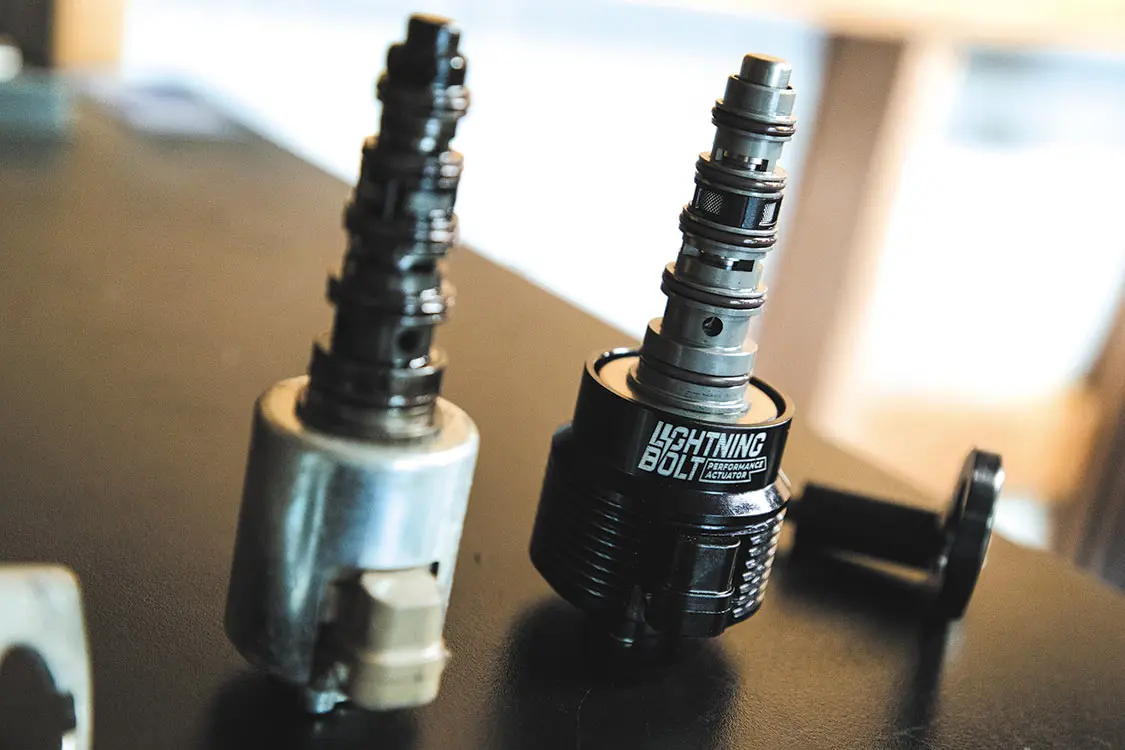
Forget about throttle controllers, modules, or tuning that mess with VGT vane percentages and disrupt your driving rhythm. The Lightning Bolt Solenoid, particularly the Type R version, is calibrated to perfection, offering lower vane resistance to accommodate the increased load produced by performance modifications. It’s your ideal companion whether you’ve got stock or upgraded turbos and fuel injectors.
Once installed, the results are undeniable. Expect a 5-12% boost increase in power, improved fuel efficiency, a cleaner exhaust, and quicker torque production. Your diesel beast is about to roar louder, run smoother, and conquer the road with unrivaled vigor.
Stay tuned as we dive into the nitty-gritty of this remarkable upgrade, bringing you firsthand insights into the installation process and the electrifying performance gains that follow. Diesel Power just got a bolt of lightning!
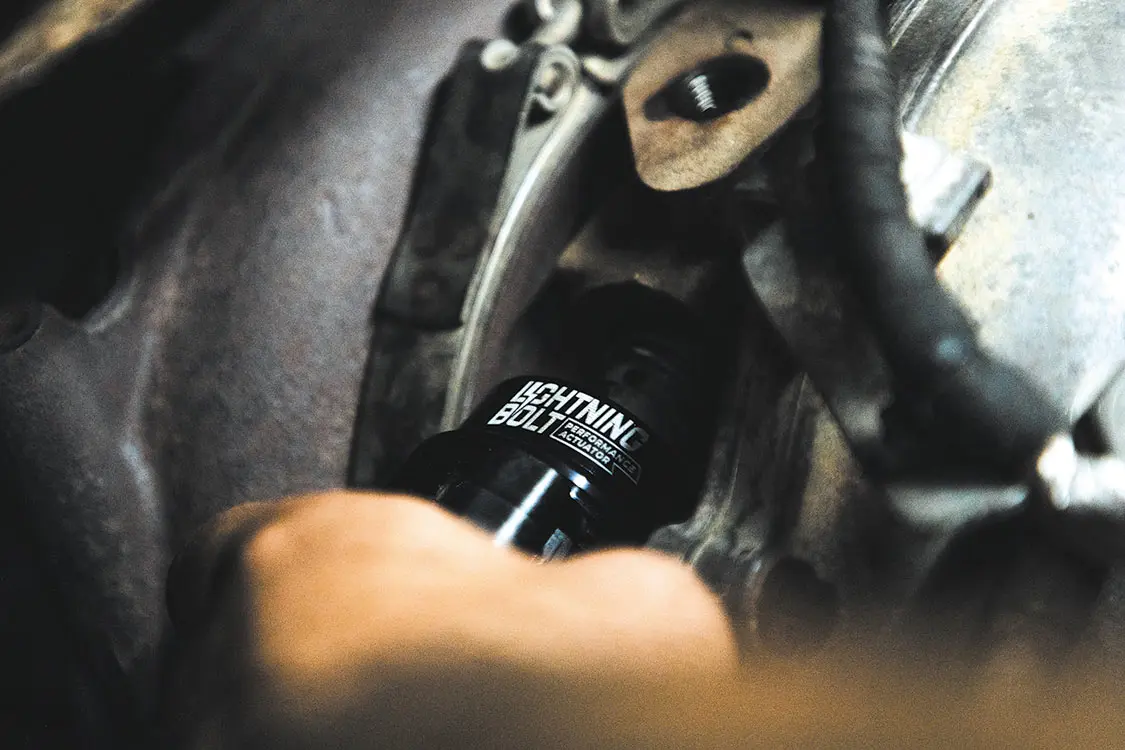

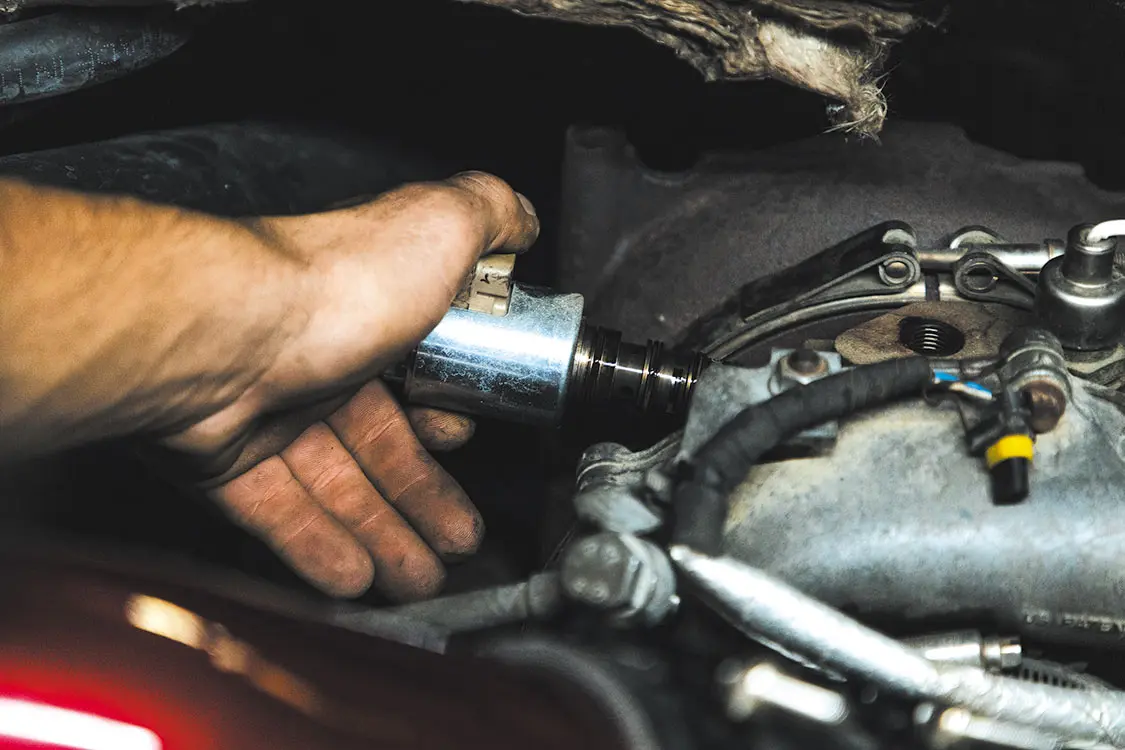
If you’re interested in having more power, this upgrade is something you should look into. Follow along as we start at the rear of the truck and work our way to the front. If you have tools and a friend or two, you can knock out this installation in a day, so it’s not out of the reach of many of our DIY readers.
When it comes to big-block power, Chevrolet has always ruled the roost with a legendary line-up of powerful big-block engines dating back to 1958 with the 348, 409, and even limited production 427-inch W-series engines. These engines were unique because they had combustion chambers in the block like Ford’s MEL series big-blocks. The 427 was produced as a Regular Production Option (RPO) known as the hot Z11 specifically engineered for drag racers. Those W-series Chevy big-blocks had a distinctive appearance that still turns heads today. What’s more, Chevrolet had good-looking cars to support the power like the ’63 Impala Super Sport.
Chevrolet’s most widely produced Mark IV big-block began life as the record-setting Mystery Motor at the 1963 Daytona 500, where Junior Johnson left mouths wide open with a top speed of 166 mph. That first Mark II big-block lead to the production Mark IV 396-ci big-block for 1965.
The Mark IV big-block history is well documented. In the beginning, the 396, with its stump-pulling, high-rpm demeanor, debuted in just about every Chevrolet model except the Chevy II. In the Corvette it was the L78, and in the Chevelle the super rare Z16. The 396 had a bore and stroke of 4.095/3.760 inches and made 375 hp. The 396 was a 6,000-rpm screamer that made the ’Vette a rocket ship and a handful of Chevelles quite intimidating. The 396 grew to 402 ci in 1970 with a .030-inch overbore, though it was marketed as the 396.
Chevrolet took the 396 to 427 ci for 1966 by increasing bore size to 4.250 inches while keeping the same 3.760-inch stroke, making the 427 a high-rpm performer. The 427 is a storied Chevy big-block in all its variations. This is an engine long on serious power with huge potential for more. The greatest factory 427 was the 435-horse L71 for the 1967-69 Corvette with three two-barrel Holley carburetion and that groovy apex air cleaner these mills are known for. In four-barrel form, the L72 yielded 425 hp with a single Holley atomizer. These engines sported a rumpity-rump high lift mechanical cam and made a lot of power. We’re working with a ’69 Chevy 427-4V sporting 390 hp from a hydraulic cam and Rochester Quadra-Jet carburetor. We thought we’d tease our readers a little bit by showing you what can be done with a 427 and even the 454 with simple modifications that are easy to accomplish with the right talent and parts.


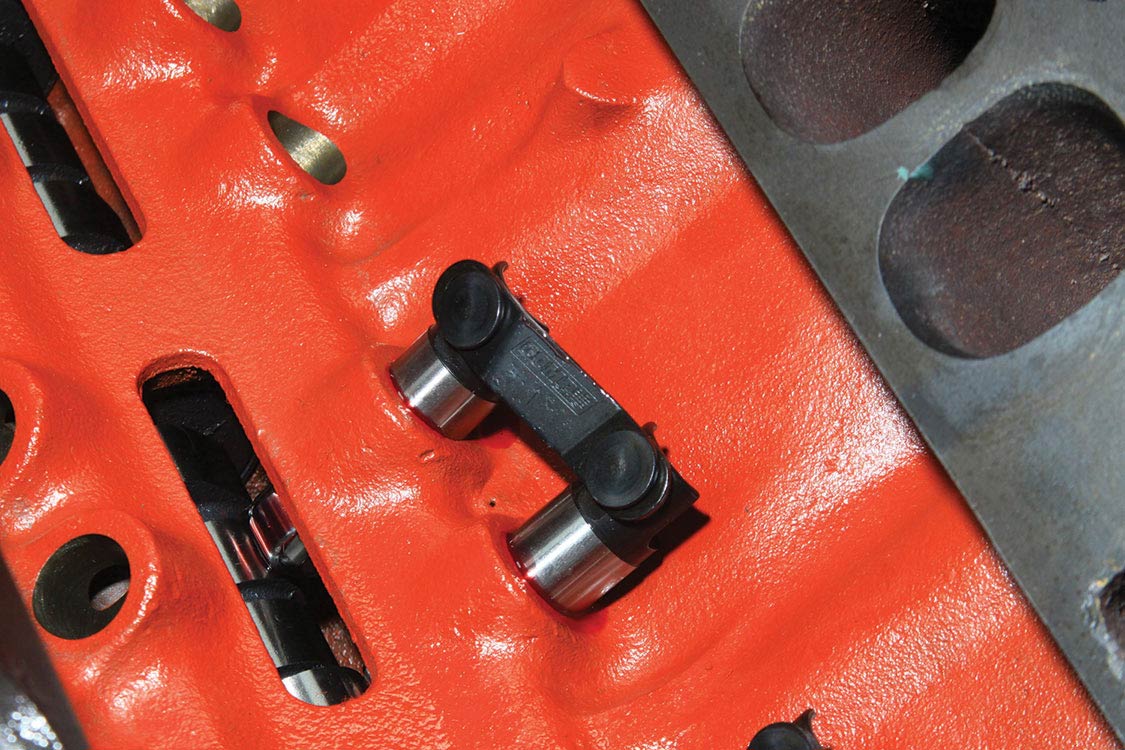
We like stealthy modifications no one can see that make a difference in performance without adversely affecting a 427 Chevy’s authentic appearance. Greg Jacobson of PHD selected the #11-433-8 hydraulic roller from Comp Cams, which kicks power up a couple of notches and virtually eliminates pesky valve adjustment.
The Comp Cams (P/N 11-433-8) Xtreme Energy Hydraulic Roller Retro-Fit camshaft (P/N K11-433-8 complete kit) will change your 396/427/454’s personality with improved high-end horsepower, midrange torque and a stable idle. When you run the Comp Cams 11-433-8 roller cam with 1.6:1 Pro Magnum roller rockers it gives your 396/427/454 a cool mechanical lifter sound with the soft chatter of 16 rockers.
What tends to limit the Xtreme Energy cam’s potential is the 427’s factory low-rise dual-plane manifold and Rochester Quadra-Jet carburetor, which is why we tried the Edelbrock Performer RPM Air Gap and Holley Street HP 850-cfm carburetor. With the Holley/Edelbrock induction combo and the Comp Xtreme Energy cam, we gained 100 hp and a comparable amount of torque.
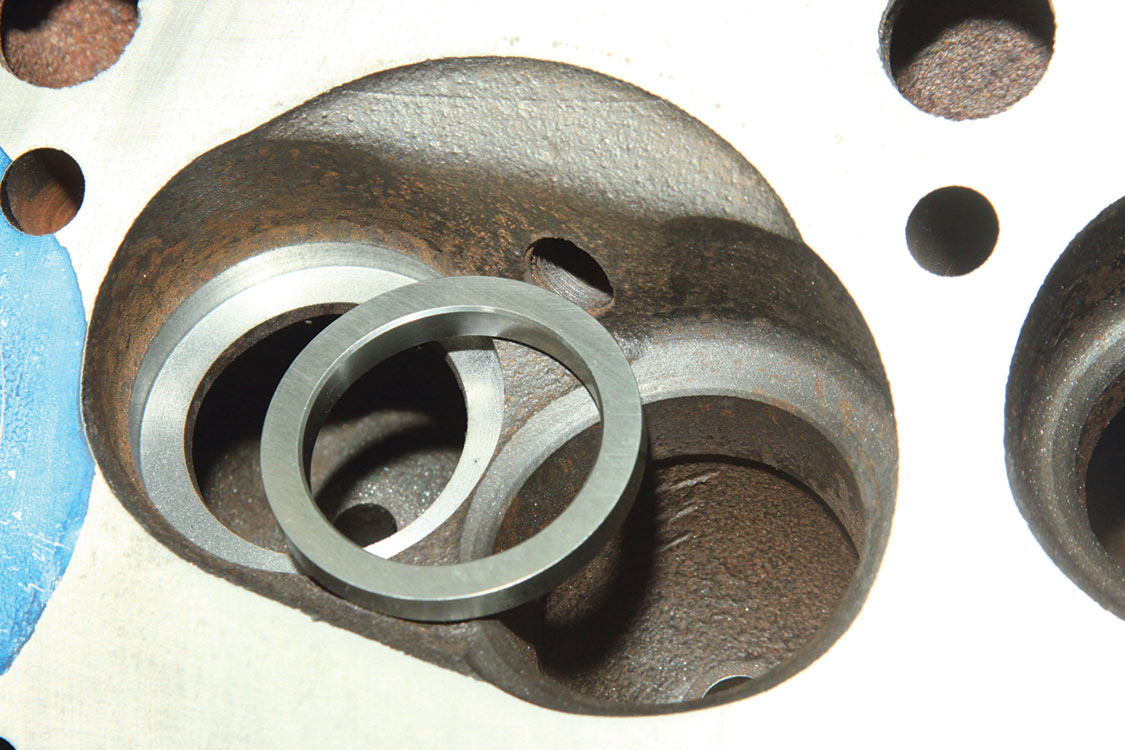
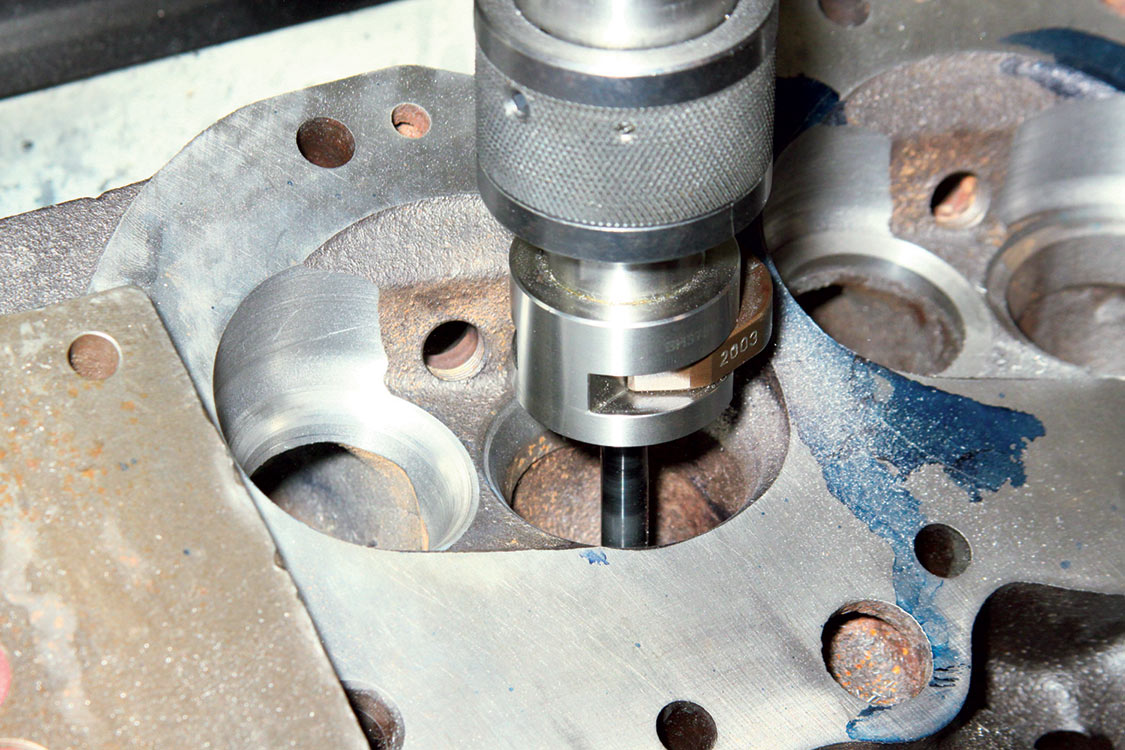
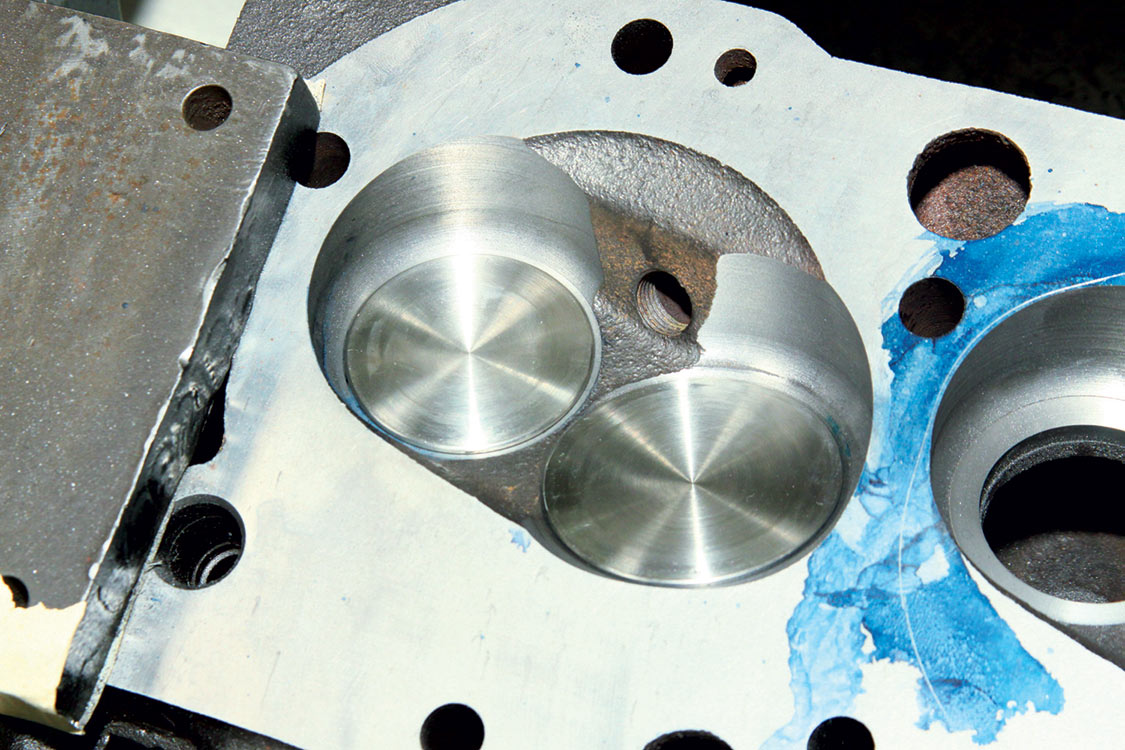
Greg and his partner Pat Smith have earned their bacon by knowing what to do with cylinder head ports and chambers. Greg tells Maximum Drive seemingly minor changes to ports and chambers can yield big power differences. Greg machined minor changes into the 427’s combustion chambers to improve valve shrouding. He also likes to make improvements to porting that reduce turbulence and restriction. Greg proves out his work on the dyno by showing significant increases in power.
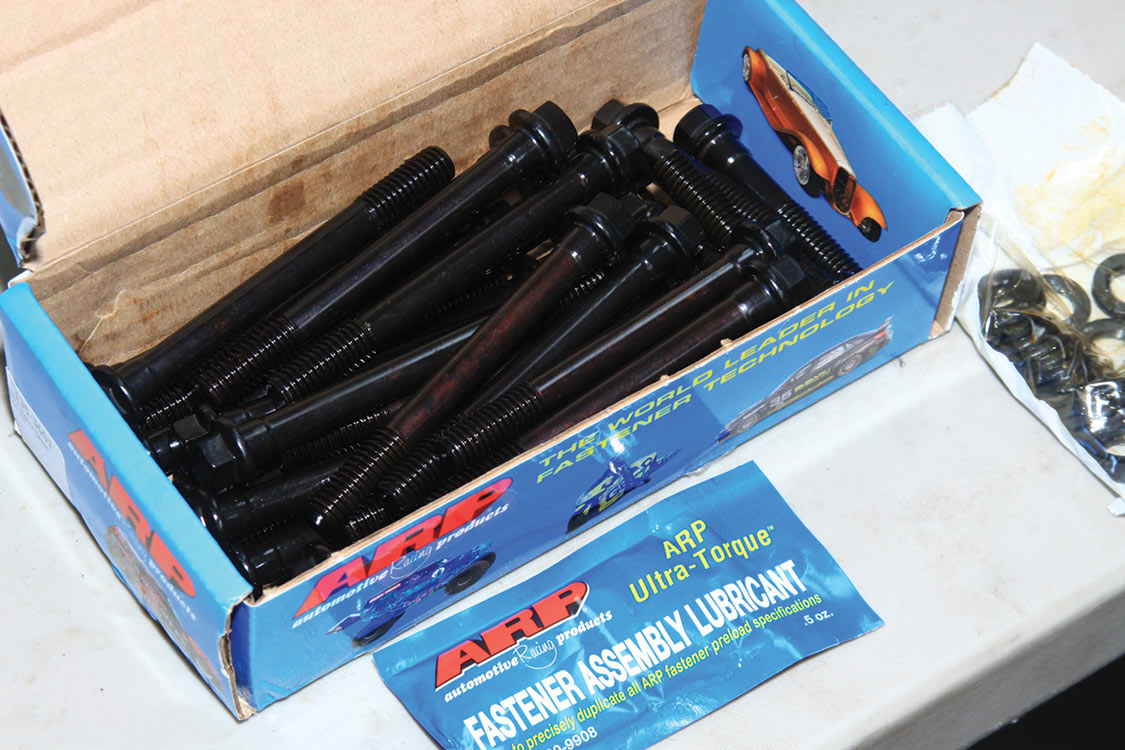
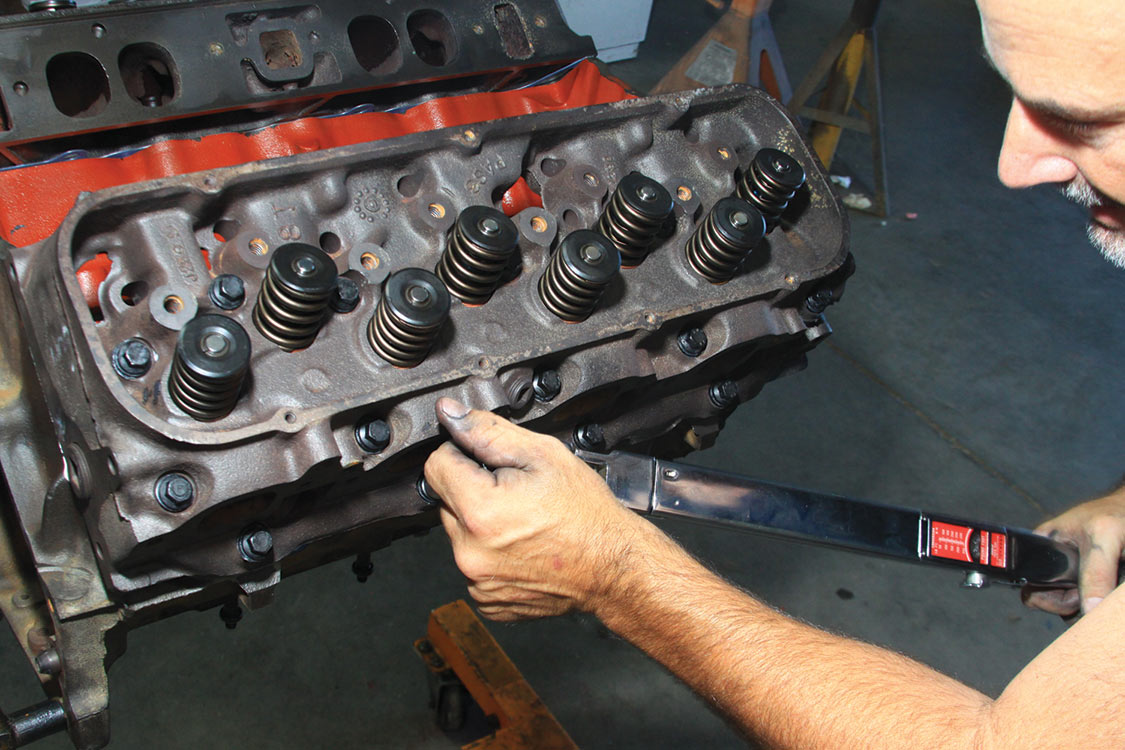
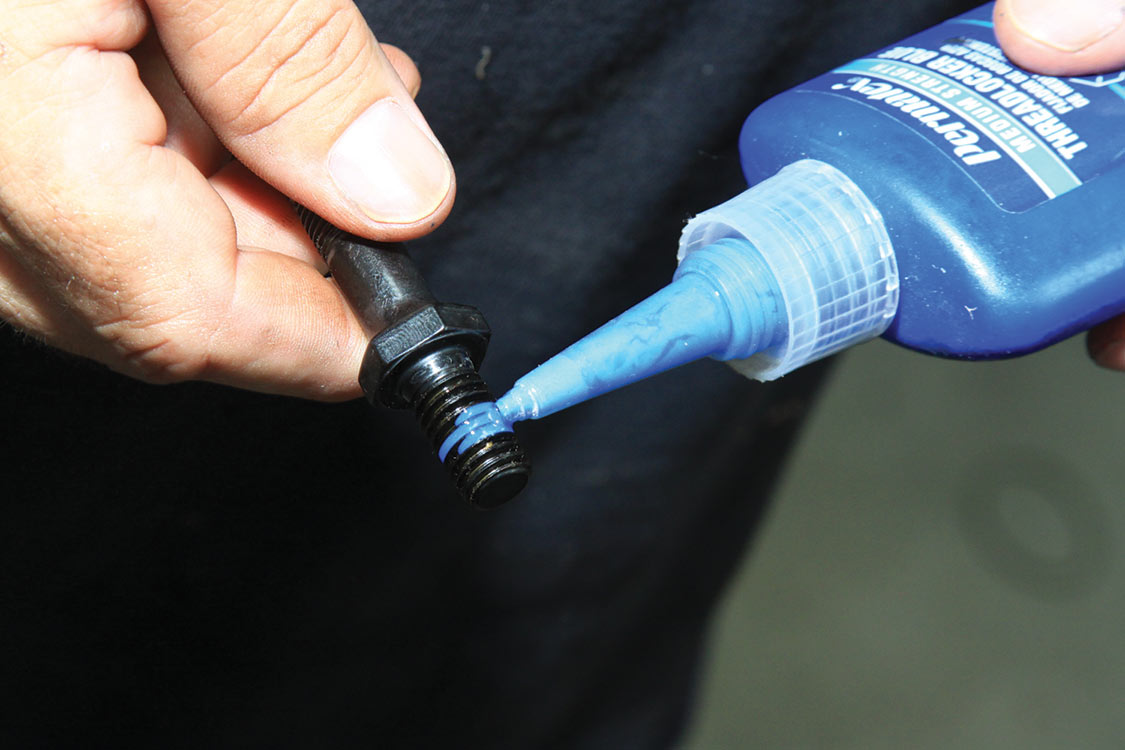
We’re using ARP fasteners throughout our 427 for improved durability. Torquing fasteners is about clamp strength and bolt tension. When you torque a fastener, you increase clamp load holding two parts together. It’s suggested you lubricate fasteners with SAE 30 engine oil or ARP Fastener Assembly lubricant and torque them in onethird values to ARP recommended torque. Lubrication and clean threads yield true torque readings. By “one-third” torque values, we mean if total torque is 80 ft-lbs, torque fasteners first to 26.666 pounds, then 53.333, followed by a total of 80 ft-lbs. This allows for consistent bolt or stud stretch and clamping load.
Not all fasteners are engineered to be reused. Old cylinder head and main cap bolts, for example, shouldn’t be reused. Toss them and install new fasteners. ARP fasteners can be reused. Bolt stretch and heat cycling take a toll on fasteners, which is why they should be replaced during a rebuild if you’re serious about durability.
Building Rat Power
Holley 850-cfm Street HP With Edelbrock RPM Air Gap
Average: 413 Horsepower | 482 ft-lbs Torque
ENGINE RPM HORSEPOWER TORQUE FT-LBS
3000 274 480
3500 312 468
4000 374 491
4500 435 508
5000 479 503
5500 502 479
6000 512 448
Rochester 750-cfm Quadra-Jet With 427 Dual-Plane Aluminum Manifold
Average: 350 Horsepower | 435 ft-lbs Torque
ENGINE RPM HORSEPOWER TORQUE FT-LBS
3000 270 472
3500 311 466
4000 361 474
4500 409 478
5000 451 473
5500 463 442
6000 460 403
6500 431 349
Automotive Racing Products (ARP)
800.826.3045
805.339.2200
Arp-bolts.com
Eagle Specialty Products
662.796.7373
Eaglerod.com
Edelbrock Corporation
310.781.2222
Edelbrock.com
Federal-Mogul
(Speed Pro, Sealed Power, Fel-Pro)
800.325.8886
Federalmogul.com
Holley Performance Products
270.782.2900
Holley.com
Performance Head & Dyno Service (PHD)
661.742.1587
Greggsracing@yahoo.com
Pertronix
909.599.5955
Pertronix.com
Summit Racing Equipment
800.230-3030
330.630-3030
Summitracing.com
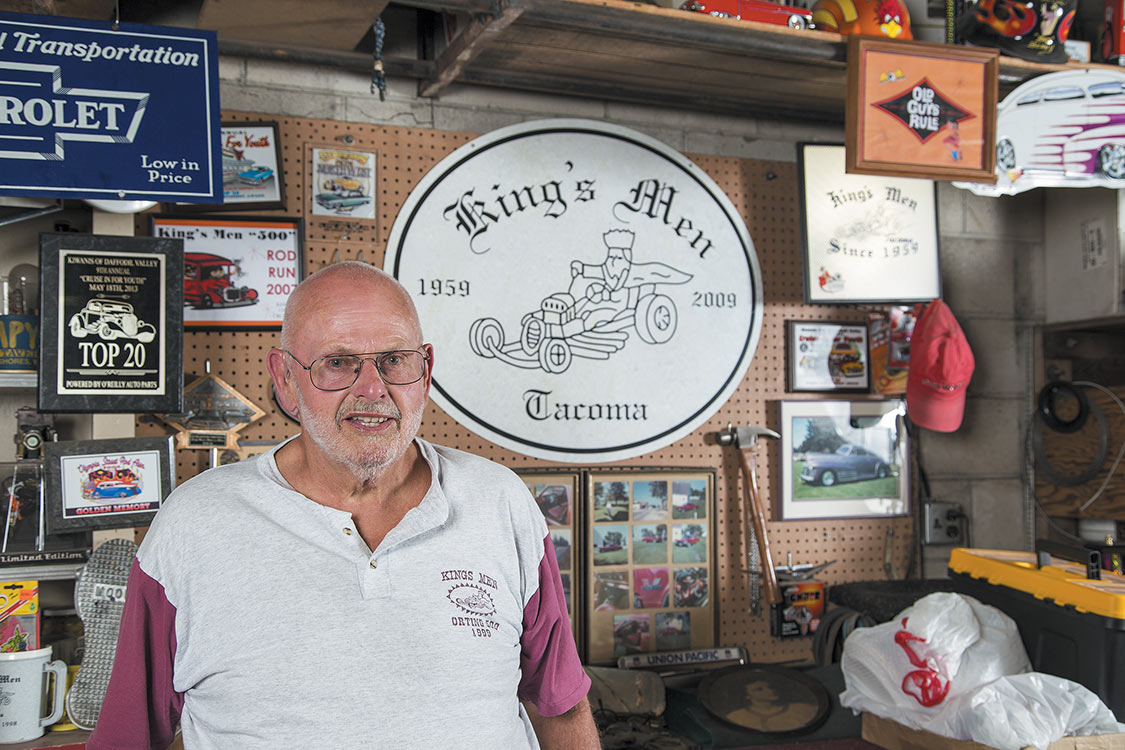
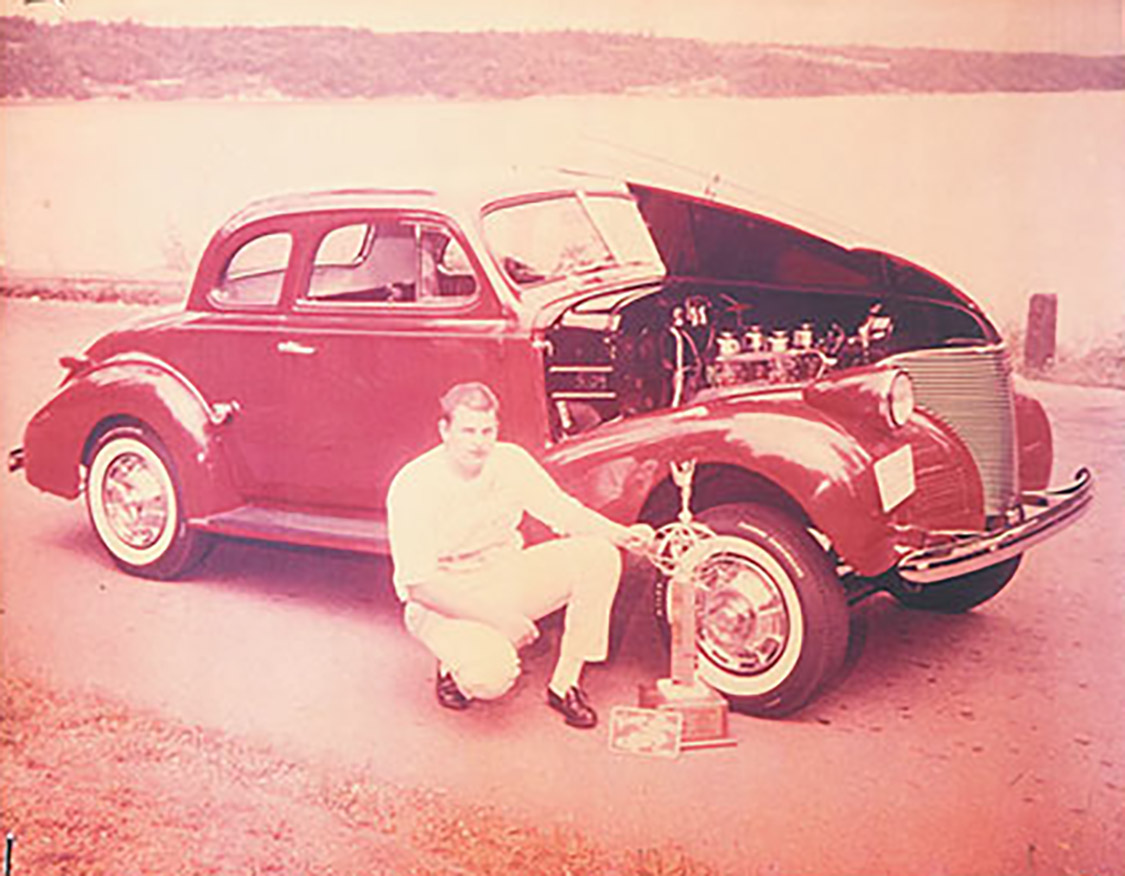
Washing your car is pretty straightforward: a hose, a bucket and suds aplenty. Let the foam fly, use microfiber mitts and towels, and you’re golden, but if you really want to capture all of your ride’s glory, step up your game, go the extra mile and attain a state of paint care nirvana. The payoff is big. Savvy owners know washing and drying a car is the beginning of the journey, not the destination. It’s what you do after that last bead of water is wiped away that truly adds pop and vitality to a car’s finish.
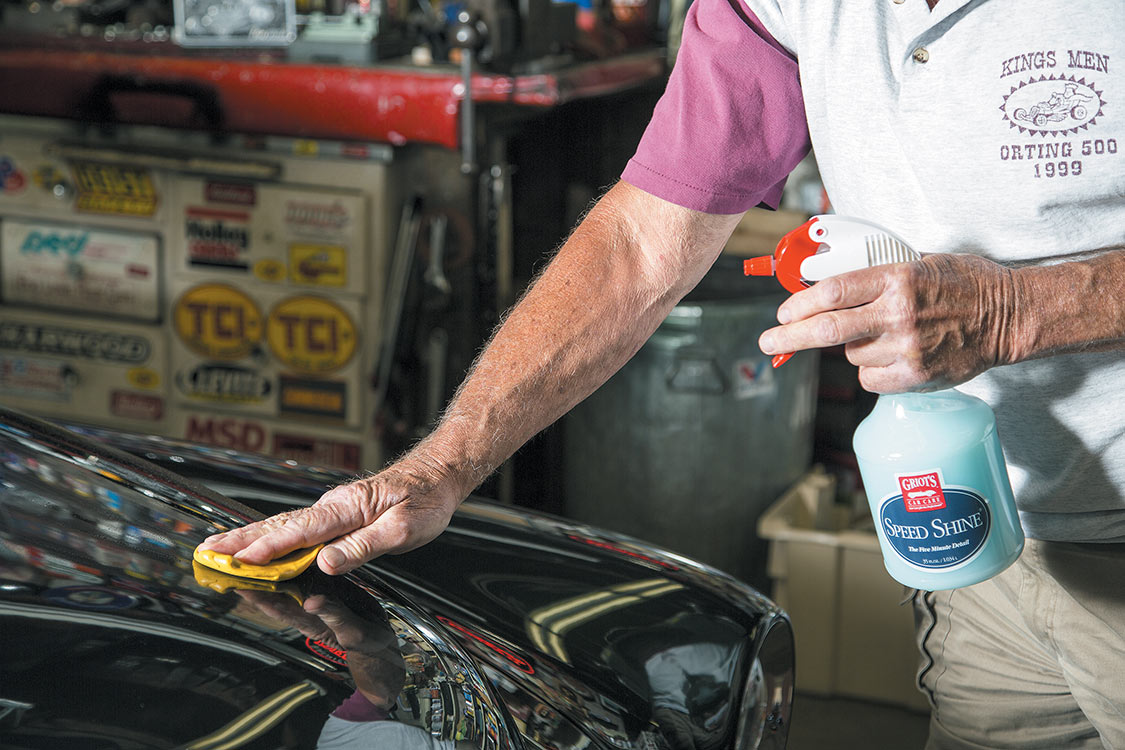
Jim says the road to perfect paint begins with clay. Paint clay lifts away embedded contaminants that resist the typical sponge-and-suds approach. He says running your fingers across your paint is a great way to determine if you’ll benefit from claying. “When it feels rough and gritty, I bust out the Griot’s Garage clay and Speed Shine. The Speed Shine quick detailing spray acts as a lubricant. I just rub down the paint with a few strokes from the clay, wipe off the Speed Shine and run my fingers across the treated surface. Try it, you’ll be amazed at the results, and have a new definition of ‘clean paint.’” After some time you’ll see a dark residue on the clay. This indicates that you’re making progress. Fold over the clay bar as you work to introduce fresh clay to the process. Jim recommends limiting your work area to 2-foot squares to keep the job manageable.
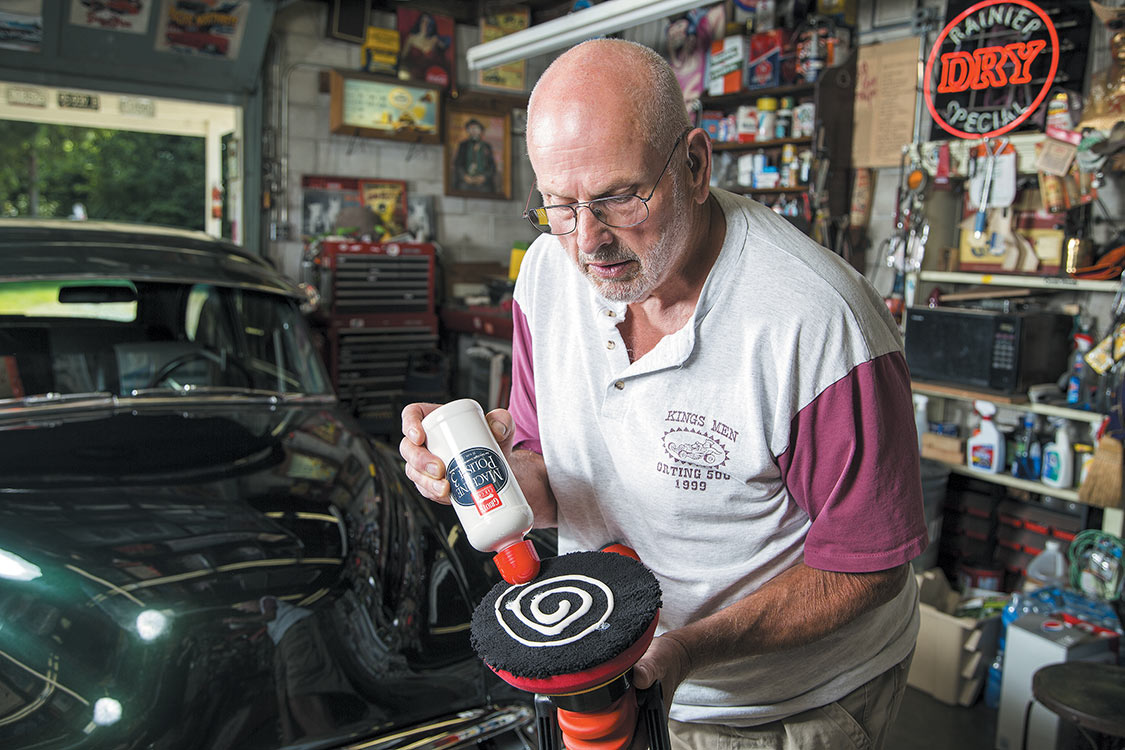
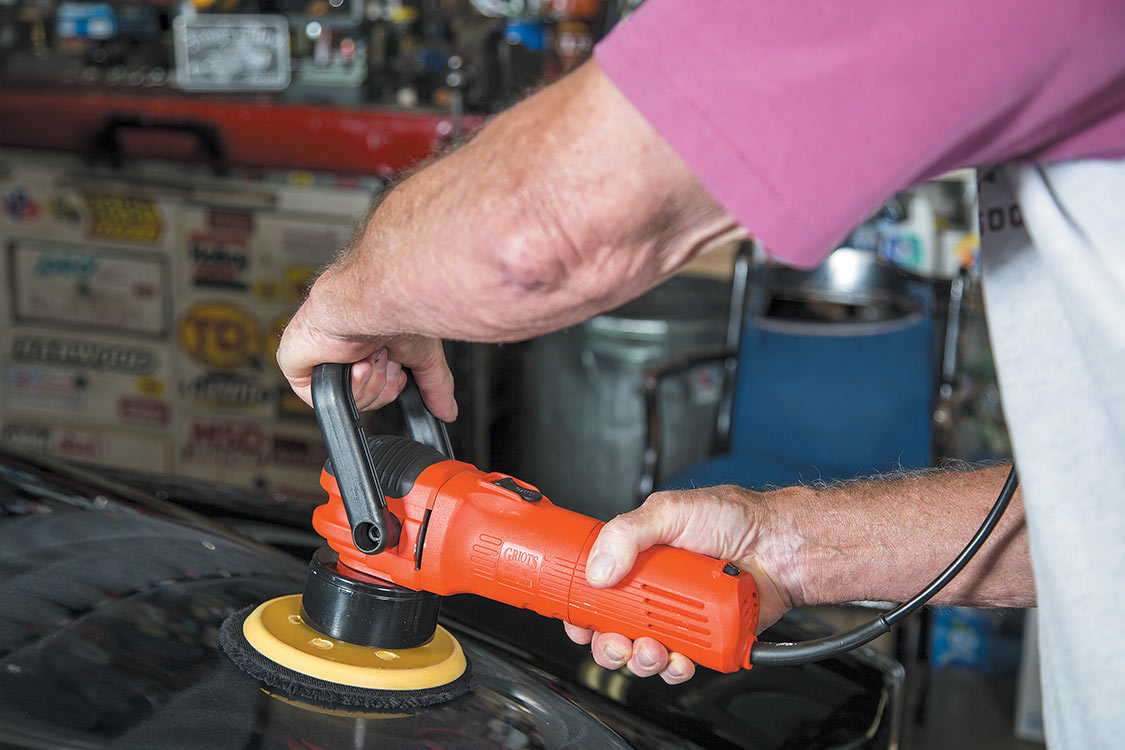
The next step is to inspect your paint for scratches, swirl marks or other defects. If you’re like most rodders, these blemishes will jump out at you during regular washings, but it’s a good idea to look the car over at this point in the proceedings because claying can bring out some of the flaws, which is good because if they can be seen they can be defeated. The seriousness of the scratches you discover will determine the seriousness (read: abrasiveness) of the polish you’ll use. Also the type of pad you use can impact the effectiveness of the polish. Jim likes microfiber pads for big scratches and some moderate blemishes because, “they have more horsepower and work quicker than foam pads.” He goes with foam pads when dealing with light imperfections or addressing overall maintenance where the entire vehicle needs a light refreshing. The best way to optimize your polishing prowess is by using a random orbital machine. Since an orbital both spins and circles its pad there’s very little chance you’ll burn through your paint, a reputation that direct-drive polishers of decades past have deservedly earned. A random orbital saves elbow grease and loads of time, while providing vastly superior results. When polishing, always start with the mildest polish and either reapply or move to a more abrasive compound if your first pass doesn’t eliminate all defects. Polishing enhances the reflectivity of paint by smoothing the scratches, ridges and defects, which induces shine.
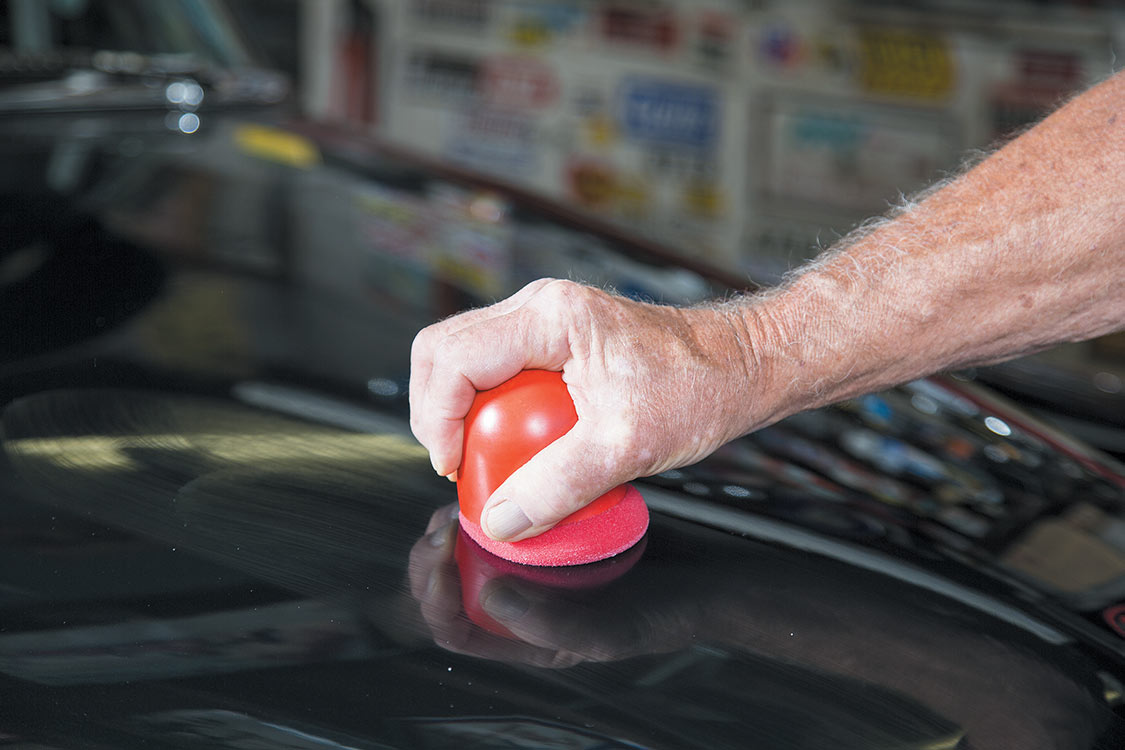
Now it’s time to add a wax or sealant to protect your hard-earned shine against the dulling effects of the elements and potential blemishes. The big choice here is wax or sealant. The major difference between the two is that wax is natural, while a sealant is made from synthetic ingredients. Generally speaking, a wax delivers deeper, richer color but a sealant will last longer. Savvy detailers use a sealer then follow up with a natural wax as needed throughout the show season. Jim is a carnauba wax man and he prefers to apply by hand. He says working in the polish by hand gives him more of a direct connection to the car. Since wax is a wipe-on and buff-off proposition, it’s less physically demanding, but rodders can also elect to apply carnauba paste or a sealant using a random orbital.

Jim is all about being ready to roll, and he was excited to show us his newest toy, a cordless random orbital from Griot’s Garage. He’s found the unit quite useful for at-show touchups or during poker runs. “The cordless is really easy to handle, has enough power to wax or remove light swirls, and one charge will do the ’52 with power left over for a friend. I find myself using it for quick detailing here in the garage, too. It charges quick and is great for the maintenance type of stuff we’re talking about.”
The beauty of these advanced steps is that once your paint reaches this state of grace it’s easy to keep it there. “Once I get my paint to this level it’s all about maintenance. I garage park the Chevy so I’ll use Speed Shine or Griot’s Spray-On Wax to keep the car layered in wax and free from dust to preserve the polish work and extend the shine. A typical wipe down is five minutes and I’m ready to roll.”
GRIOT’S GARAGE
GRITOSGARAGE.COM
KING’S MEN
KINGSMENCARCLUB.COM
The 6th Generation Ford Bronco has proven to be a force to be reckoned with, both out in the wild as well as throughout the aftermarket parts scene. Down at the tires all the way up to the roof, and everywhere in between both bumpers, there doesn’t seem to be a single component that can’t be swapped out and/or customized.
With that said, check out a batch of the latest and greatest wares we’ve gathered for your Bronco no matter which model you may happen to have. Increase its horsepower and overall performance, dial in the suspension, tweak the looks just right and outfit it with the best accessories to enhance your daily drive as well as those adventurous weekend explorations.
We’ve scoured the marketplace for the most innovative, high quality products from the most respected manufacturers in the game. Follow along to find the new parts that will transform your new Bronco for the better.
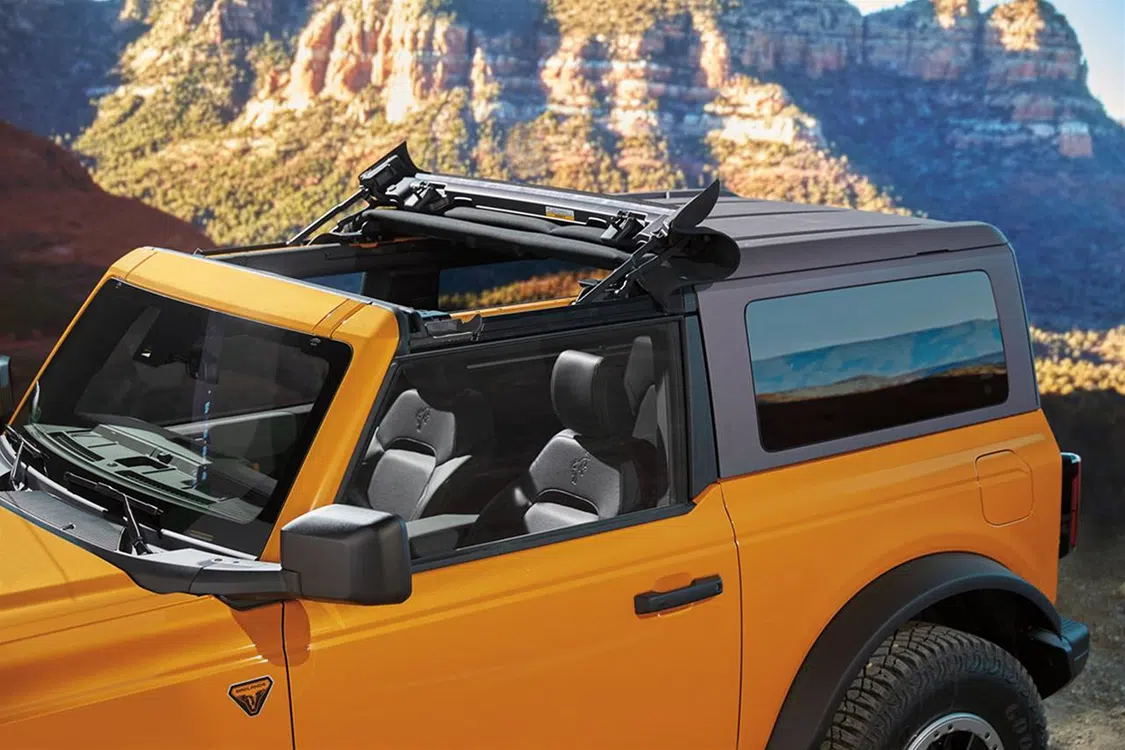
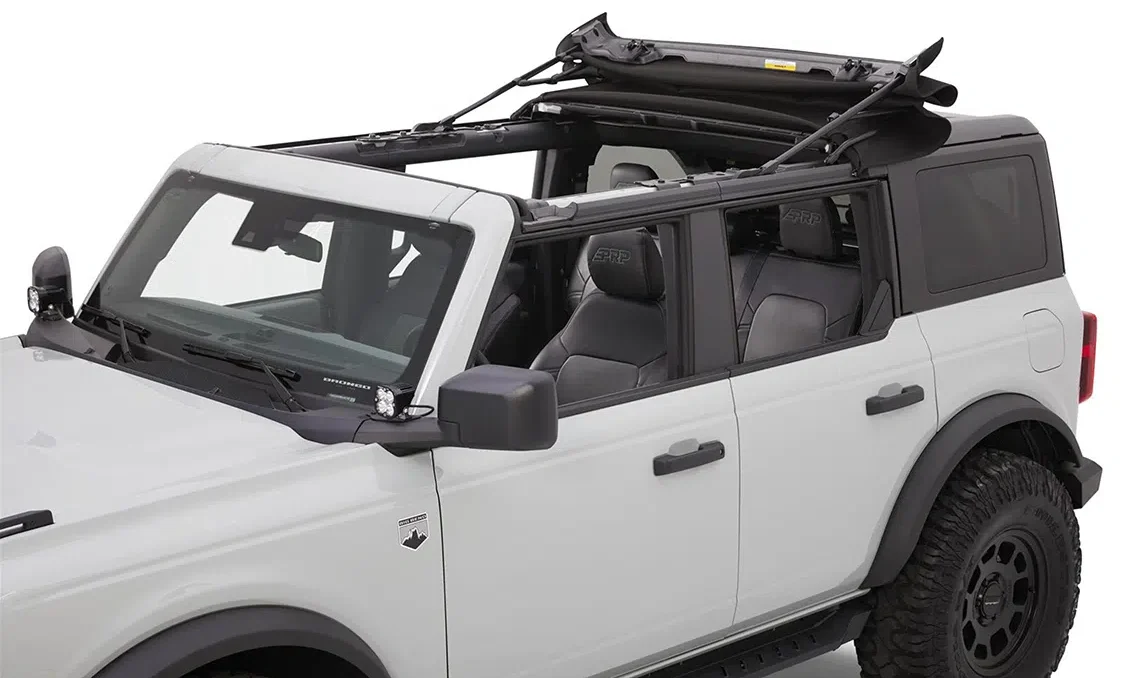
If you’re truly looking to submerse yourself in the great outdoors while out in your Bronco, check out the Sunrider and Skyrider tops from Bestop. The Sunrider is available for two-door and four-door Broncos, and is available in either a black twill or black diamond polymer cloth material, which comes pre-installed on the frame assembly. The Skyrider is only compatible with four-door Bronco models, covering both rows of passengers and featuring a slick slide mechanism that makes opening the top smooth and easy. Both of these all-season soft tops replace the factory hardtop’s panels—just flip them back and bask in the fresh air and sunshine.
Summit Racing Equipment
800.230.3030
summitracing.com
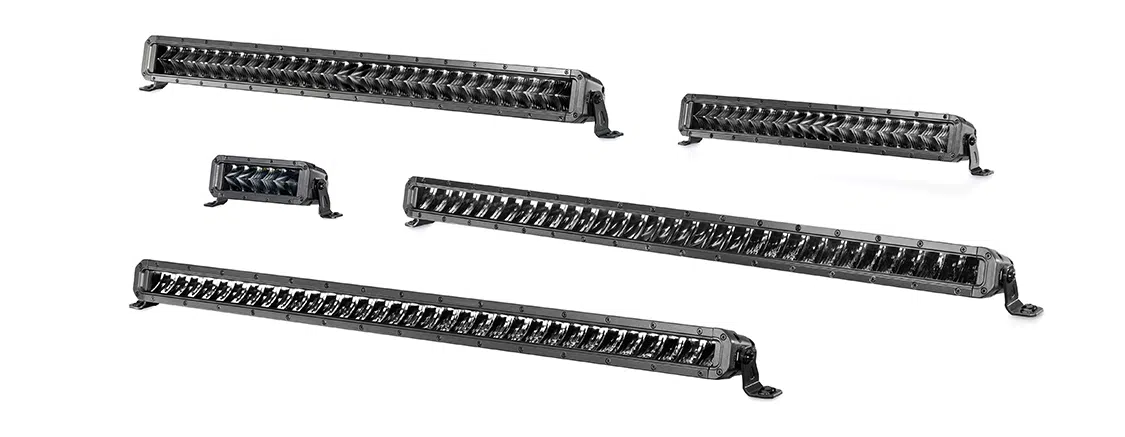
Building off the Black Magic headlamp series, Hella has expanded the range to now include 16 different light bars for off-road applications. These auxiliary lights, depending on the exact model, offer up to 20,000 maximum effective Lumens, which is perfect for off-roading beyond the beaten path. Choose between Slim or Double Row designs that are both available in straight and “curved” versions. All lights within the Black Magic lineup feature a distinctive, all-black design that offers high recognition value. They have also been outfitted with an integrated thermal sensor that adjusts them to the ambient temperature to deliver an ideal amount of light during all conditions.
Hella Automotive
hella.com
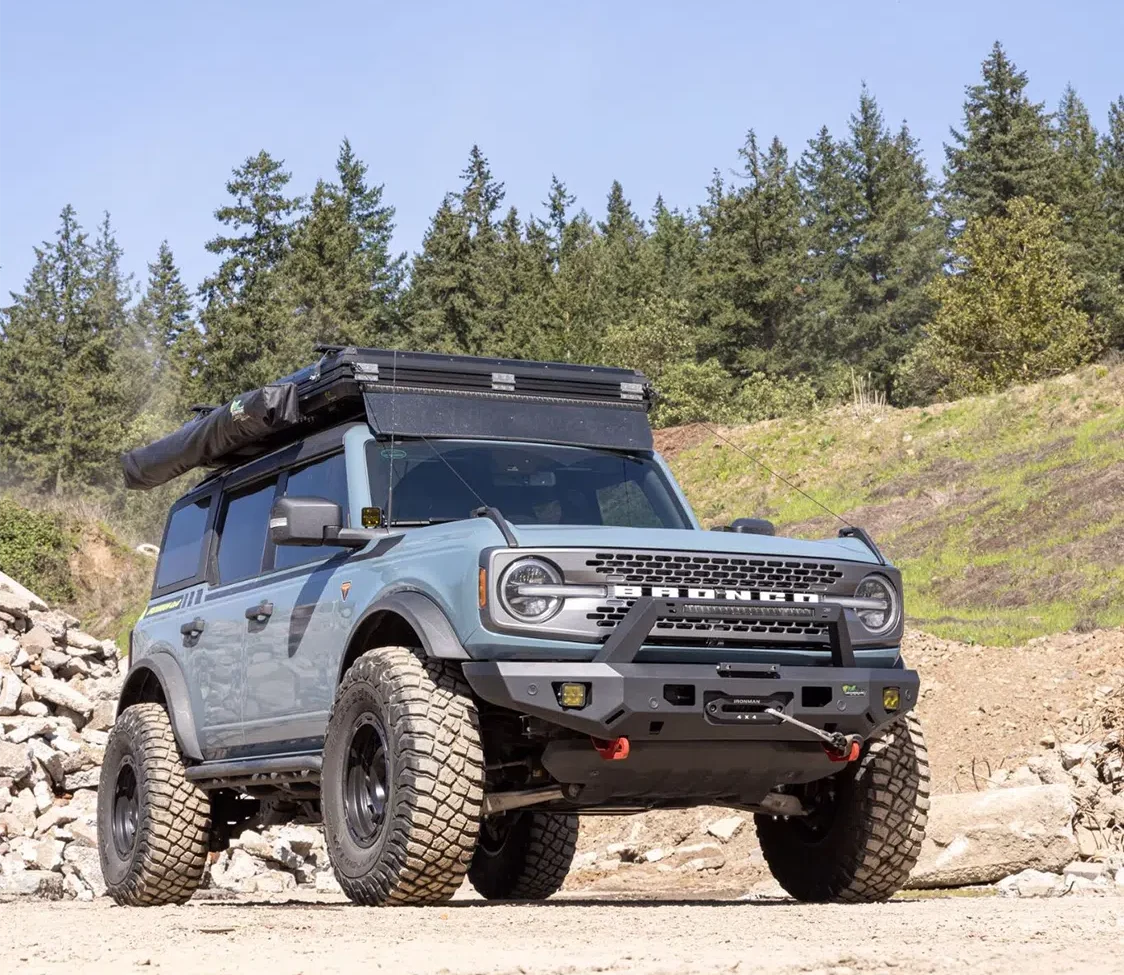
Body Armor 4×4 introduced the Odyssey line of bumpers to offer unique styling to the new Ford Bronco while staying true to the company’s commitment to manufacturing affordable quality upgrades. The front bumper boasts a sturdy, rugged aesthetic with well-rounded functionality, such as the ability to run a 12,000-pound winch and an option to wire up an 18-inch single-row or 20-inch double-row LED light bars along with two cube LED light housings. The front bumper is also compatible with OEM parking sensors and features simple, no-drill installation. The rear unit’s highlight reel includes matching two-stage light texture black powder coating to match the front, and is designed to improve departure angles, incorporate integrated shackle recovery mounts and two LED light pods, as well as being compatible with the OEM sensor and hitch receiver.
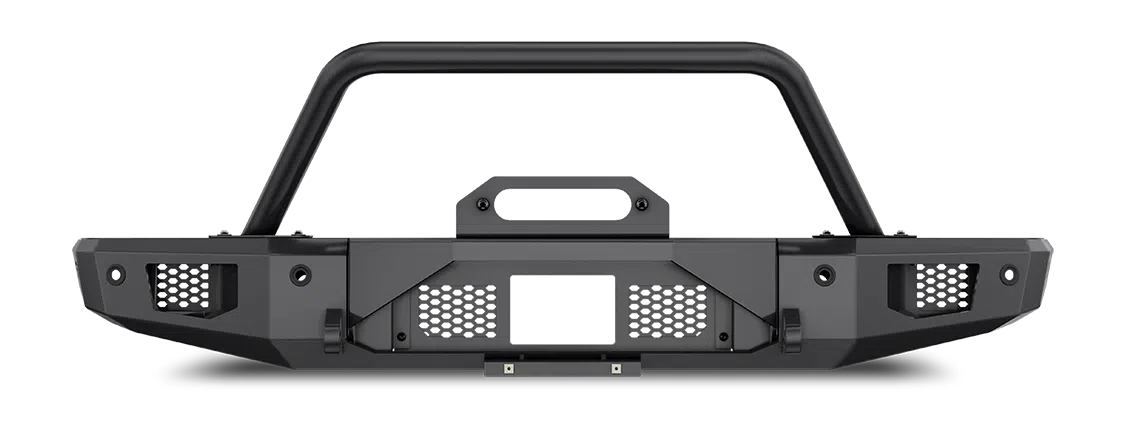
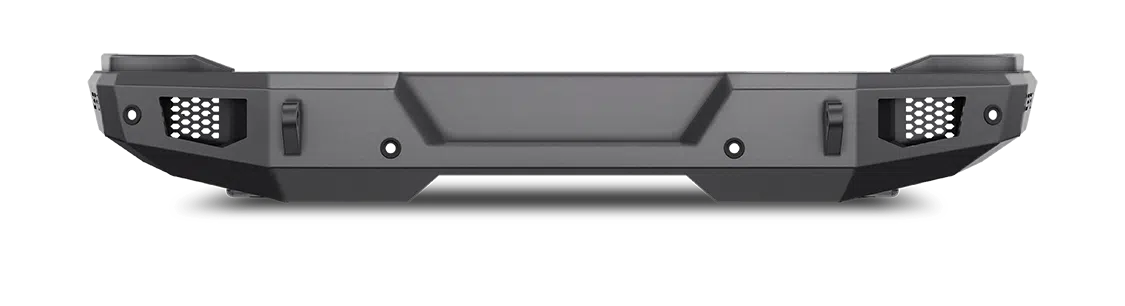
Body Armor 4×4
bodyarmor4x4.com
Belltech’s upper control arms from 2021+ 4WD Broncos alleviate the unfavorable ball joint angles that can suck the fun out of driving a lifted truck by improving camber and caster and maximizing articulation. These control arms are constructed of forged aluminum and fitted with quality OEM-style bushings, which assist in providing a smoother, safer ride with improved handling.
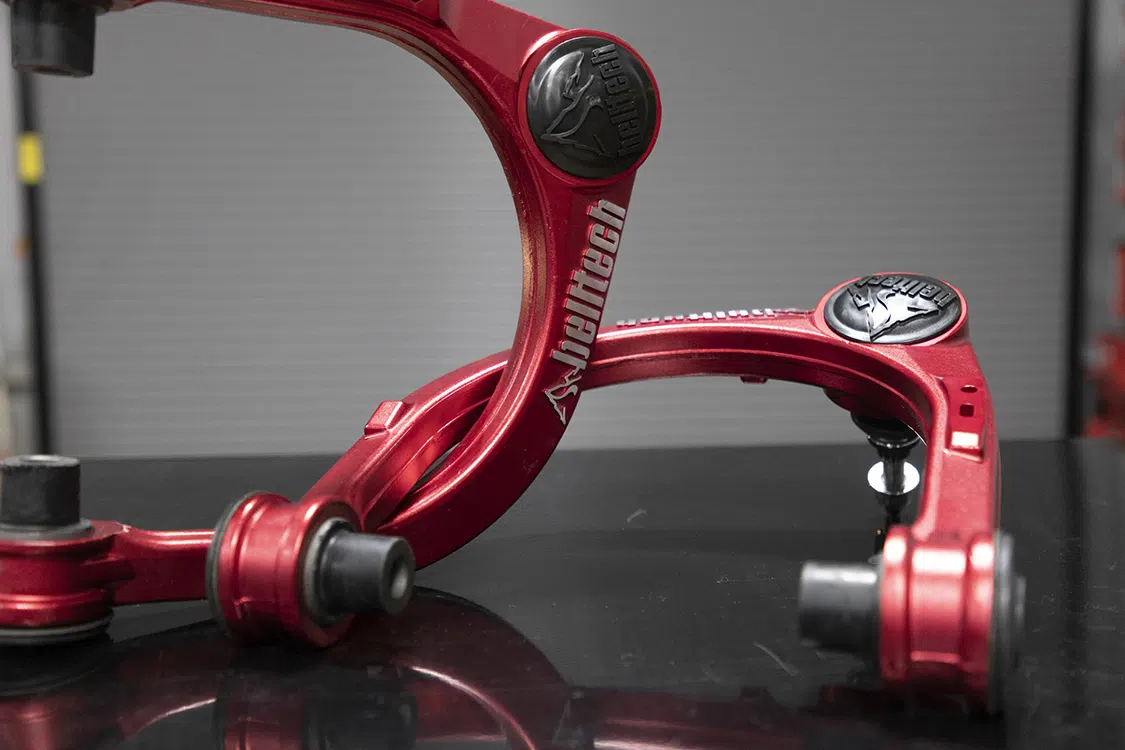
Belltech
800.445.3767
belltech.com
Ironman 4×4 is tossing their hat into the ring with the release of new and exciting Ford Bronco products. Foam Cell Pro suspension, Raid bumpers, and heavy-duty side steps are just some of the upcoming product releases that carry a summer 2023 release date. All of these parts will feature both sophisticated on-road handling as well as utilizing innovative off-pavement technology.
Ironman 4×4 America
855.467.5714
ironman4x4america.com
Keep your new Bronco running smoothly out on the trails by protecting your lower shock mounts and lower control arms (on the axle side) with this kit from Anvil Off Road. Designed with durability and style in mind to protect your Bronco’s valuable suspension components, this package features powder coated mild steel construction (1/8-inch thick), and is designed to install using basic hand tools and the included hardware. Don’t worry about fitment issues, as this kit is compatible with both stock and aftermarket shocks.
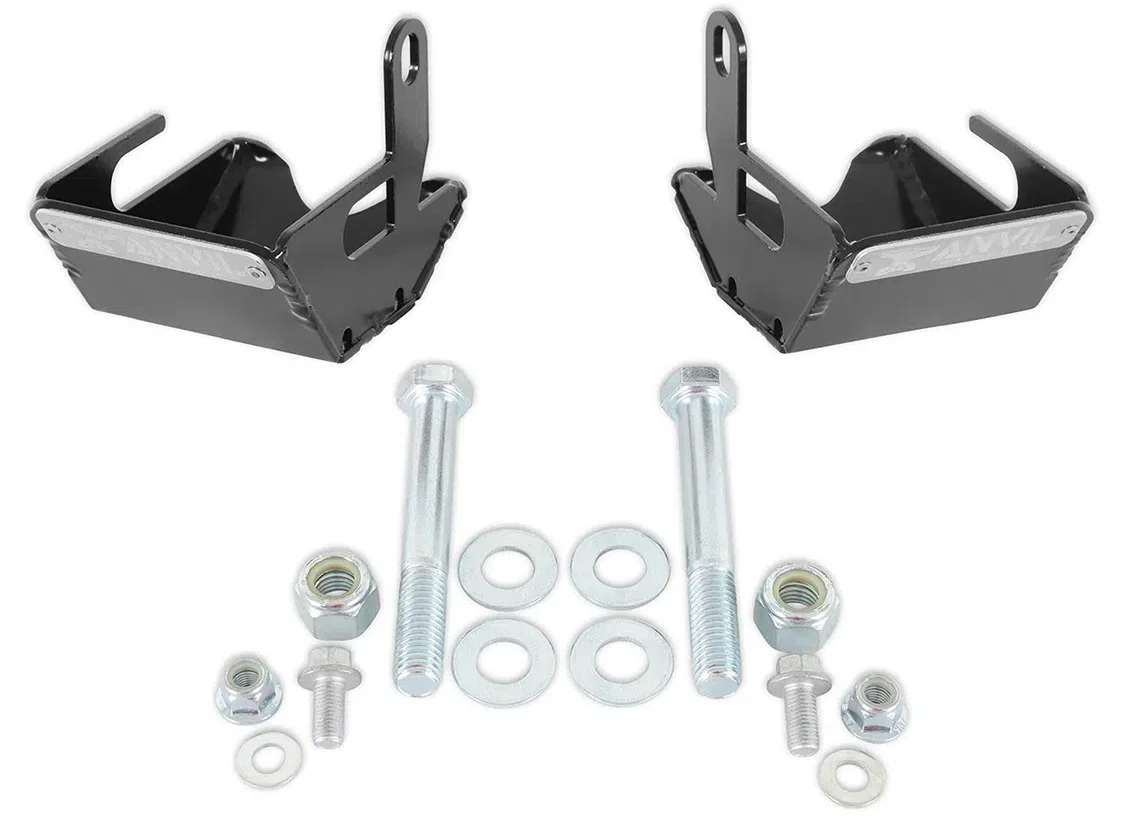
Anvil Off Road
866.464.6553
holley.com
Oracle Lighting’s new, patented Oculus Bi-LED projector headlights feature a unique modular design, easy plug-and-play installation, and 5,200 Lumens of pure illumination power for enhanced visibility during nighttime and weather situations of all types. Each headlight housing features a precision LED lighting projector that creates optimum light distribution and beam angle, which installs using original mounting hardware and headlight wiring without the use of additional relays or harnesses. The halo is available in white or amber illumination, and features more than 200 bright LEDs for an impressive output of light. The new modular design allows separate components (turn signals, marker lights and mounting tabs) to be installed independently, which allows these individual components to be replaced or upgraded when future options are made available.
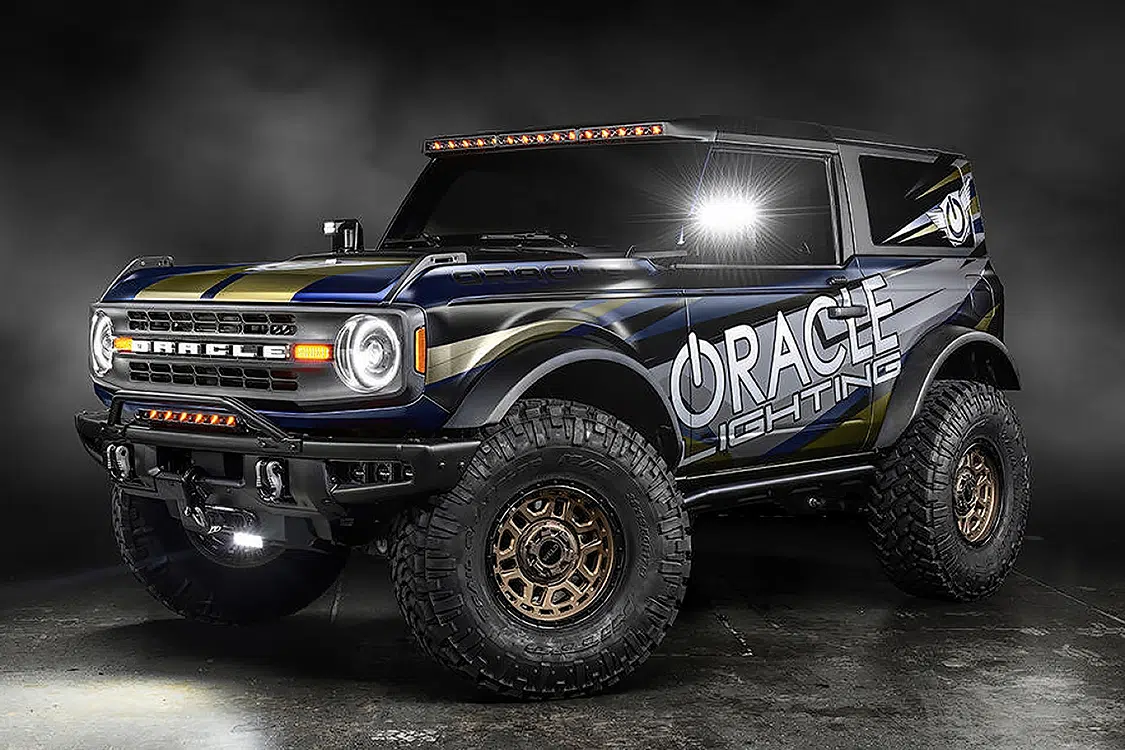
Oracle
800.407.5776
oraclelights.com
Traction boards are an absolute must-have item while off-roading, but depending on the vehicle, mounting a board or two is not always convenient. This is where Overland Kitted stepped in to introduce their spare tire mounting system that has been specifically designed with MAXTRAX recovery boards in mind. This American-made mounting solution features an anti-wobble design, dimple-died holes for strength and mechanical grip, and a heavy-duty tire strap from Mac’s Custom Tie Downs. This specific system works with vehicles with a rear-tire mounted reversing camera (like your Bronco), and is RotoPax compatible to carry RotoPax fuel containers ranging from 1 to 3 gallons with the use of additional brackets.
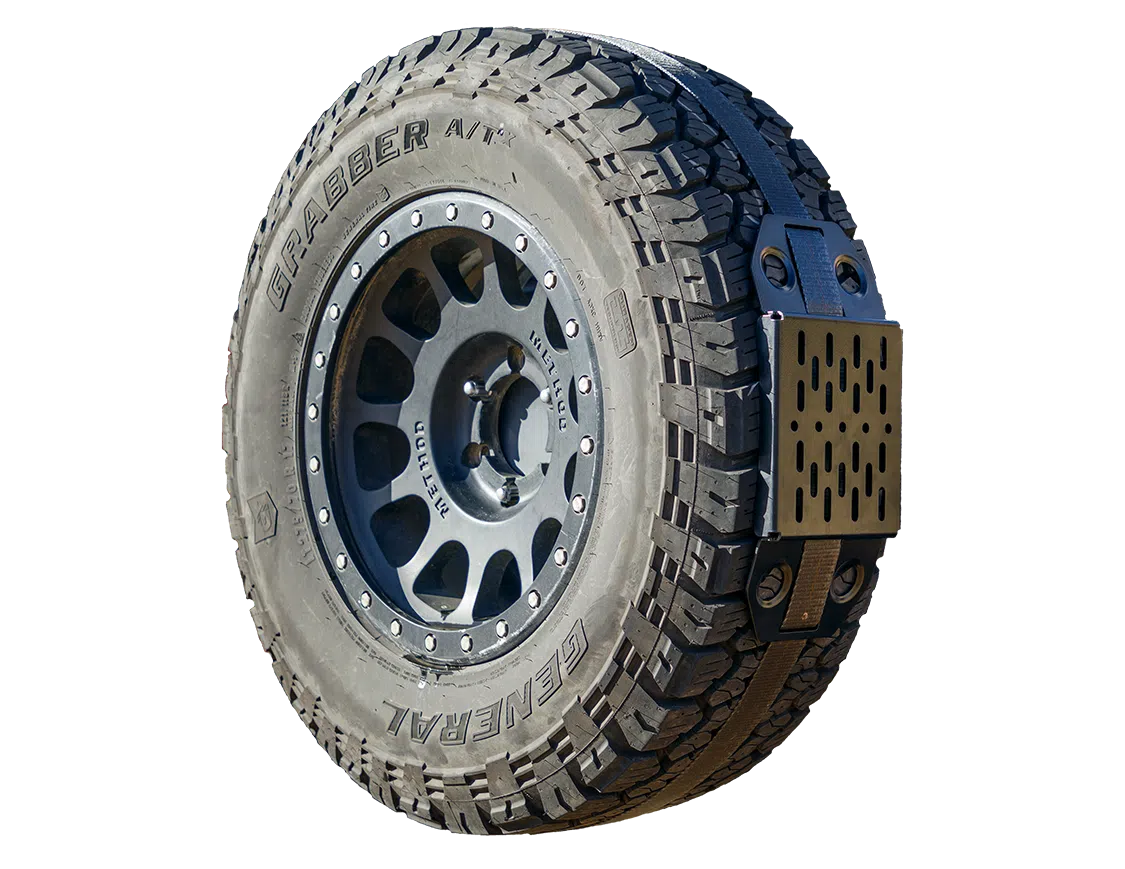
Overland Kitted
480.410.5864
overlandkitted.com
Designed for 2021+ Ford Bronco 2-door models with the 2.3L or 2.7L engines, this cat-back exhaust system uses a FlowFX style muffler for an aggressive exhaust tone and increased performance gains up to 12hp and 13 ft-lbs at the rear wheels. Three-inch, mandrel-bent 409 stainless steel tubing is utilized to maximize exhaust flow and durability, and all necessary hardware is included. Install this system using factory mounting locations to make the job a breeze.
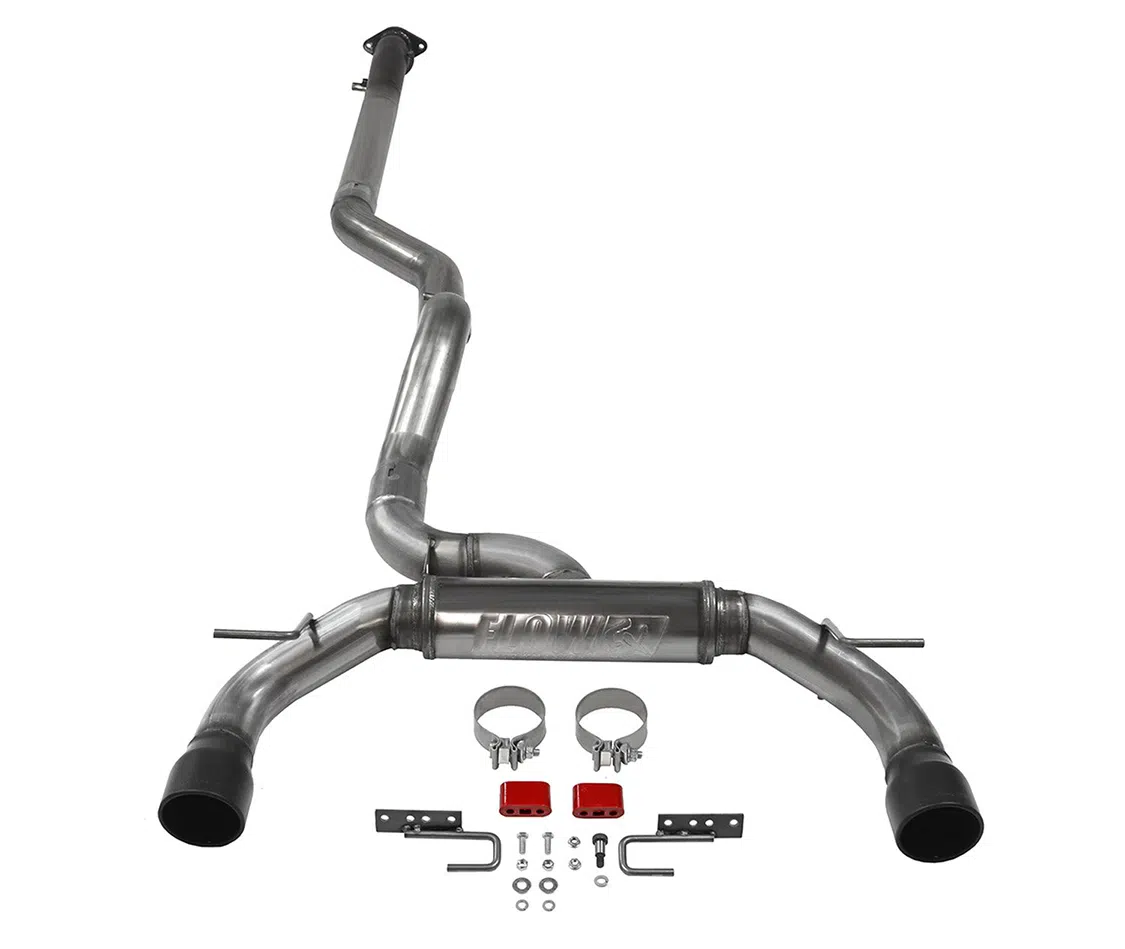
Flowmaster
866.464.6553
holley.com
If you’re planning on taking your Gen 6 Bronco off road, Eaton’s new selection of differentials could make that experience much more enjoyable. Both will act normally on the road, but will give your rig the upper hand when taking on mud and overall rocky terrain. The Detroit Truetrac kicks into action when a wheel encounters a loss of traction or the terrain changes enough. The helical-shaped gears mesh with increasing force, which transfers torque to the high-traction wheel until the wheel spin is slowed or completely stopped. Once the vehicle exits the low-traction situation, the dif goes back into standard operation. The Electronic ELocker4 functions differently as it provides electronic control through driver-selectable operation and added reliability over lockers requiring air lines and compressors. Once activated, this differential sends all available torque to both wheels equally in order to overcome the challenging terrain ahead. Both of these differentials fit all 2021-2023 Bronco rear axles not equipped with a factory locking differential.
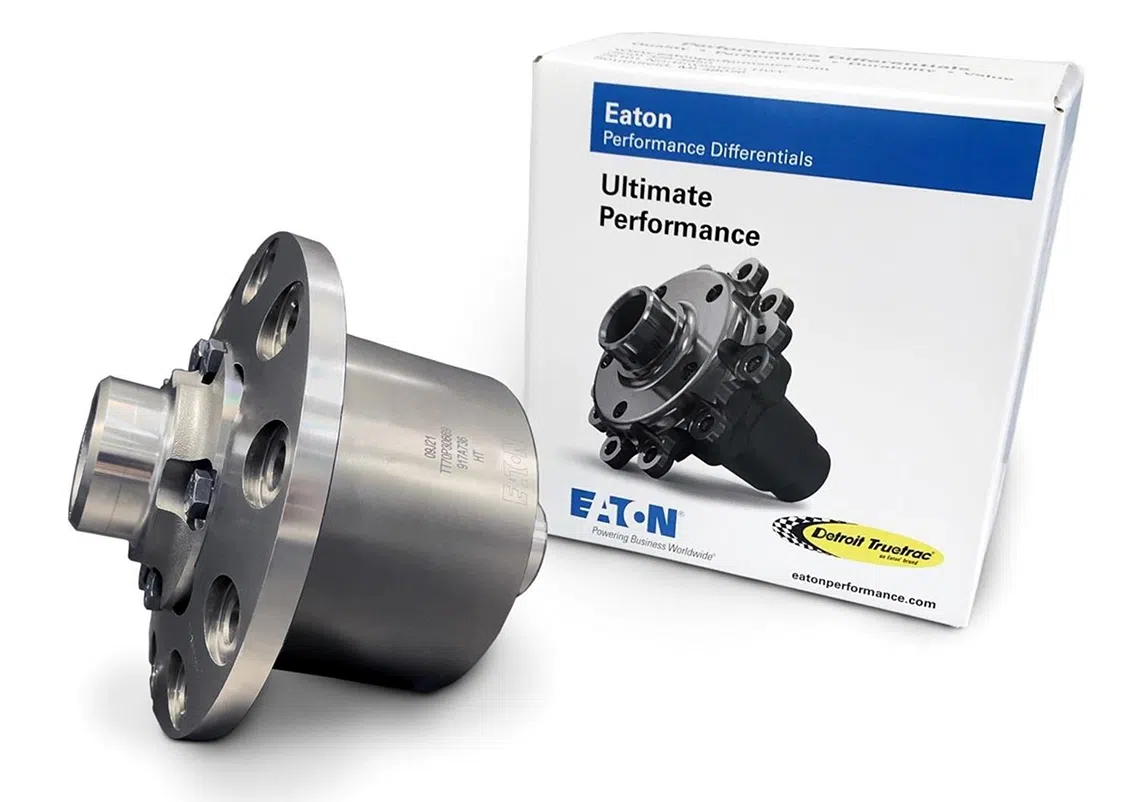
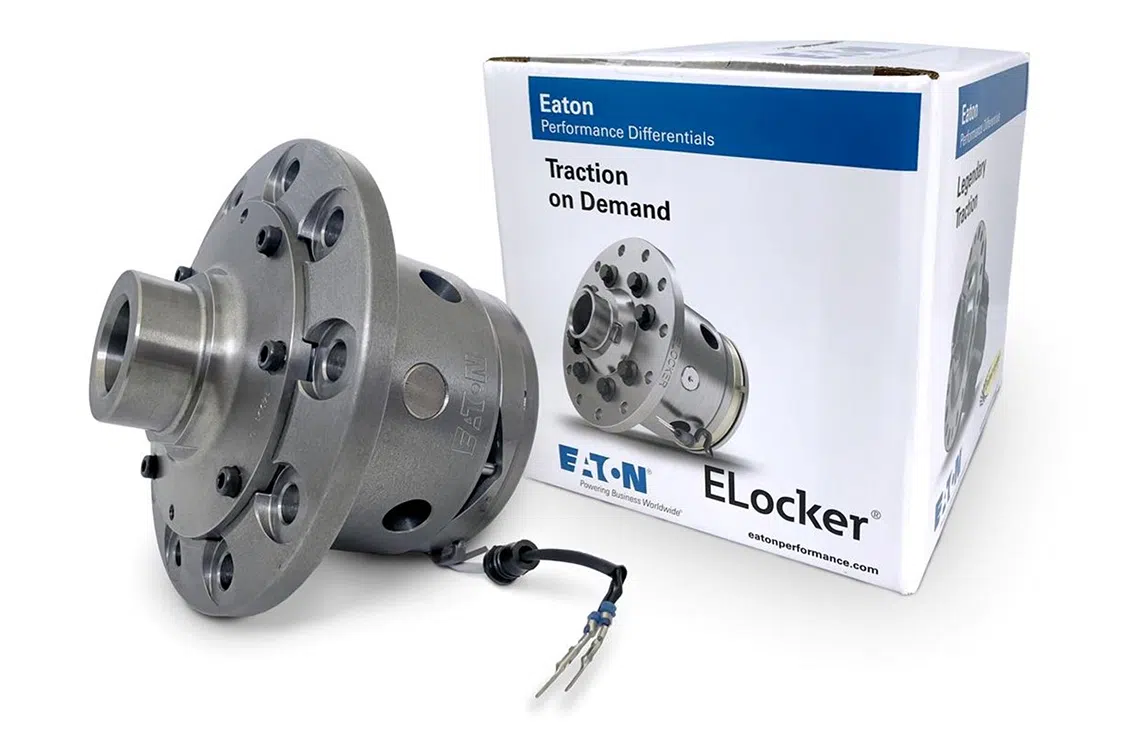
Summit Racing
800.230.3030
summitracing.com
Fabtech’s tie rod kit for 2021-2023 Bronco 4×4 models reinforce the factory steering system for optimal performance when running oversized tires up to 40 inches tall. With easy, no-drill installation, this kit is designed to replace the entire stock tie rod assembly from the steering rack to the steering knuckle, which provides elite strength and durability. The oversize ball stud design at each end allows for increased steering movement and the flexible nitrile rubber boots that cover the ball studs effectively shield the studs from contaminants, which promotes extended service life and maximum performance for the steering system.
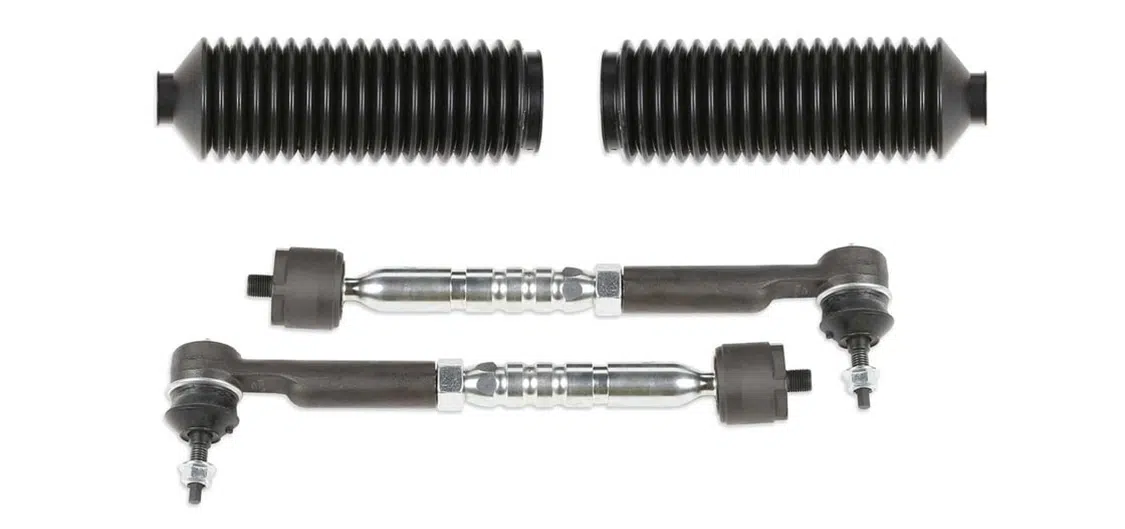
Fabtech
909.597.7800
fabtechmotorsports.com
These units are designed and engineered by off-road enthusiasts to enhance comfort, maximize suspension articulation, and increase compliance in the dirt. The 2.5-inch aluminum bodies and external reservoirs efficiently dissipate heat by increasing internal oil capacity while the remote reservoirs with Dual Speed Compression (DSC) adjusters are strategically mounted to clear aggressive mud tires as well as aftermarket skid plates and bumpers. Installation is made as easy as possible as the shocks come fully assembled right out of the box with progressively wound coil springs, reservoir mounting brackets, and all necessary hardware.

Fox
800.369.7469
ridefox.com
Finding the right exhaust system for your Bronco is more important than you’d think. MagnaFlow understands this fact, which is why they developed the Overland Series exhaust system for enthusiasts who plan to spend a lot of seat time both on- and off-road. This system is just loud enough to add character to an adventure rig without it sounding overly loud as to disturb the quality of conversation inside of the cab. The Overland Series exhaust features mandrel-bent stainless steel tubing that preserves exhaust flow and boosts power while offering maximum durability and corrosion resistance. A high clearance design with no tip exit provides more ground clearance and improved departure angles.
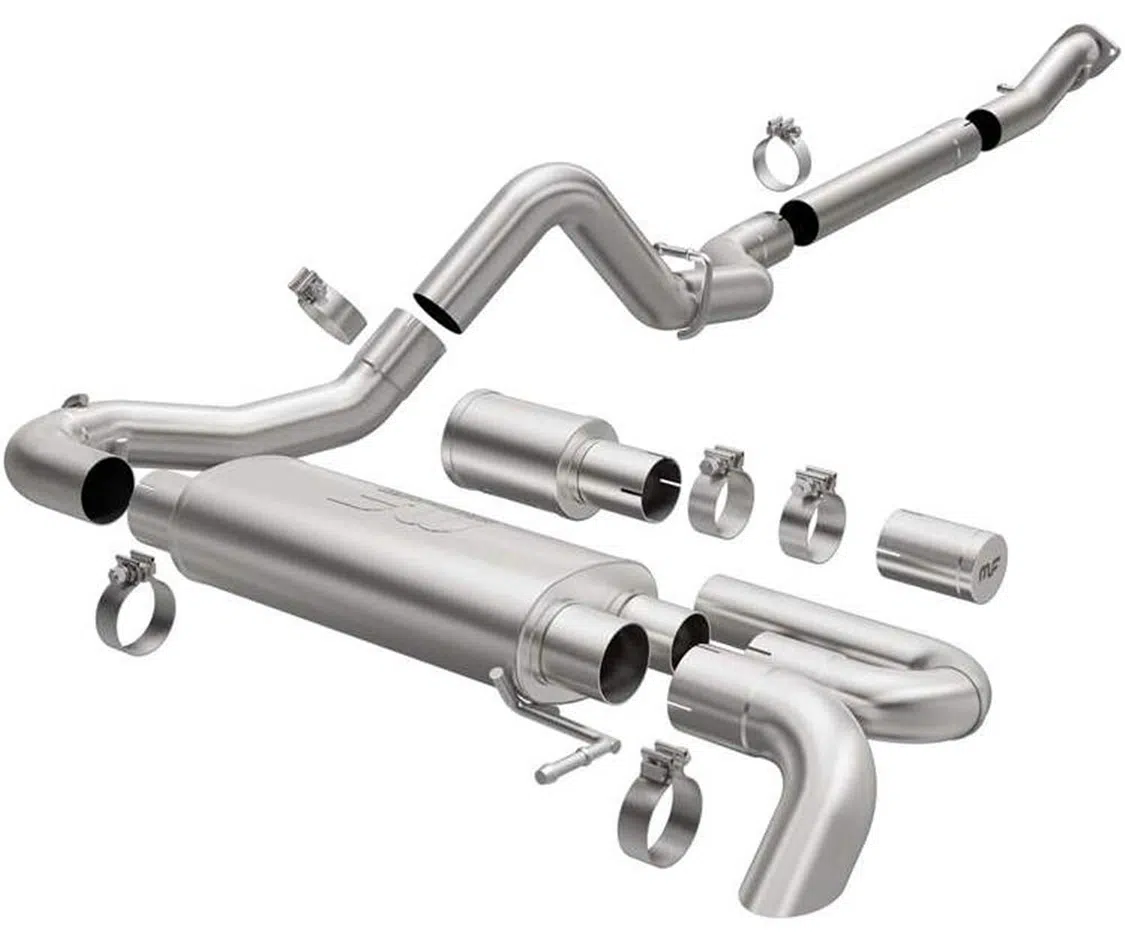
Summit Racing Equipment
800.230.3030
summitracing.com
Finding an ideal place to mount the Rear Bronco ARB dual compressor can be tough, especially if you are looking to plant it somewhere inside the interior. With this rear driver side mount from American Adventure Lab, mounting in the cabin has never been easier. Place it right where it is accessible while still being out of the way enough that you can still take advantage of the entire cargo area.
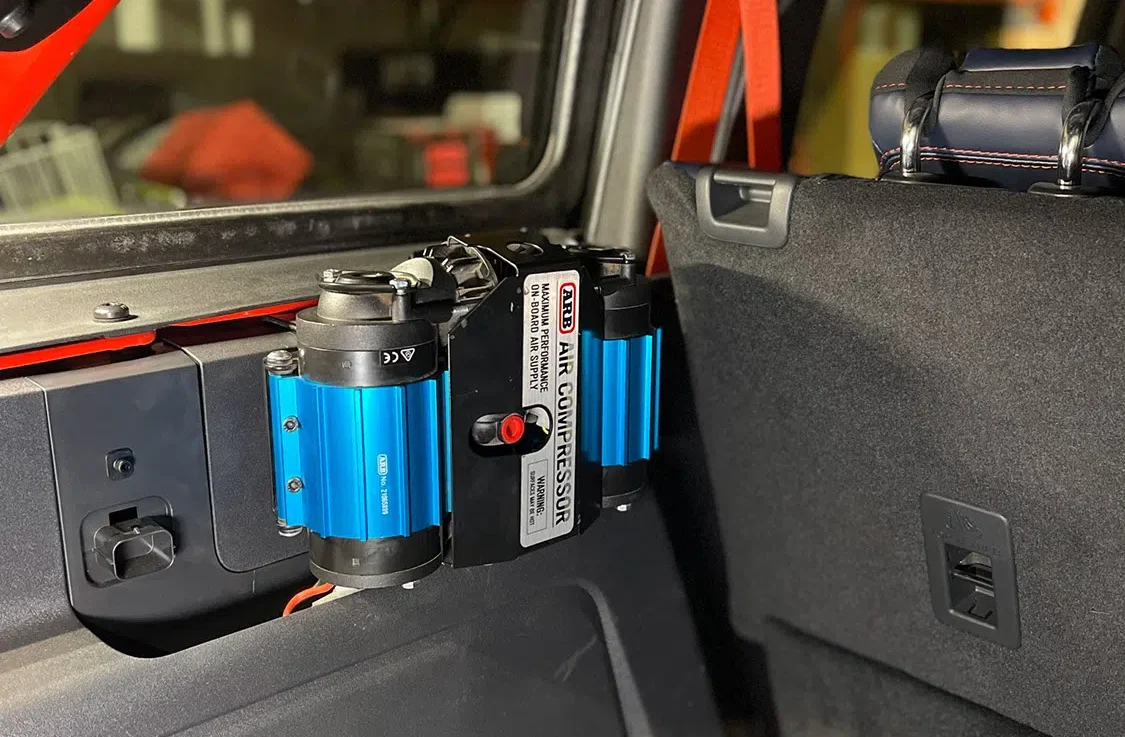
American Adventure Lab
385.202.4188
americanadventurelab.com
Available for 6th Gen 2- and 4-door Bronco models equipped with the OEM Ford MIC hardtop, the much-anticipated modular roof rack system from Trailrax presents a viable and attractive method to mount gear and tools for the next trek out of town. A wide array of available accessories allows for pure customization to ensure nothing is left behind. Trailrax has equipped the rack with a wind deflector to kill all road noise, and collaborated with Heretic Studios to design a cutout to flush fit one of their 40-inch off-road lights. Add the TrailRax Pak Rax for even more function and mounting capacity to greatly enhance all off-road and overland adventures.
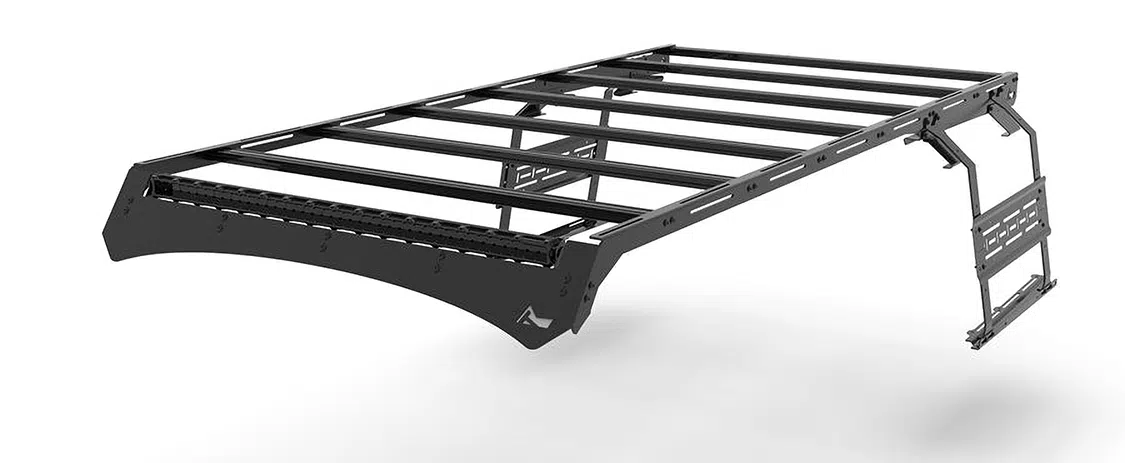
Trailrax
385.777.2601
trailrax.com
This kit features precision-manufactured, custom valved remote reservoir coilover shocks in order to gain the most travel and ride quality possible for both on- and off-road situations. Jack the front of your 4-door Broncos up 2-3 inches with adjustable height, as well as 1.25-2.25 inches over stock for models equipped with the Sasquatch package. The Stage 4 package adds remote reservoirs to increase shock oil volume and heat dissipation as well as billet upper control arms to provide on-vehicle caster and camber adjustability, and feature Delta Joint PRO for up to 90 degrees of movement. This suspension system is designed to provide up to 11.5 inches of front suspension travel and 14 inches of rear suspension travel with 35-inch tire fitment. 37-inch and larger tires can also be used with the optional up-travel limiters sold separately.

ICON Vehicle Dynamics
951.689.ICON
iconvehicledynamics.com
Part #63-2619 has been designed specifically for 2021+ Ford Bronco 2.7 V-6 models, and can highly benefit these vehicles through the enclosed air box design, which shields inlet air from engine bay heat. The box lid allows for quick and easy access to the filter without the use of tools. A high-density polyethylene rotationally molded tube helps increase the volume of airflow to the engine, which provides a guaranteed increase in horsepower and torque.
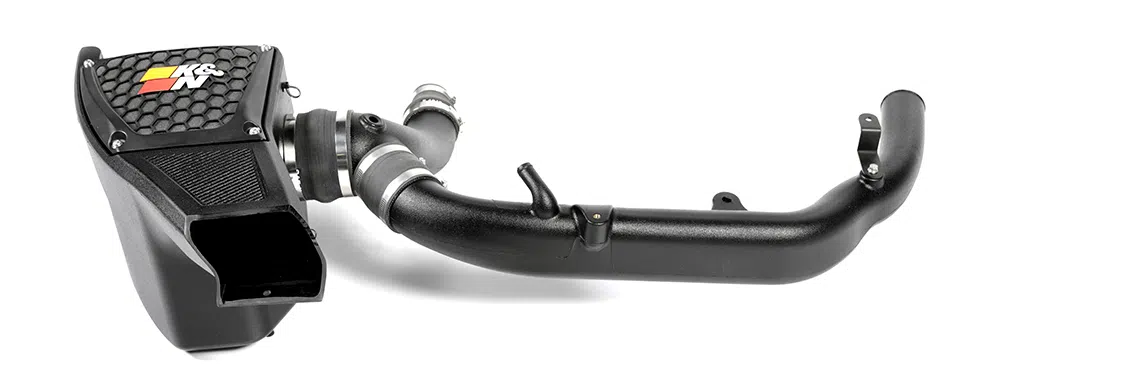
K&N
800.858.3333
knfilters.com
Add tire coverage and shield paint from rocks and debris from the trail with these angled front fender flares. TrailFX has fabricated these flares from 14-gauge mild steel and finished them off with a black, textured powder coated surface. Each pair attaches using existing factory mounting points for easy, no-drill installation.
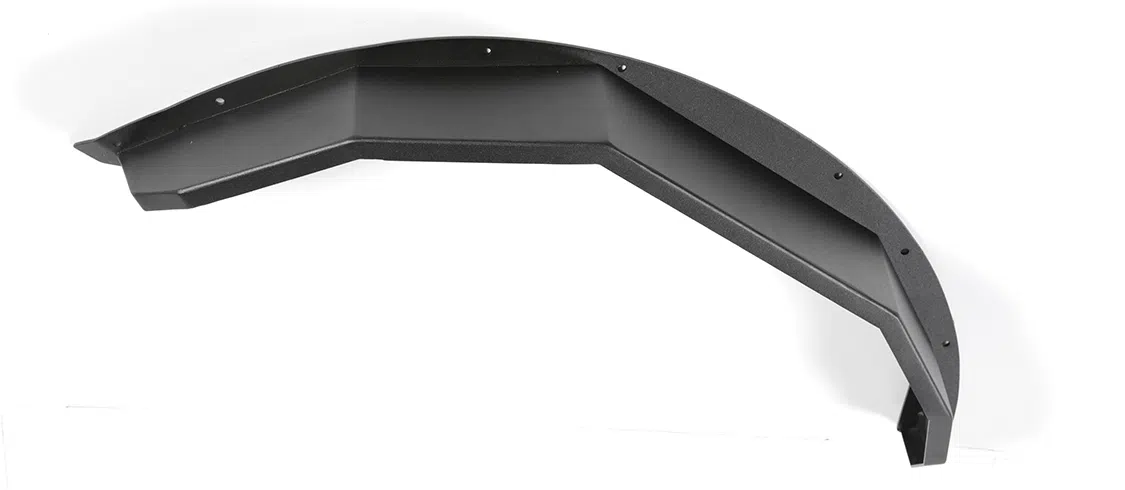
TrailFX
833.727.8784
trailfx.com
If you were thinking about some way to convert your Sasquatch edition Bilstein shock equipped Bronco over to air ride, Universal Air has provided the solution. This bag and bracket kit will allow for the conversion while retaining the fully functional OEM active dampening system.

Universal Air Suspension
800.864.2470
universalair.com
The Flashcal for Bronco 2.3L and 2.7L models allows for complete adjustment of a number of vehicle features that lets the end user make it his or her own. From adjusting speedo calibration for larger tires all the way to modifying daytime running lights or auto locks functionality, Flashcal can unlock the Bronco for complete control.
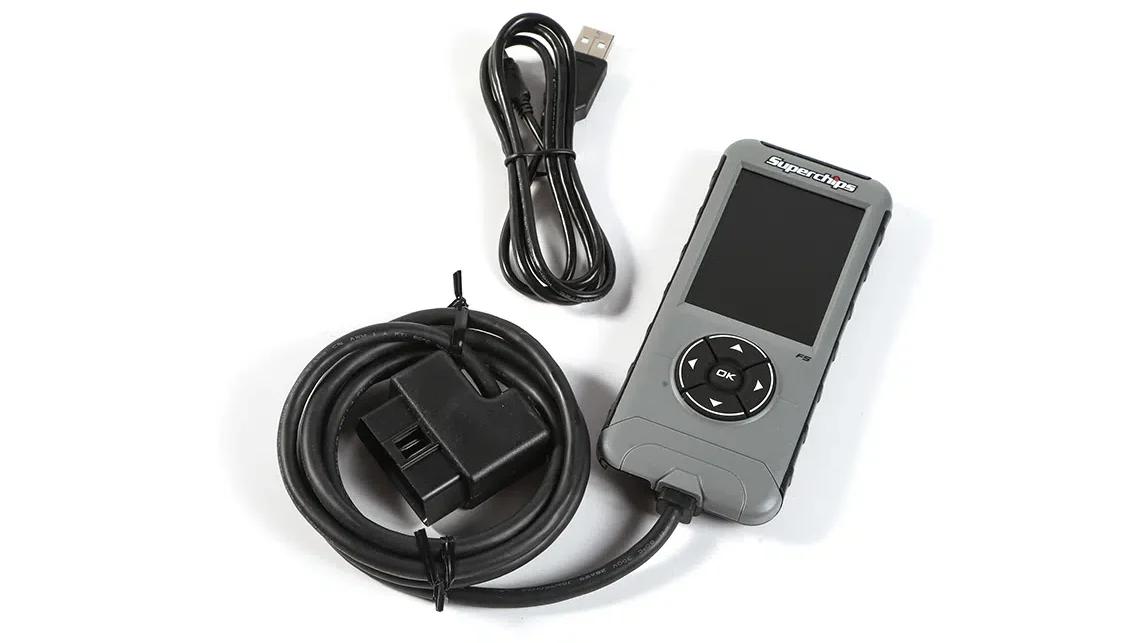
Holley
866.464.6553
holley.com
Rock Slide Engineering’s tailgate table is a lightweight aluminum folding table that attaches to the tailgate of the Ford Bronco or any flat surface. This table attaches easily and provides two separate flat surfaces, then folds closed to 1 inch thick for ease of use and storage. This black powder coated unit also features trash bag holding points and an integrated bottle opener to pop open your cold ones after setting up camp.
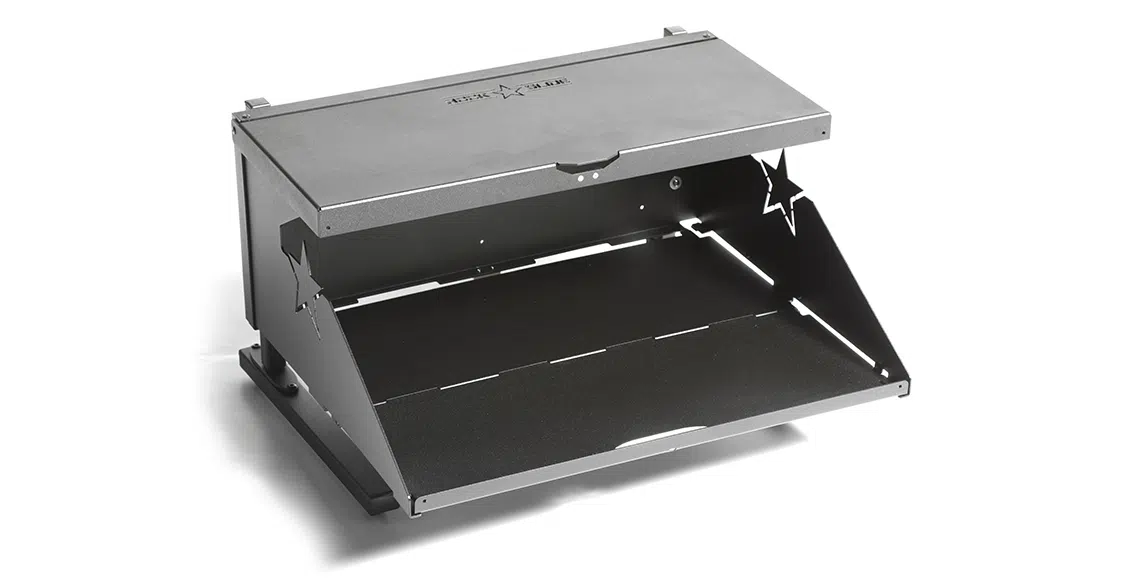
Rock Slide Engineering
435.752.4580
rockslideengineering.com
“These clear tails feature an attractive design and functional LED lighting elements including high-powered reverse lights and unique perimeter lighting for a unique touch.”
Designed for the new Bronco, Oracle’s low-profile taillight design helps avoid potential damage while on the trail as opposed to the factory housings that protrude out significantly more. These clear tails feature an attractive design and functional LED lighting elements including high-powered reverse lights and unique perimeter lighting for a unique touch.
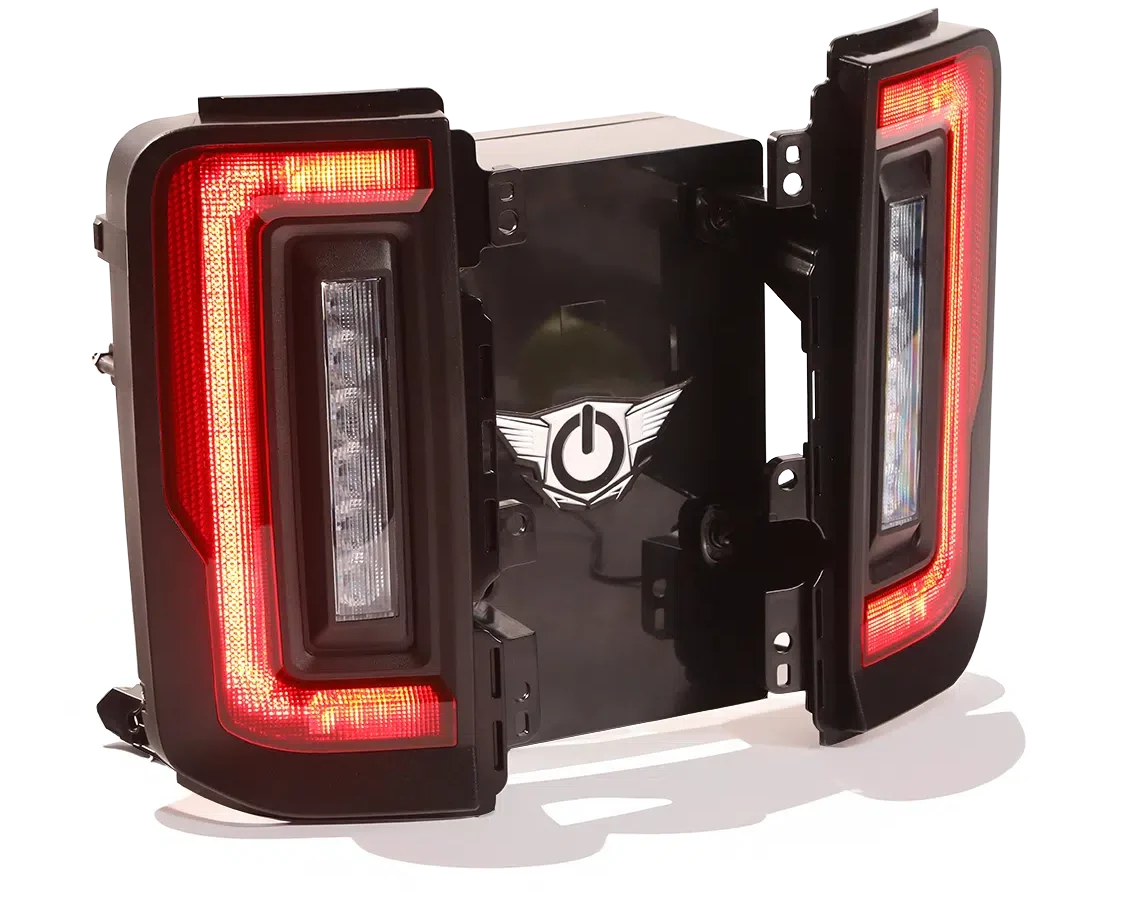
Oracle
800.407.5776
oraclelights.com
Enjoy the extra protection of your Bronco’s body and rockers from using Go Rhino’s frame-mounted sliders. They mount directly to the frame, and the one-piece welded design acts as sturdy side bumpers to keep your ride as dent-free as possible. These rugged sliders are North American made from steel and are finished in a black powder coat finish for long-lasting performance.
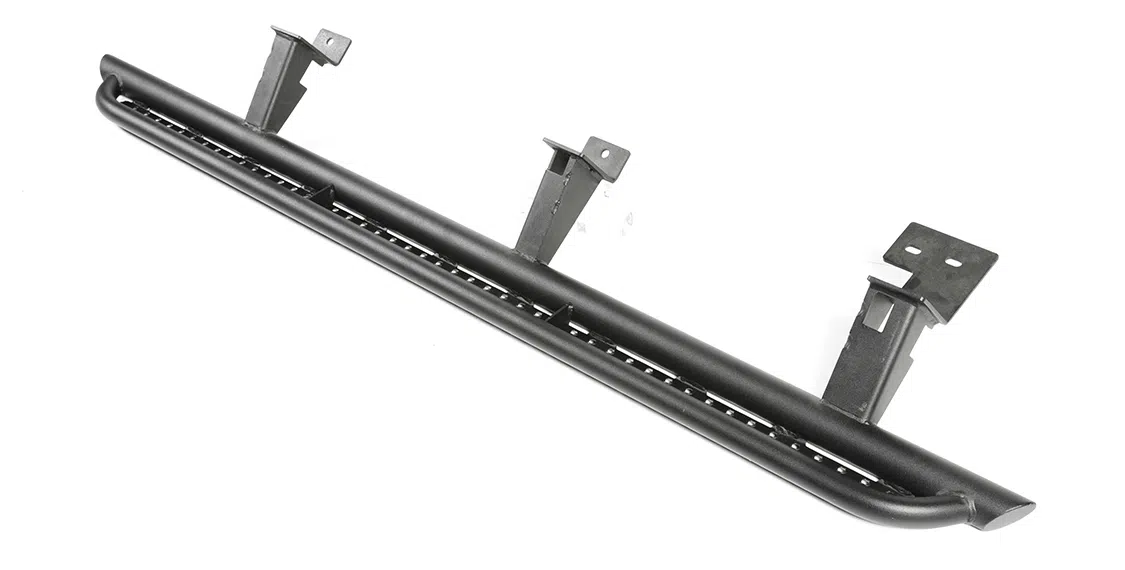
Go Rhino
888.427.4466
gorhino.com
The Havoc Off-Road tailgate tire mount is the perfect solution for lifted Broncos with oversize tires. Featuring a heavy-duty cast aluminum hinge with hardened hinge pin, this tire carrier assembly handles tires up to 40 inches in diameter. The tailgate tire mount works with all factory equipment, including third brake lights and rear-facing cameras.
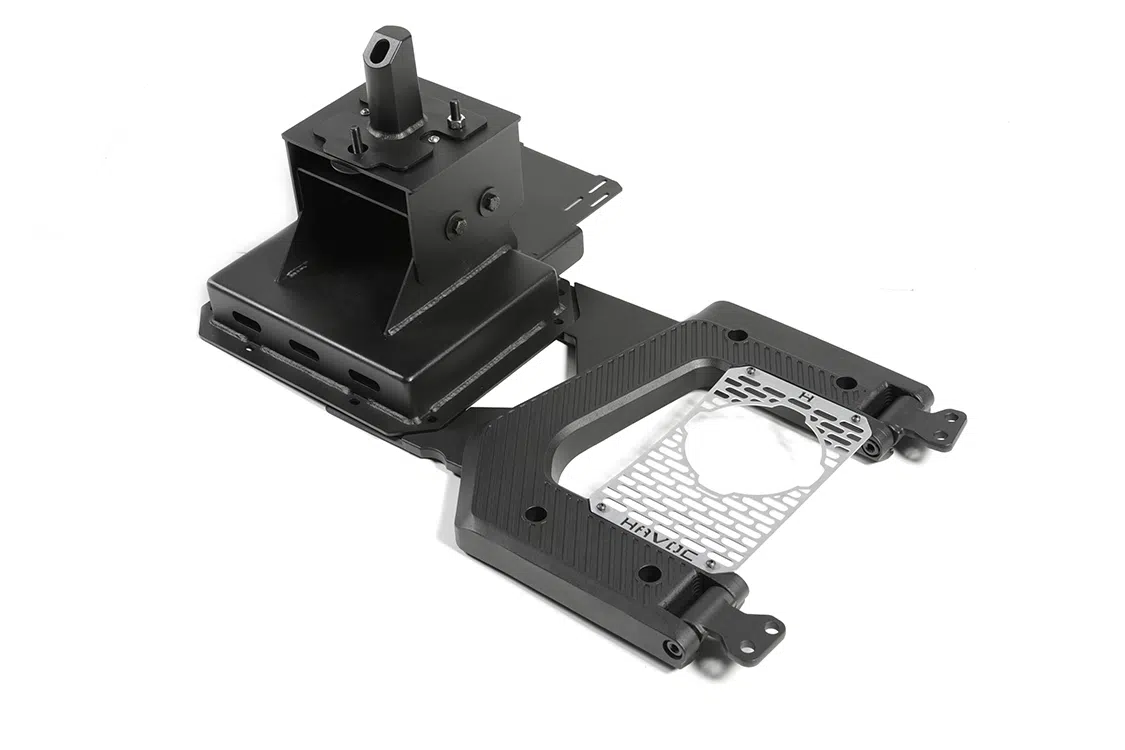
Havoc Off-Road
855.460.6800
havocoffroad.com
Designed to mount directly to the frame of 2021-2022 Bronco models, the Westin/Superwinch tray is tested to a maximum 16,500 pounds of straight-line pull. Most 8,000- to 12,000-lb winches up to 10.25 inches tall will fit, making this tray highly adaptable to your desired specs. The tray features completely bolt-on assembly, as well as boasting pre-drilled holes for quick mounting of hawse or roller fairlead, and even works with factory sensors to make for a simpler install.

Westin Automotive
800.345.8476
westinautomotive.com
Dana/Spicer is the supplier for the stock rear Bronco axle, and has now made this semi-float rear axle that offers the benefits of the celebrated Ultimate Dana 60 axle, such as Spicer chromoly steel axle shafts and ring and pinion gearing, a nodular iron diff cover, heavy-duty brackets, optimum weight capacity, and more. This direct-fit solution reuses the Bronco’s same wheels and brakes, and matches well with the Ultimate Dana 44 front axle, which allows the reuse of factory 5-lug hubs.
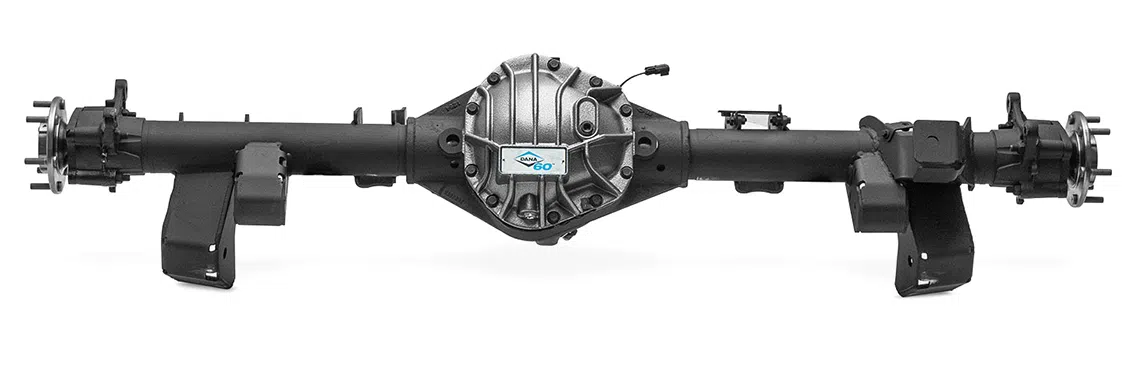
Spicer
spicerparts.com
Those who drive their Bronco as often as possible will definitely benefit from the Windshield Gard. This part is pre-shaped from ClearPlex film and is applied to the windshield to protect against on- and off-road hazards such as rocks, sand, and general debris that could potentially crack the factory glass. The film’s hard coat also resists impact damage and scratches to prolong its clarity for many adventures to come. Because it is pre-shaped, installation of the Gard is easy enough for anyone to handle without the need to alter the film in any way.
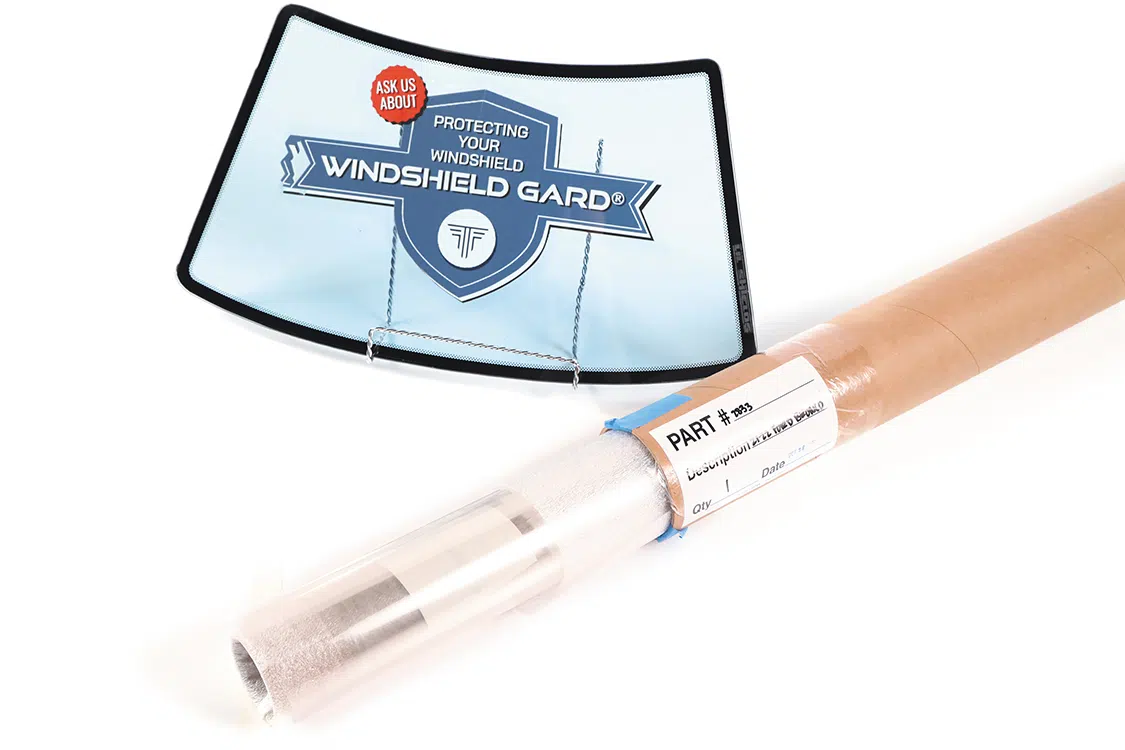
Targe
targegard.com
Keep your items organized and tidy with this handy storage tray. Keep all that loose change, flashlight, sunglasses, and all the other belongings nicely tucked away within the console. This high-quality ABS plastic tray allows easy power cord access on both sides to keep your cell phone properly charged from the available power port.
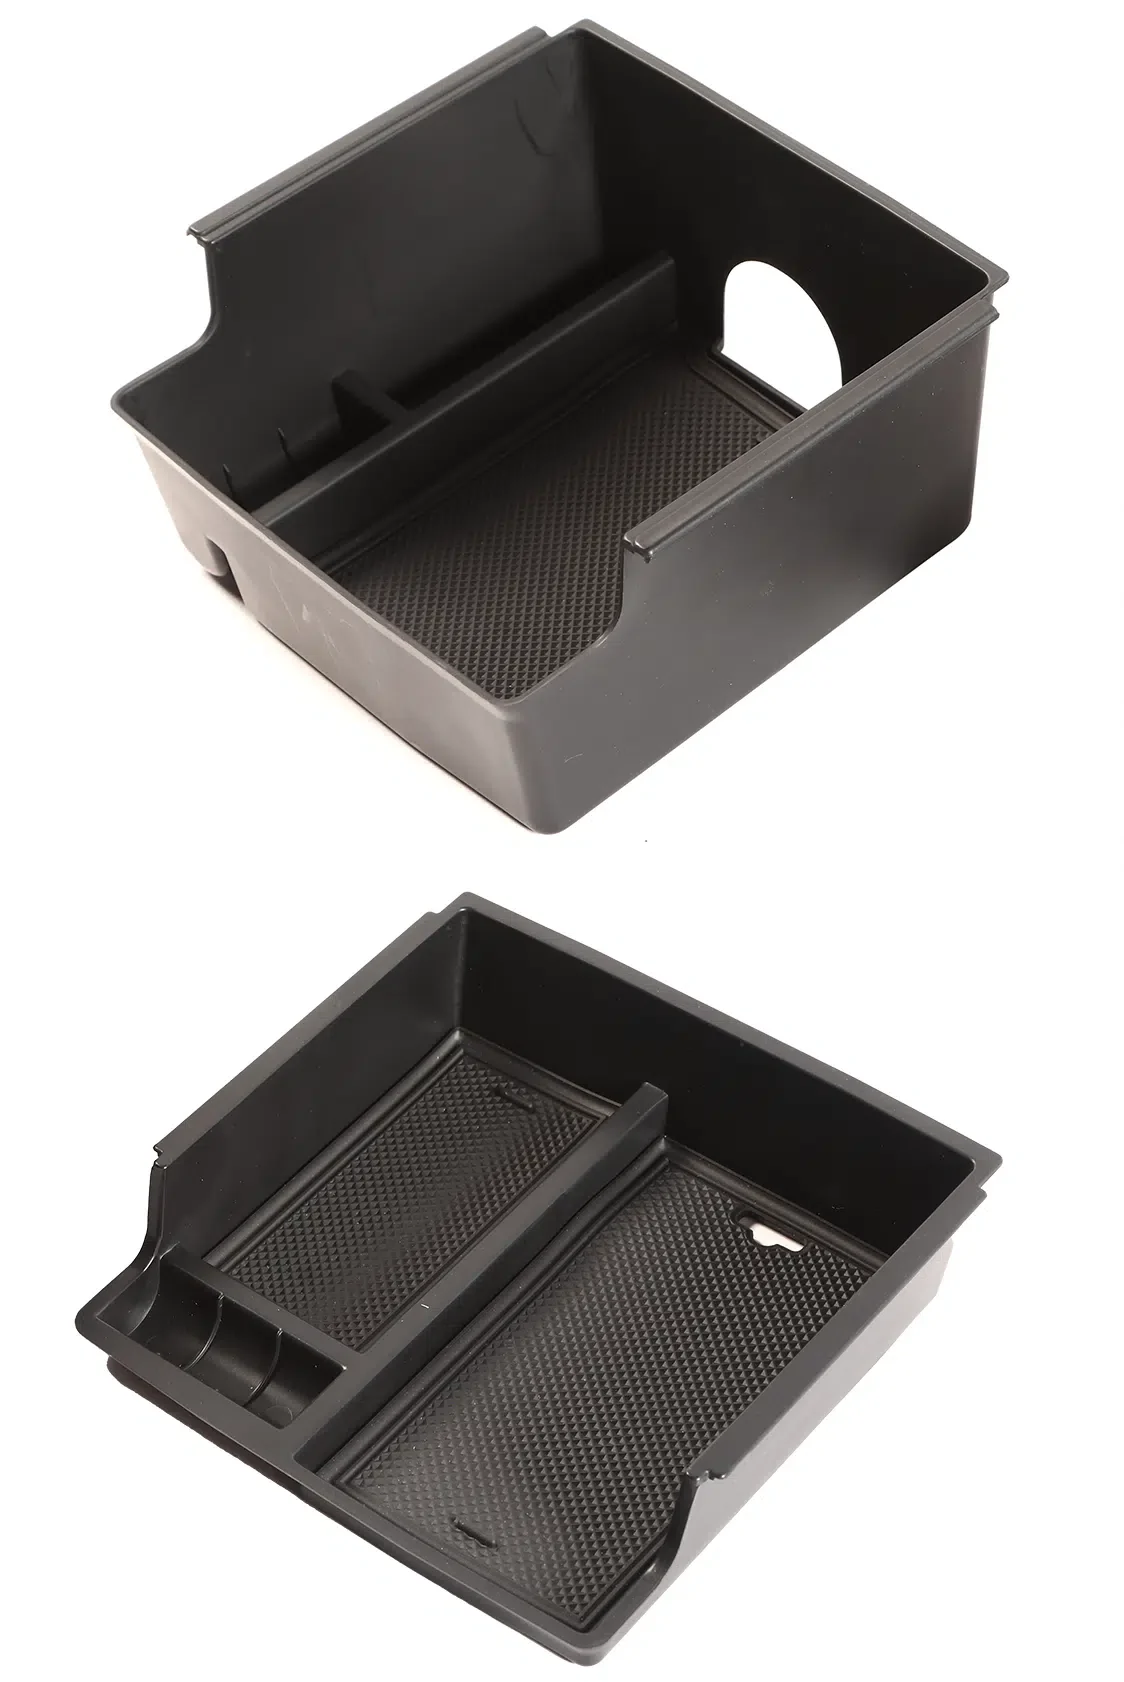
Stallion 4×4
800.474.8955
stallion4x4.com
The Pivoting Accessory Compartment System (P.A.C.S.) drawer is an easy, no-drill storage solution that easily maximizes the organization of your goods. The factory cargo cubby and jack that sit below the drawer are still easily accessible, which makes this box that much more adaptable. A latching mechanism keeps the drawer securely closed so the contents stay in place while your Bronco is in motion. The top plate has built-in mounting points so that bungee cords or tie downs can keep anything placed on top of the drawer planted at all times. Further customize the drawer with optional accessories and coating options.
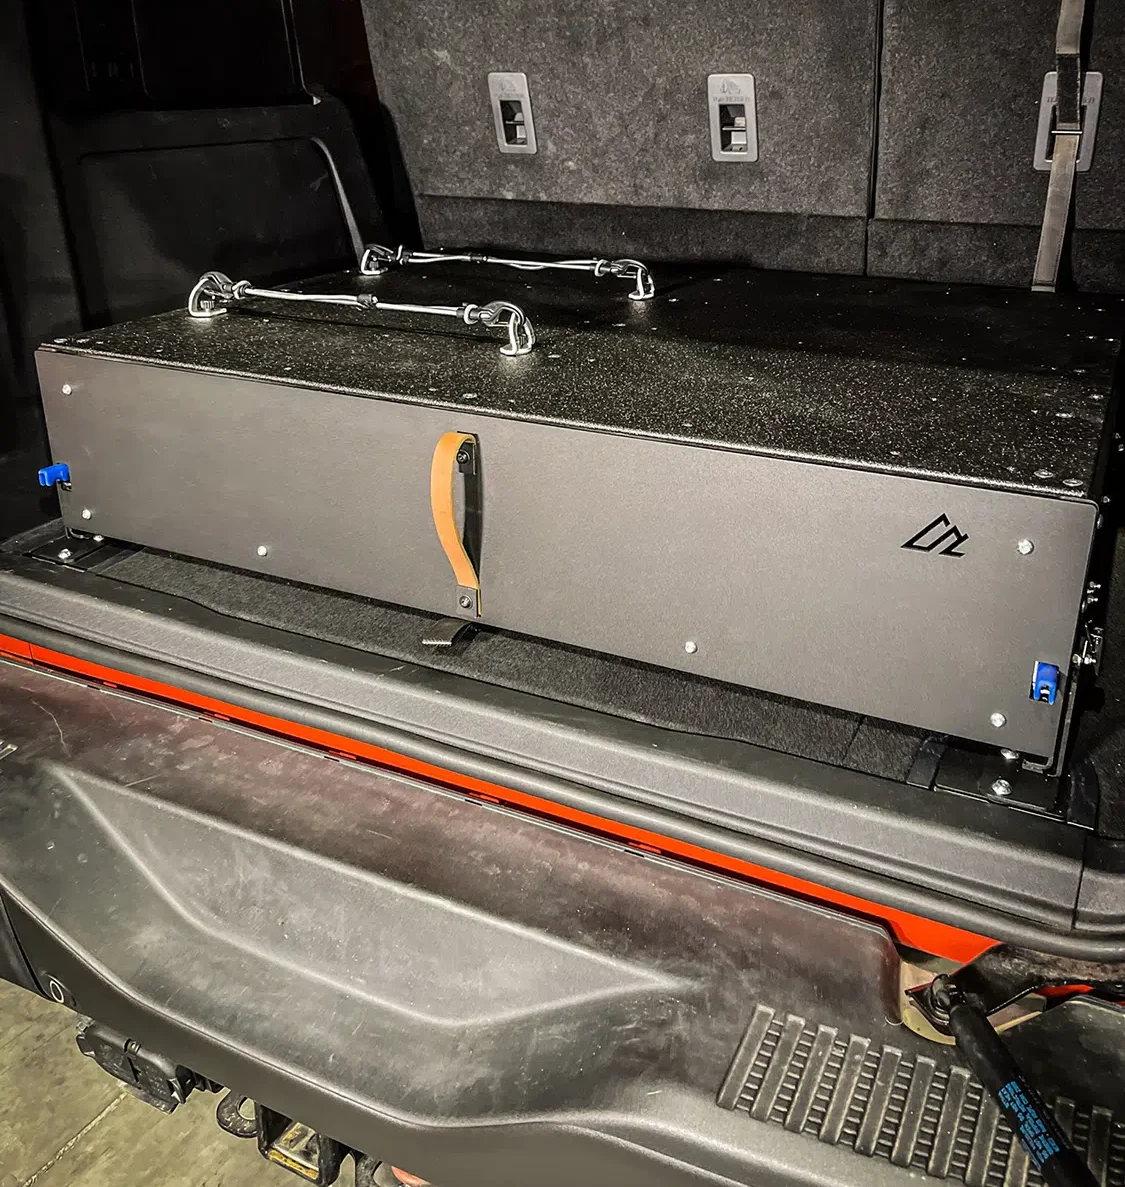
American Adventure Lab
385.202.4188
americanadventurelab.com
The difference between good and great is all in the details. Take your Bronco to the next level with WeatherTech. Their FloorLiner High Performance (HP) offers the next generation of laser-measured protection for your interior. These mats offer high walls for formidable coverage, waterproof retention devices to stop leaks, and underside nibs to help the mats stay in place. Plus, FloorLiner HP is custom fit to your Bronco’s year, and as always, it’s 100% made in America. Level up your Bronco and discover vehicle protection that keeps up with you.
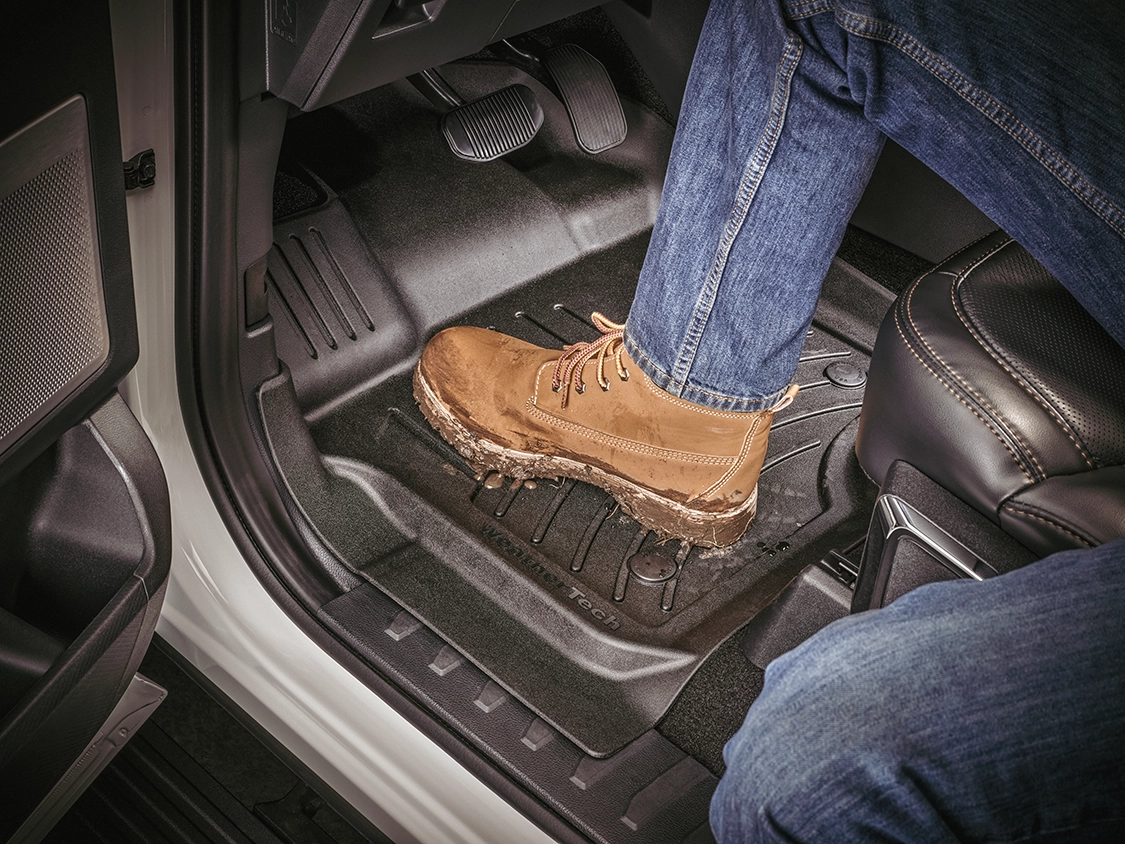
WeatherTech
800.441.6287
weathertech.com
This kit is designed for the Ford Bronco enthusiast that is looking to light up the trail with ample light, and stand out from the pack. With style, fitment, performance, and ease of installation, this kit specifically utilizes a set of S2 Sports in Driving/Combo, a set of S2 Sports in Wide Cornering, and a set of Squadron Sports in Spot. The brackets used to mount this performance oriented light setup ensure no cutting or drilling, and the wiring that is included will allow for the lights to be operated from a toggle switch in the cab. This is a comprehensive kit and does not require any additional parts for installation.
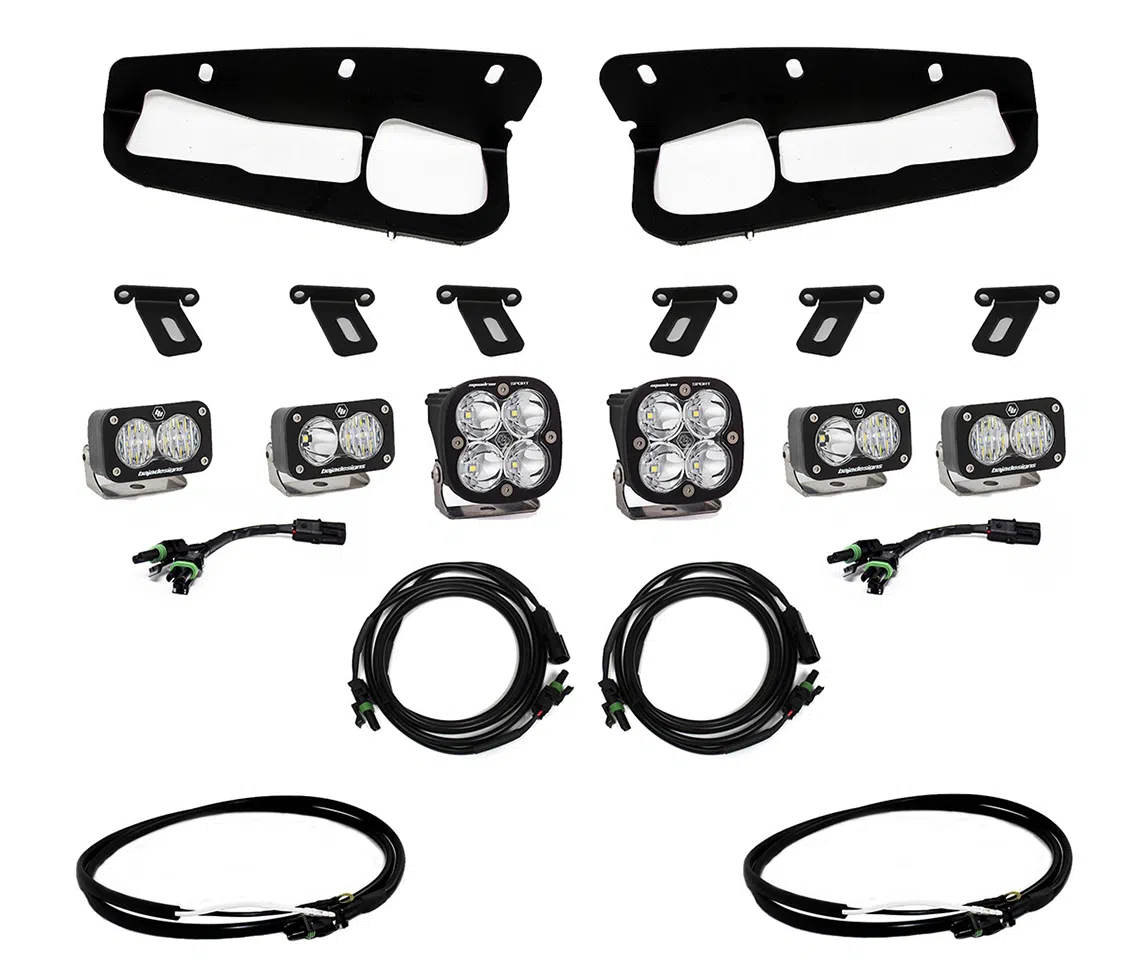
Baja Designs
760.560.2252
bajadesigns.com
The MXPW115 is made in the USA and built into a genuine, surplus ammo can. The base station is waterproof and nearly crushproof, ensuring that it stands up to the most rugged of environments. When setting out on an extended excursion, power will not be a concern. The MXPW115 Ammo Can Base Station comes stacked with a 4Ah LiFePo4 Battery, providing up to 20 to 25 hours of listening and 4 to 12 hours of general use battery life for any adventure. The base station charges through AC power and Midland Radio’s MXPW01 Solar Panel (sold separately). With multiple power options, the MXPW115 is sure to bring communication throughout the duration of any off-grid expedition. Outdoor adventurers can stay safe by receiving the latest NOAA Weather Radio alerts as well as the ability to reach others in case of an emergency. The MXPW115’s other features include a volt and amp meter, laser engraved faceplate, 3 AMP USB Port, 3-Watt dual speakers, headphone jack, two sets of power poles, and a fan switch.

Midland Radio
816.241.8500
midlandusa.com
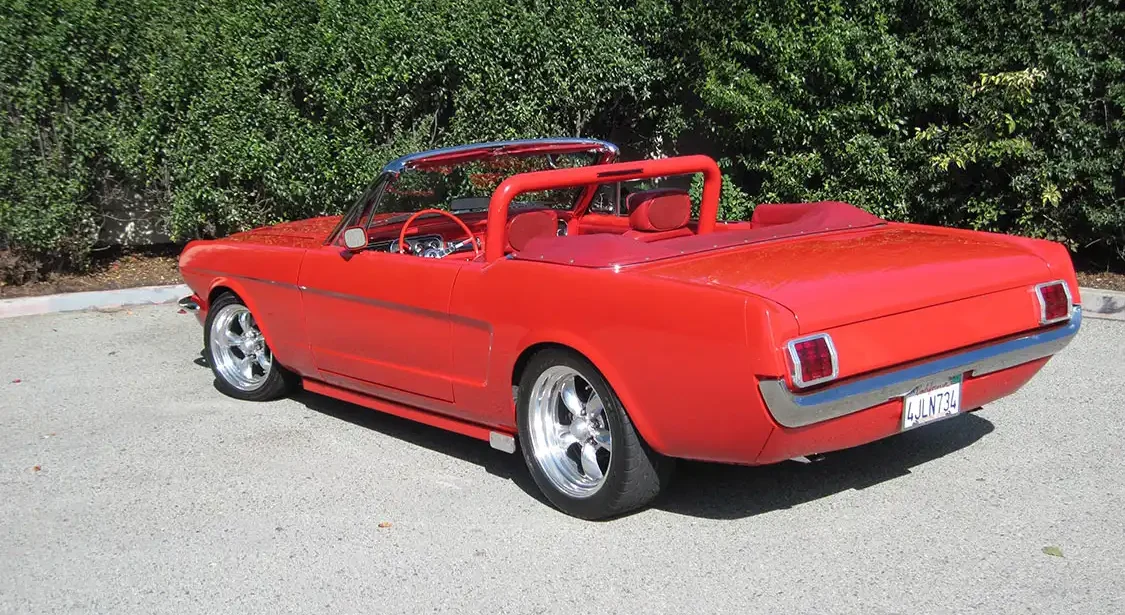
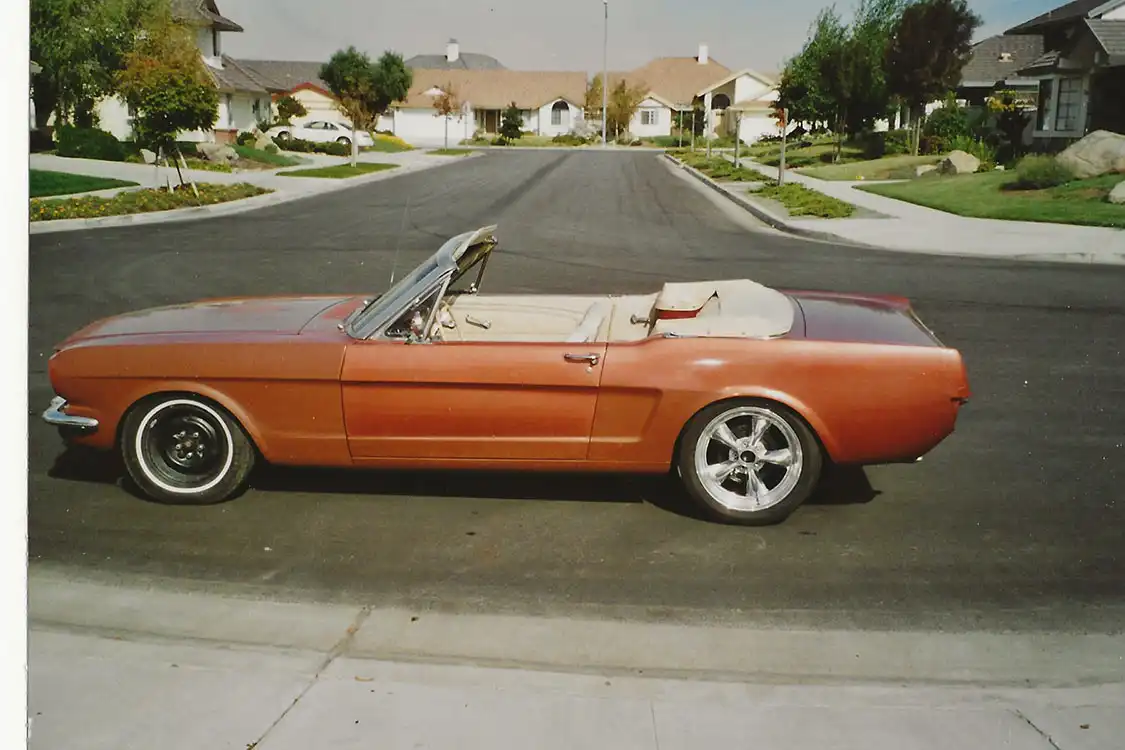
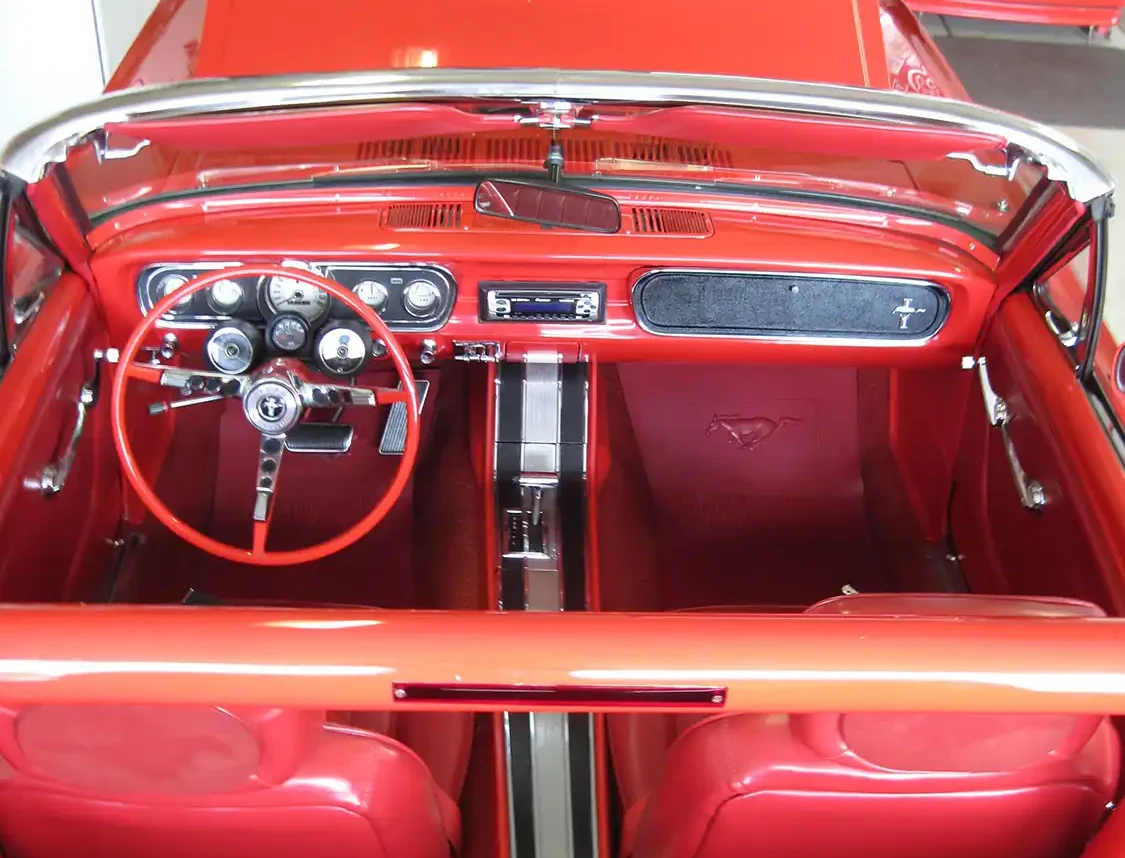
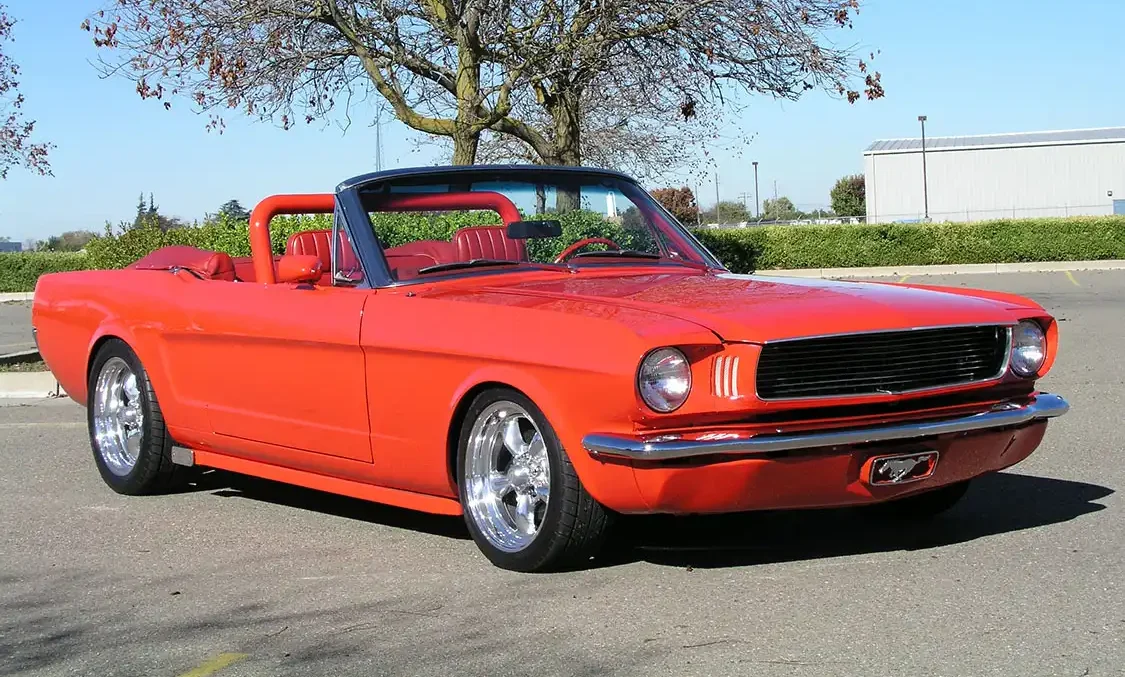
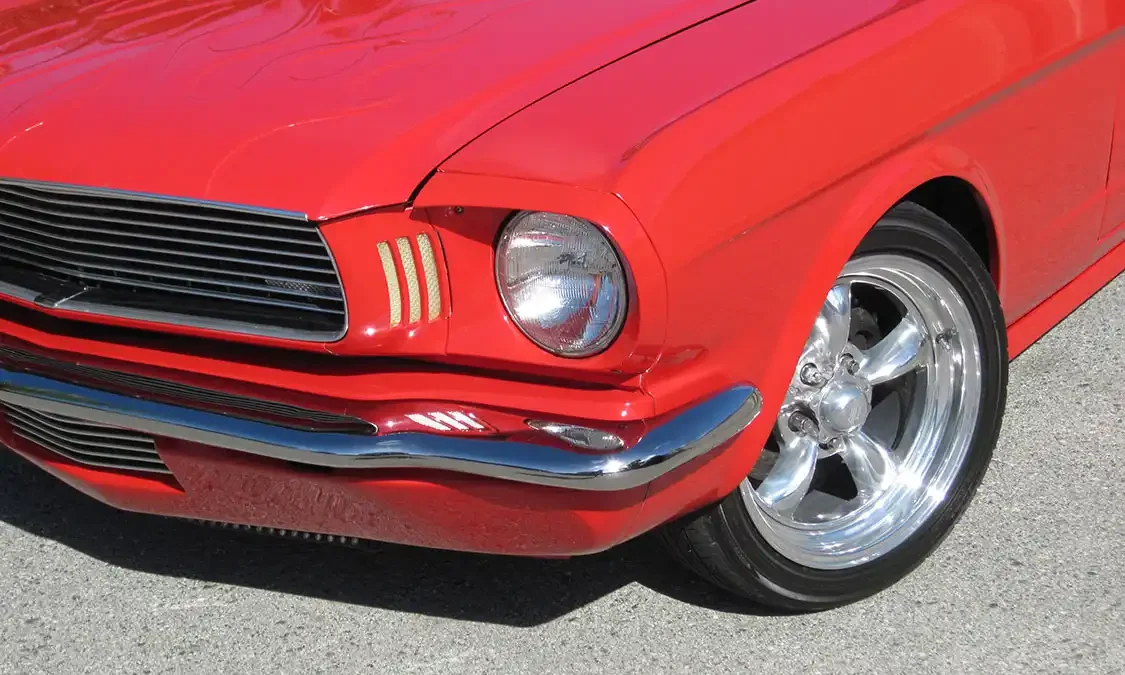
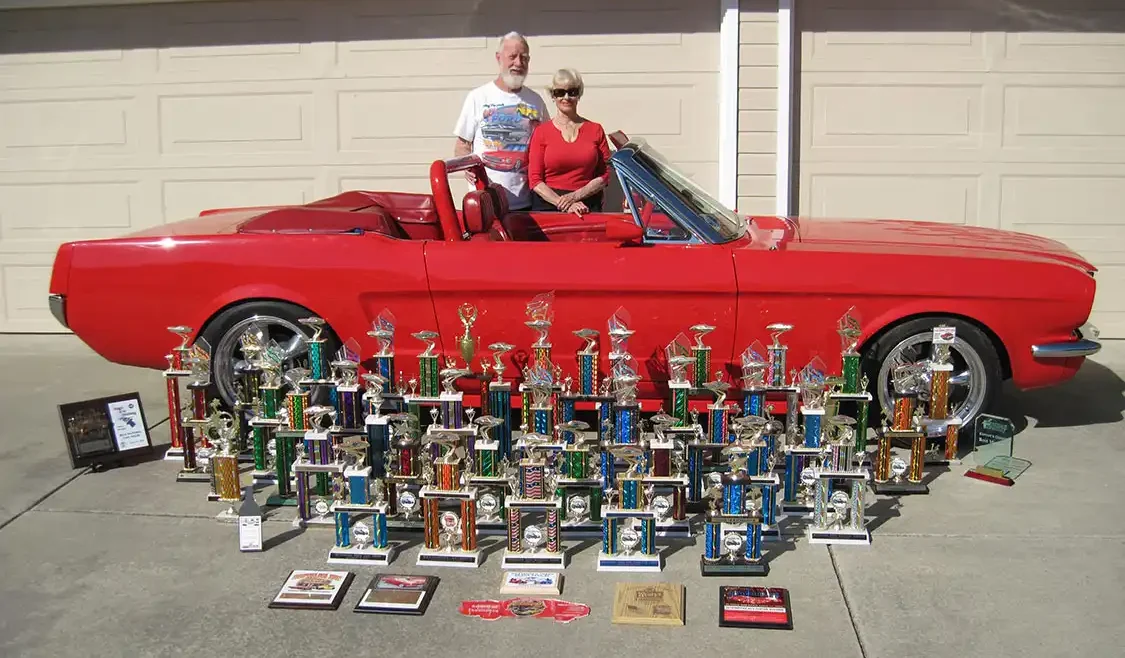
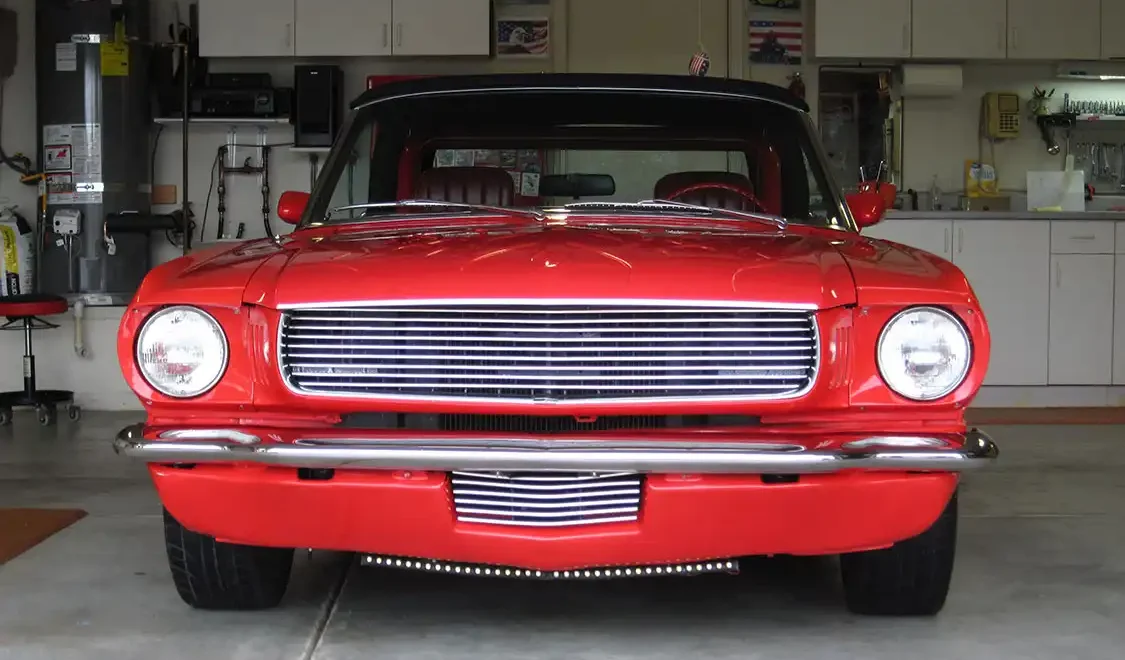
We were driving in the industrial part of our city when we saw a “plain Jane” 1966 Mustang convertible for sale. Both of us smiled. We located the owner. He was a very good guy – no hassles on the price. we smiled again and bought it.
One of my theories has been “Less is More” – simple but not easy.
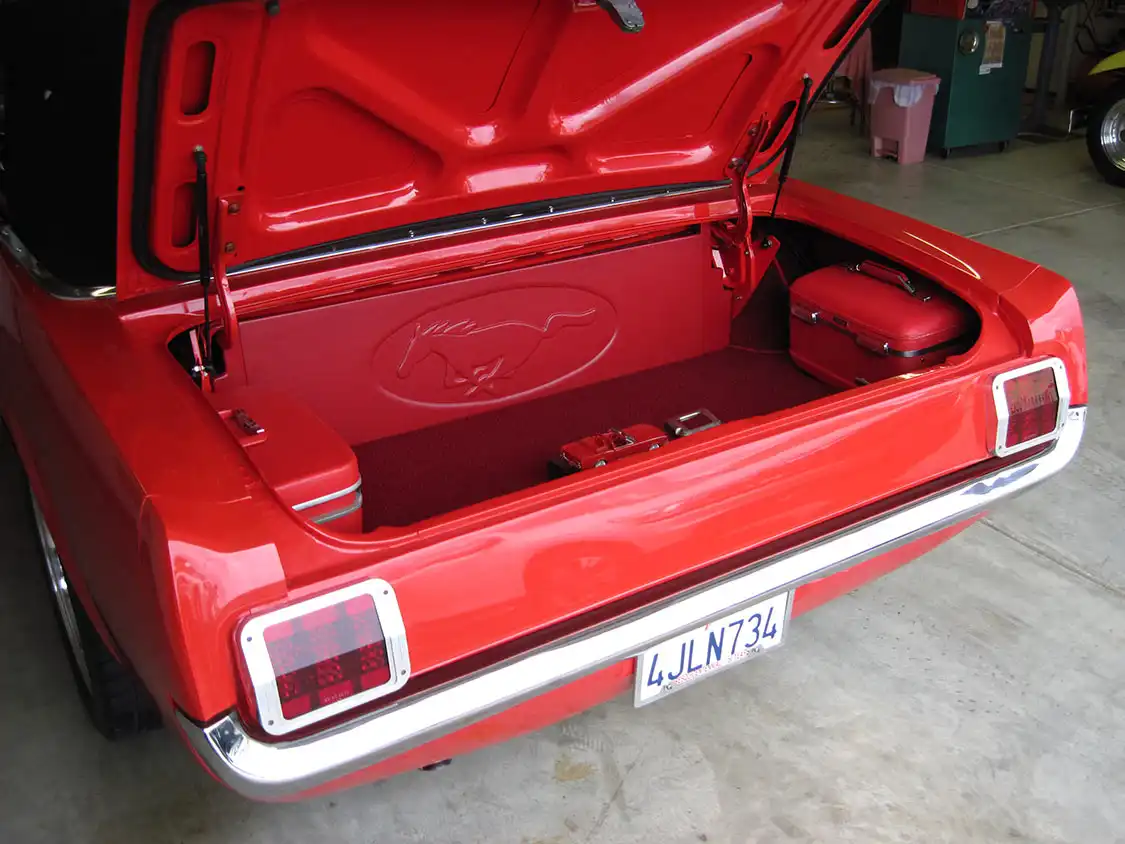
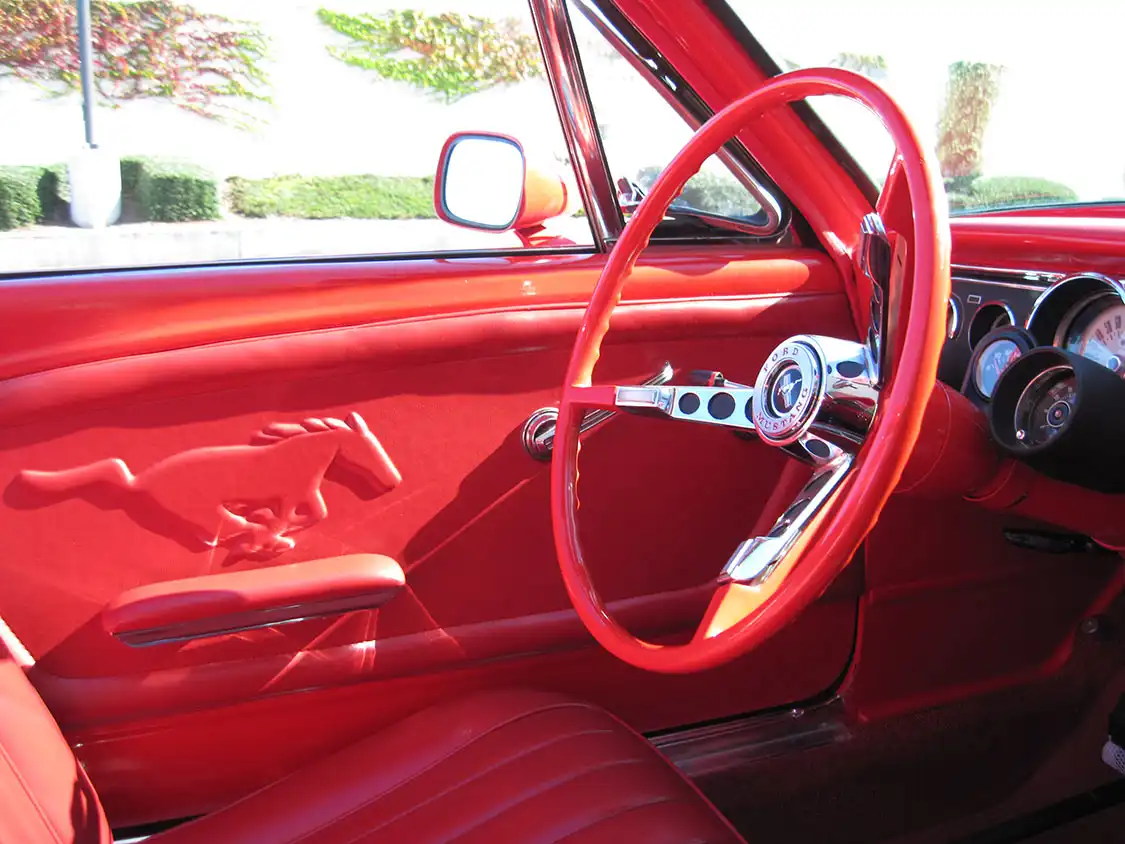
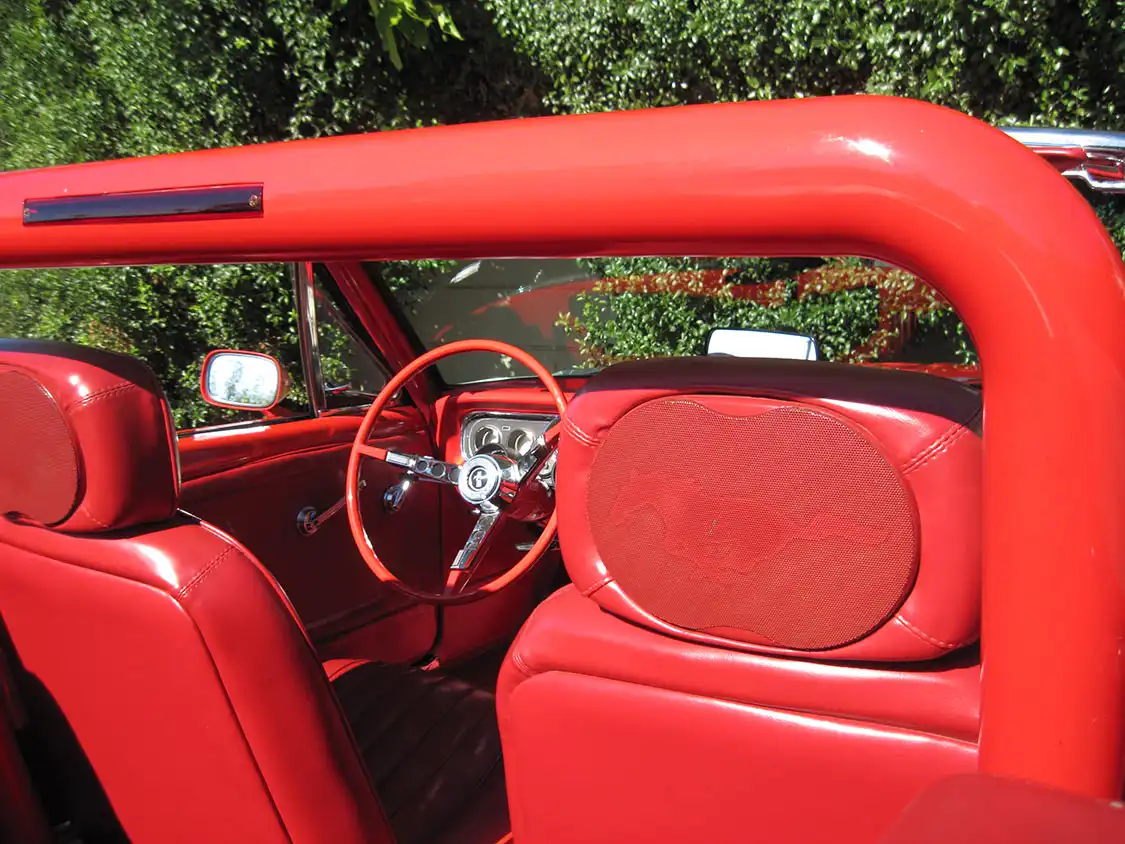
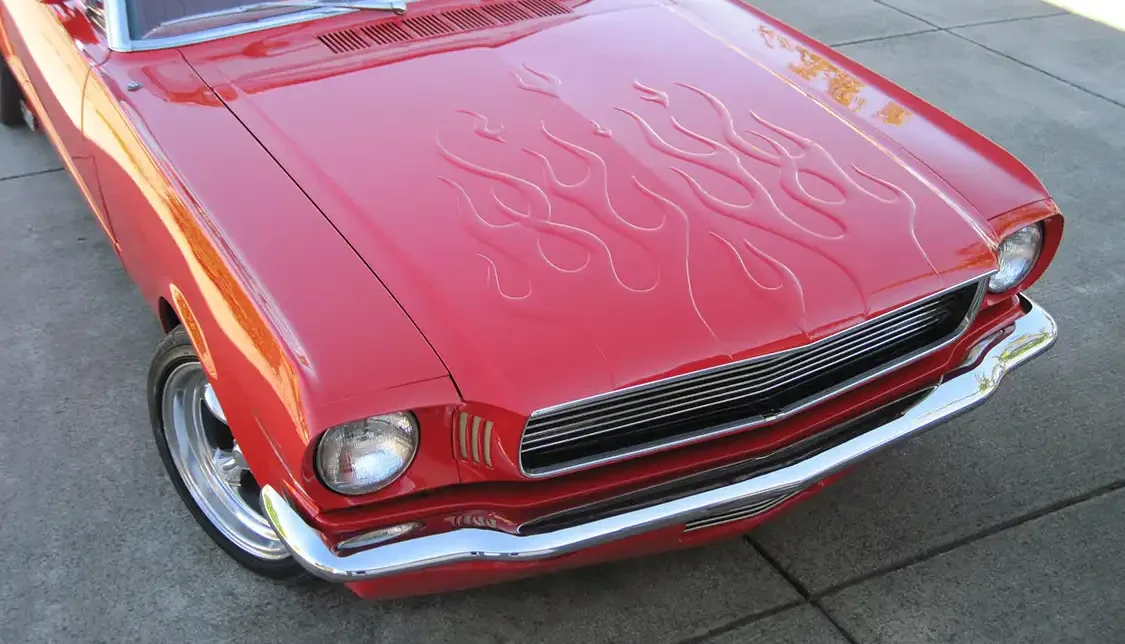
All of the custom pony graphics (12 of them) as well as the flames were hand carved by owner.
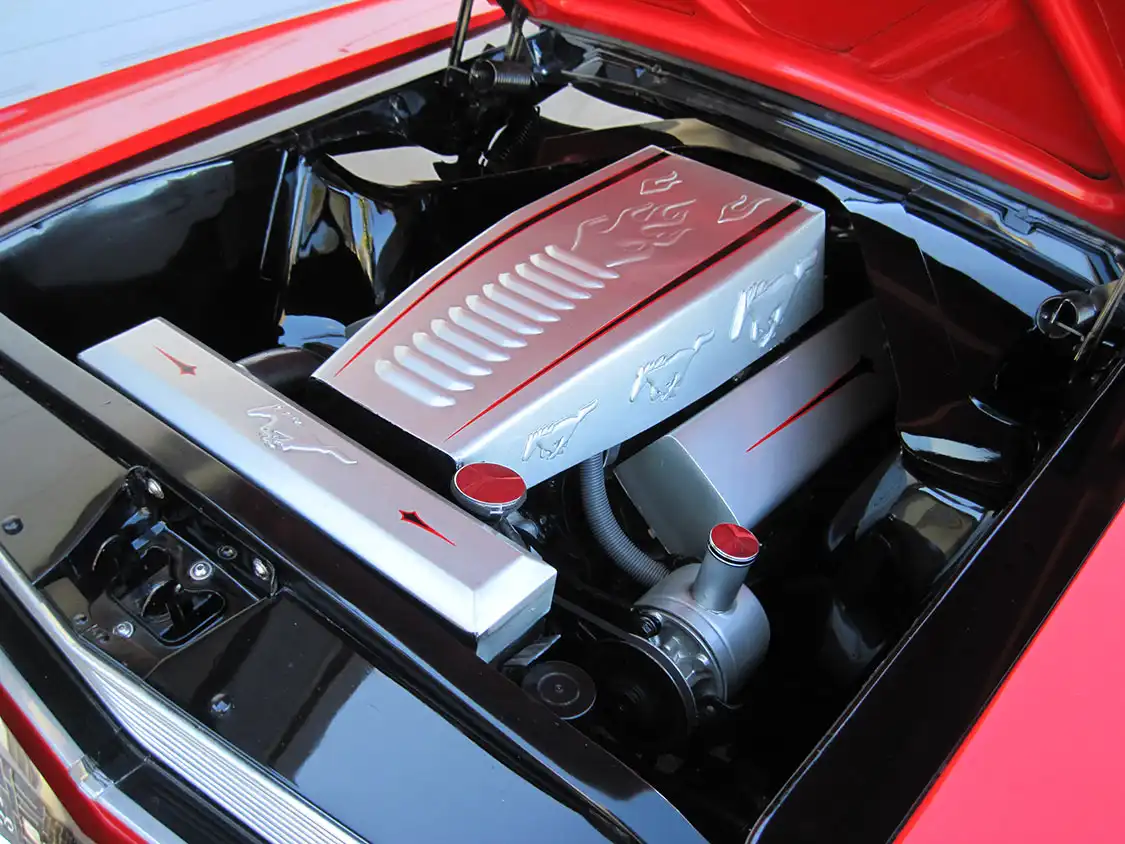
I looked to Smeding Performance for a crate engine with plenty of torque and reliability. Bored 0.060-inch oversize, the 311ci small-block is packed with Keith Black forged flattop pistons, an Elgin hydraulic camshaft, factory iron heads with 1.94/1.60-inch valves, an Edelbrock 600-cfm carburetor, a Performer 289 dual-plane manifold and an Autolite distributor with Pertronix ignition.


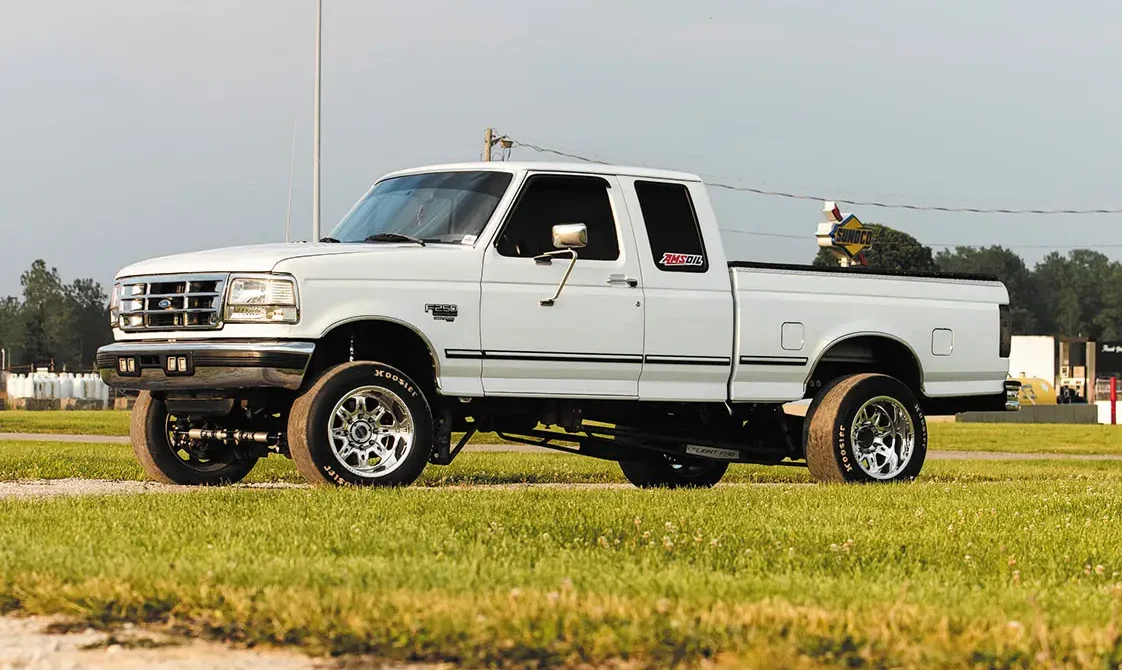
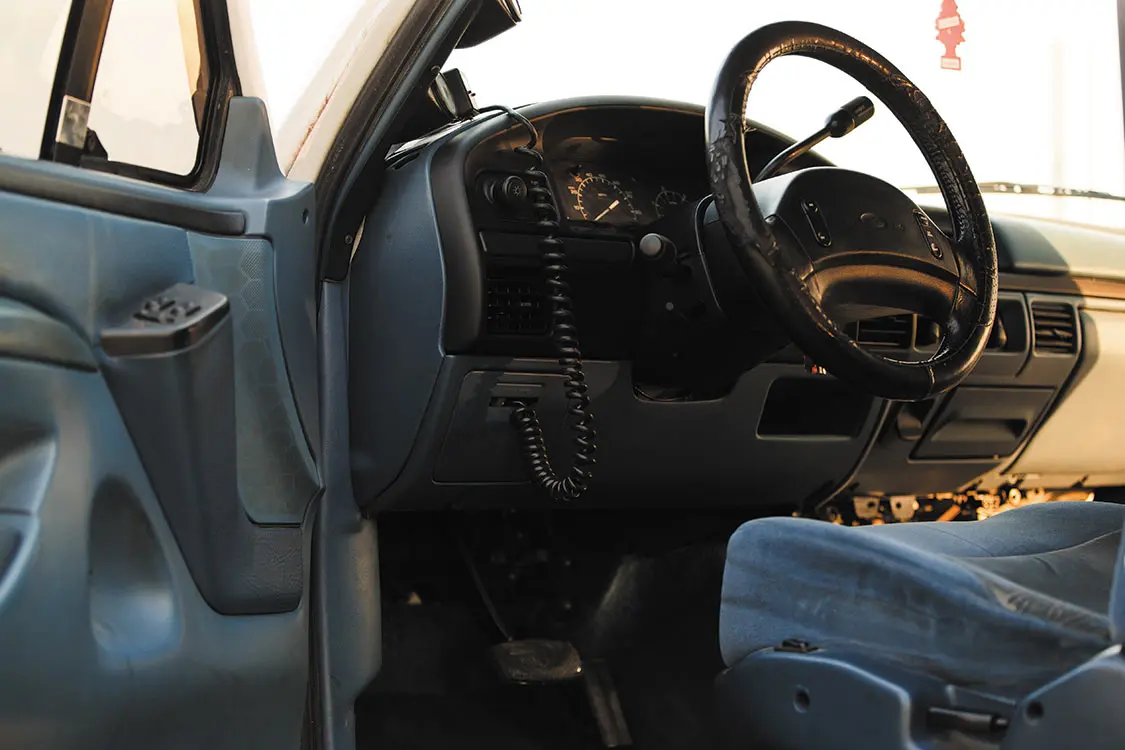
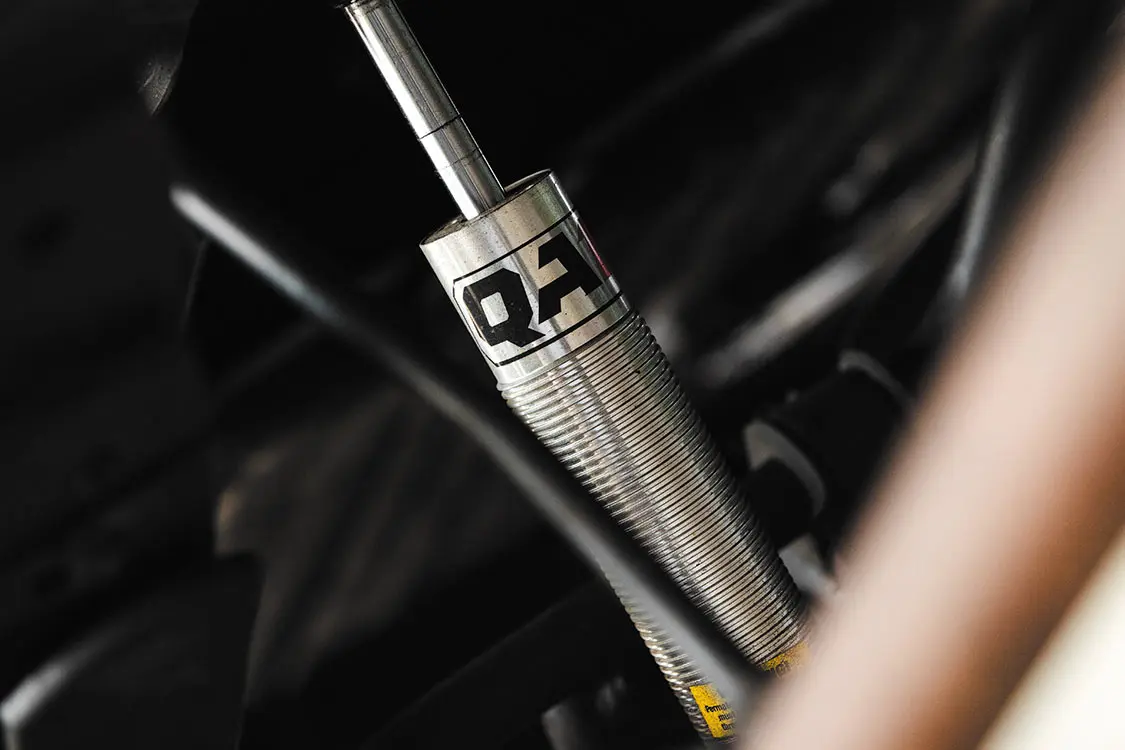
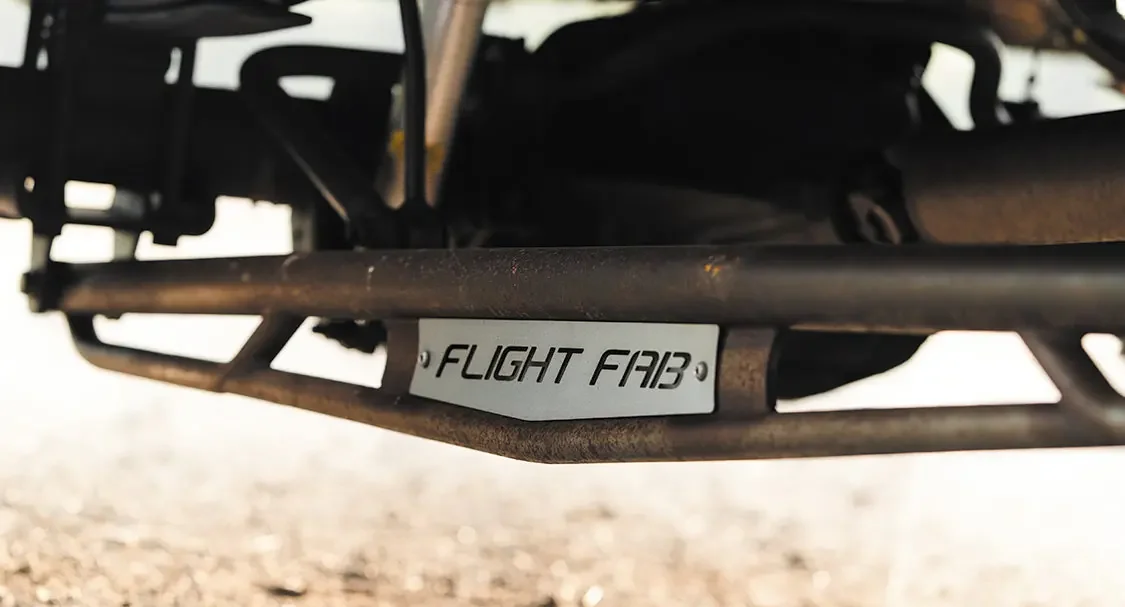
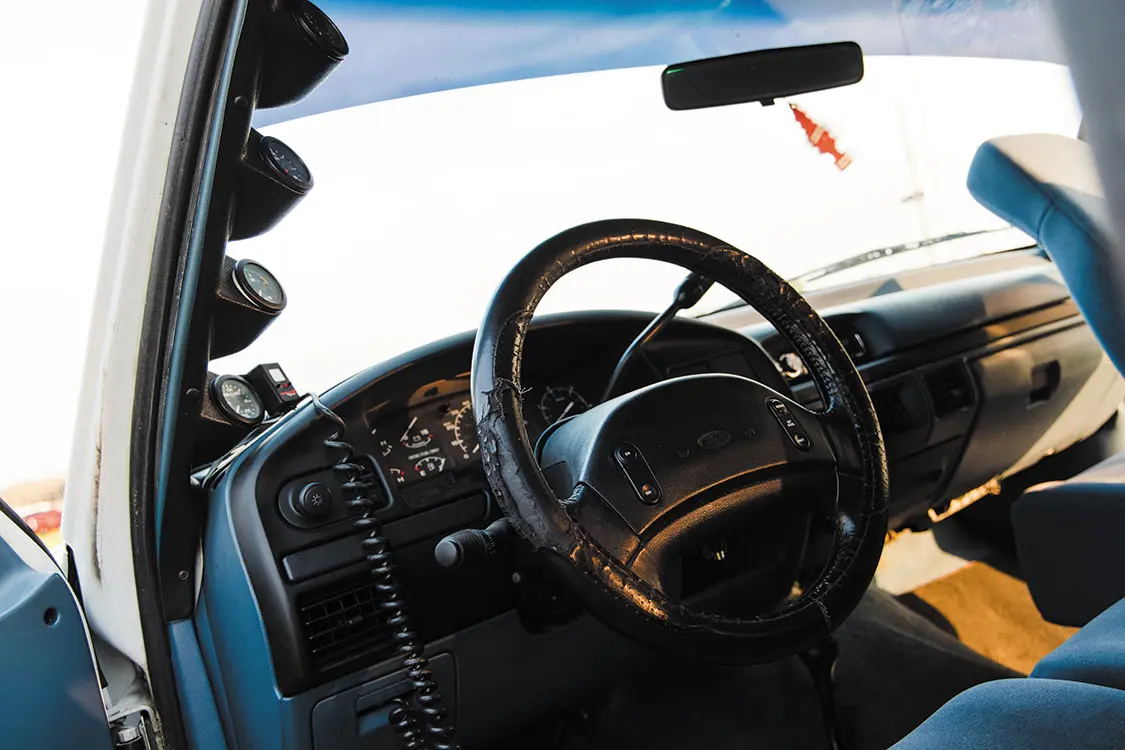
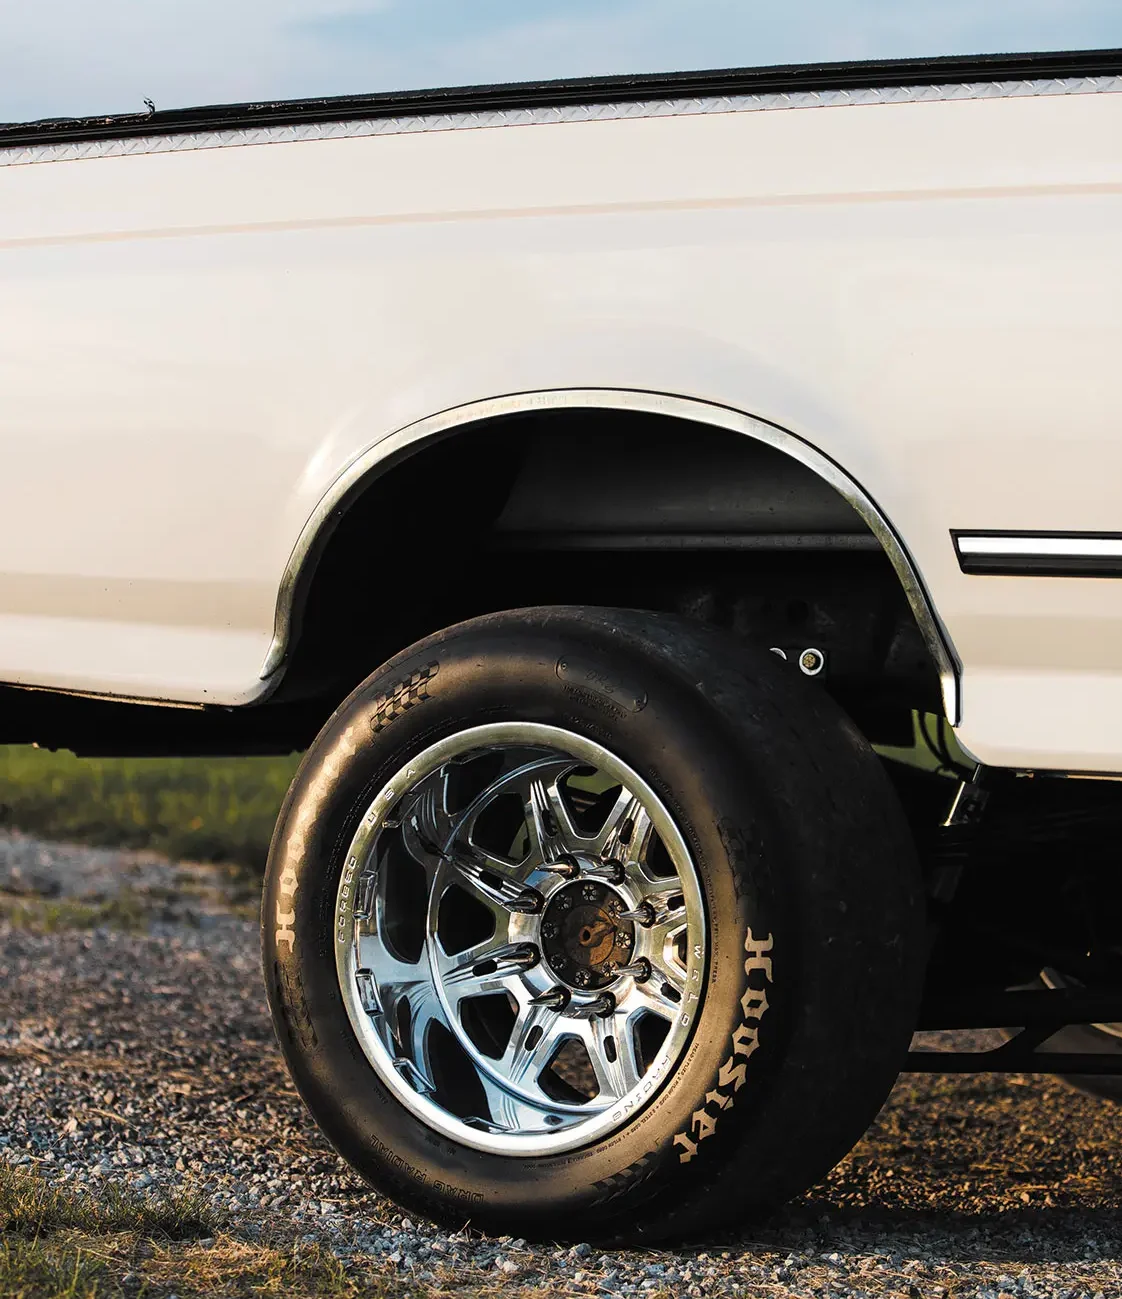
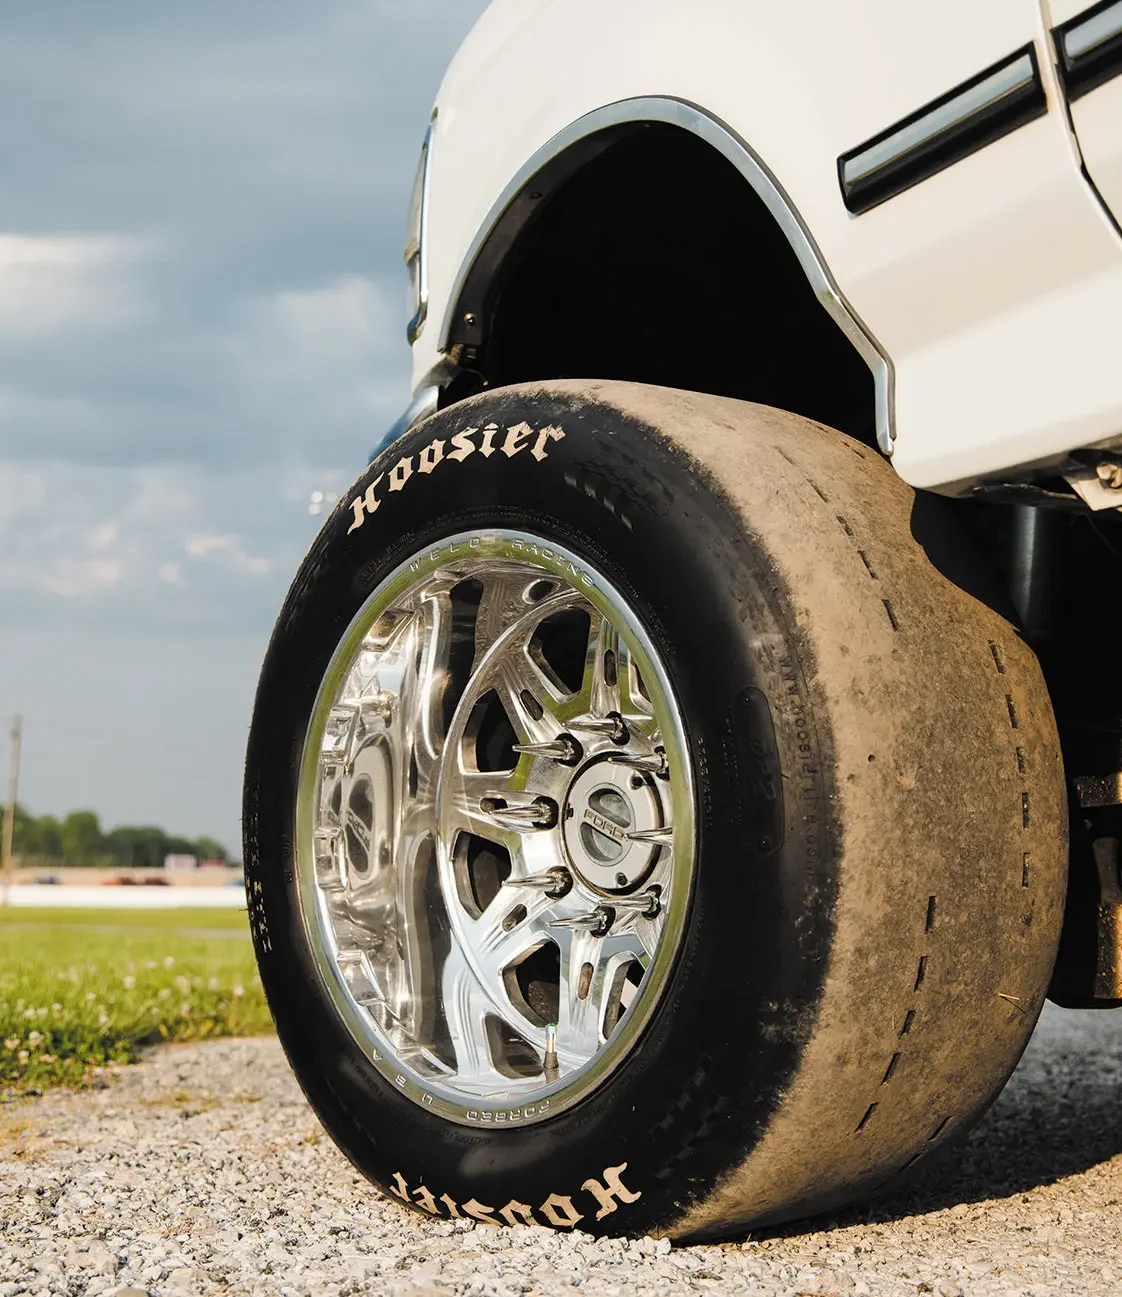
When you first see David Keyser’s white 1997 Ford F-250, it looks exactly like how you may have imagined it if someone were to describe it to you—a white 1997 Ford 250. Of course, the truck has been given a few custom visual treatments, and the wheels, tires and suspension work are all glaring changes but for the most part, the body, paint and interior are all still in bone stock condition. These were things that David wasn’t interested in changing up all too much anyway. These OBS F-Series pickups are cool-as-hell to boot and are now officially ‘classics’, so leaving them in largely as-is condition will fetch zero complaints from us. What David was hoping to improve upon, however, was his truck’s power output. He was all consumed by the thought of beefing this thing up way past factory specs.
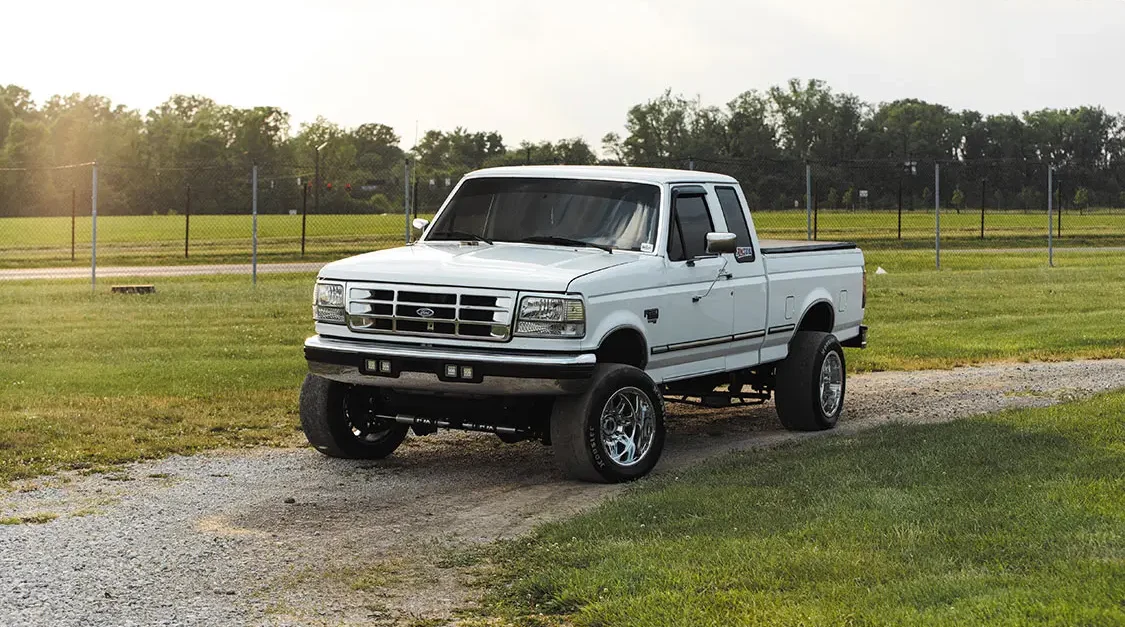

“I originally picked the truck up from the original owner in Florida in November of 2012,” David tells us. “It was a completely stock 2WD truck with 126k miles, and my plans for it weren’t all that grand. That all changed though after my dad took me to my first Rudy’s diesel event at Piedmont Dragway in Julian, North Carolina. I was instantly hooked on diesel performance from that day forward.”
With a newfound goal in mind, David started working harder and scraping up extra funds to spend on performance parts. Since he was a much younger man at this point (he is currently only in his mid 20s now), David’s budget for big purchases was limited. That’s not to say that he didn’t drop some decent money into the bucket back in the early days with his F-250.
“I started off with a TS Chip, a S&B intake and a 4-inch MBRP exhaust, and I drove the truck around with only these mods for about 70k miles going back and forth to college and work,” he admits. “In 2018, I finally threw in some Rosewood injectors, a T500 HPOP, a mild build transmission that I assembled myself, along with some custom tunes on a PHP Hydra from JeliBuilt Performance.”
While all these additions sound like they would be enough to keep David satisfied, all the power gains did leave him wanting even more.

David owns up to and is fine with his insatiable appetite for heightened performance. “I’ve always been the person who wants to perfect everything, which normally creates a lot more work for myself. Overall, I was hoping to build the ultimate 7.3L F-250 that I could drive daily and drag whenever I wanted to.”
Unfortunately, this led to him jumping on a deal of a lifetime (or so he thought) when a unique opportunity presented itself.
“I picked up a bunch of used parts from a good buddy Joey who had an injector tip break off, which messed up his motor. Well, I bought some parts from that engine and installed a set of 275/200 Full Force Diesel injectors, Irate Diesel T4 S369 turbo kit and fuel system, 6.0 intercooler and a Colt Cams stage 2 cam. It was a lot of good parts that I really wanted, but 8 minutes into the first drive, after installing everything, a connecting rod bent. That ended up costing way more time and money than I had planned on spending. I did reach the point of deciding if my goal still made sense, and I was so unsure of which direction take next.”
After some brief deliberation, David knew that throttling back his truck’s engine output just wasn’t an option. Sure, gaining some reliability would be nice, but in the long run, giving up on going big would officially go down as being a major fail in his eyes. Instead of going backwards, David leaned into rebuilding his engine to handle the level of performance he really wanted.

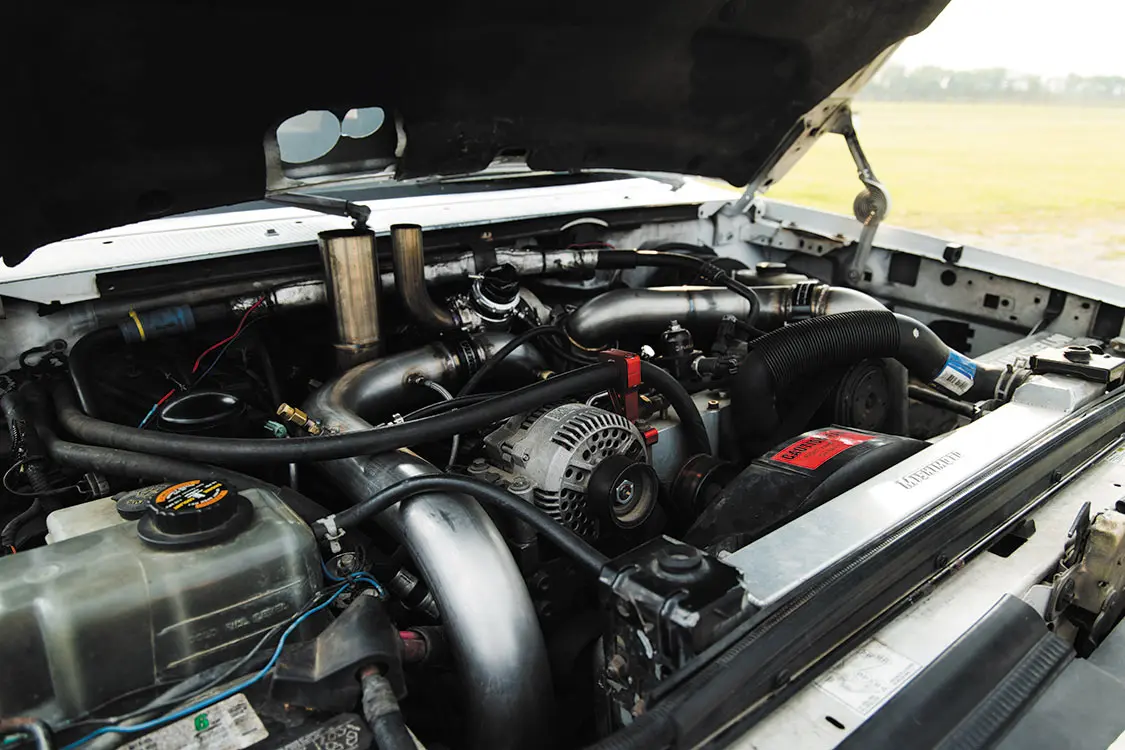
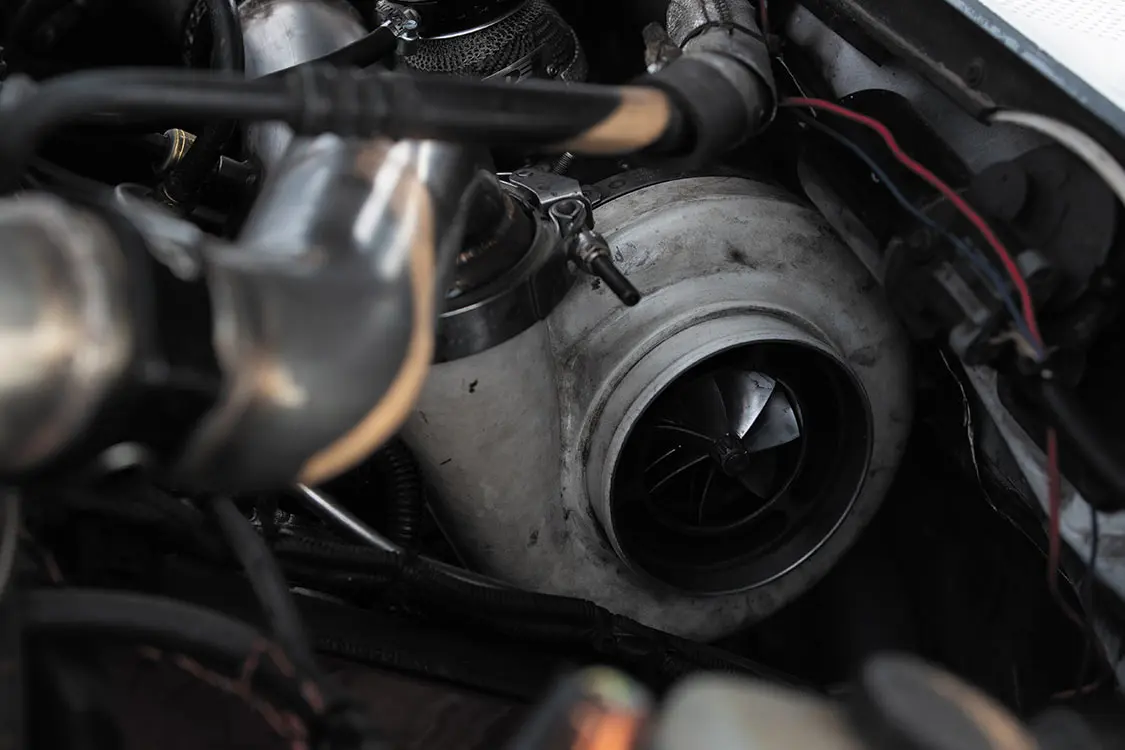
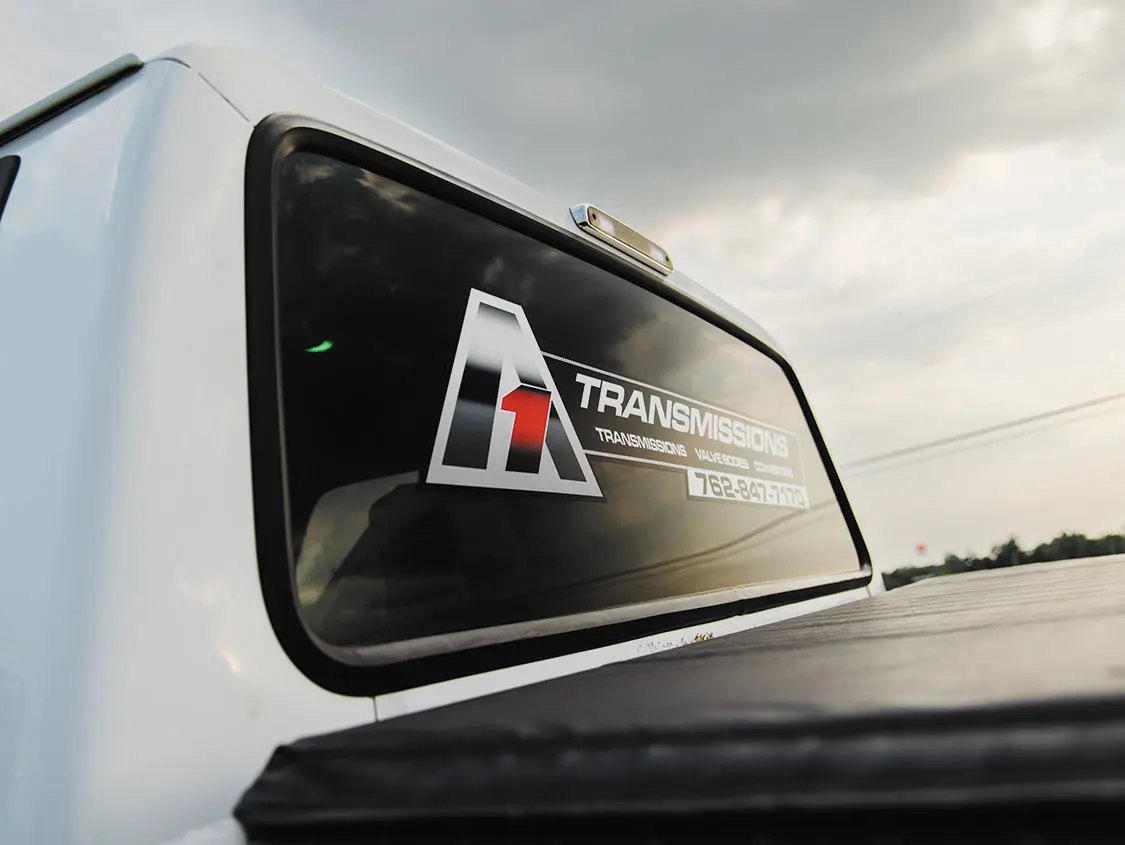
“I’ve been through lots of setups since I first built the engine in 2019, but my current configuration has been great so far. I have an awesome lineup of so many great products like the 455/400 from Unlimited Diesel, the Forced Inductions turbocharger, some killer machine work from Crutchfield Machine and so much more but it’s the custom E4od from A1 Transmission that is one of my favorite pieces on the truck.”
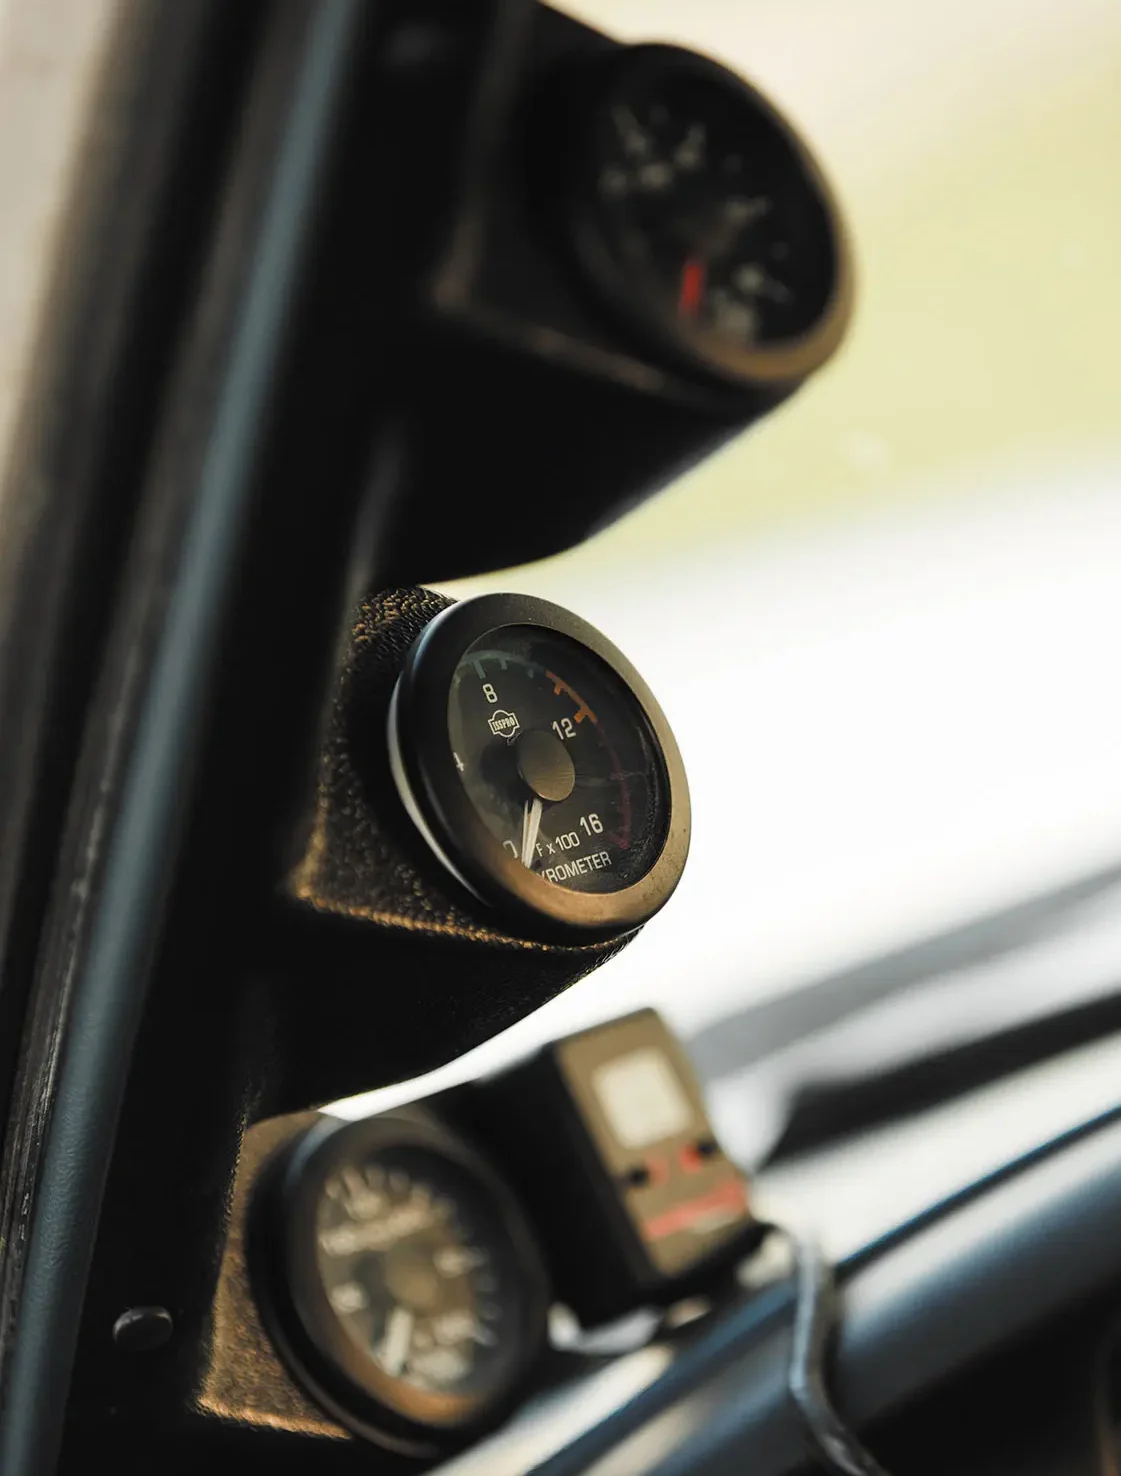
While the best place to get a glimpse of the performance parts that are currently featured on David’s rig, it’s easier to consult the spec box as that was a wildly abbreviated rundown of the truck’s arsenal, there was still one more item on his list he wanted to check off the list once the work under the hood was wrapped up.
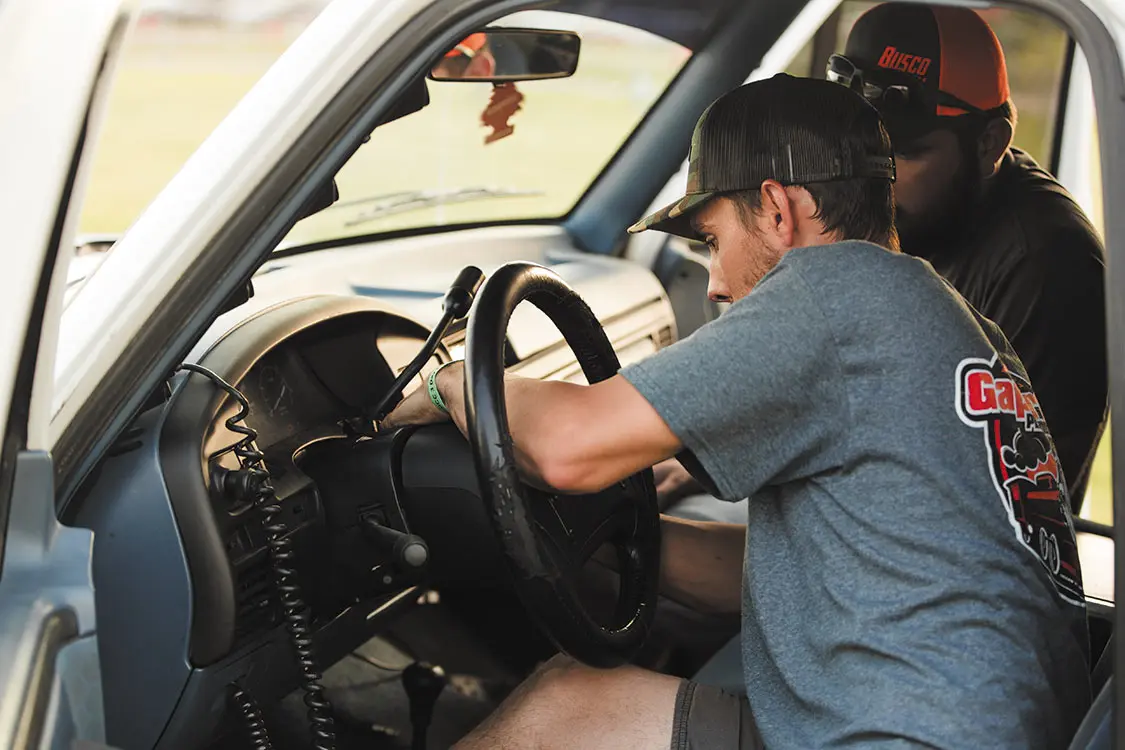
“The truck was originally a 2WD, and since I had some extra time in 2020 during the pandemic lockdown, I swapped it over to 4×4 using 2006 F350 SRW axles and a Sky’s Off-Road Design ‘05+ SD axle swap bracket kit to make it happen”, David says proudly. While he was daily driving this truck the majority of time since he first purchased it, he picked up a new service truck earlier this year, so the 7.3 is not currently being driven on an everyday basis. “Some of my best accomplishments with the truck include my personal best of 7.11 at 99.8 with it in the 1/8, and the truck weights 6,405 pounds with myself in it. We have sled pulled it in the past to a 2nd place finish, and have won local hard tire classes and placed several semifinals in 7.70 or ET classes. I do miss driving this truck every single day but I still plan to race it at local events and hopefully dip into the 6’s one day.”
OWNER: David Keyser
HOMETOWN: Roxboro, NC
ENGINE
ASPIRATION/FUEL SYSTEM
PROGRAMMING
EXHAUST
TRANSMISSION
CHASSIS
REAR SUSPENSION
FRONT SUSPENSION
WHEELS
TIRES
BODY
INTERIOR
Billet Aluminum Hood Hinges for 1988-98 Chevy C/K Trucks
Fits 88-98 C/K Chevy/GMC Trucks
92-99 Blazer/Jimmy/Suburban/Tahoe Yukon
●High strength, precision billet aluminum construction
●Utilizes sealed bearings & stainless steel nitrogen gas struts (included) for smooth operation
●Bolt-on application for steel, fiberglass, or carbon fiber hoods (specify when ordering)
●Available in raw machined or bright polished finish as well as a variety of Fusioncoat and anodized colors
●Sold in pairs
●Made in the USA