Street rod building is a never-ending process. With new products entering the market almost daily, individual and professional rod builders are constantly striving for the hottest look in the hobby. The Grand National Roadster show, with its prestigious AMBR award, is a perfect example of the lengths owners will go to be the best. While the majority of us are not AMBR competitors, we still like to maintain the most contemporary look that we can.
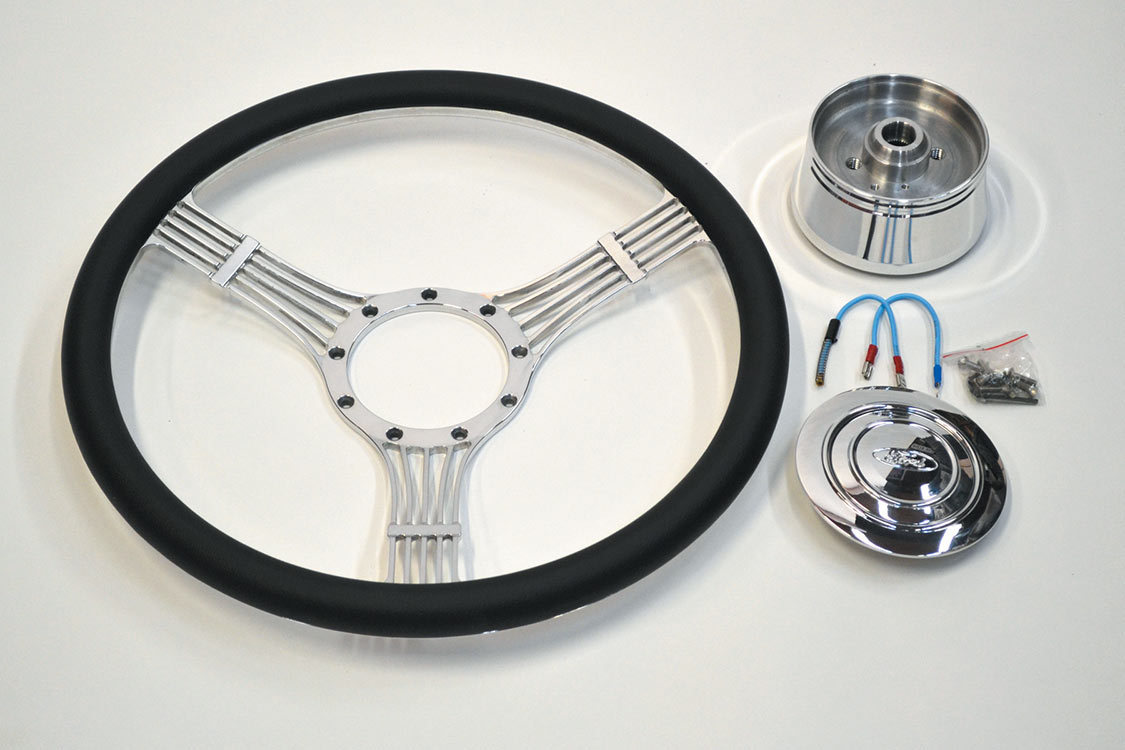
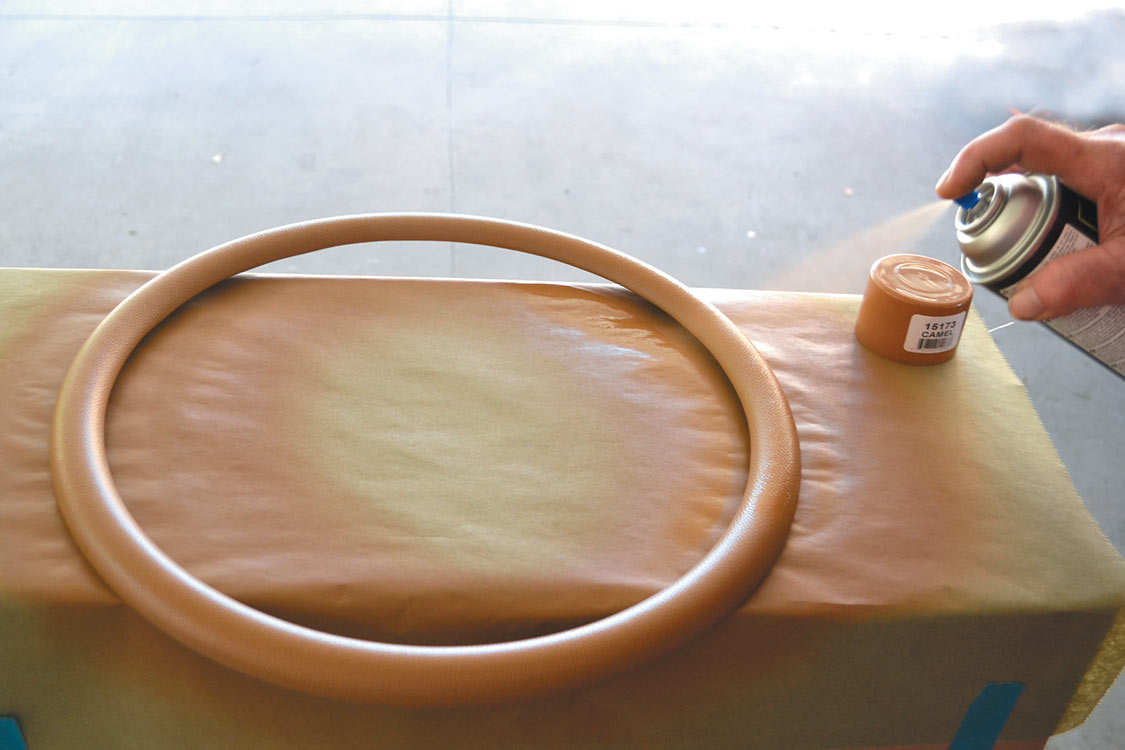
1.The kit contains everything you need for the installation. This new installation hub fits the vehicle’s GM ididit tilt column, but will fit almost any GM column you’re using. Only a ground wire and column wire are required. This horn button features the Ford oval logo.2.The black leather-covered top of the split ring wheel can simply be unscrewed from the lower handgrip portion of the wheel and dyed to the color of your choice.3.The black leather was dyed with aerosol SEM Color Coat to approximately match the interior. The dye dries in minutes and is very durable.
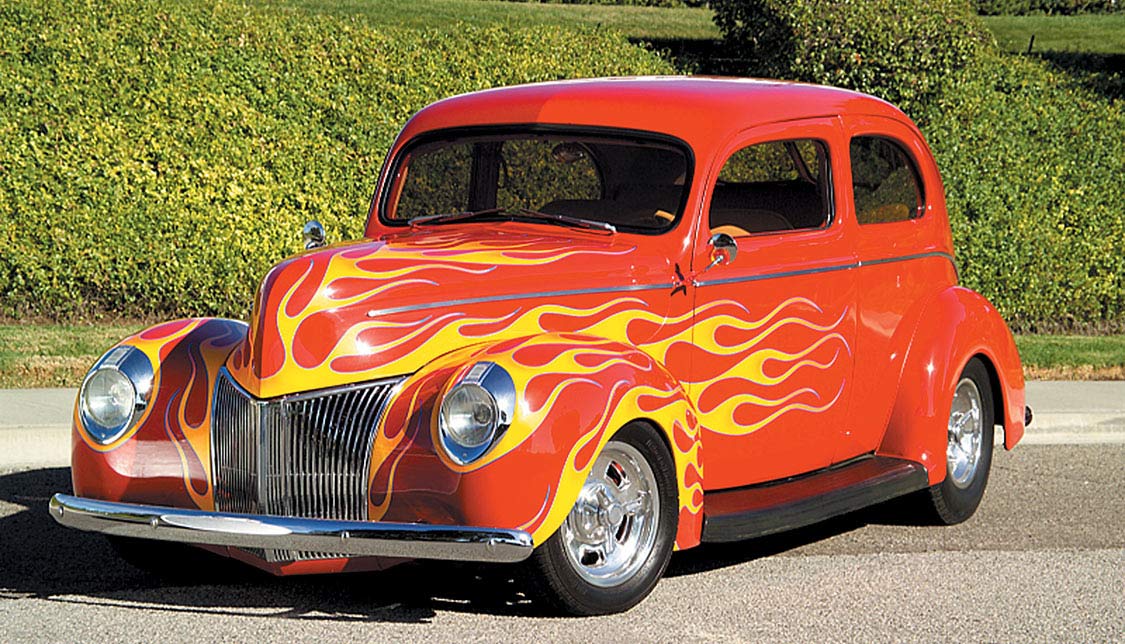
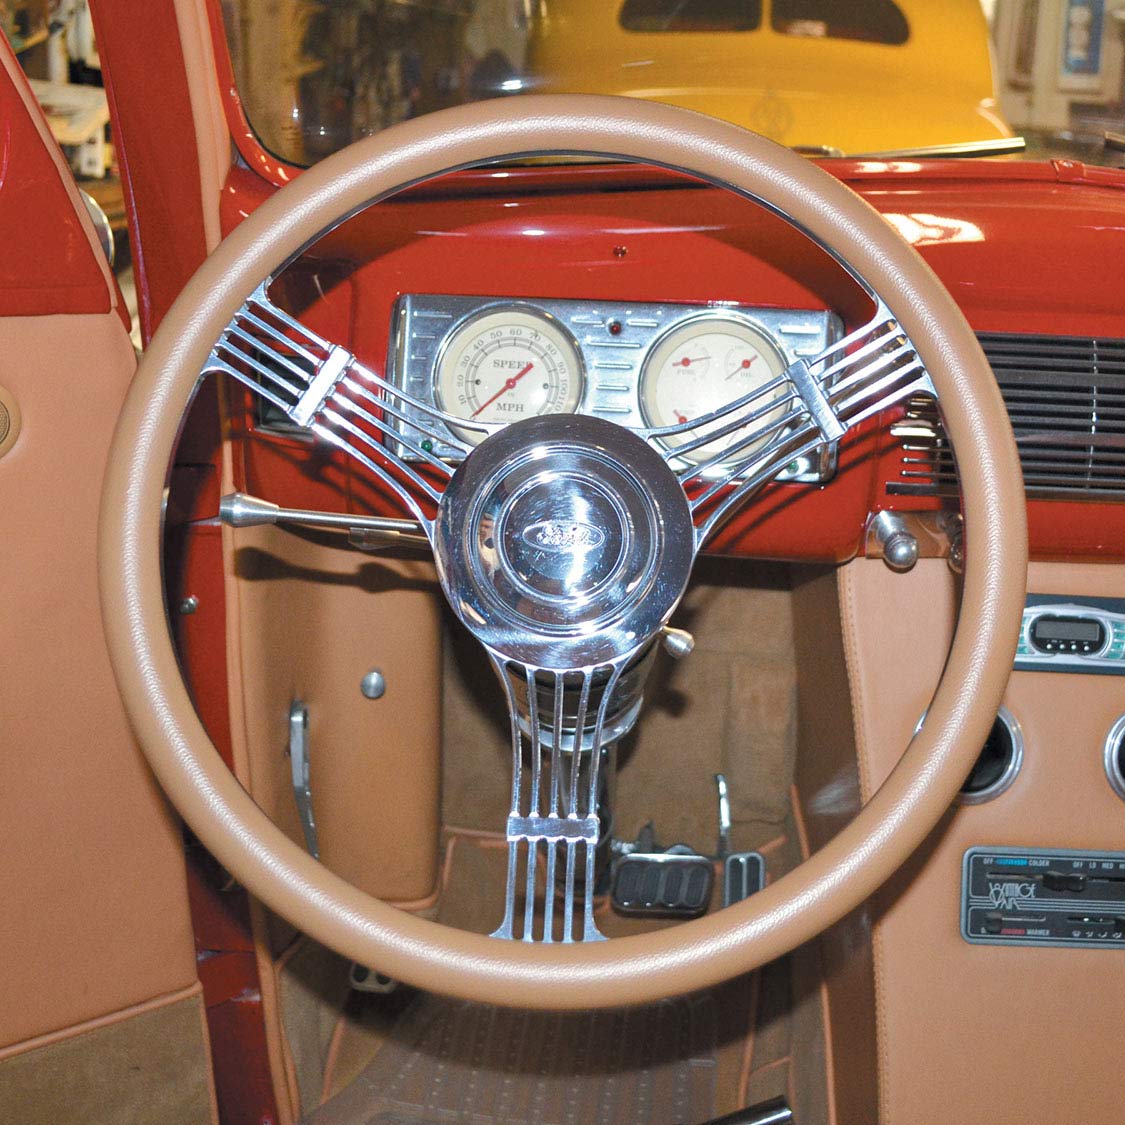
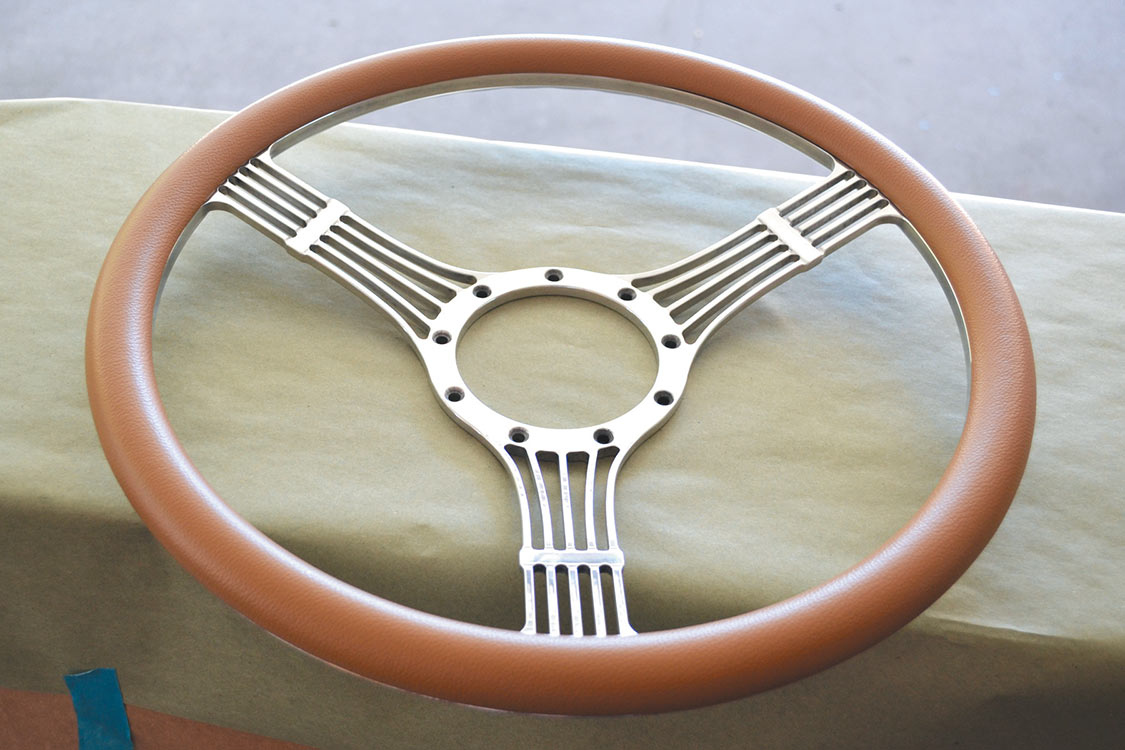
This beautiful early Hemi-powered and flamed ’40 sedan underwent an interior change, receiving a new GT Performance Products banjo-style steering wheel from the GT RETRO series with a completely redesigned mounting hub and horn button assembly. The wheel features two-piece construction, allowing the black leather top of the handgrip to be easily removed and dyed to match, and 6061 aluminum construction with split grip leather wrapped rim. It has a 15.5-inch diameter and a 1-inch dish.
The original factory banjo-style steering wheels were found on high-end cars of the ’30s and ’40s, and that classic style fits today’s street rod scene perfectly. The installation is straightforward and will usually require only a steering wheel puller and basic hand tools. The horn mechanism is unlike any on the market today, and eliminates the possibility of the horn button popping off by itself in the middle of the night. The horn button seals tightly with a pressure-fit O-ring. It’s very simple and very cool.
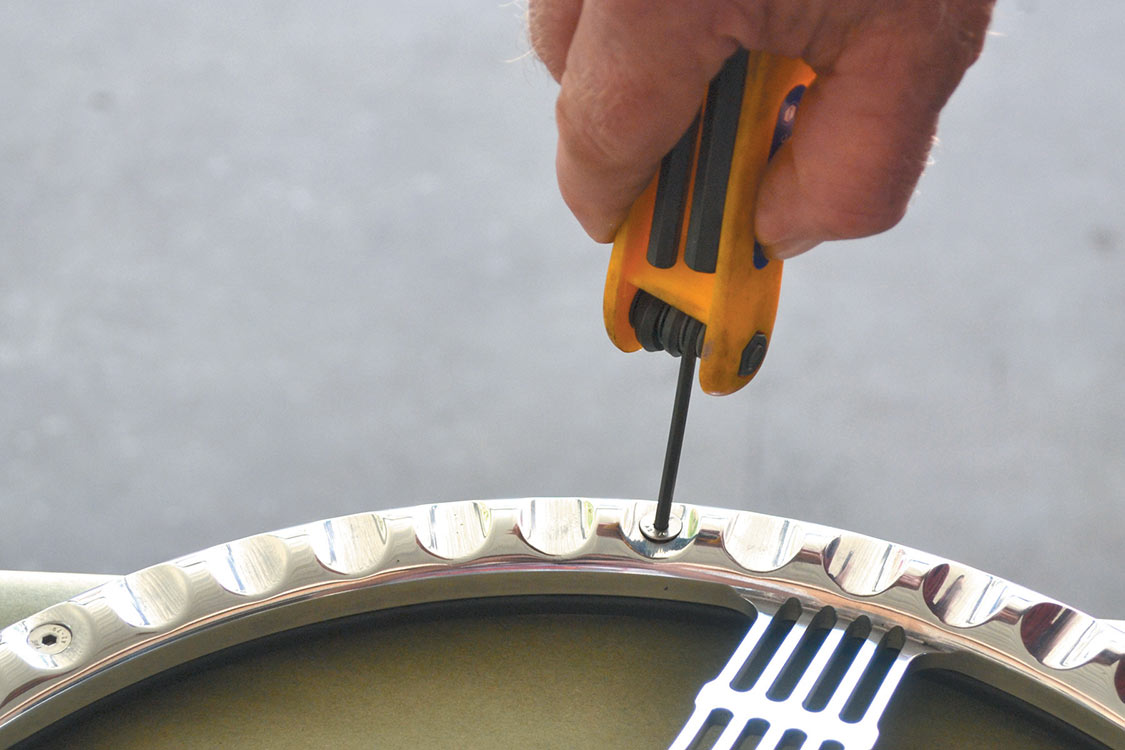
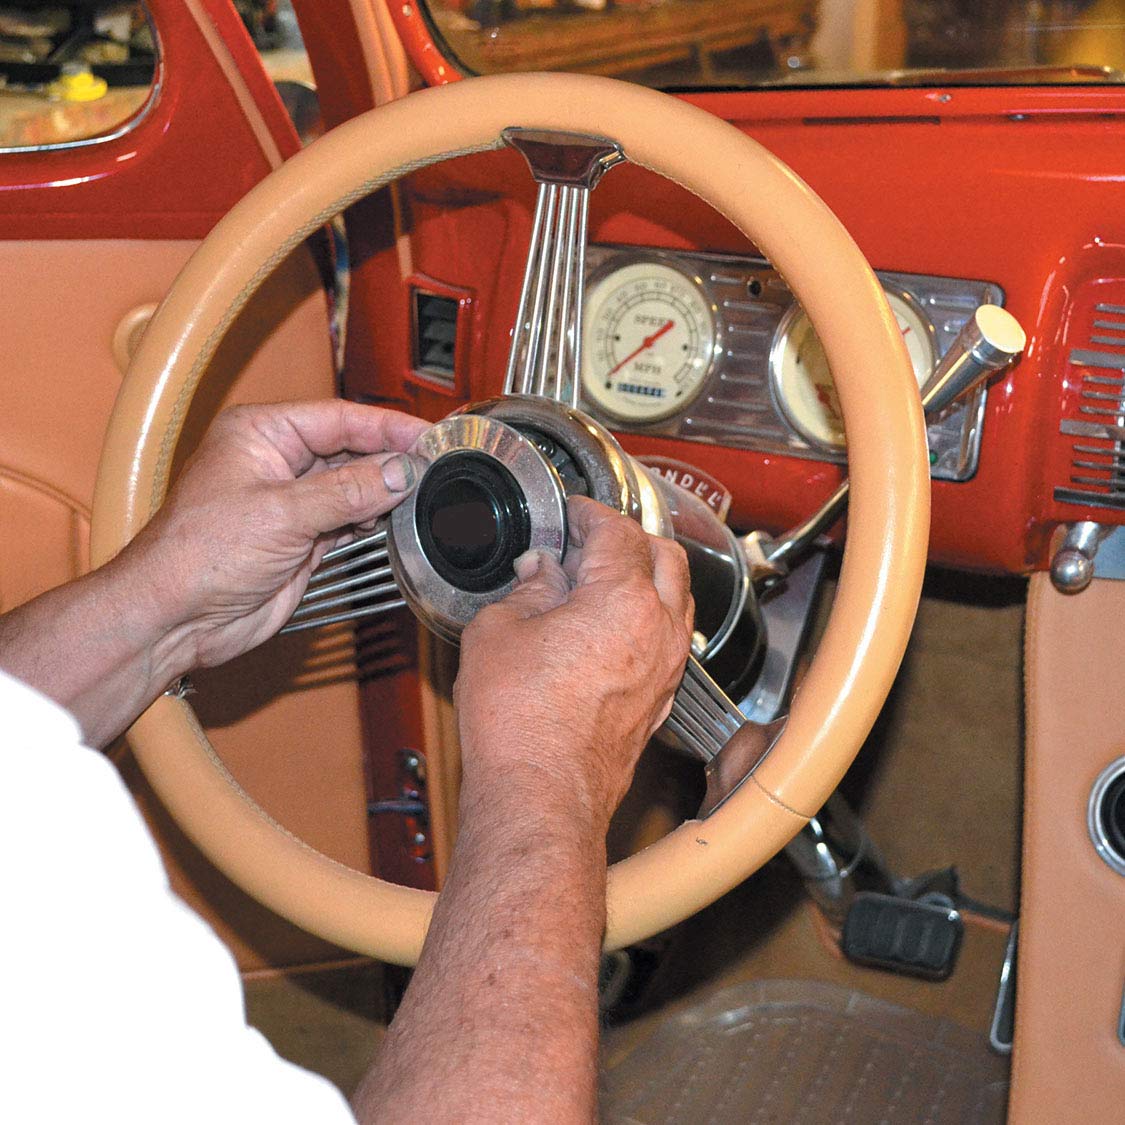
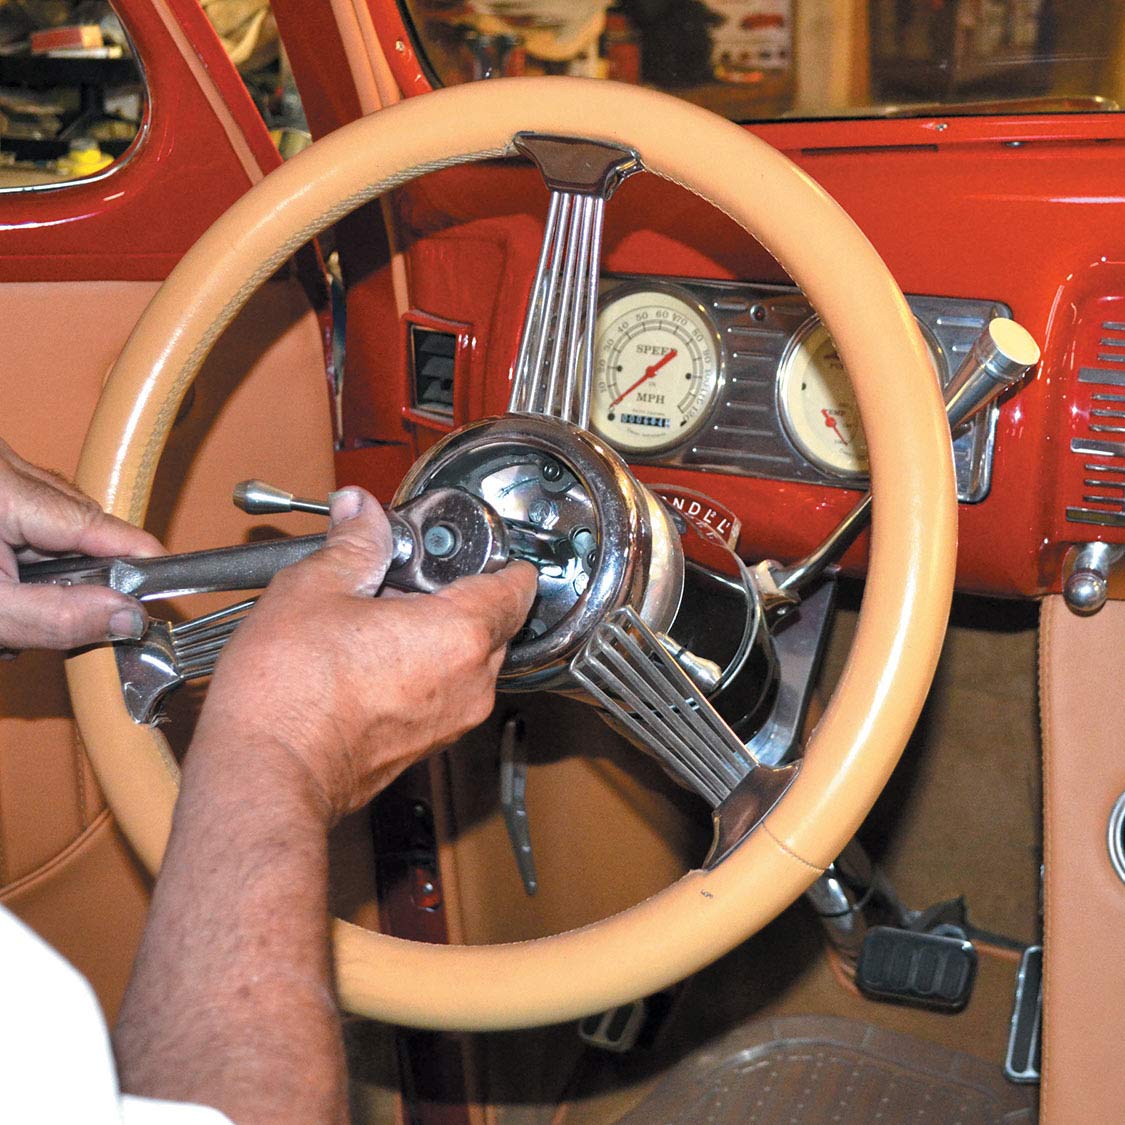
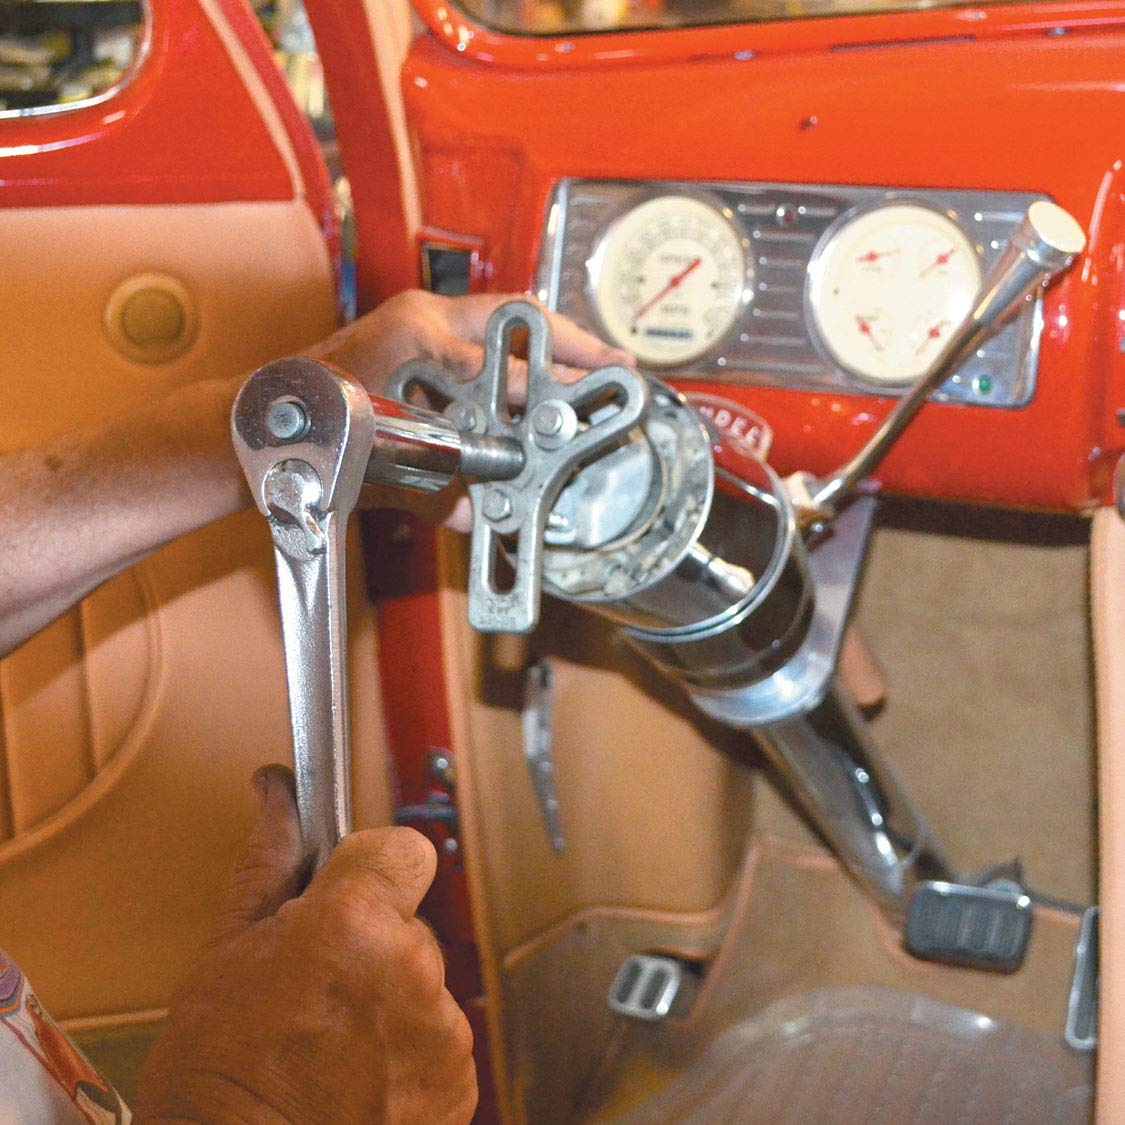
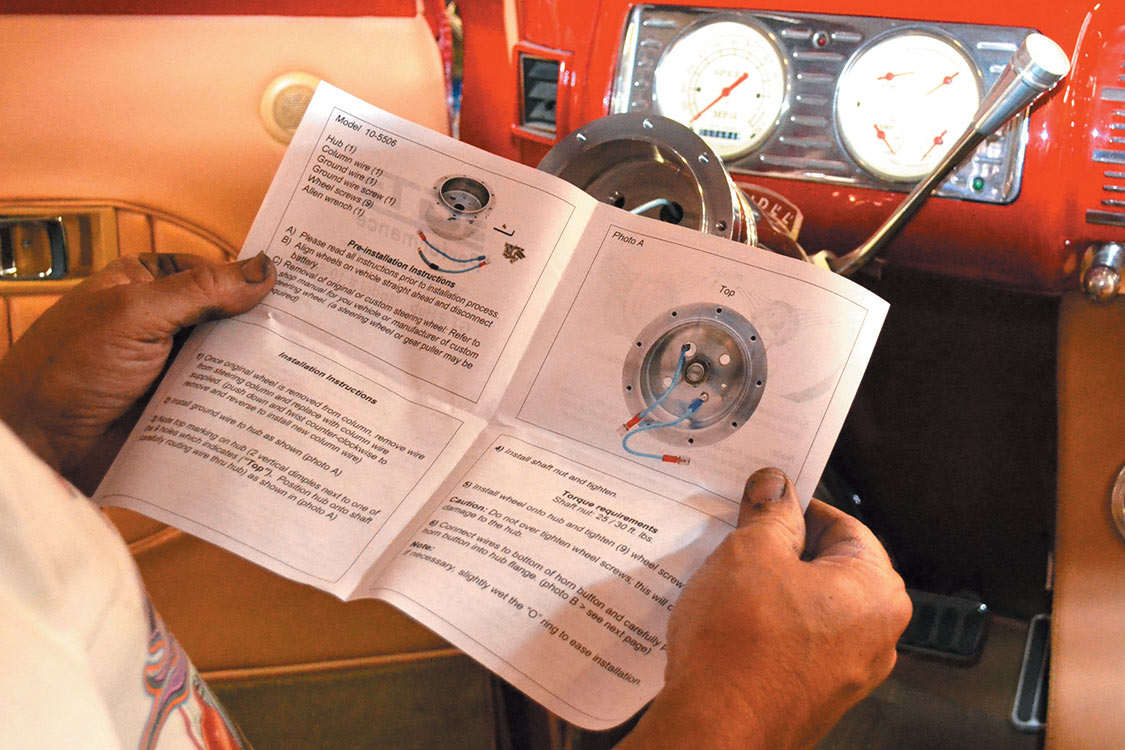
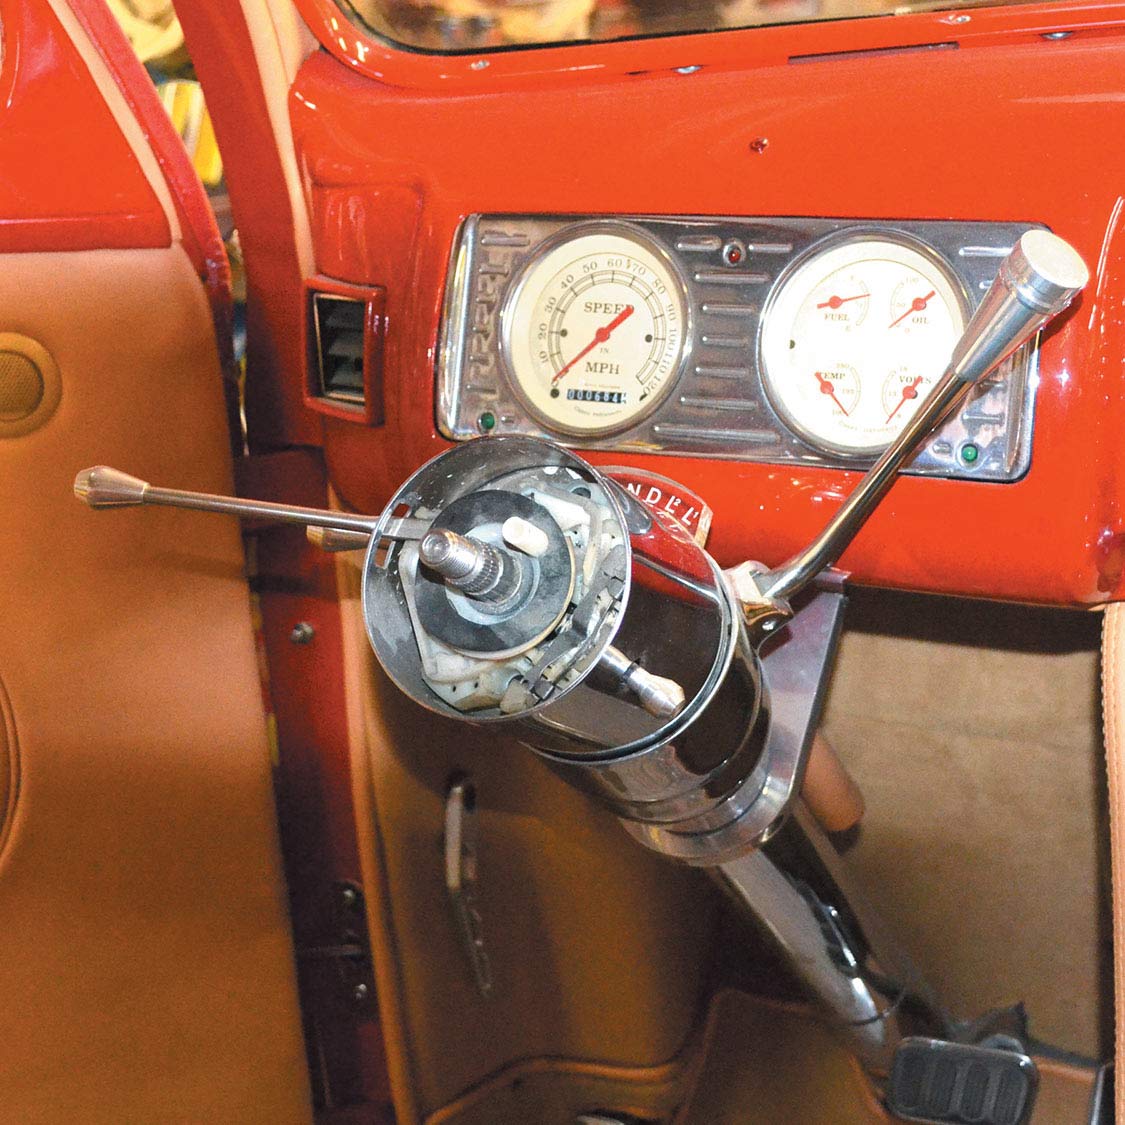
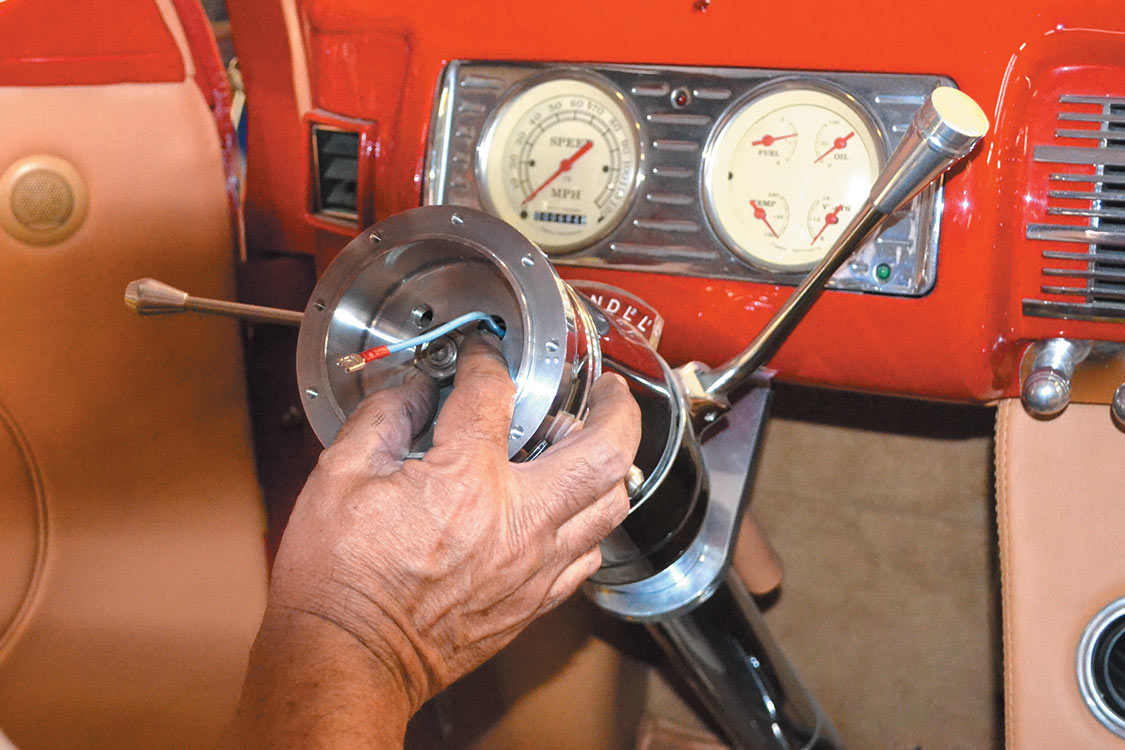
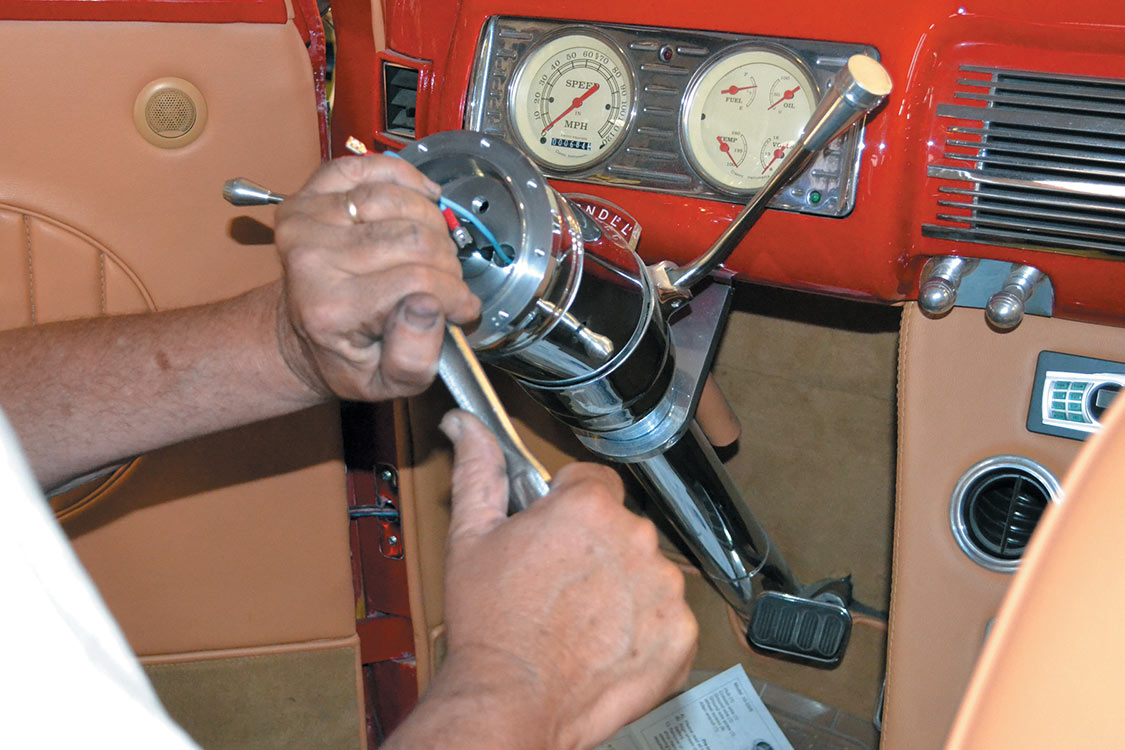
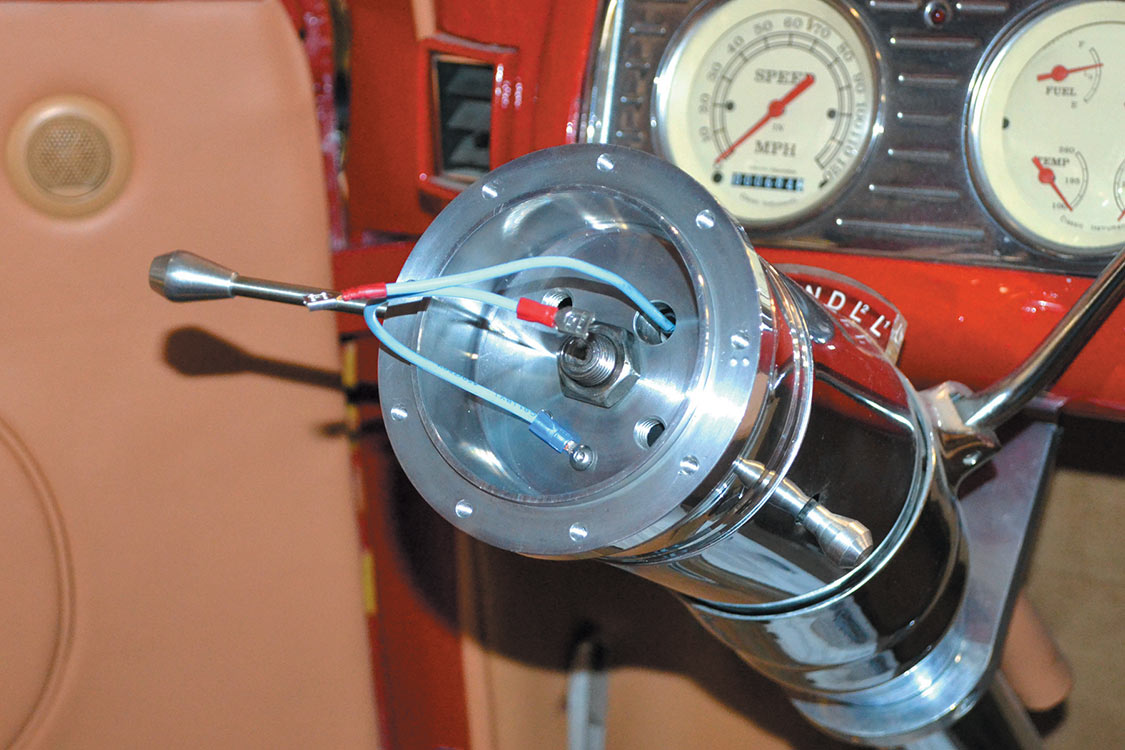
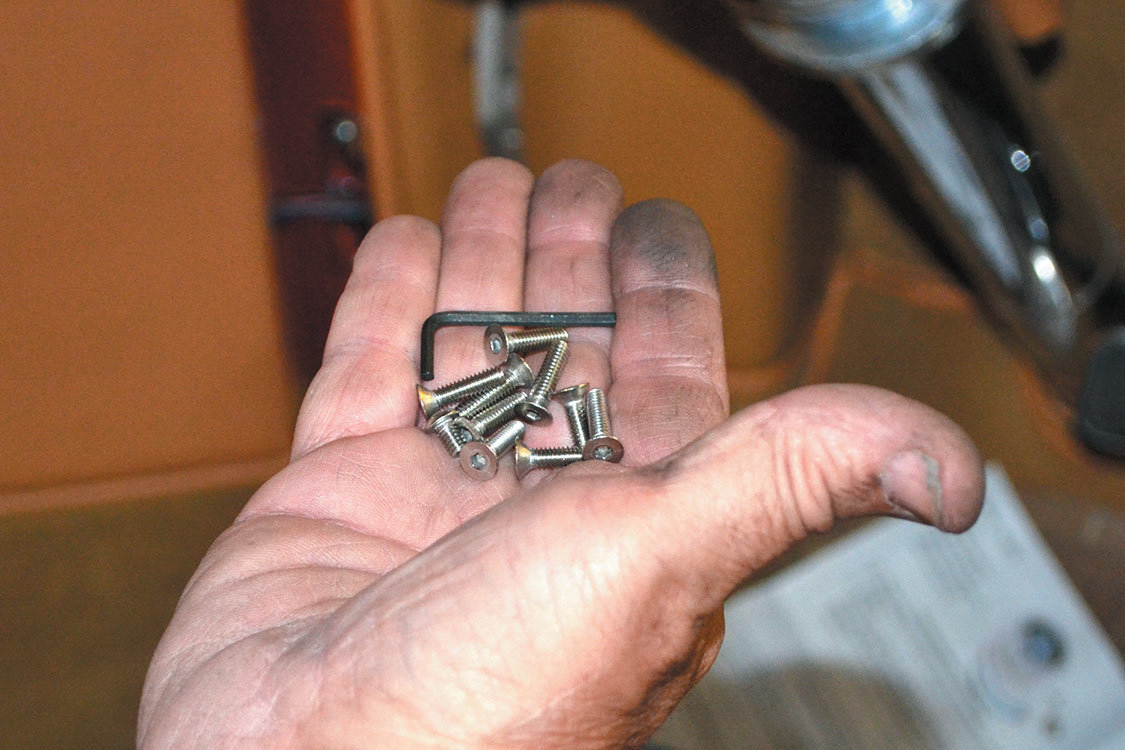
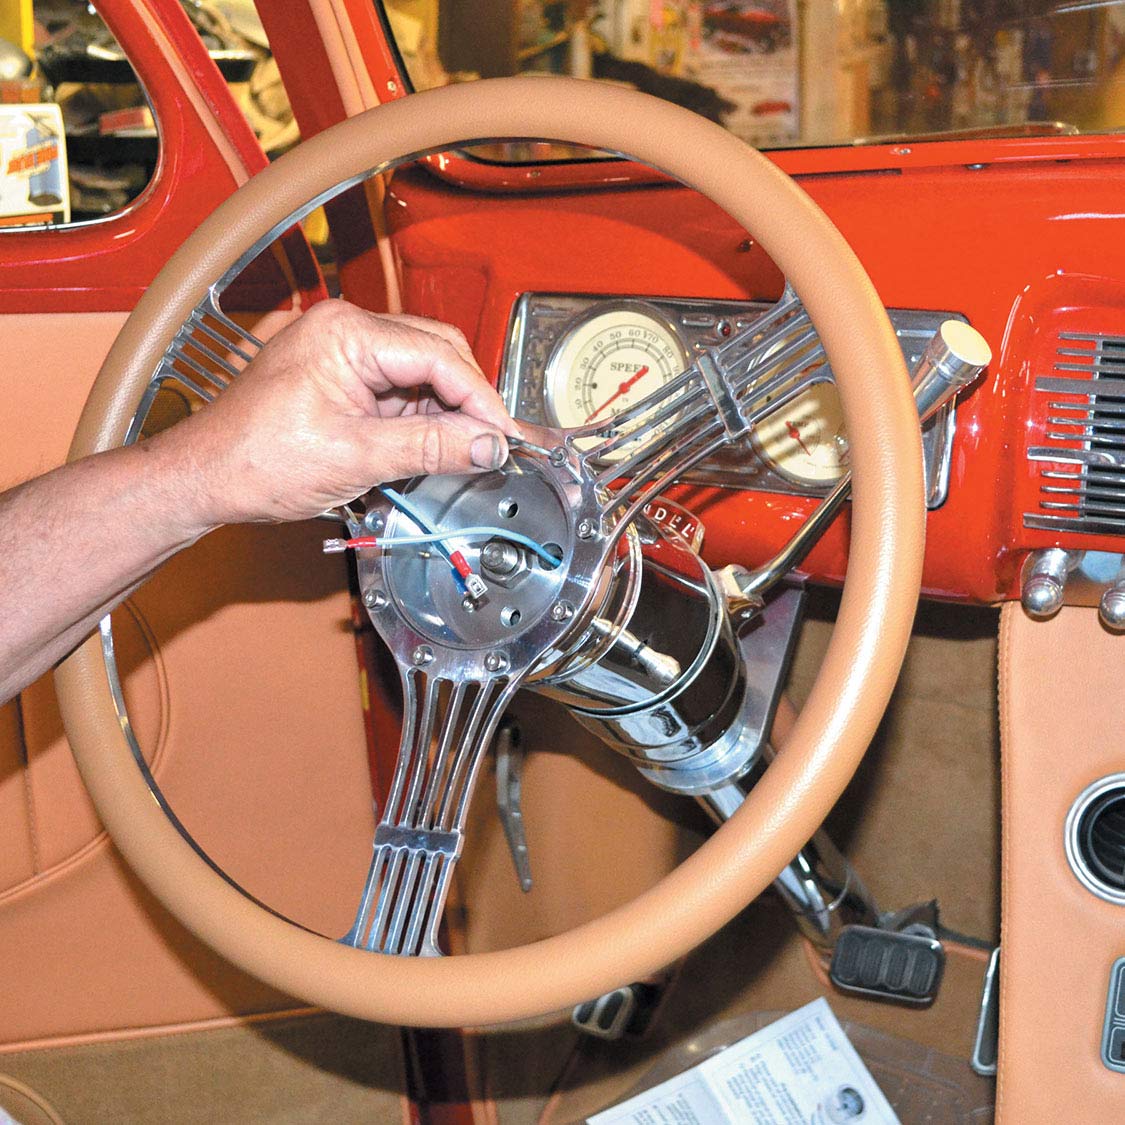
4.After reattaching the top to the lower hand grip, the wheel is ready for installation. If you’re using it in black, it’s ready right out of the box. Note the updated difference in spoke design to the older style that is being removed.5.Begin by disconnecting the battery and removing the old horn button. Keep in mind that if the wheel you’re removing is still in good shape it can be sold, so work slowly so that you don’t damage the material or plating.6.After removing the original wheel’s horn button, the 7⁄8-inch retaining nut is taken off. Prior to removing the old wheel make sure your front wheels are straight and the steering wheel doesn’t move while removing the nut. This old wheel is material wrapped completely around the handgrip.7.We used a steering wheel puller to remove the old wheel-mounting hub from the steering shaft. It’s pressure fit and usually won’t come free by just pulling on the wheel. A few cranks and off it comes.8. Complete step-by-step illustrated installation instructions are supplied with the installation hub. Read them carefully before starting the installation.9.With all of the old parts removed, the new GT Performance Products hub (P/N 10-5506) is ready to install on this GM ididit chrome column. The new hub is designed to conform to the shape of the column, making a smoother transition from column to wheel.10. Install the column wire prior to installing the hub. The column wire can be pushed through the new hub before it goes on the steering column, and then replace the retaining nut.11. The 7⁄8-inch shaft nut can now be tightened to 25/30 ft-lbs. If you don’t have a torque wrench, that’s just plain tight.12. The column is now ready for the wheel installation. Notice the ground wire is attached to the hub and the column wire comes through the hole in the hub.13.Position the wheel onto the hub using the supplied Allen head bolts and wrench.14.Install all of the Allen head bolts before tightening them down. Work your way around the wheel, evenly tightening the bolts, followed by one final tightening on each.15. Connect the column wire and the ground wire, per the instructions, to the horn button. Notice the rubber O-ring in the button; this will seal the system, preventing dirt and moisture from entering the column.16.The Ford logo horn button (P/N 11-1241) is now firmly pressed into the collar and the battery is reconnected. Now you can play your new banjo–Honk!17. Notice the difference in the mounting hub design. The previous version has machined ribs and is considerably smaller than the new GT Performance Products hub. The new hub also flows much more smoothly into the ididit column design.18.This new banjo-style wheel is a nice update to an already beautiful interior. Not a bad improvement for about a 30-minute project.
Note:The GT Performance Products P/N is 21-4245. Horn buttons and hub assemblies are ordered separately. Mounting hub coverage includes most models of GM cars from 1969-93, Chevrolet/GMC and SUV trucks from 1974-94, Jeep 1976-95 and all GM ididit steering columns. They’re not designed for use on airbag-equipped vehicles.
For more info, or to preview the complete collection of new steering wheels, horn buttons and installation kits, visit Gtperformanceproducts.com or call 818.847.9611.


 Please wait...