Chris Hamilton . November 21, 2023 . OBS Builders Guide
Share Link
Save ArticleLogin to save it
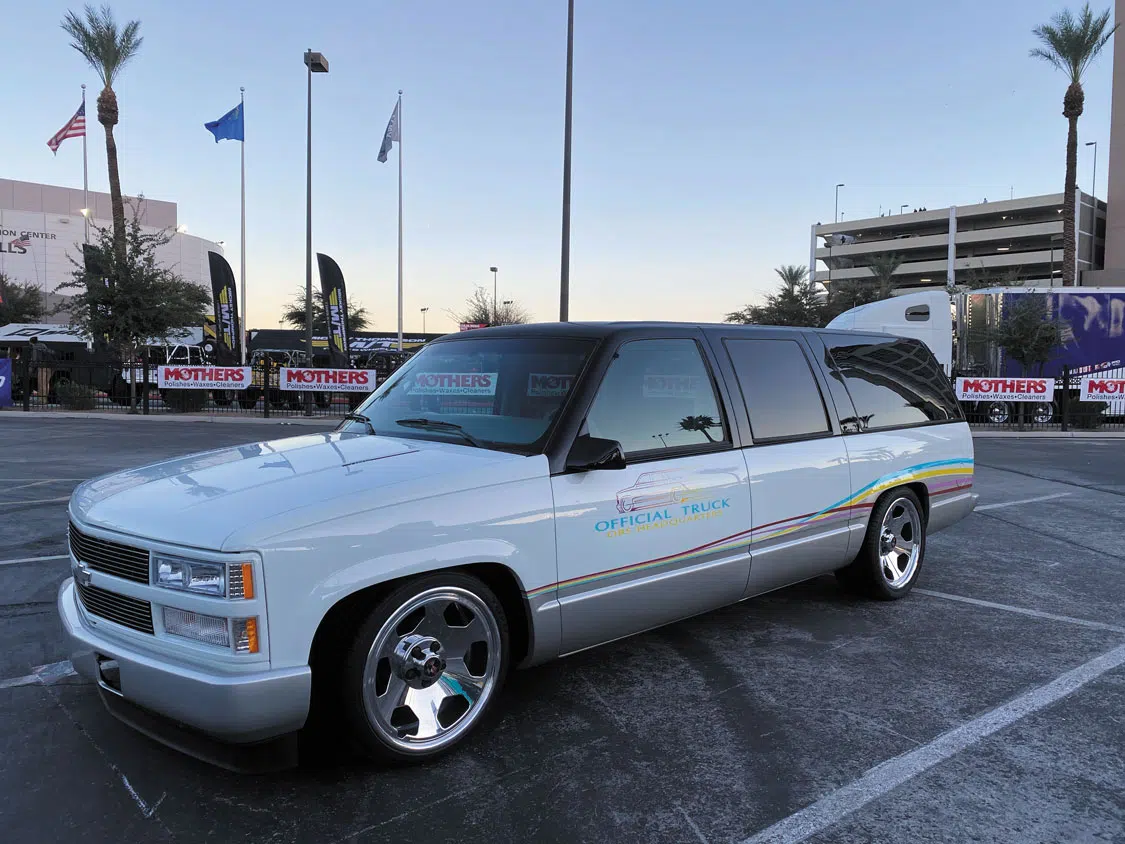
Brik Yrd, a ’99 Suburban, Gets a Facelift
First impressions are everything, especially in the truck and custom paint world. Nothing stands out more on a truck than a clean paintjob with custom graphics. The first thing you notice on any truck is how it looks—paint, stance, and wheels and tires all play a key role in your truck’s appearance.
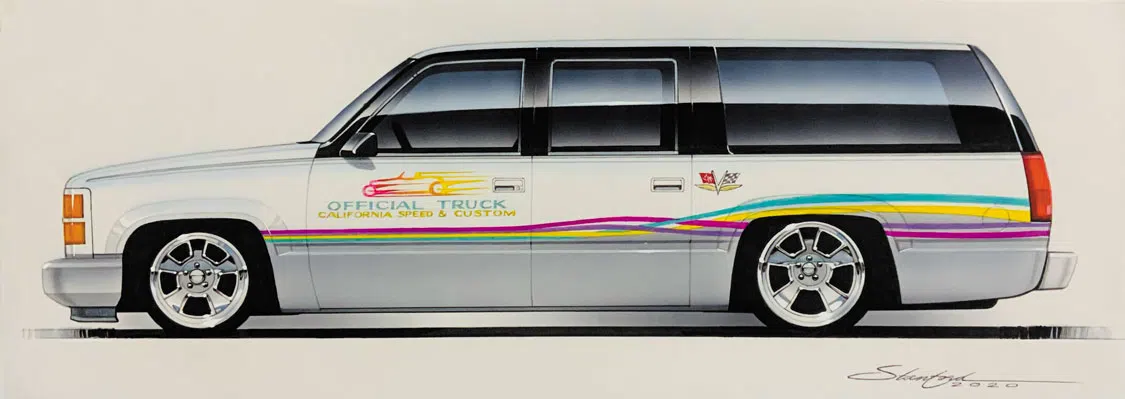
For those of you just joining in, we started this project in the OBS Builders Guide, Vol. 3. A “what if” phone call to legendary automotive designer Steve Stanford resulted in Brik Yrd, a 1999 Suburban with a few twists and turns on the theme of the original 1993 Indy 500 pace truck. As always, Steve nailed it perfectly, and we were off to the races.
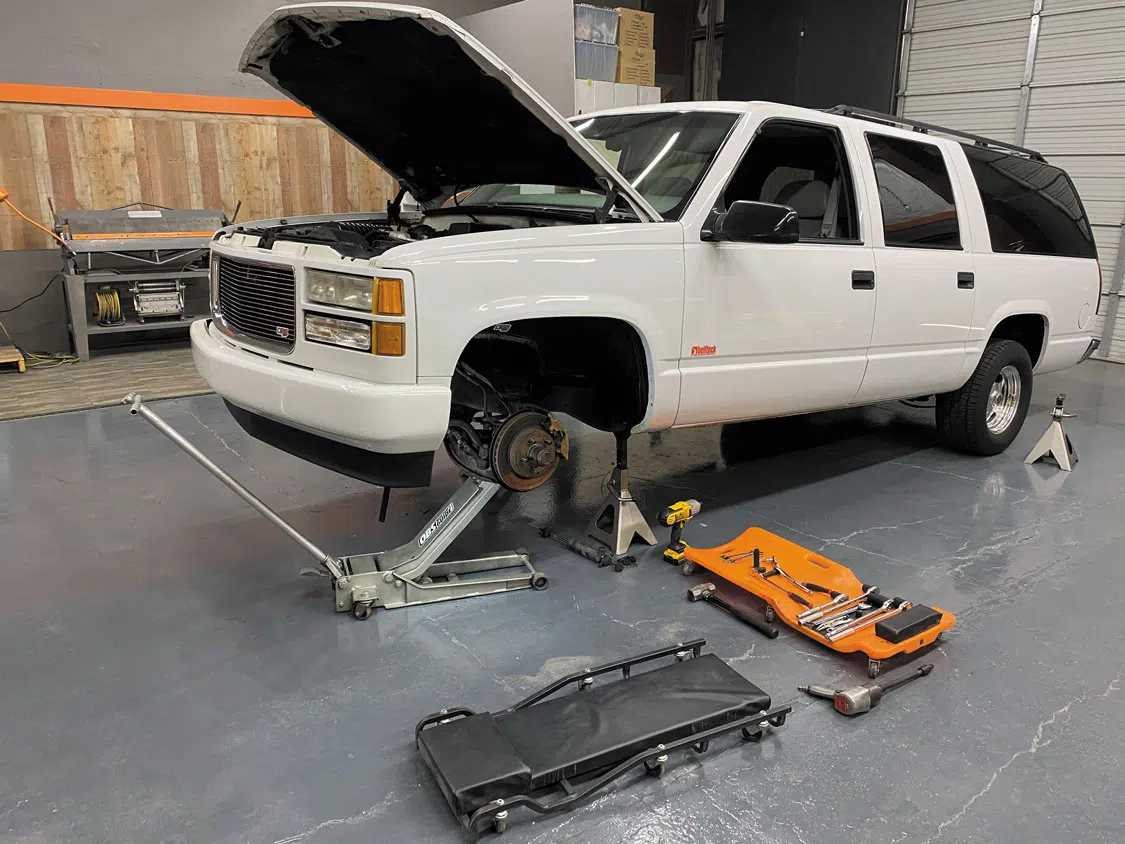
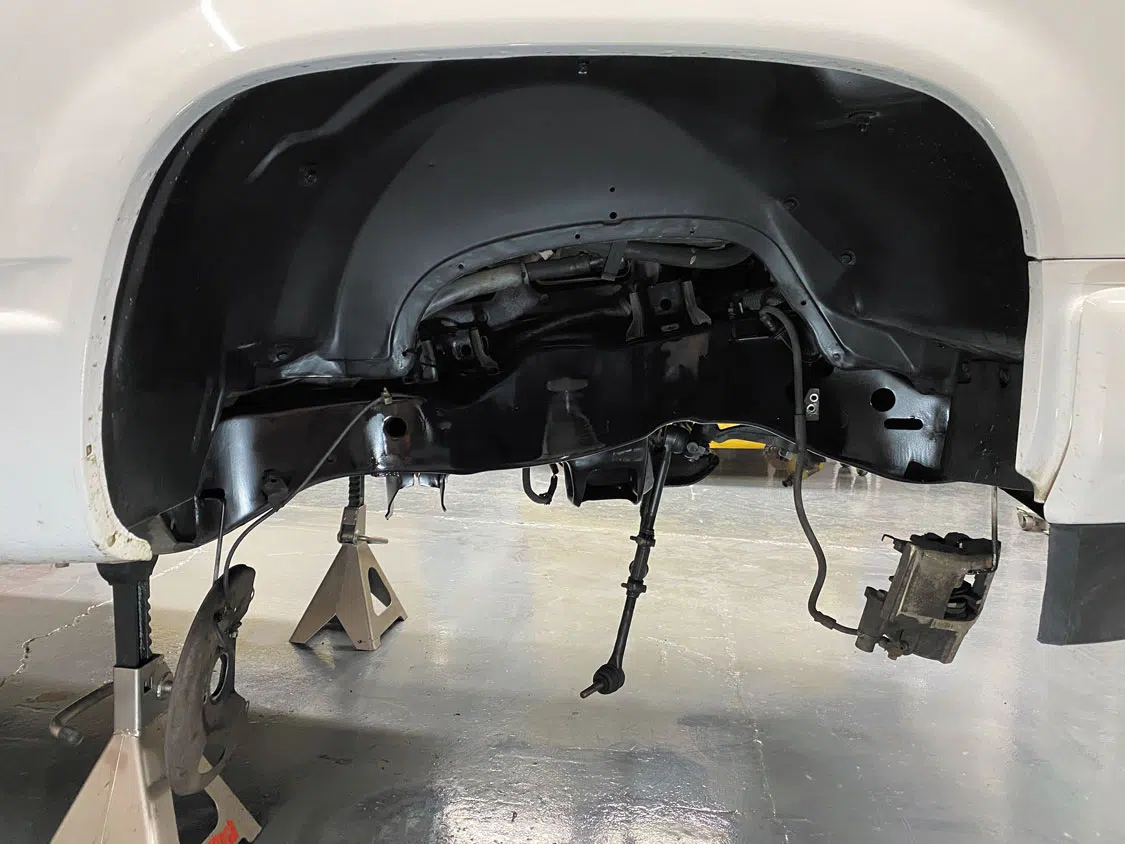
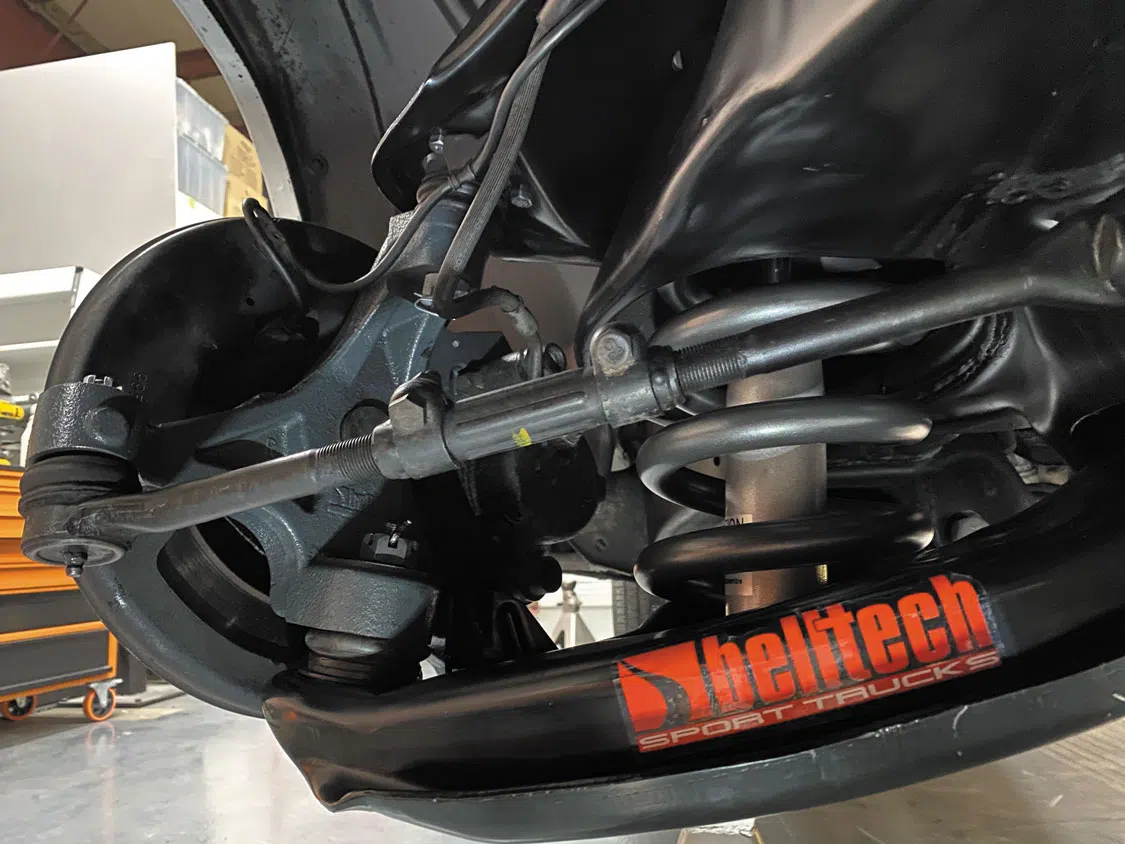
1. The Steve Stanford rendering is amazing. Let’s build it!2. First up, let’s get the truck sitting on the ground with a complete Belltech lowering kit.3. Remove all of the front suspension.
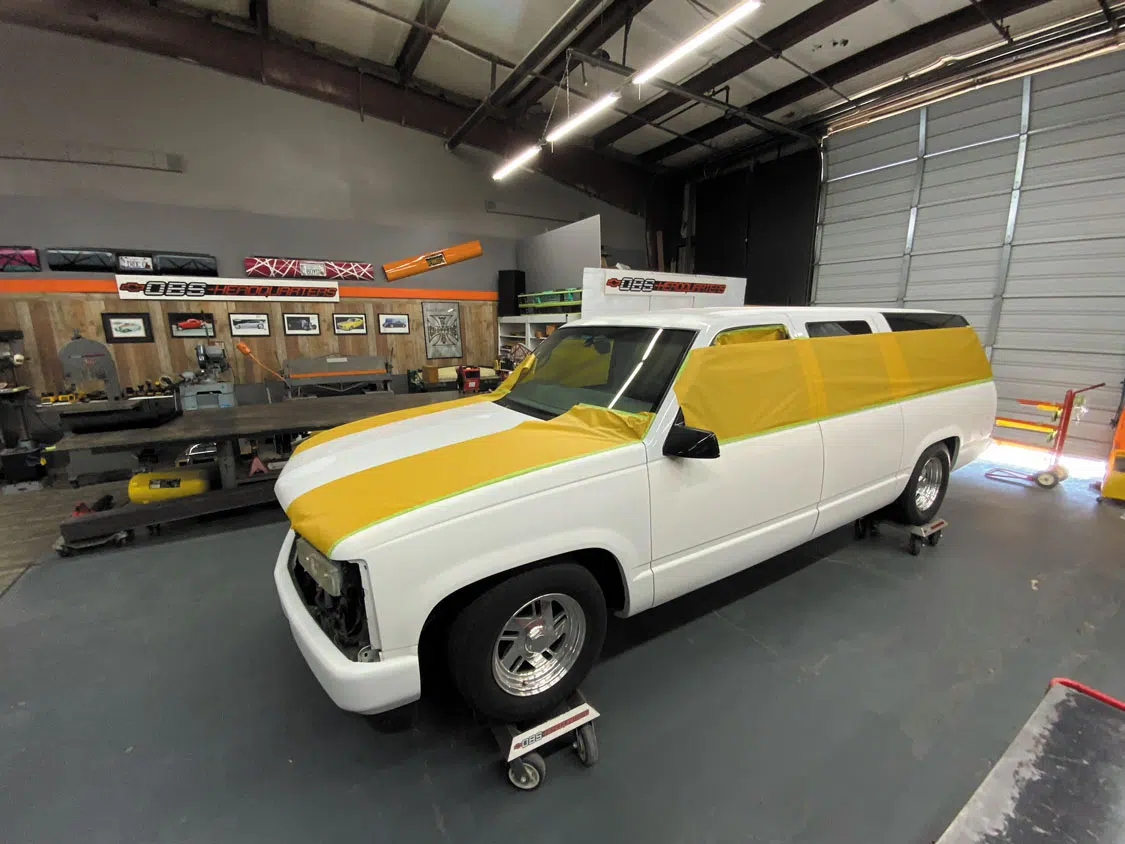
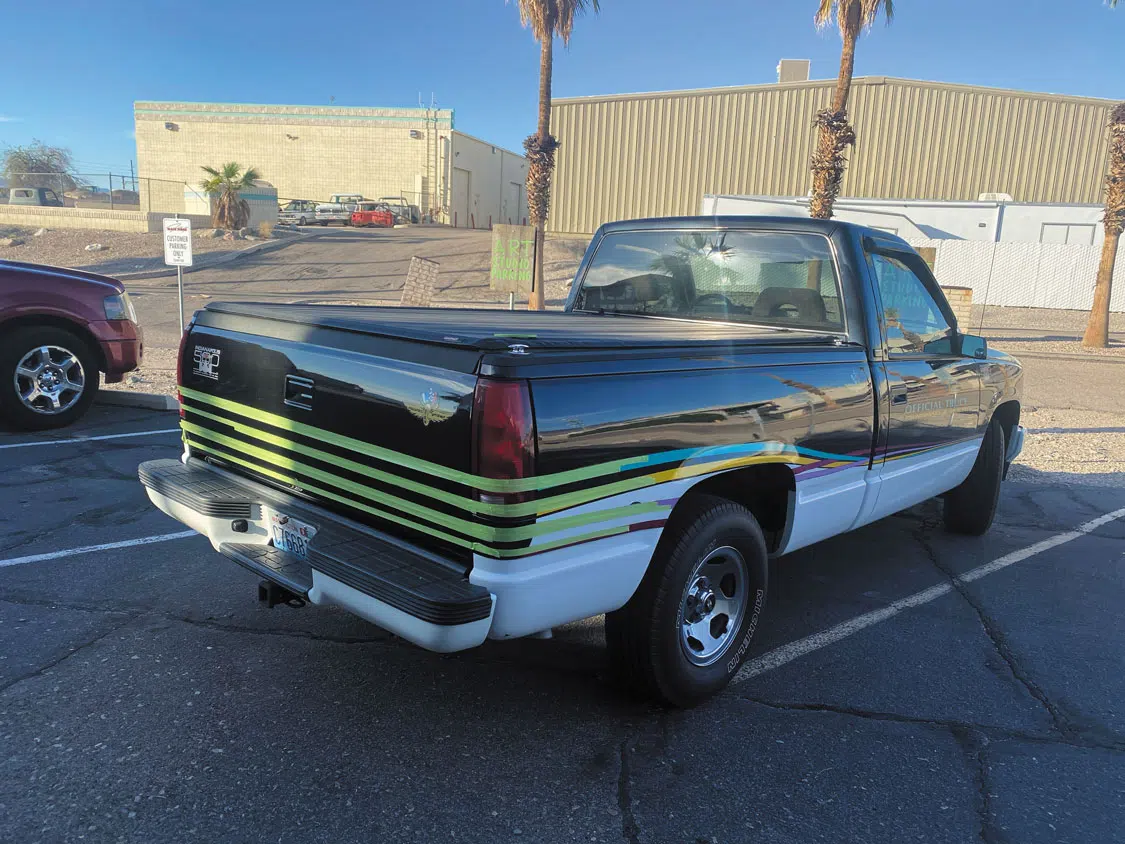
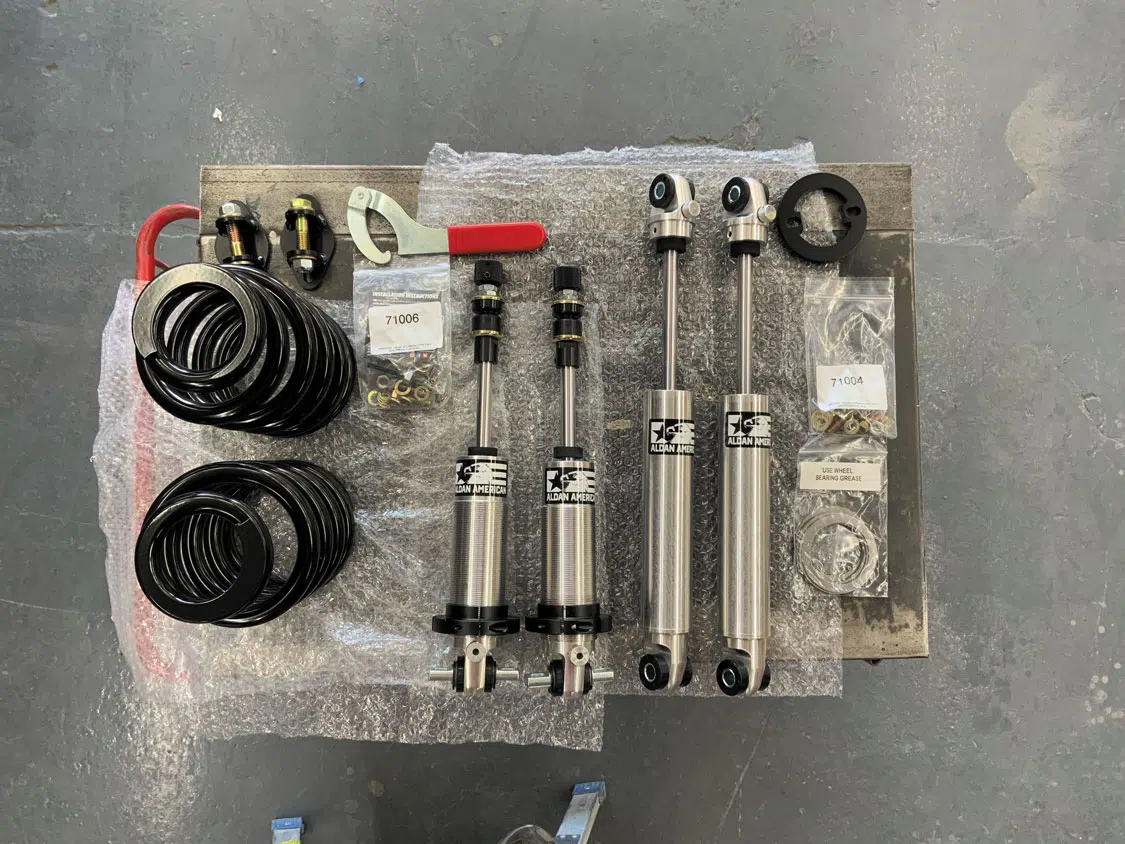
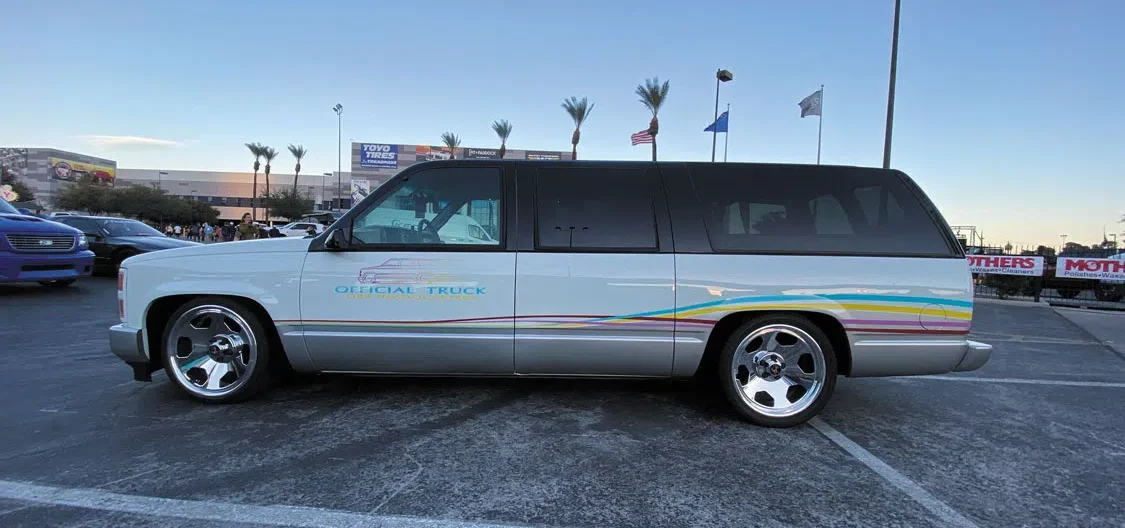
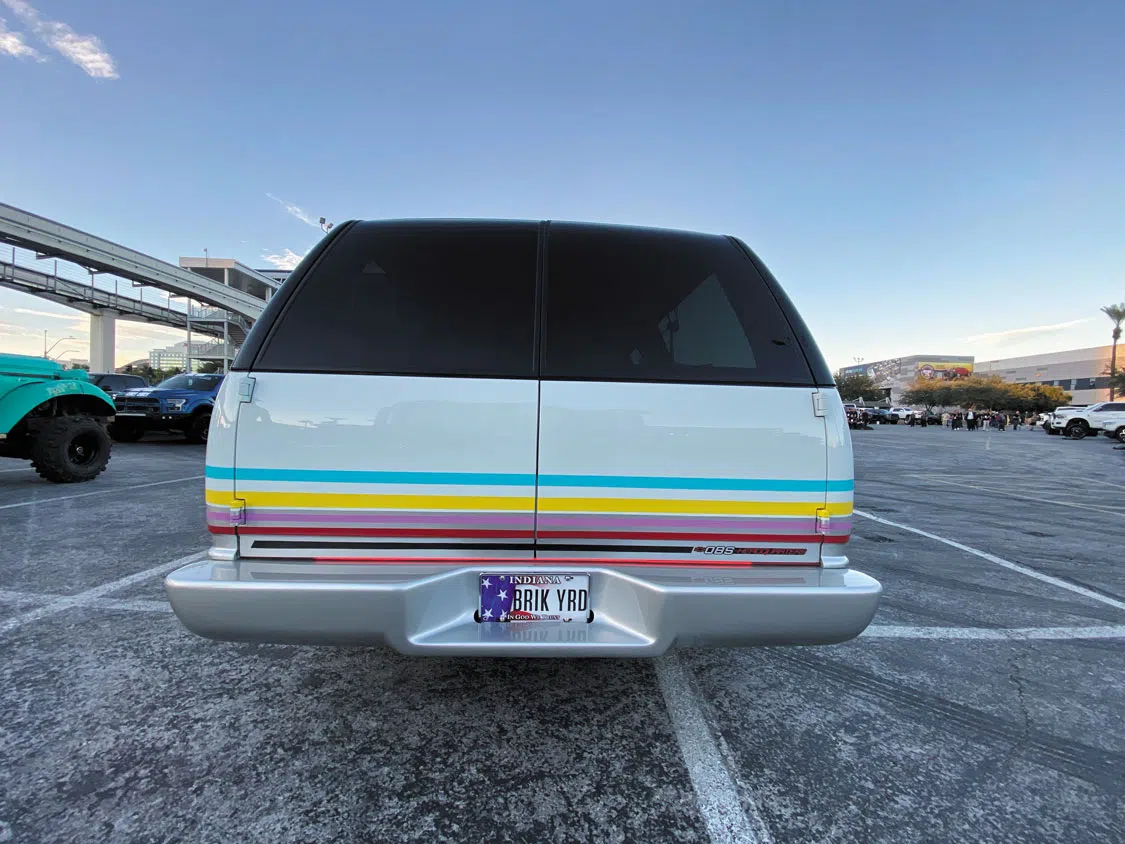
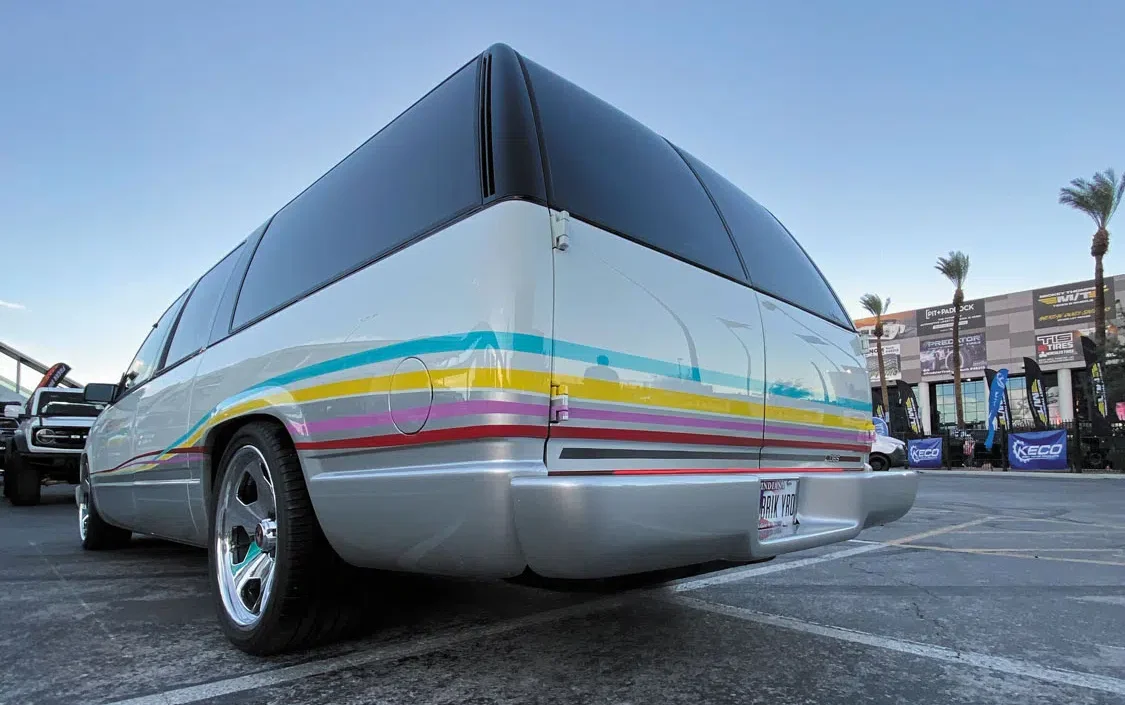
In the last issue, we backdated the grille to 1993, added a billet insert, and tucked in the pace truck front bumper. Everything was supplied by LMC Truck. This time around, we lowered it using a complete Belltech suspension kit with Aldan American coilover shocks. Next up was the body. We shaved the door handles and taillights and tucked the rear bumper. After it was prepped, we painted all the pace-truck graphics in seven overlapping colors using PPG’s Vibrance line, bringing Steve’s rendering to life.
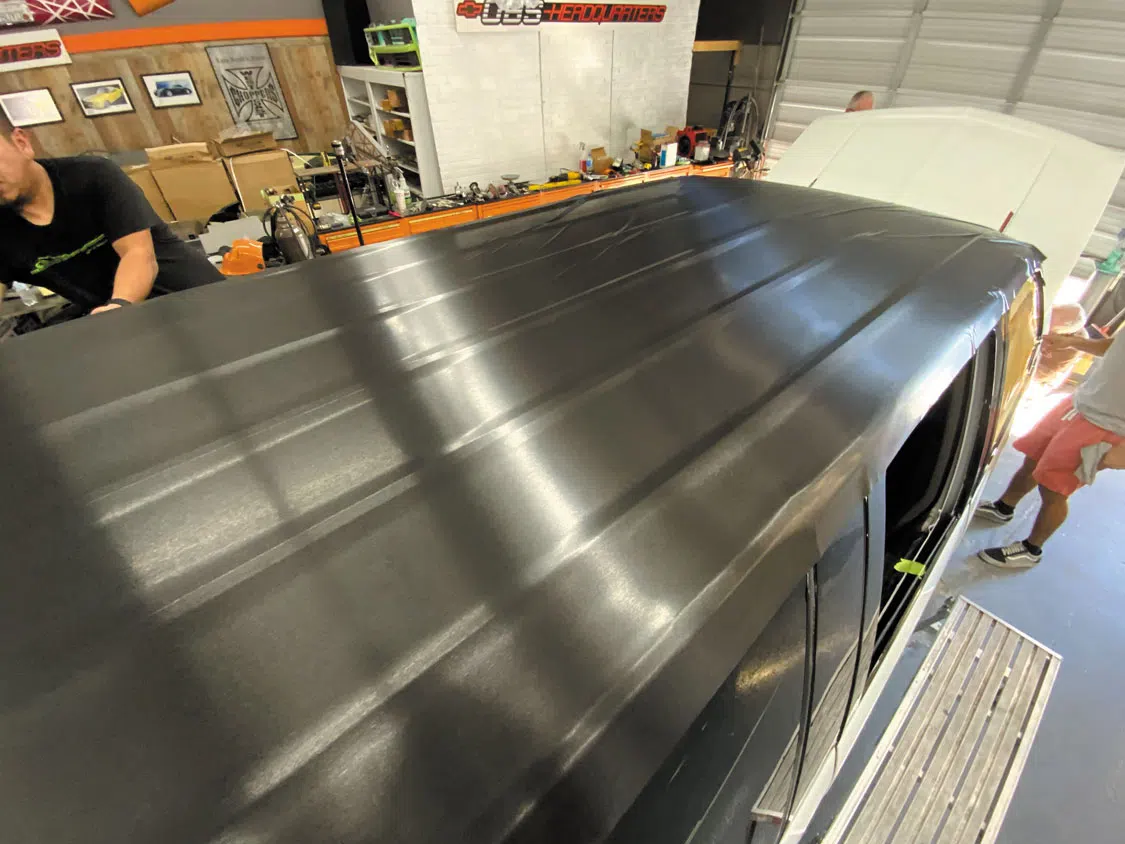
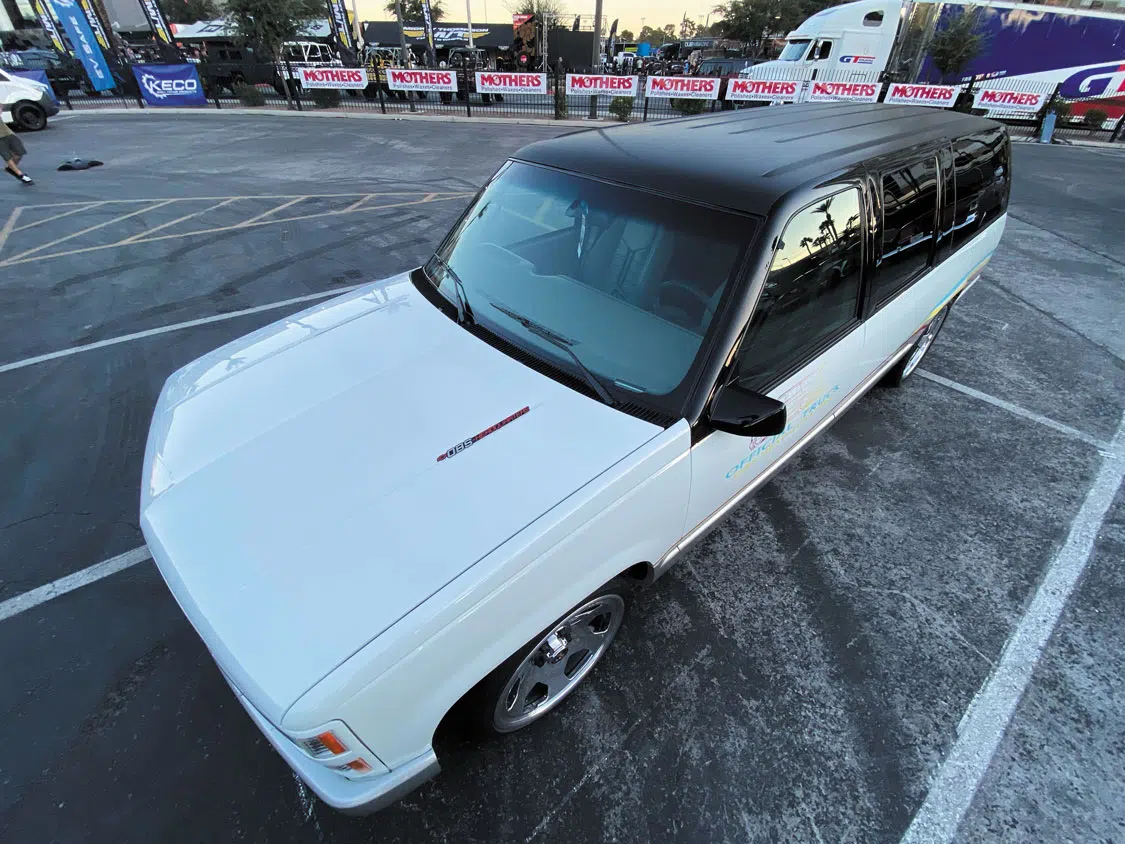
In a nod to the ’50s Cadillacs with the brushed stainless steel roof panel, we rolled the roof in a black aluminum brushed wrap from 3M for a totally different look. The crowning touch on the exterior are the amazing US Mags Billet OBS 20-inch Indy pace truck wheels wrapped in Toyo Proxes Sport tires.
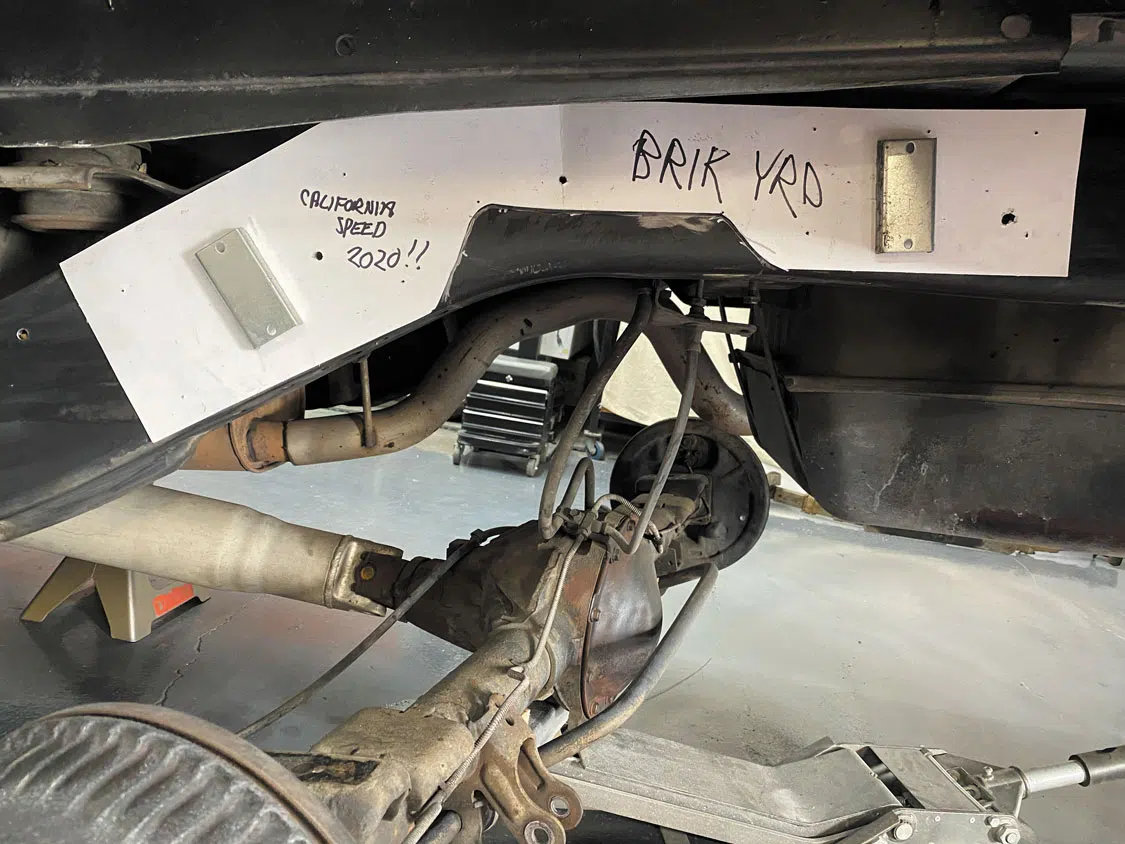
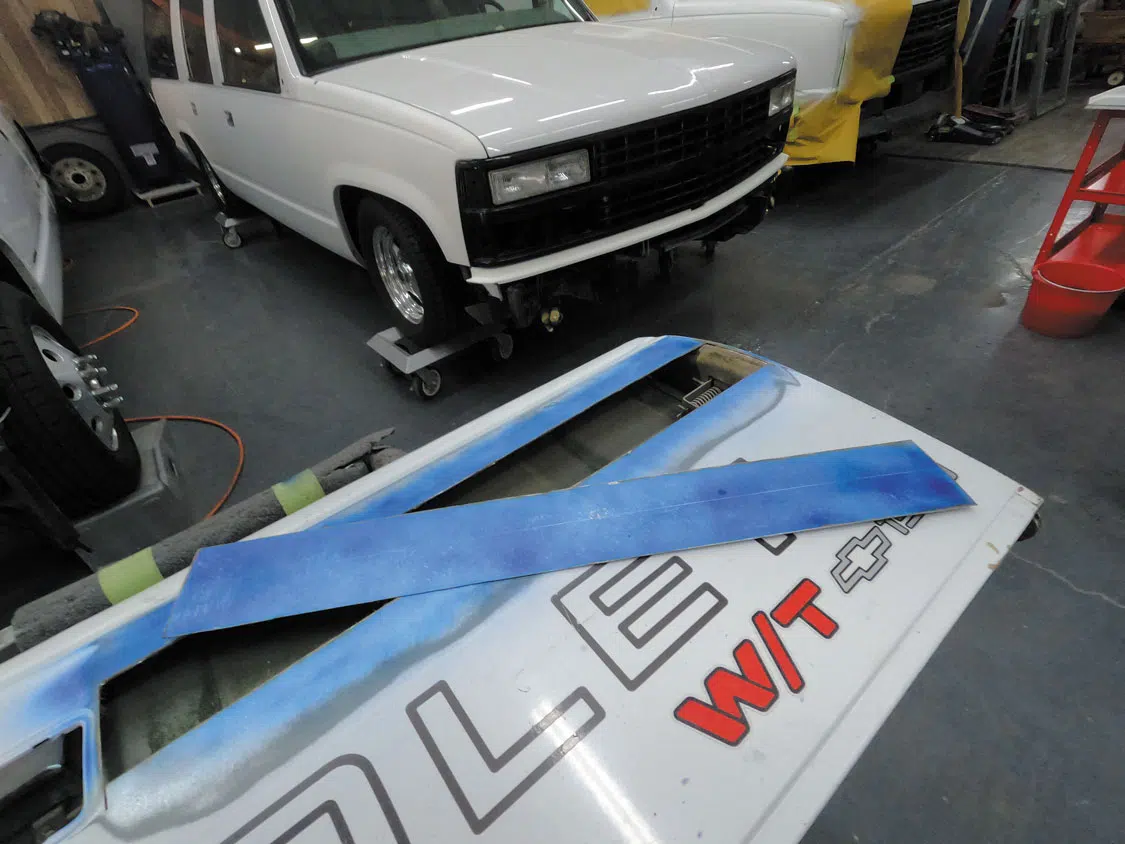
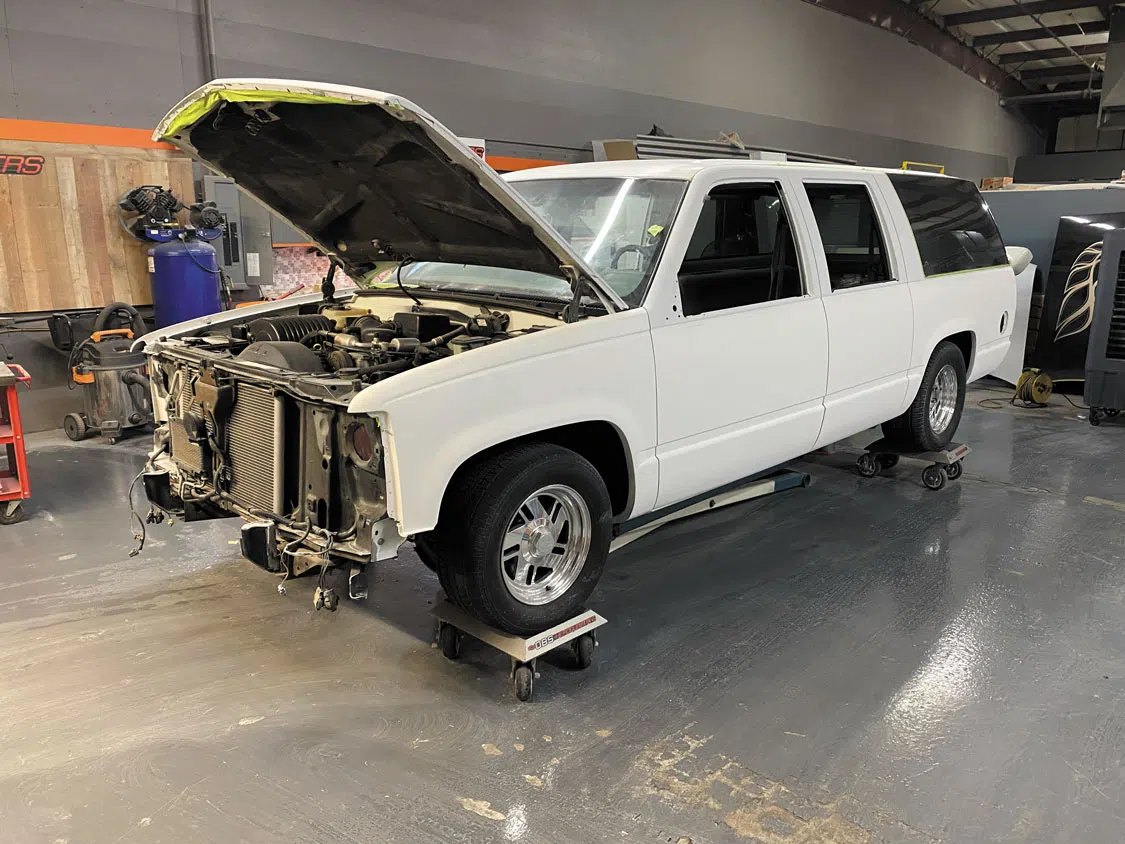
4. After a thorough cleaning and some touchup paint, we are ready for all the new parts.5. Installing quality Belltech components means everything bolts up perfectly. The front suspension is now complete.6. The rear consists of a Suburban-specific C-notch. Be sure to move all the brake fuel and air-conditioning lines out of the way before cutting. Bolt in the C-notch, touch up the paint, and re-attach all the lines.
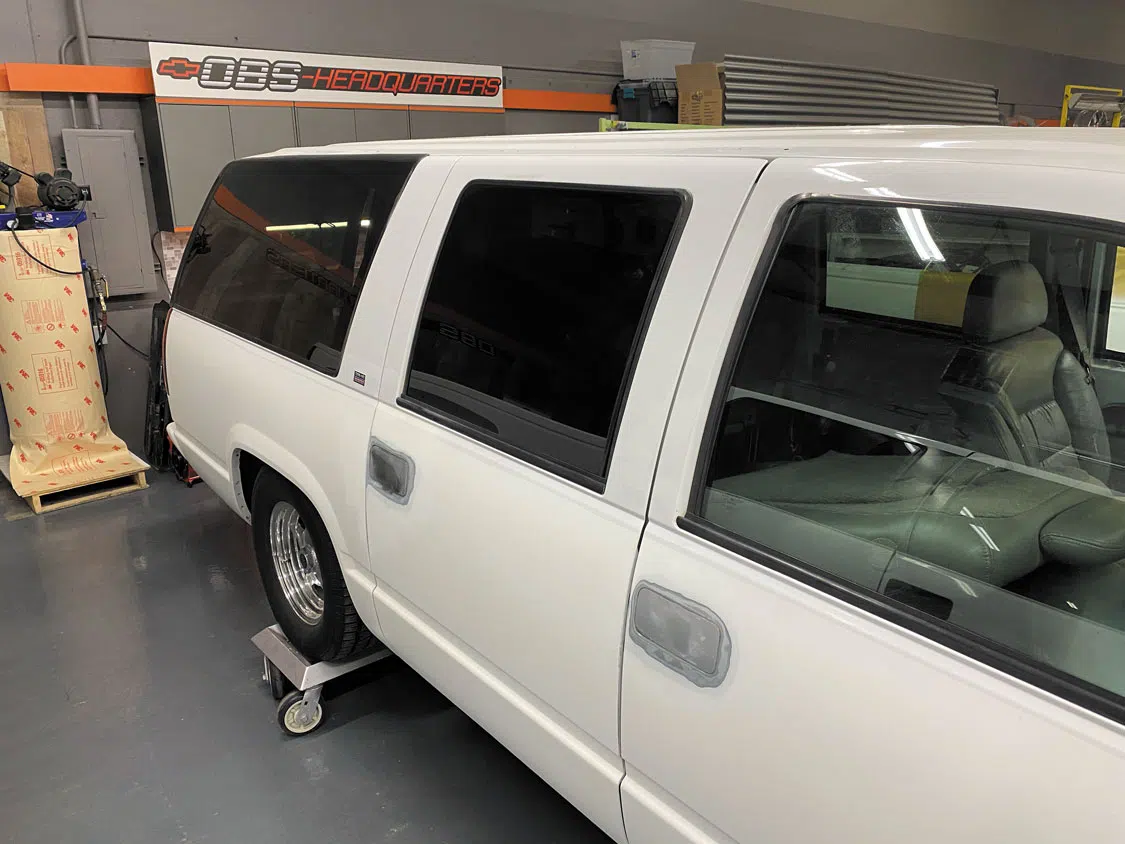
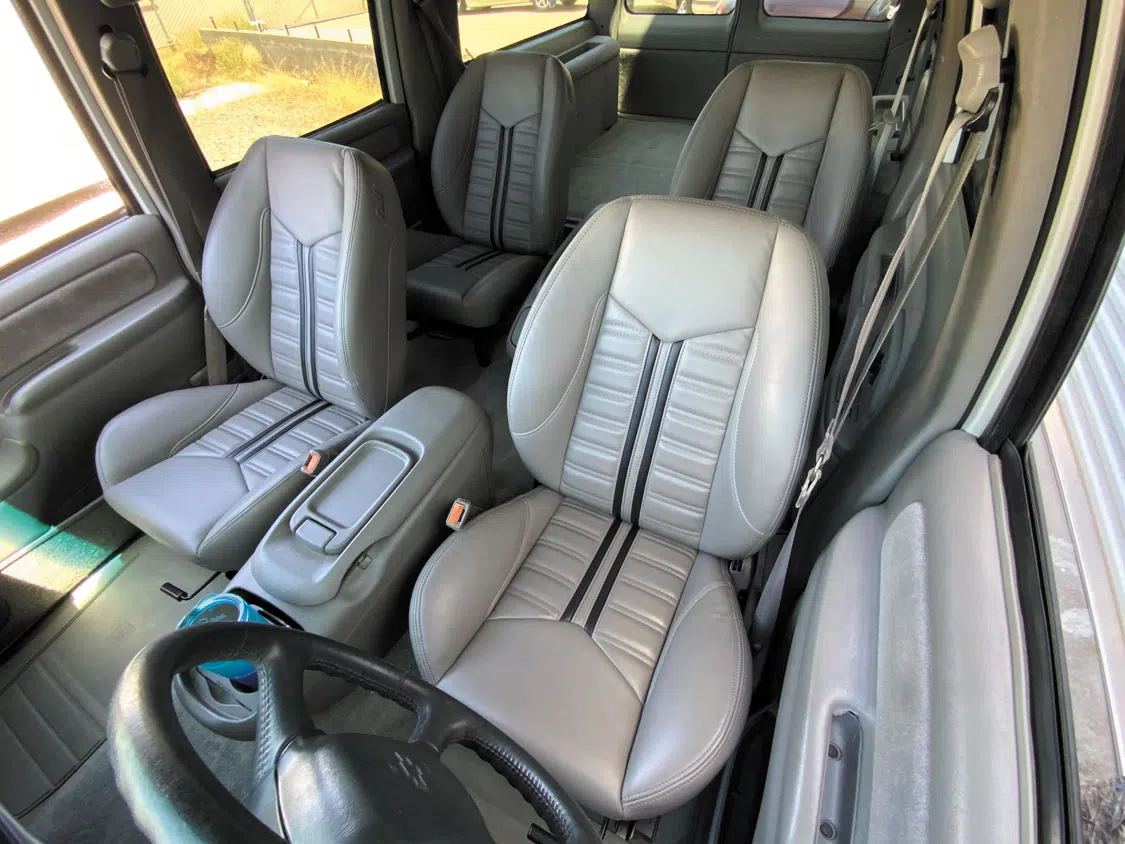
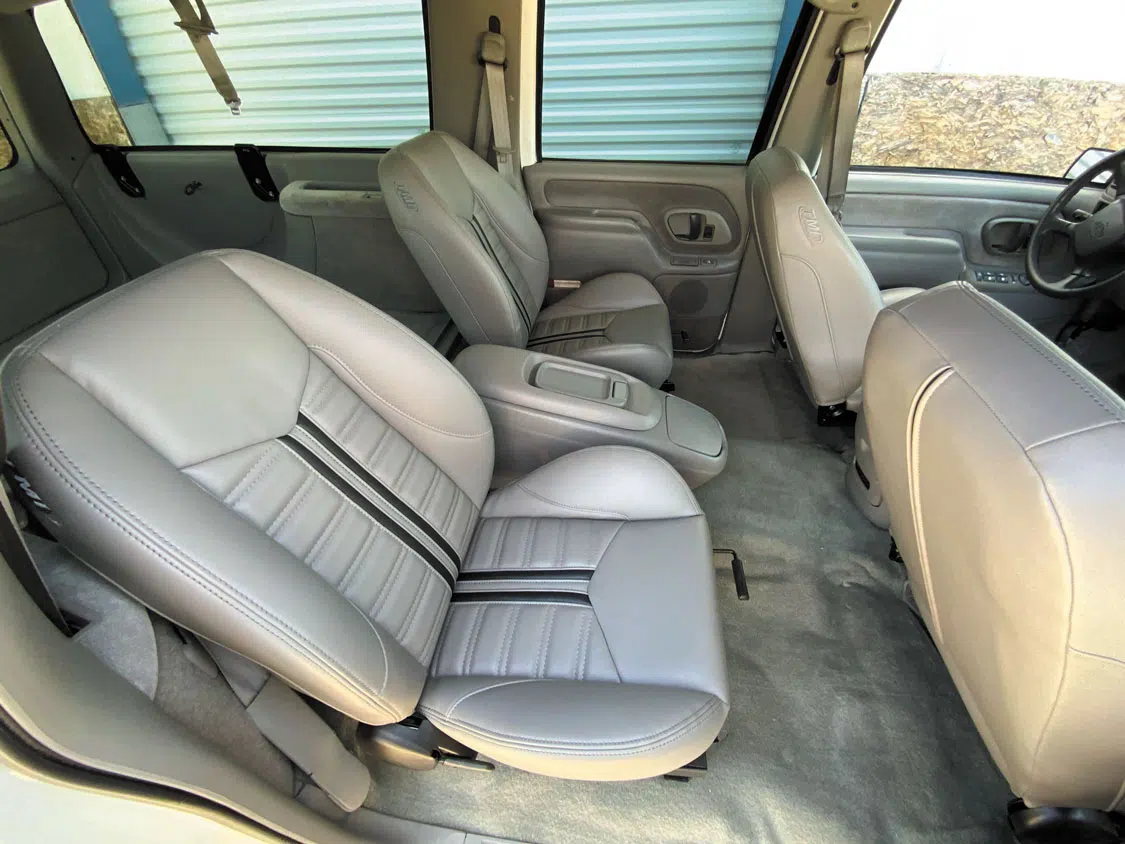
A call to TMI Products was made, and the crew constructed four matching buckets seats in the factory gray with a black racing stripe. The seats paired with two center consoles and new carpet to complete the interior.
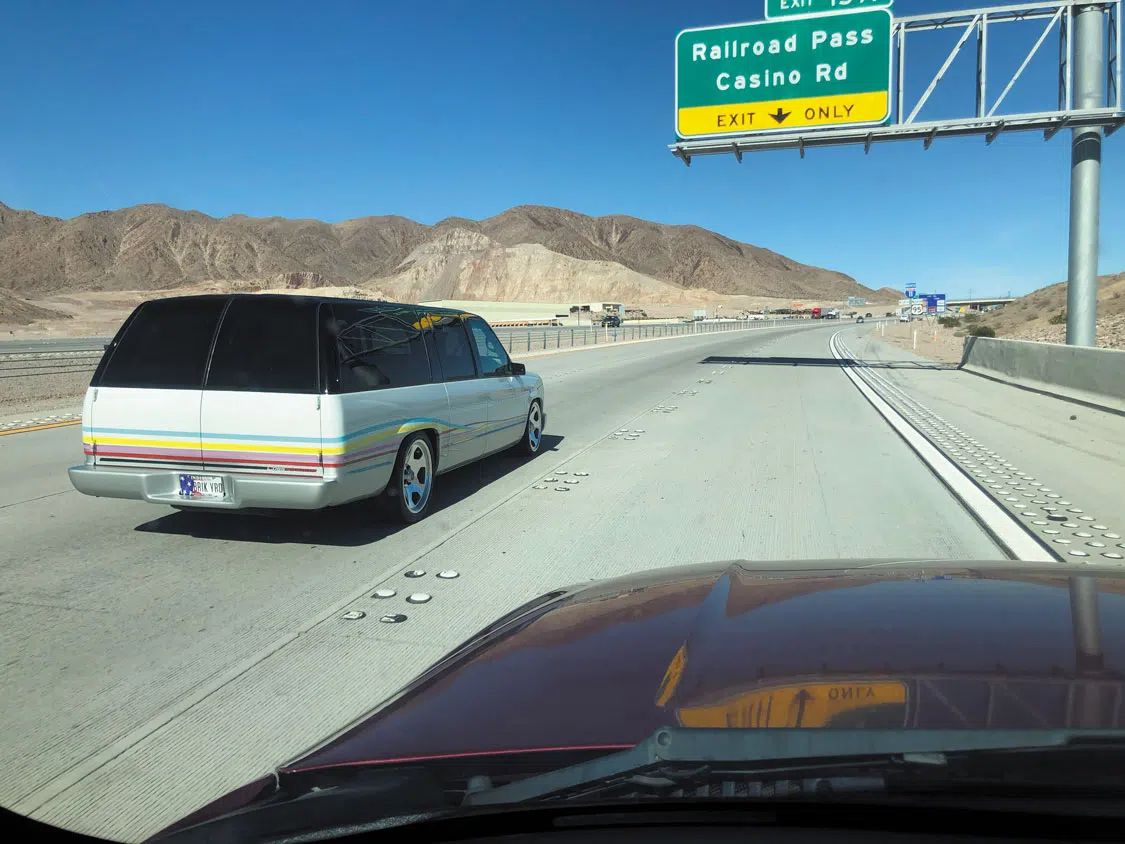
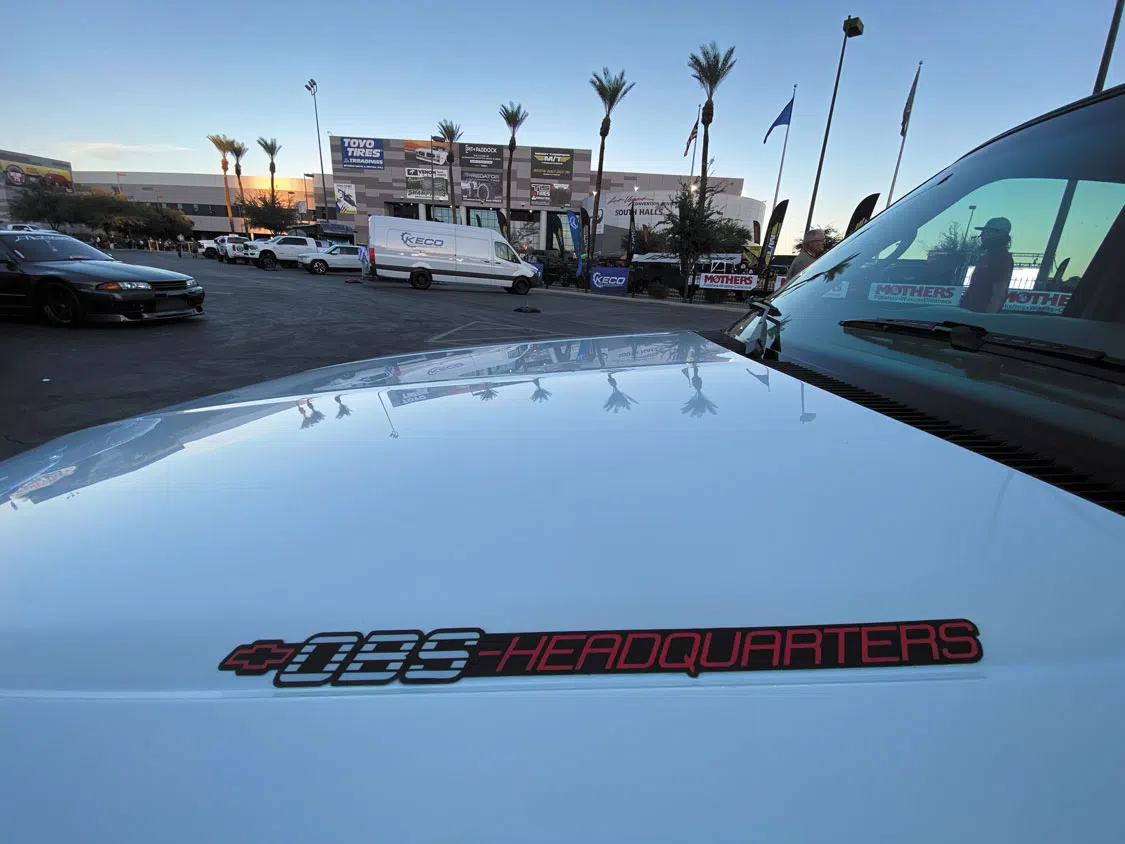
With a lot of help from our friends, we wrapped it up and drove it to the SEMA Show in Las Vegas where it was display in the Aldan American outside space. We can’t thank everyone enough—vendors, friends, random onlookers—for the love and support shown to Brik Yrd. We are not done yet, so hang in there! Let’s get to work!
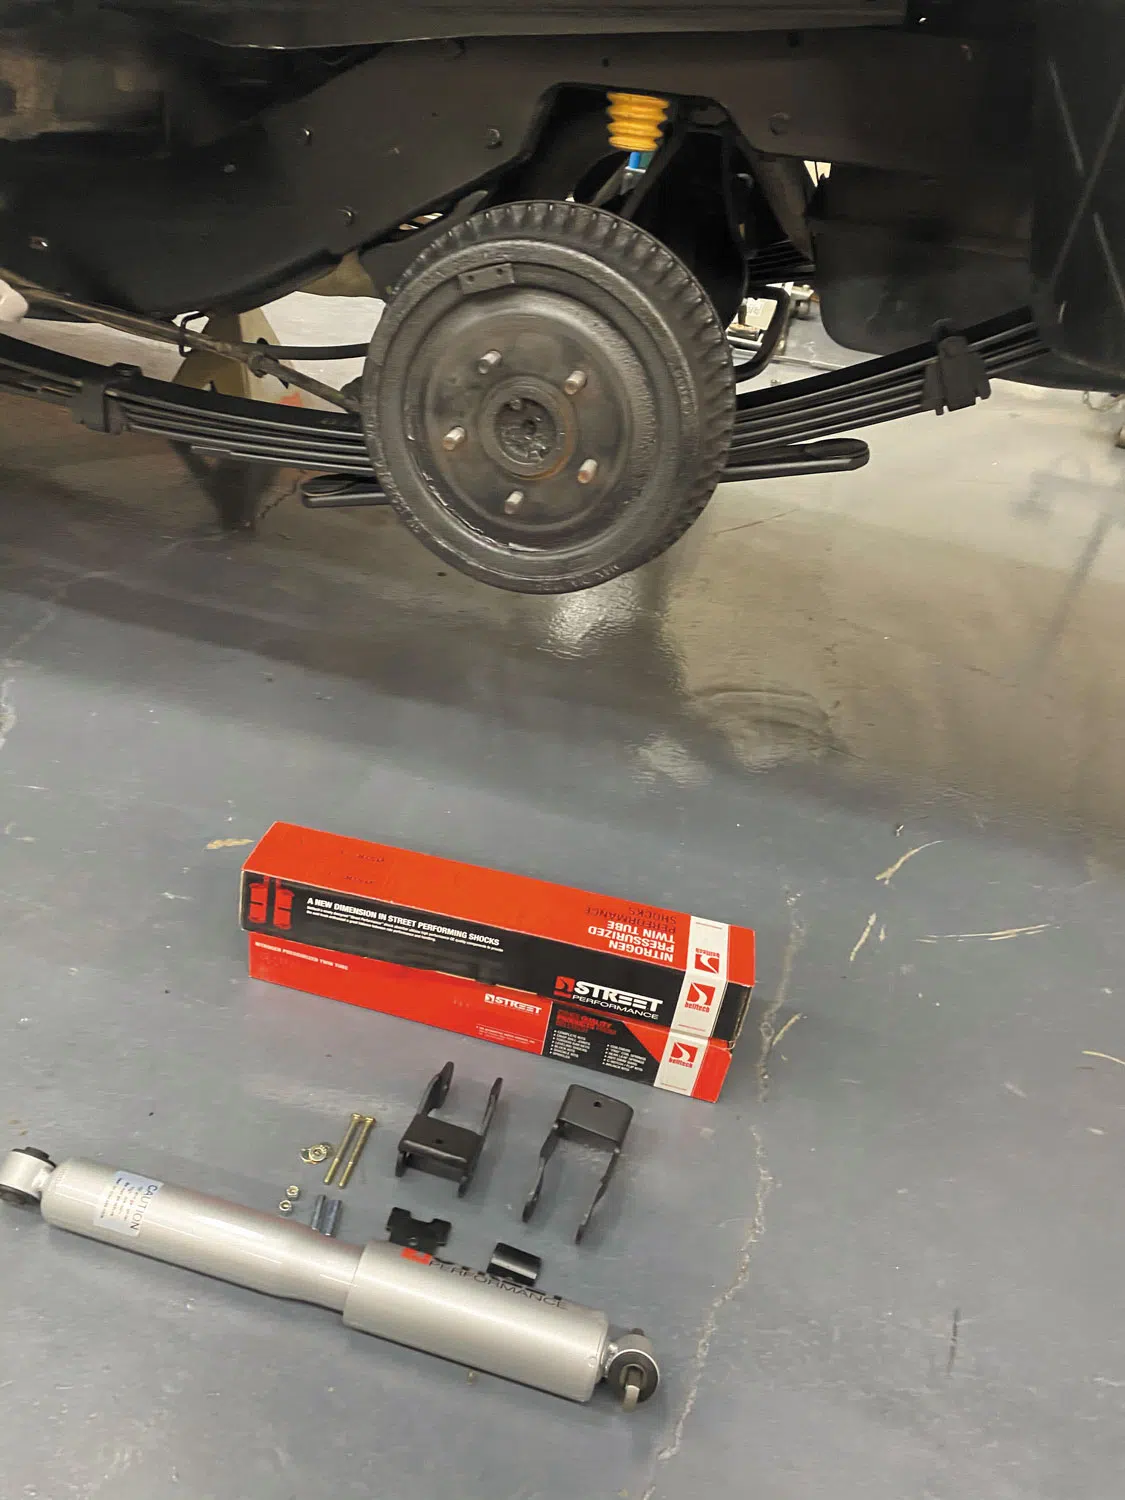
7. New Belltech shocks complete the rear suspension.8. With Brik Yrd sitting properly, it’s time for body modifications.9. To wrap the graphics around the back seamlessly, it was decided to fill the taillights. We used fillers from LMC truck. Though not intended for a Suburban, a little massaging had them fitting nicely.10. Next, we decided to also shave the doorhandles for a cleaner look. We cut filler panels from an old tailgate so that the metal thickness and curvature is factory correct.11. The door handle filler panels were glued into place with 3M panel bond.12. Once the panel bond had cured, the area was given a light skim of fiberglass-reinforced filler.13. With the big modifications complete, we concentrated on correcting any minor imperfections and preparing for primer.14. It was faster and easier to completely strip all the paint off the hood and then prime it completely.15. After a light cleanup and some masking, the complete truck was sprayed with three coats of PPG primer.16. Once the primer was dry, we covered the surface in 3M guide coat. This helps with surfacing out any minor imperfections. We then sanded out all the difficult body lines and contours first.17. Next, the large flat surfaces are block sanded to perfection. With no guidecoat showing, we are ready to move onto the paint process.18.Now the extensive task of masking begins.19. The inside of the doors and jambs were in perfect condition, so we preserved them.20. When spraying graphics, it’s nice to be in a large space so you can stand back to ensure everything is shaping up as Steve designed.21. Masking is complete, and now the fun begins. The complete body was given three coats of factory white basecoat.22. A real Indy pace truck was used to measure for the graphics.23. Steve designed a speeding Suburban to replace the IndyCar logo on the doors of the original pace-truck design. The race date was changed to the shop name, and then we had the complete design made into a vinyl mask.24. After careful measuring, the mask was placed in the correct position on each door.25. PPG Deltron basecoat was used to recreate the pace graphics.26. The colors on the door graphics faded from purple to yellow like the original truck. This is the part where you need a little faith!27. Phew! It worked. The mask was carefully removed, revealing Steve’s amazing design.28. Once the doors were complete, the original truck was used to make a template for the side graphics.29. The turquoise stripe was done first to provide a locating point for the remaining stripes.30. All the remaining graphics are below the turquoise stripe. Now it gets interesting.31. Yellow was the second color to be applied.32. The purple stripe was added next. The stripes were applied one at a time as they overlap each other.33. A few liberties were taken by altering some of the graphic colors.34. With the graphic colors applied, the complete bottom from the body line down and the front and rear bumpers were sprayed silver with a gradual, darker fade down into the rocker panels. The fade makes the body appear to be lower than it actually is.35. With everything below the belt line sprayed, the upper door and quarter panel surrounds were sprayed black.36. All the basecoat is now applied to the complete vehicle. Notice all the overlaps. Double vision ensued. It was checked thoroughly to make sure all the colors were clean and tight and then prepped for clearcoat.37. After a thorough cleaning and more masking, the PPG 2020 clearcoat was applied.38. Karl and Stan get to work color-sanding the clearcoat flat. Guidecoat was used again to ensure all scratches were removed between sanding grits from 800 all the way to 8,000.39. Once the color sanding was complete, the surface was polished back up to a mirror shine using the new 3M rotary polisher. It looks wet and glossy.40. With the paintwork complete, a custom set of Indy pace truck wheels were needed. US Mags came to the rescue.41. US Mags machined the Indy pace design in an aluminum blank for a 20-inch wheel.42. The hoops were heated.43. The freshly machined centers were dropped into place and welded and then sent for final polishing.44. The upsized wheels look incredible—old but new.45. Off we go to the tire store to mount the Toyo Proxes Sport tires.46. Once the new wheels were installed, it was decided to lower the front an additional inch. This was accomplished using an Aldan American coilover kit. It now has a slight, old-school rake.47. The rear wheels fit and looked perfect. The center cap badges were adorned with the Brik Yrd verbiage.48. The front wheels and tires are also a perfect fit. The upsized wheels really complete the pace-truck look, also adding a modern, massive amount of polished bling!49. The 1957 Cadillac Eldorado had a brushed stainless steel roof. Brik Yrd now has a black brushed stainless 3M wrap on the roof, a little nod to the past.50. The 3M wrap gives an interesting texture to the roof and completes the blacked-out area of the upper body.51. Moving to the interior, a call was made to TMI Products for custom seats. TMI created four bucket seats in the factory gray with a black racing stripe.52. The TMI rear bucket seats and factory center console look amazing.53. We are off to the SEMA Show in Las Vegas 2022!
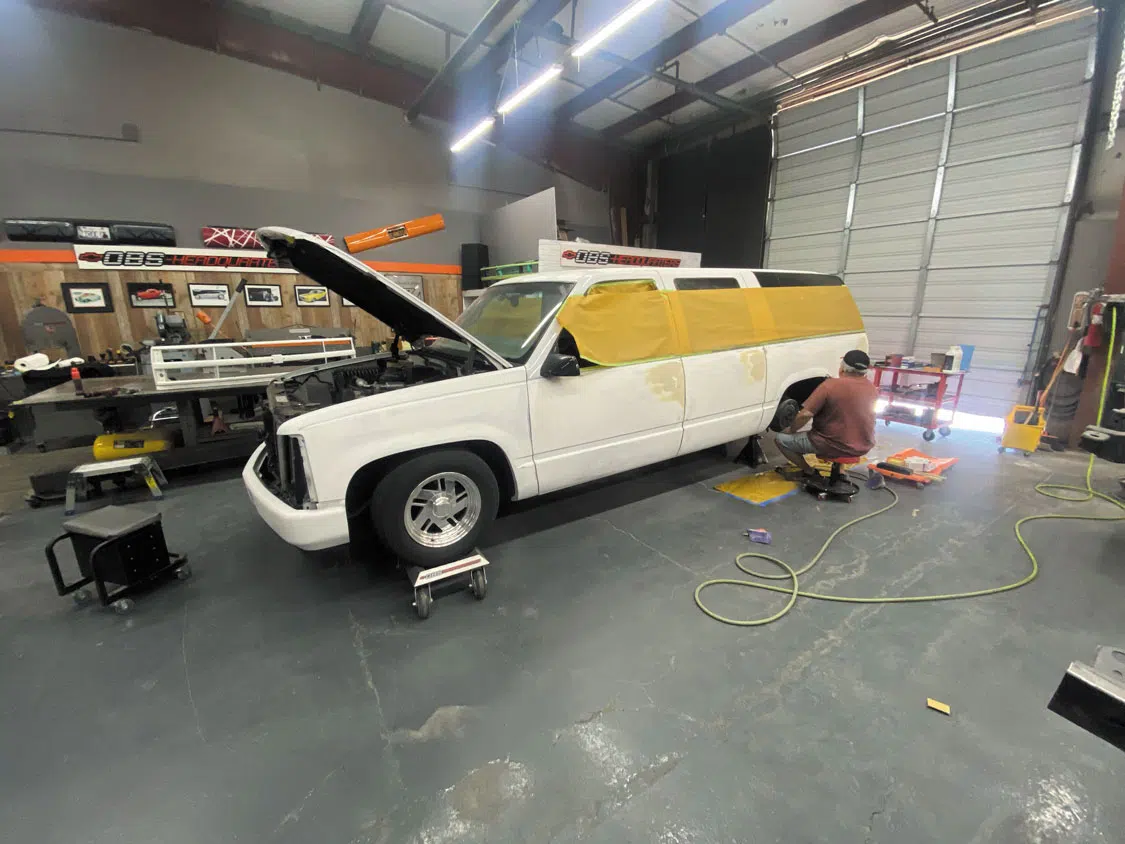
Chris Hamilton is an automotive journalist, editor, and lifelong truck enthusiast with extensive experience covering custom truck builds, fabrication, performance upgrades, aftermarket products, and a
We use cookies to enhance your browsing experience, serve personalized ads or content, and analyze our traffic. By clicking "Accept All", you consent to our use of cookies. Visit our Cookie Policy for more info.
 Chris Hamilton


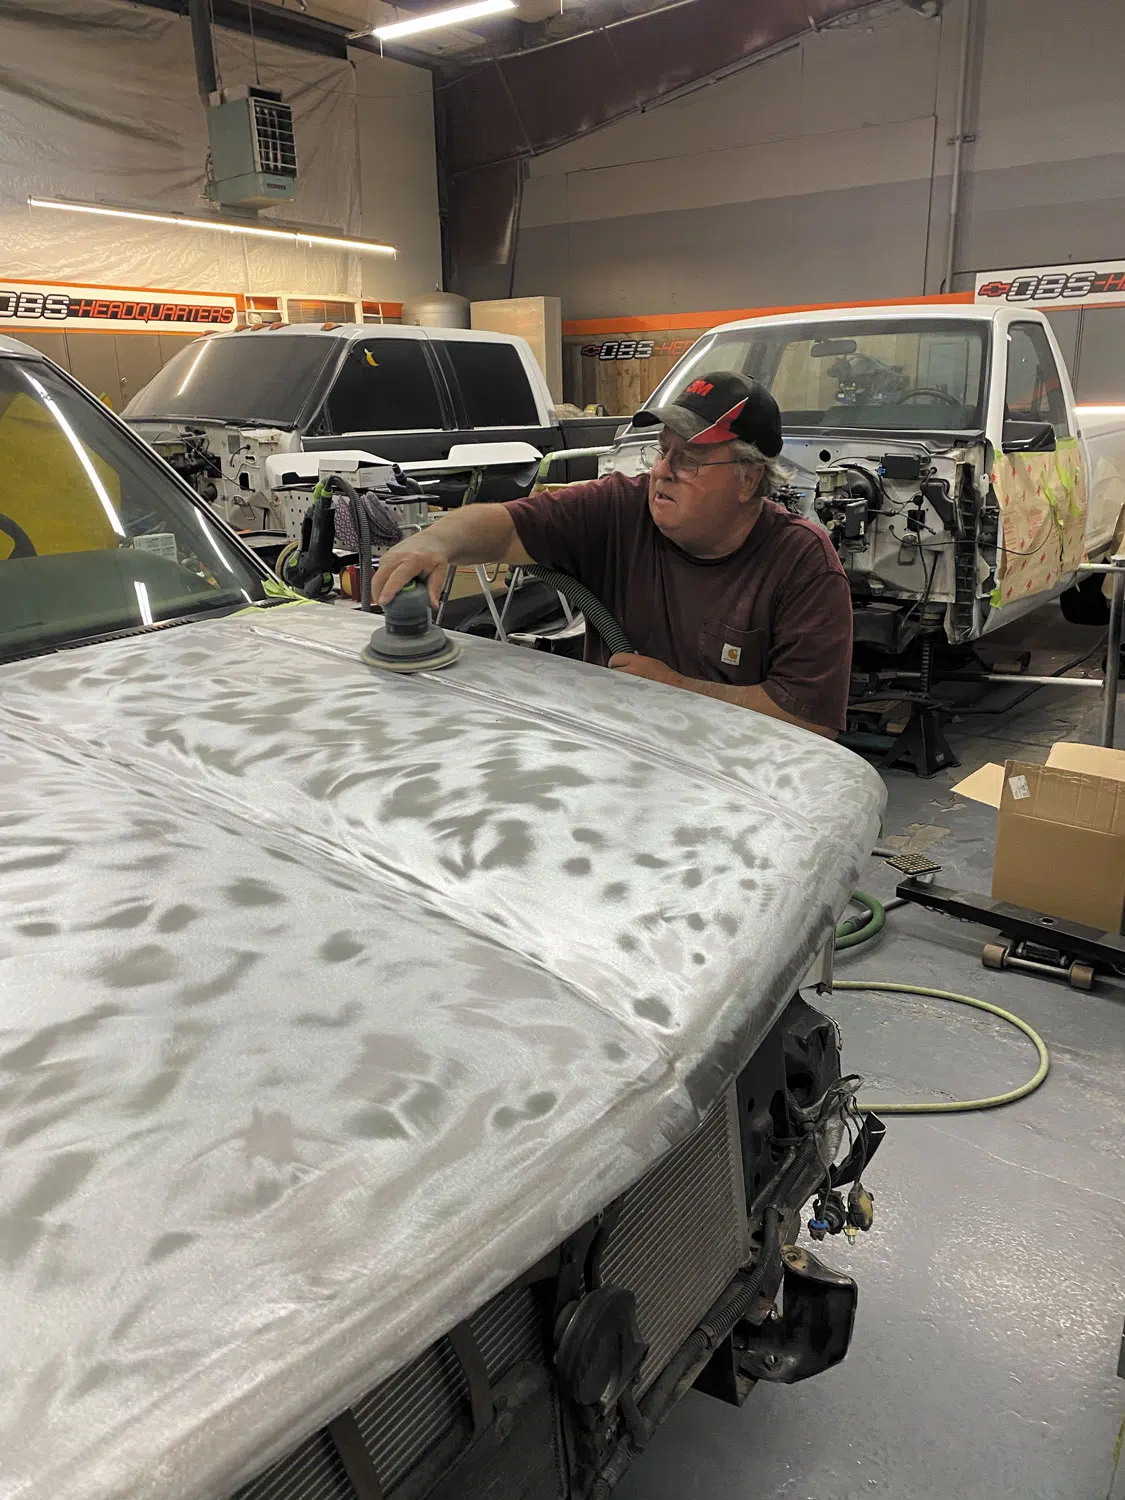


 Please wait...
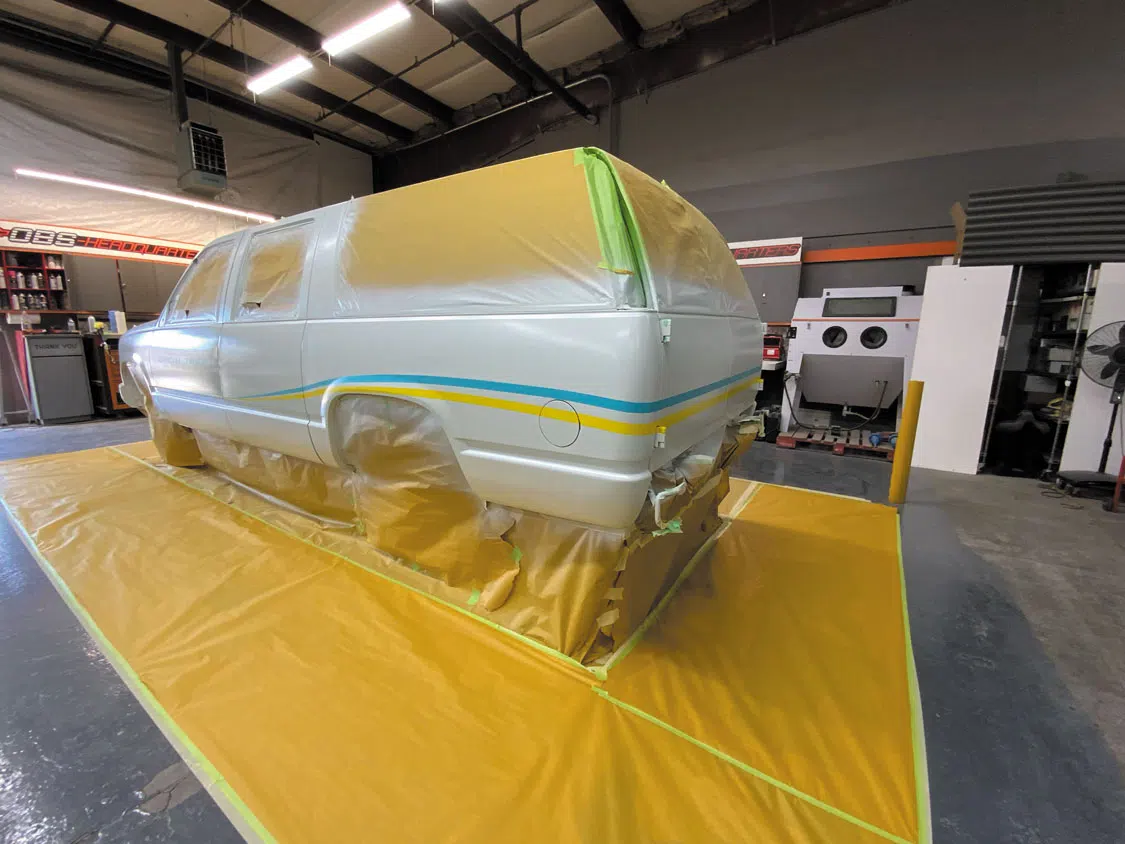
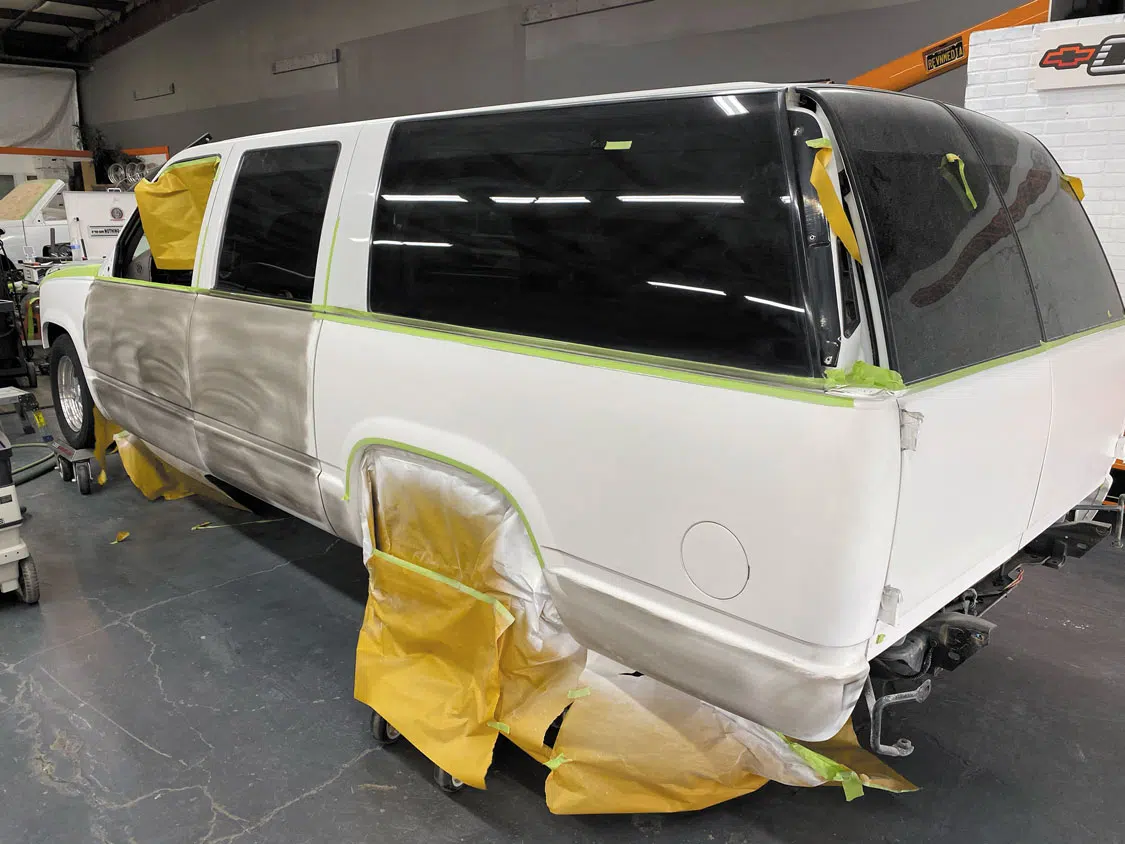
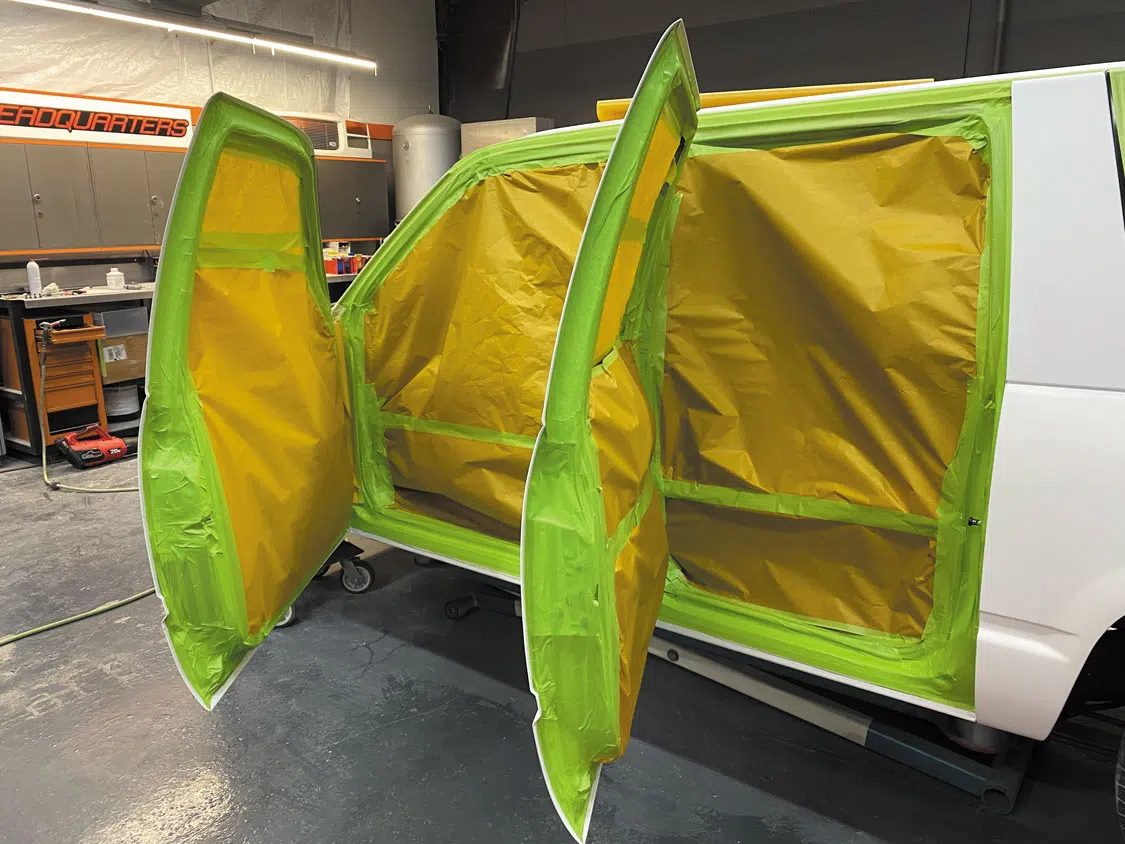
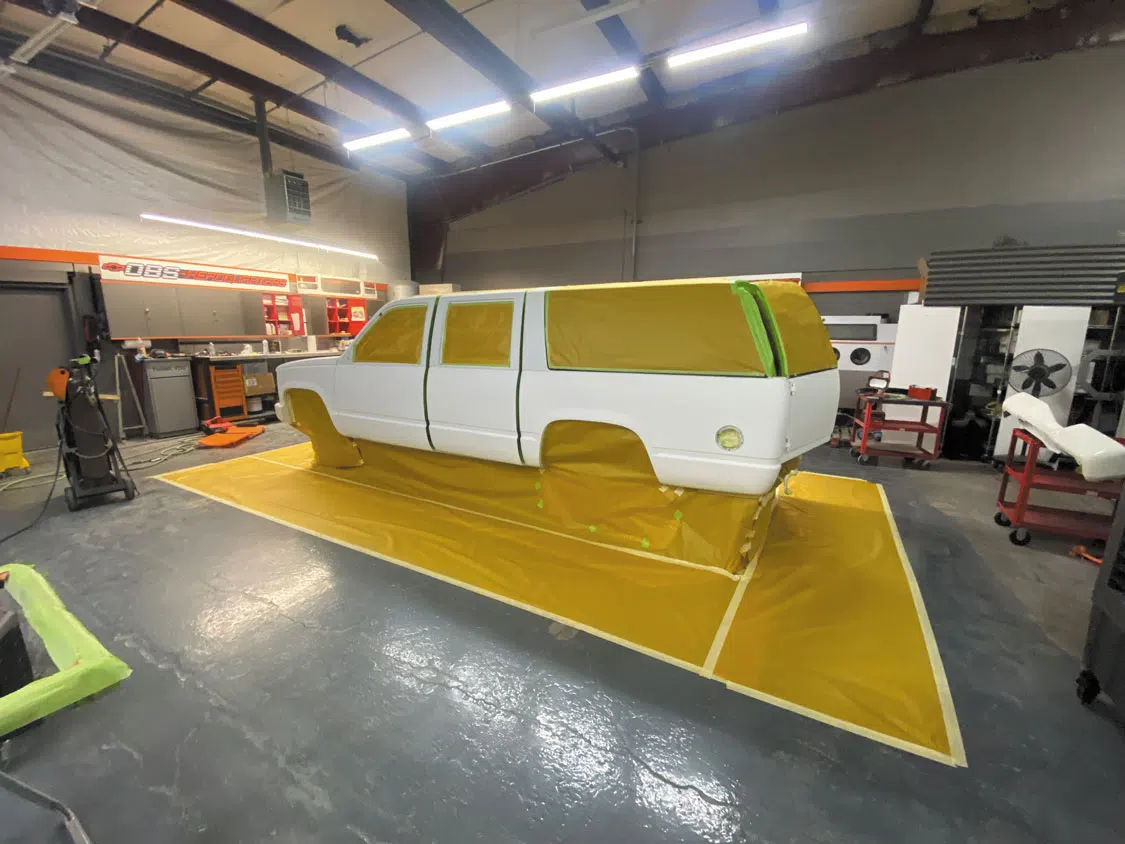
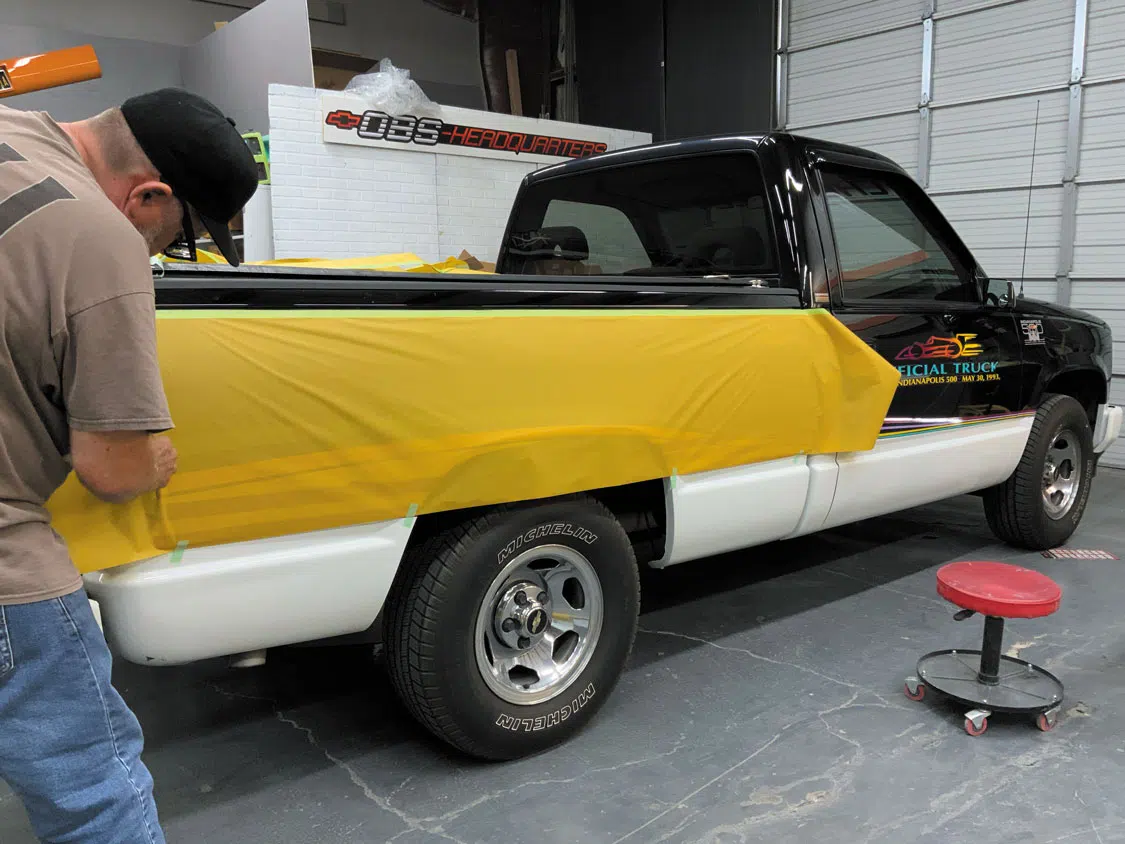
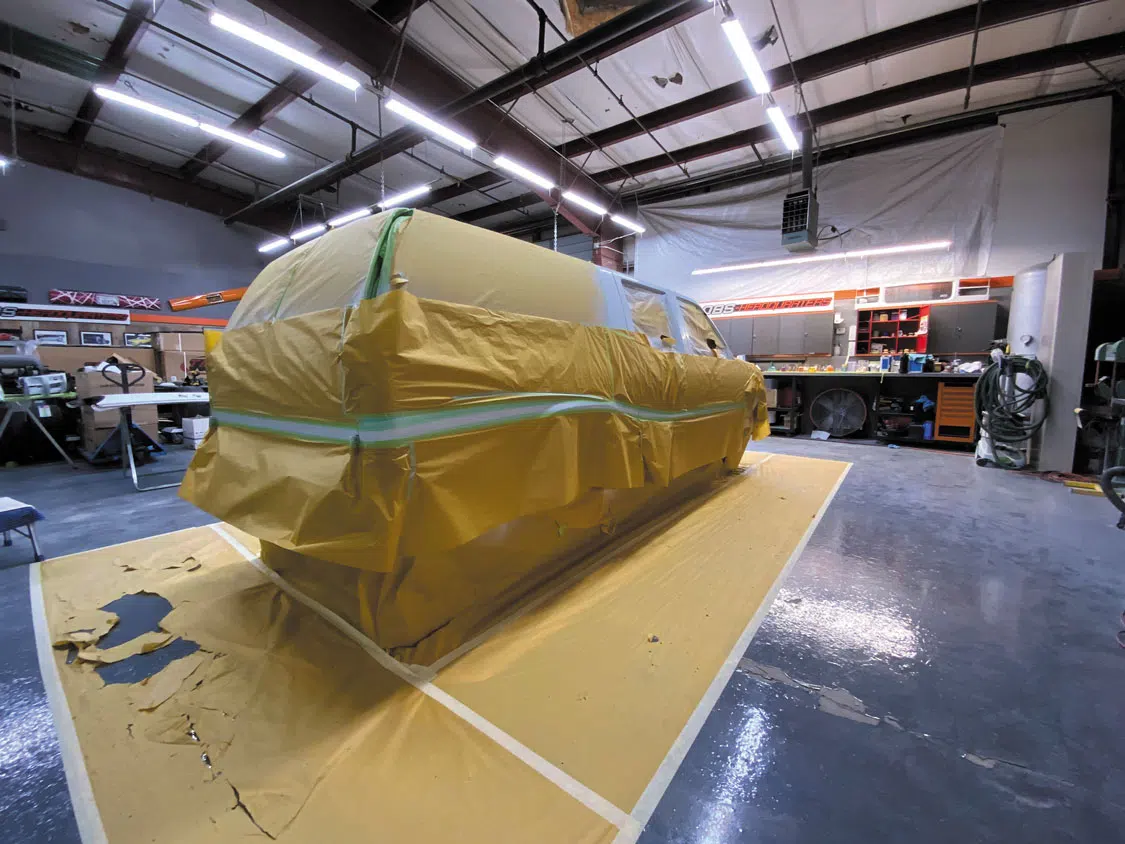
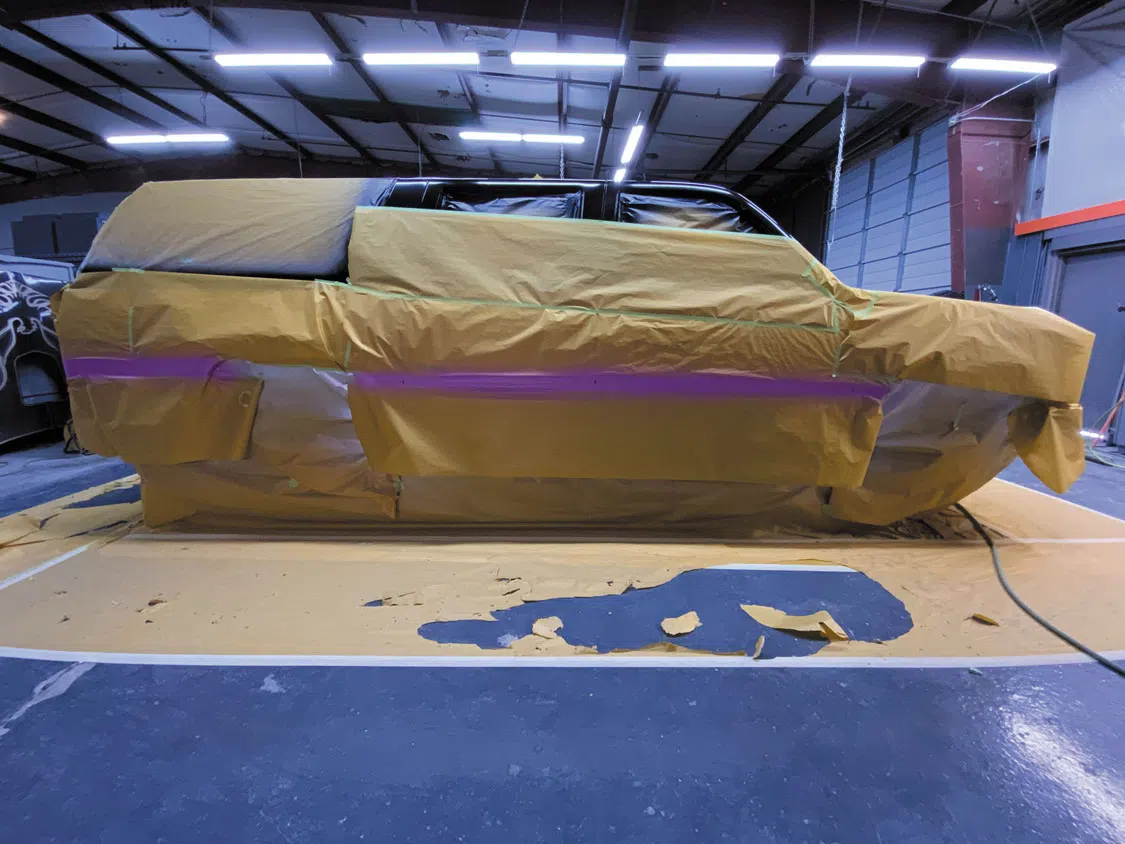
Share Link