 Dan Burrill
.
June 06, 2022
.
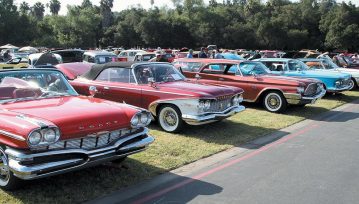
All Feature Vehicles
Dan Burrill
.
June 06, 2022
.
All Feature Vehicles

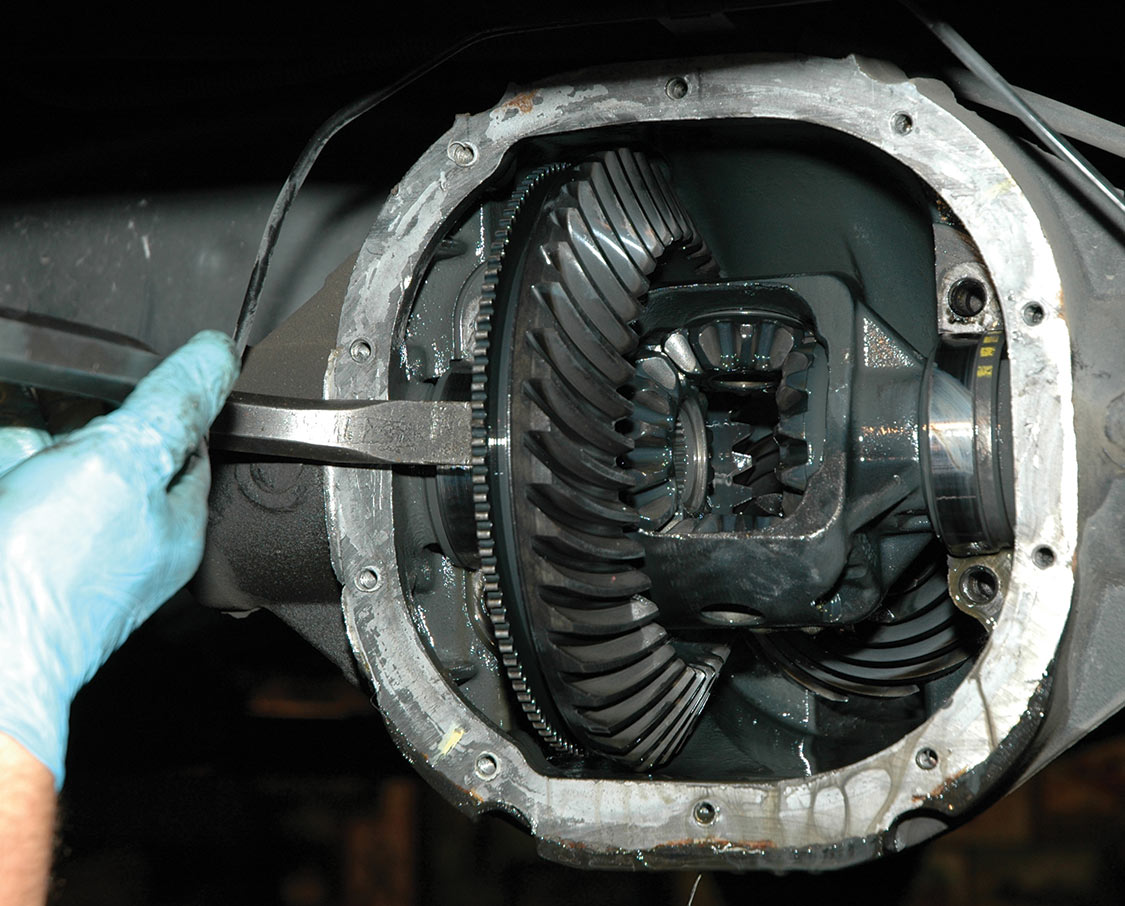
Ford’s 8.8-in. differential is a strong and popular rear end for retrofitting classic or older Mustangs. But performance enthusiasts often ask, why not just use a Ford 9-in.? There are a number of good reasons to justify the 8.8-in. over the 9-in.
First of all, the 8.8-in. axle can readily handle the power and torque of a modified 302-cu.-in. or 351-cu.-in. Ford small-block V-8. Cost is also a factor: There are thousands of Fox-body Mustangs with 8.8 rear ends in recycling yards all across the U.S. that can be easily purchased for a very reasonable price. This rear end is lighter than a 9-in. and is almost as strong. And the other nice thing about the 8.8-in. unit is that the width is about the same as the older stock Mustang rear end, so it’s not necessary to have the housing narrowed. And the newer units come with disk brakes.

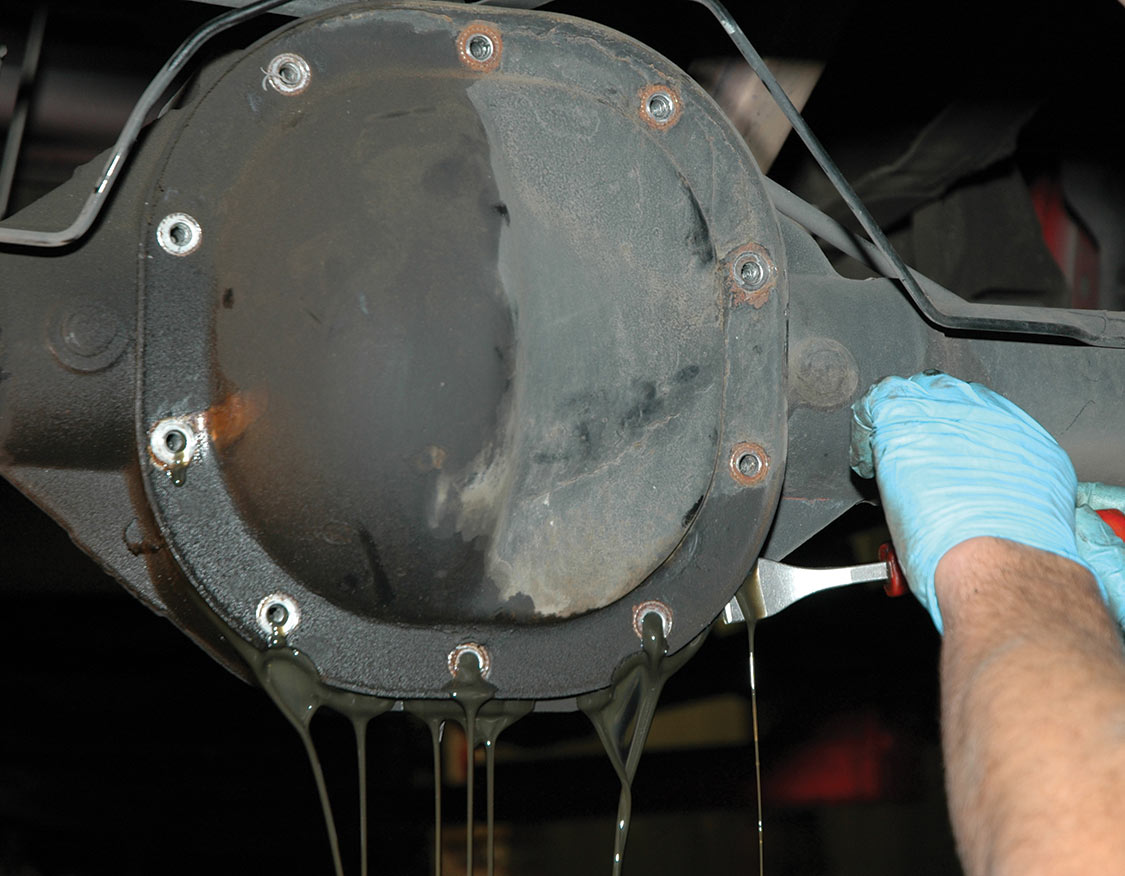
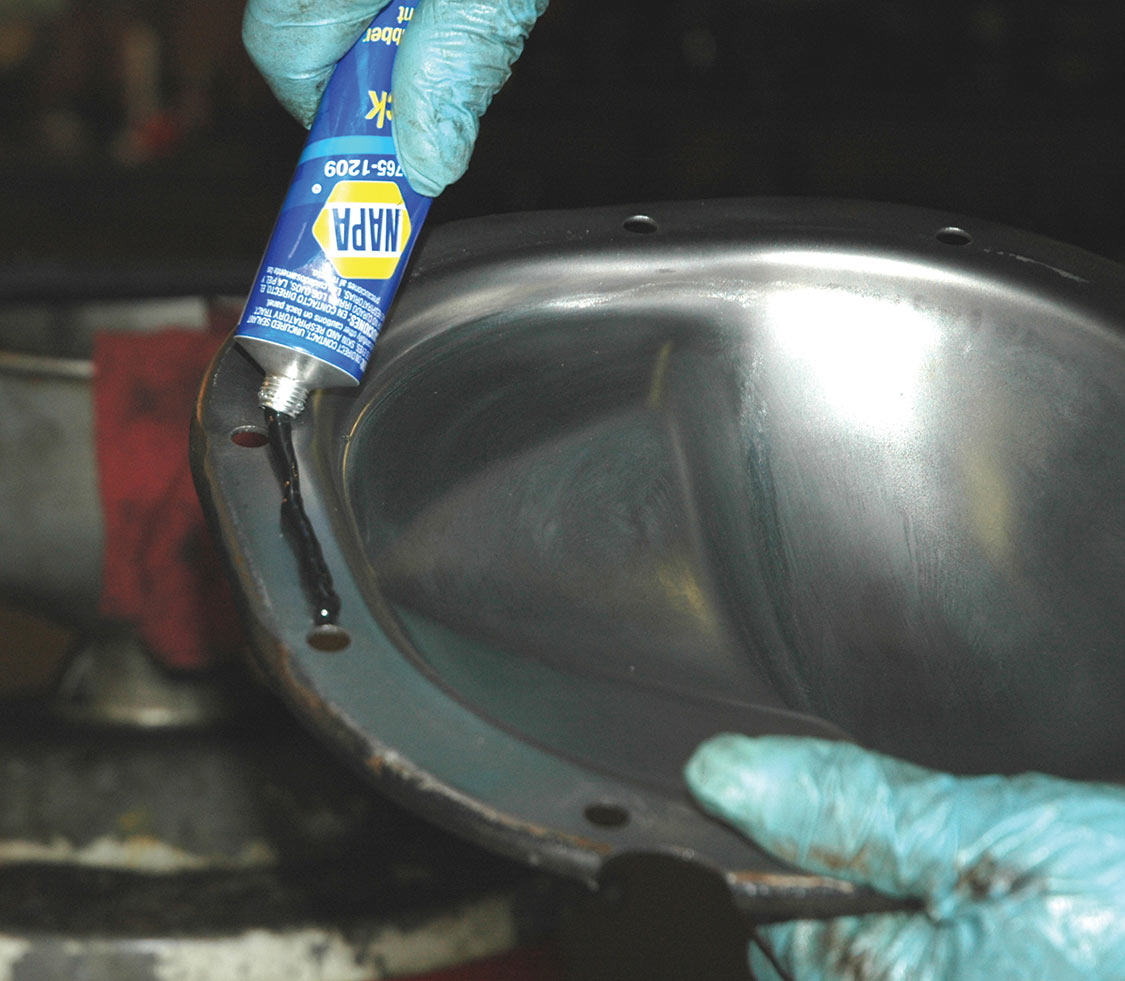
It is fairly simple to change out the original tired rear end and put in a newer, stronger one that will give years of trouble-free use. The newer cars don’t have rear leaf springs, so old-style spring perches need to be welded to the newer axle housing. After that, it’s just pull out the old and slide in the new.
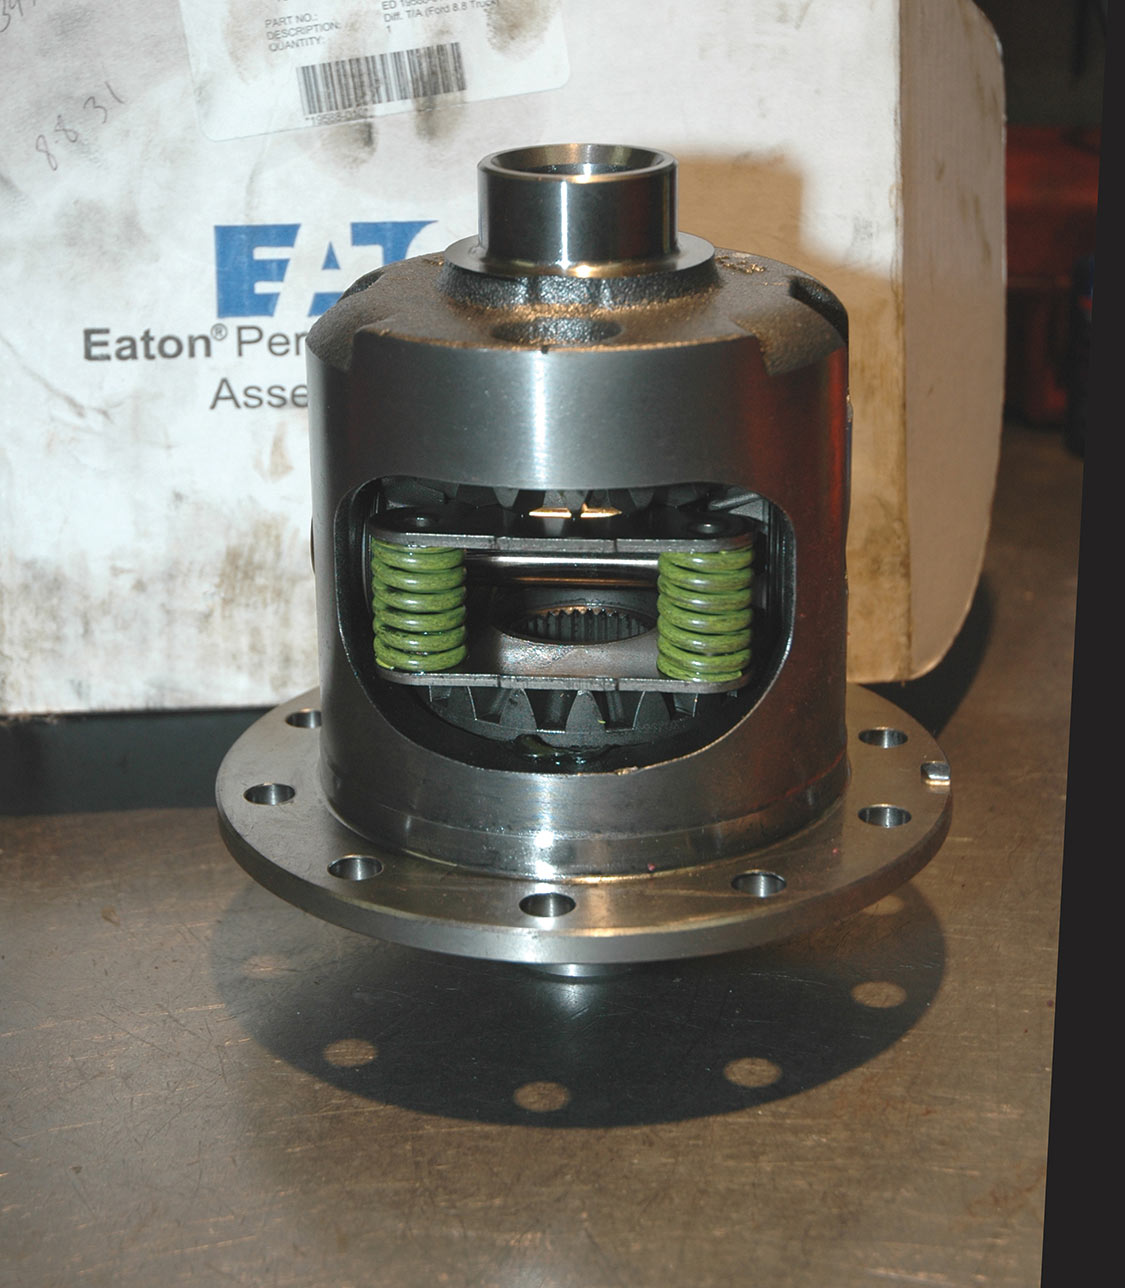
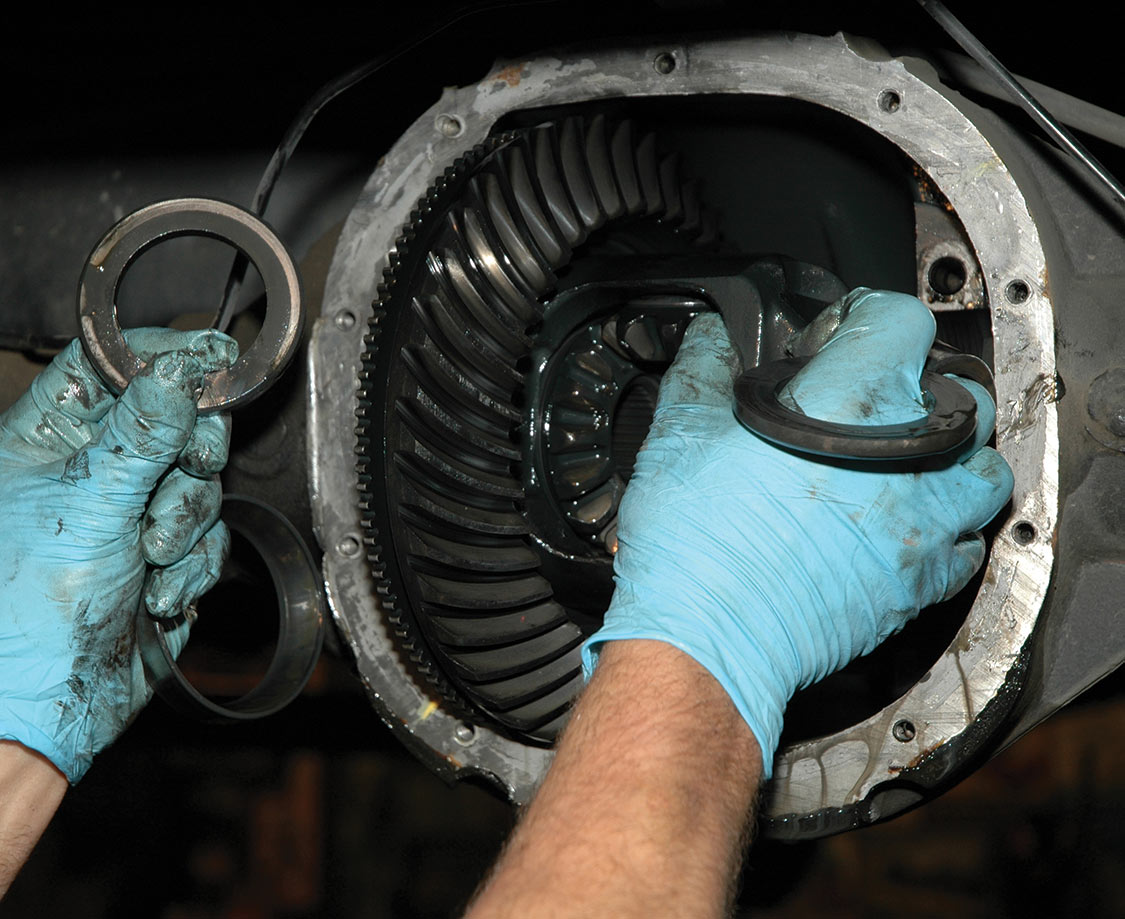
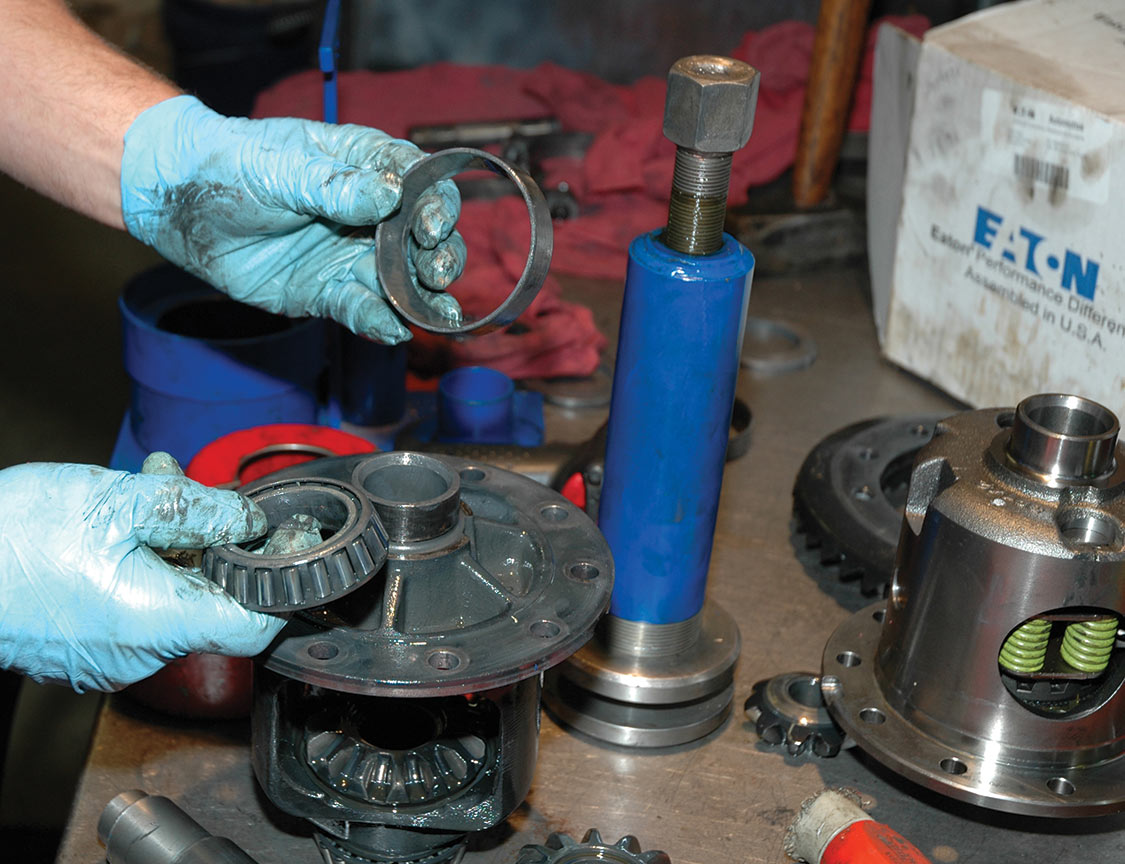
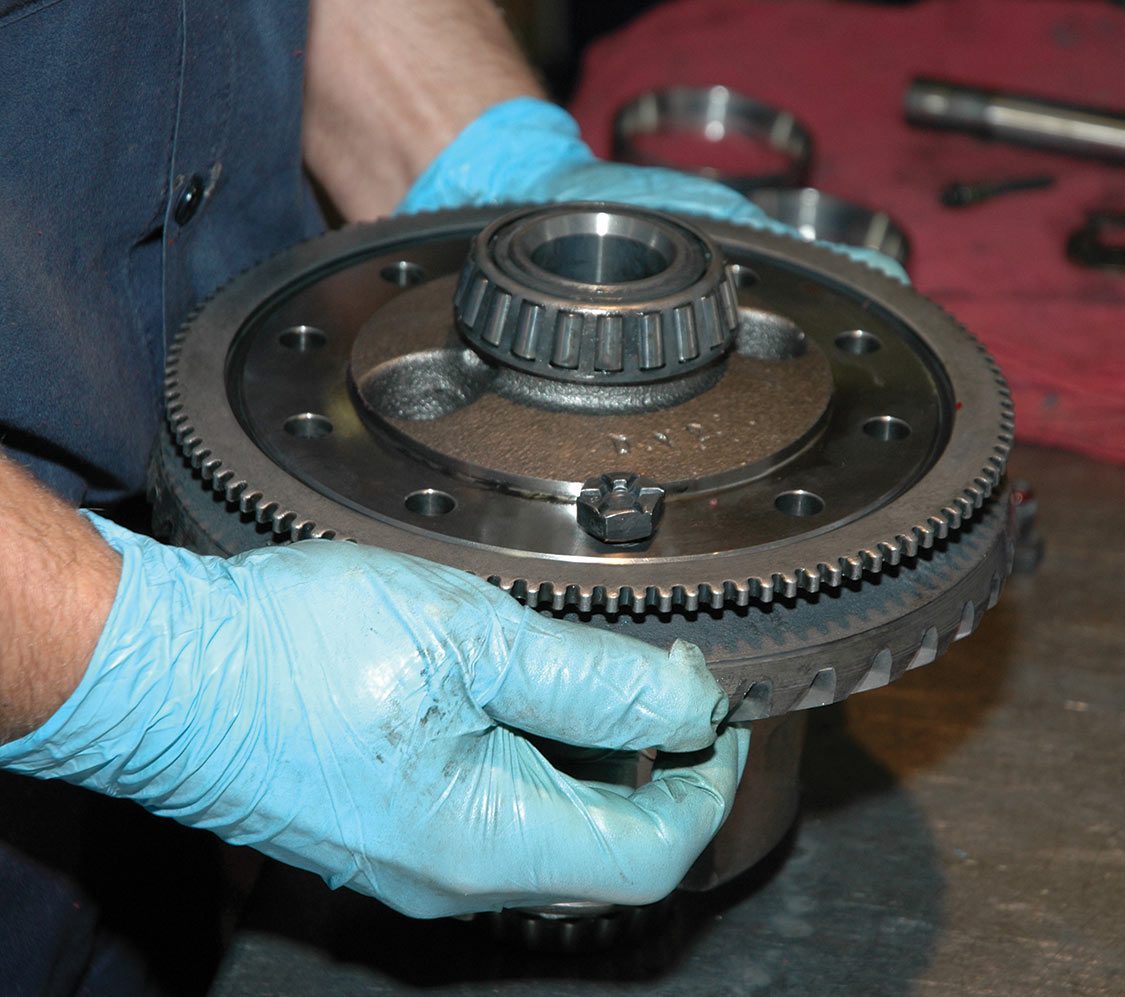
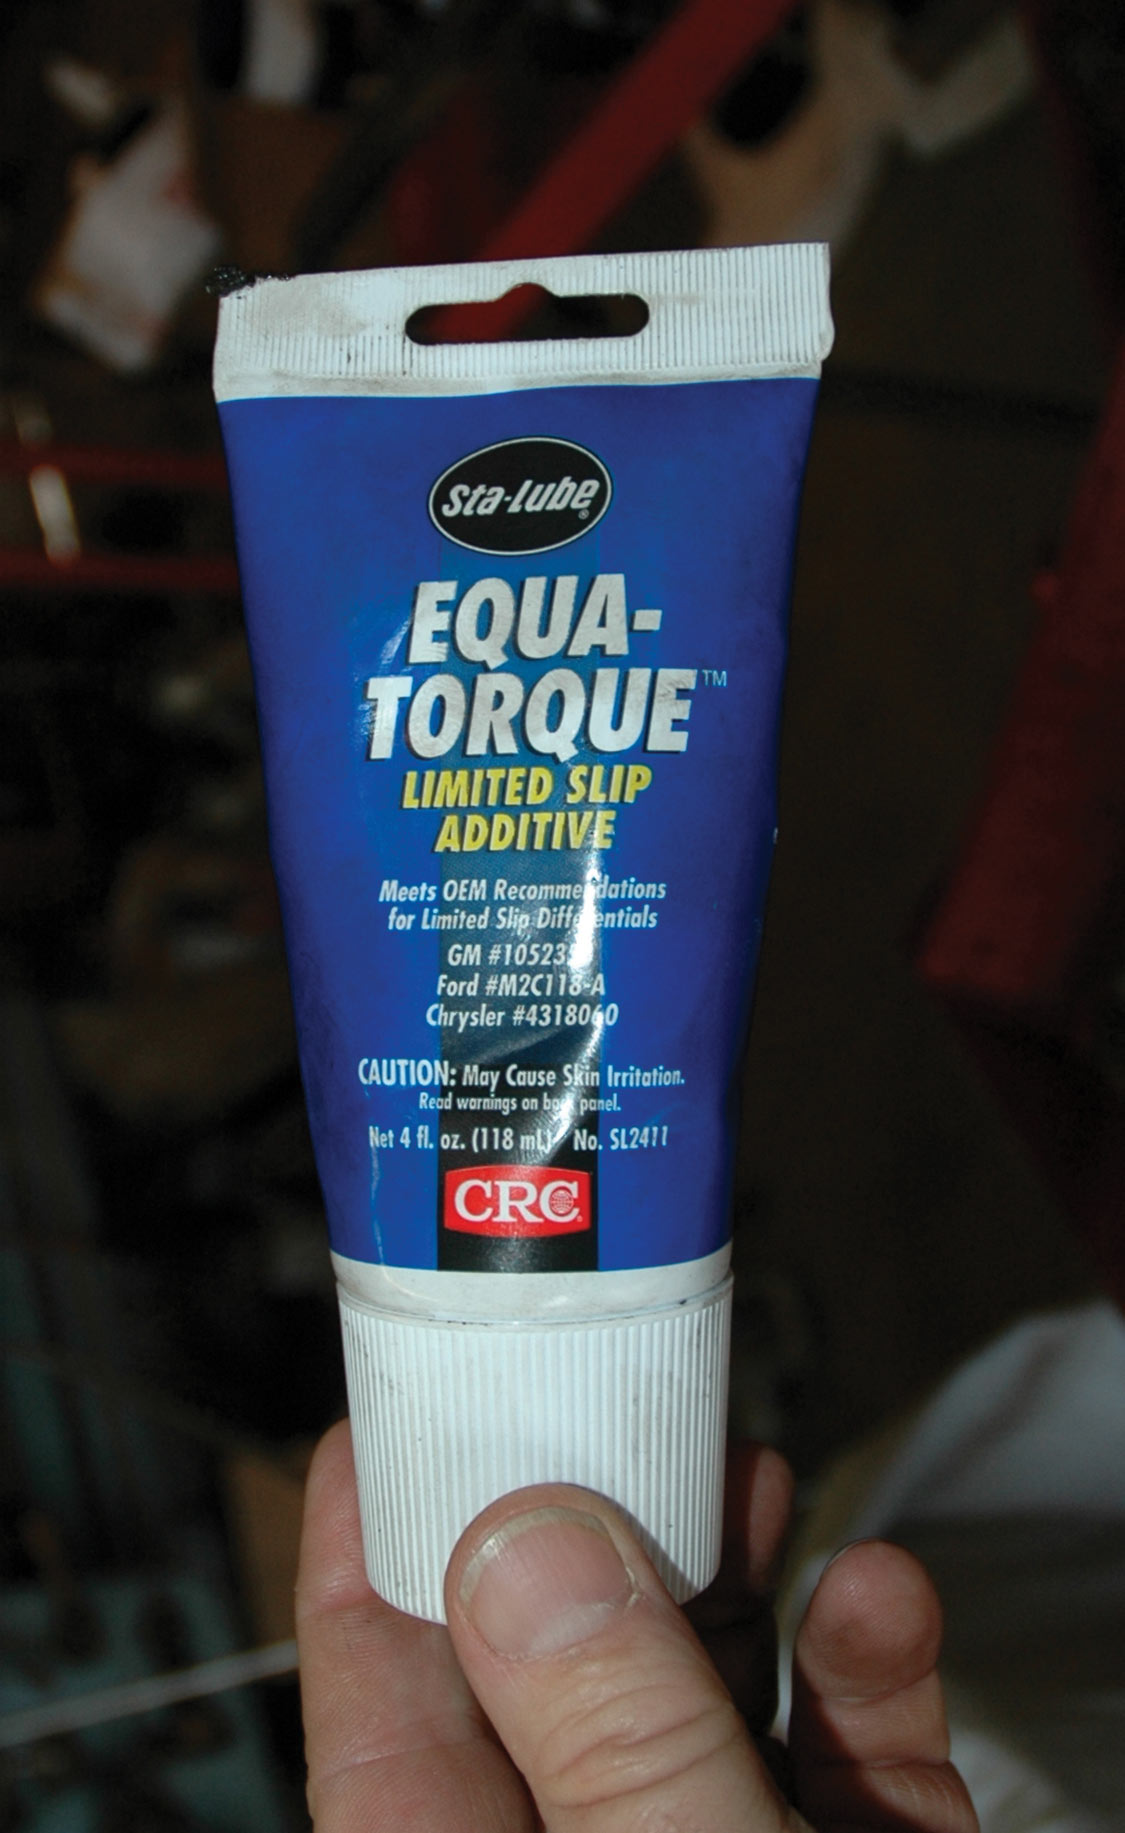
We should note here that Positraction, or Posi for short, came stock in the later-model Mustang GTs and some other late-model Ford cars and trucks, but most of the 8.8 axles available today came with what we call an “open differential.”
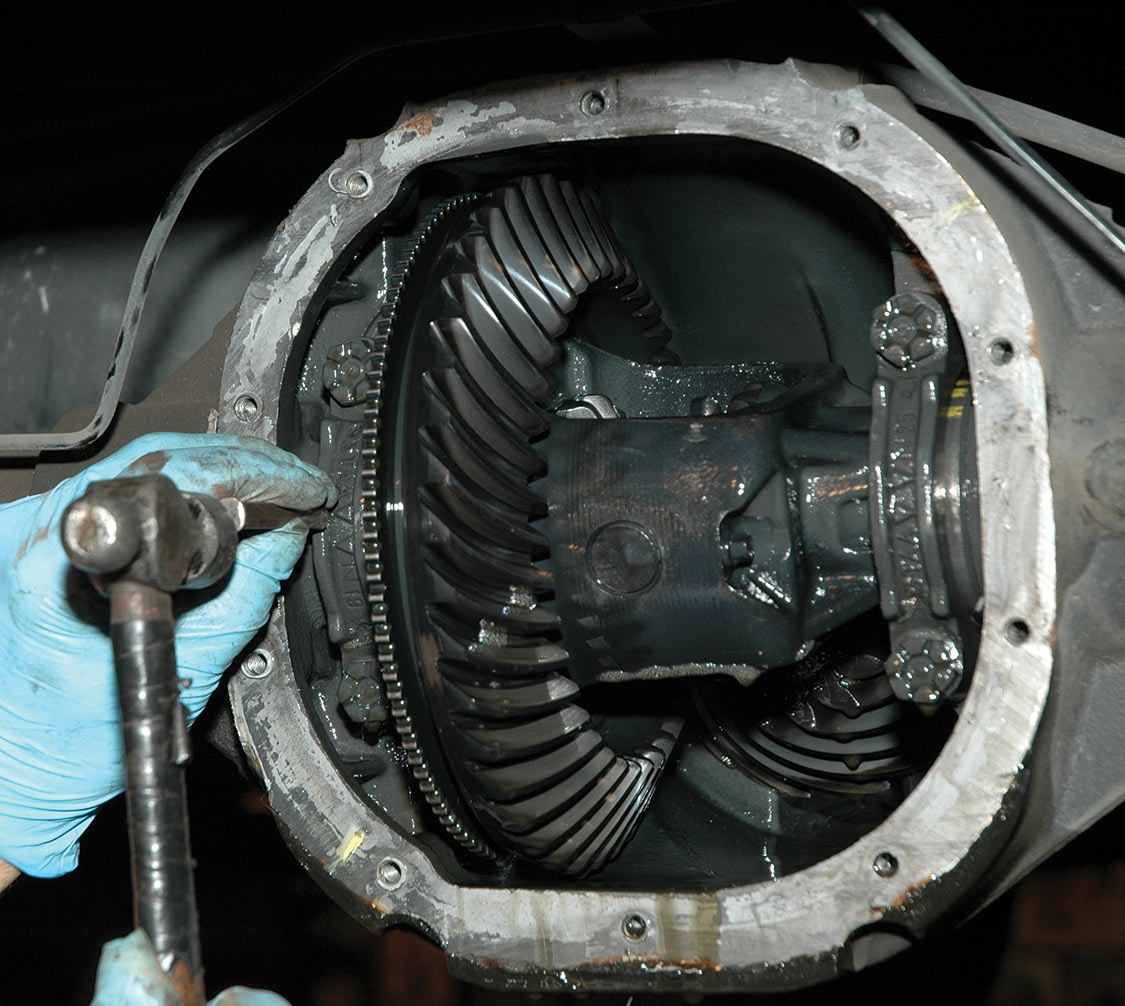
With an open differential, power is transmitted to the axles via a set of simple gears in the differential/ring gearhousing. These gears allow for one axle to spin at a different speed from the other, which is necessary when negotiating tighter turns. When driven-wheel traction is more or less equal, power is distributed equally to both wheels. If one wheel loses traction significantly enough to cause the wheel to slip on the road surface, all power will then be transmitted to that wheel, until even grip is restored. Usually reducing power to the drive wheels is the quickest way to stop the wheelspin, but it doesn’t do much for getting the vehicle going rapidly again in a forward direction.
The idea is to prevent wheel slip at either wheel… So, when one wheel loses traction, the Eaton positraction automatically kicks in, locking the rear wheels together and sending power to both. The whole point of the torque-sensing limited-slip differential is to reduce the likelihood of wheel slip.

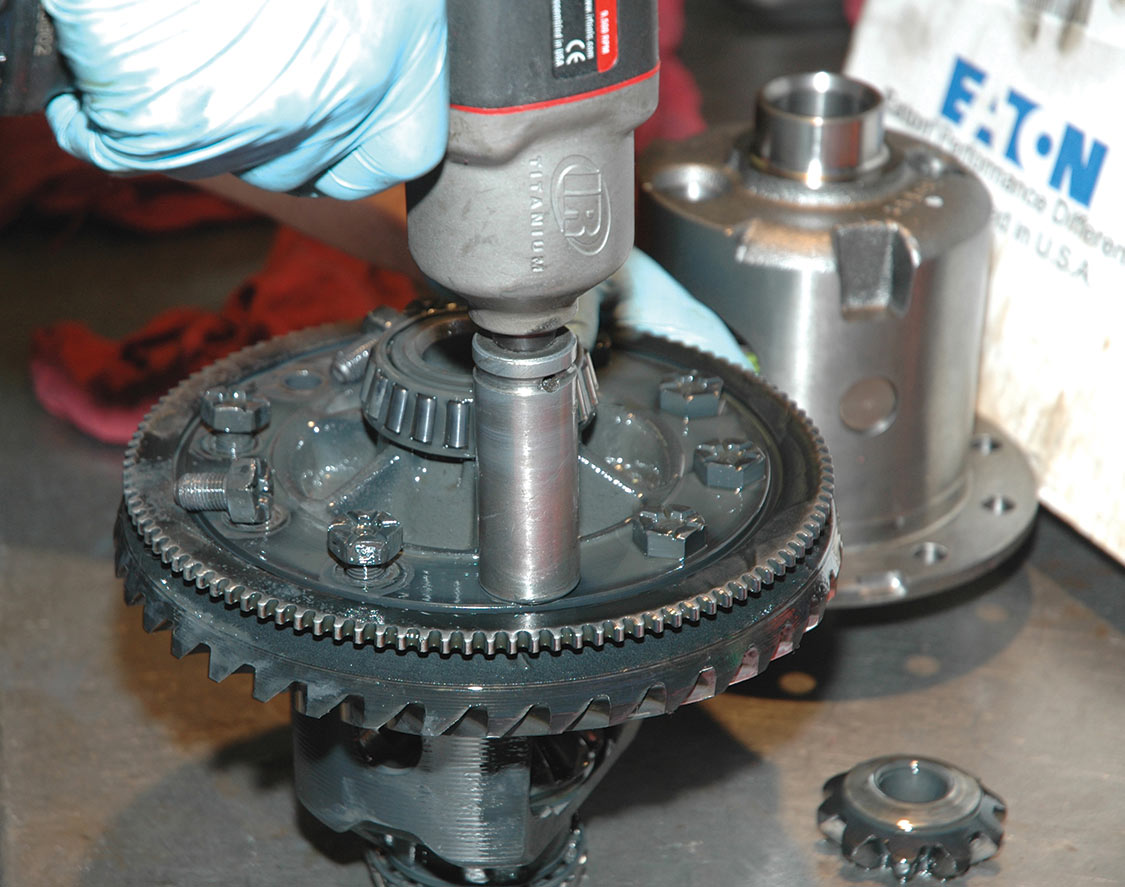
As most car enthusiasts already know, one of the best ways to get power to the wheels is through a Posi or limited-slip differential. Positraction is Eaton’s trade name for the company’s limited-slip differential. It was first introduced in 1961 and gained notoriety during the muscle car era as a strong, reliable unit.
Before we show how to install one, let’s clarify the difference between a limited-slip differential and a locking differential.
Basically, a limited-slip differential sends power to the non-driving wheel based on input torque, which is power coming to the axle from the engine. In contrast, a locking rear differential, such as a Detroit Locker, locks the drive and non-drive wheels together based on wheel slip at the drive wheel, regardless of engine power input.
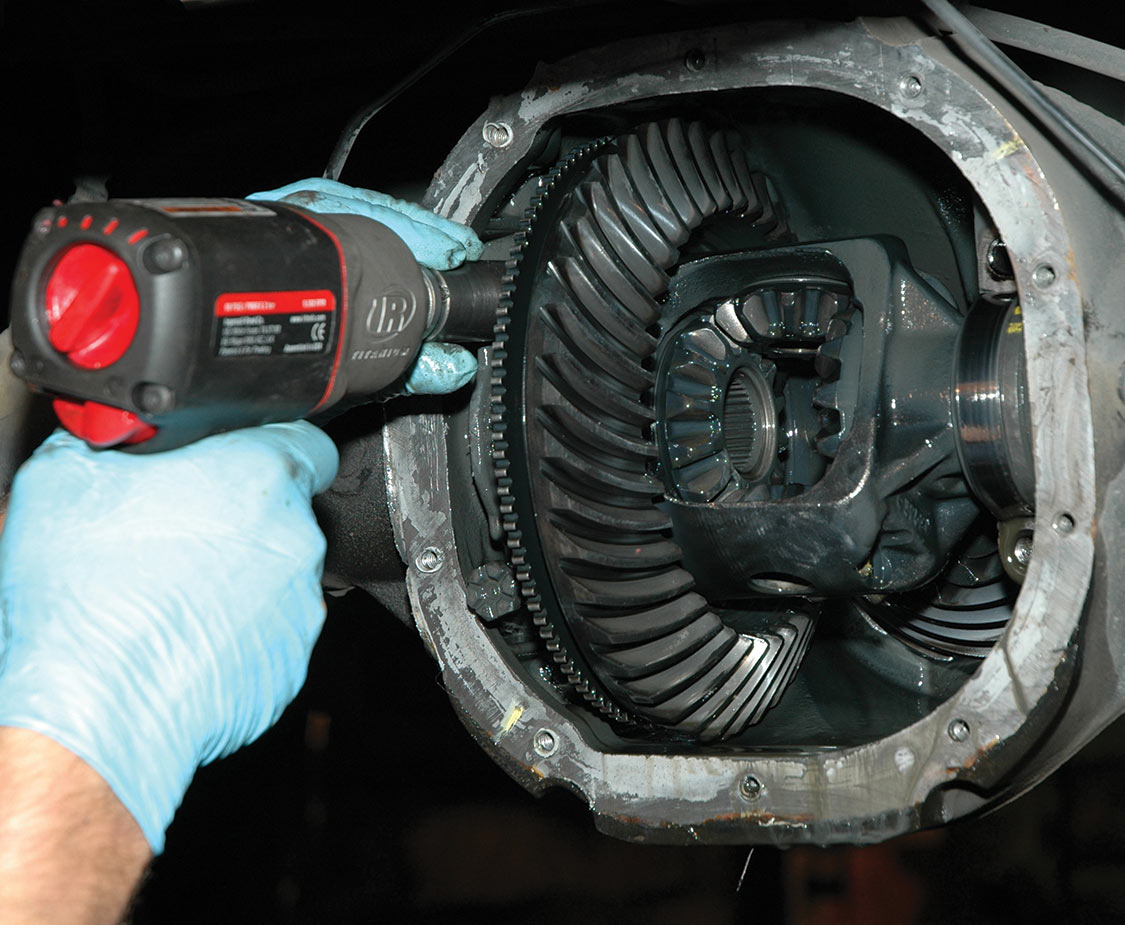
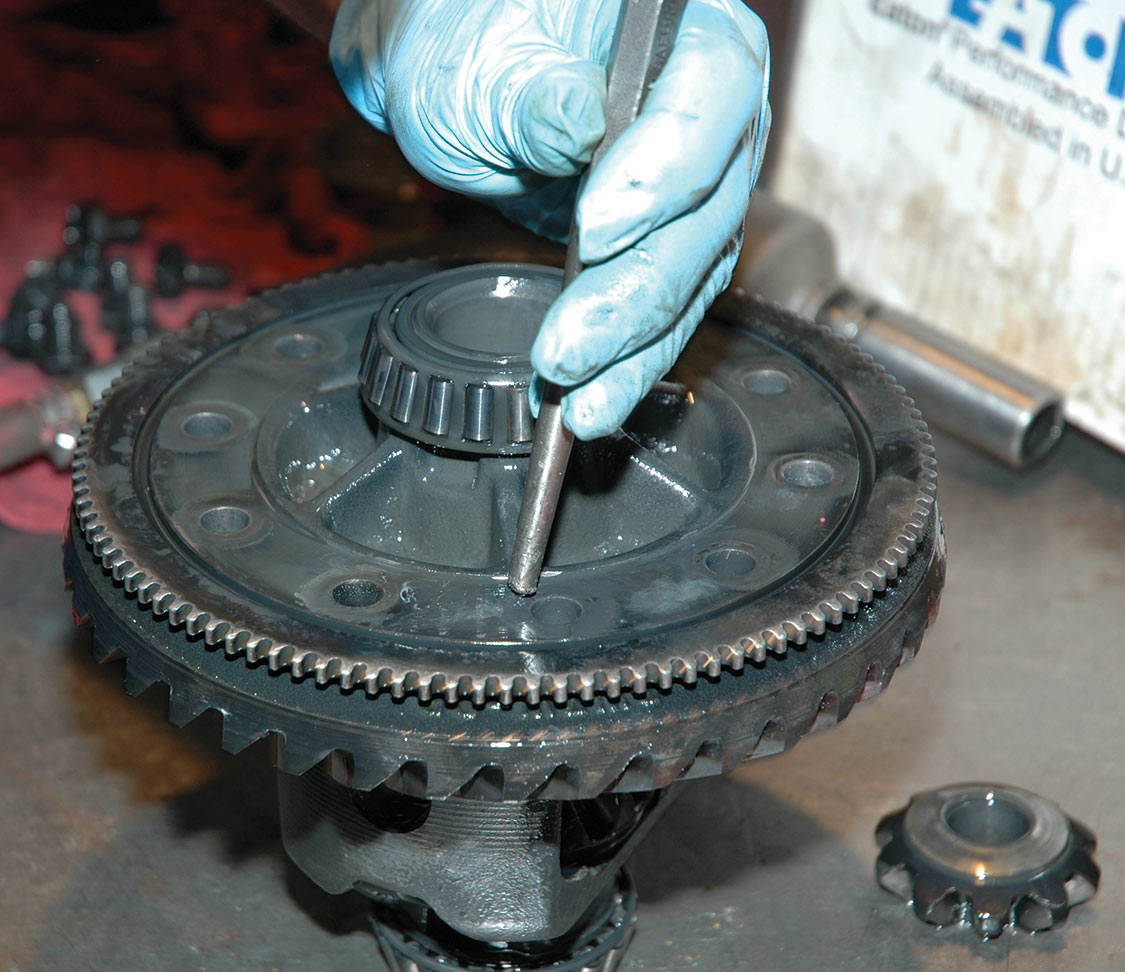
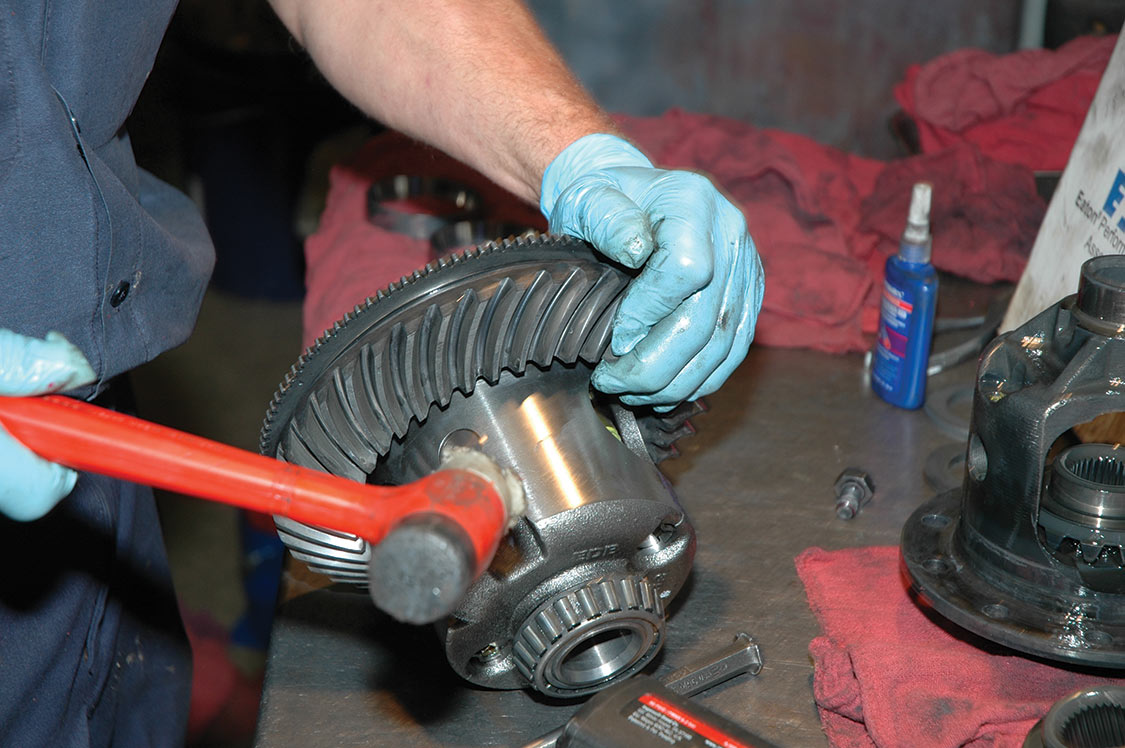
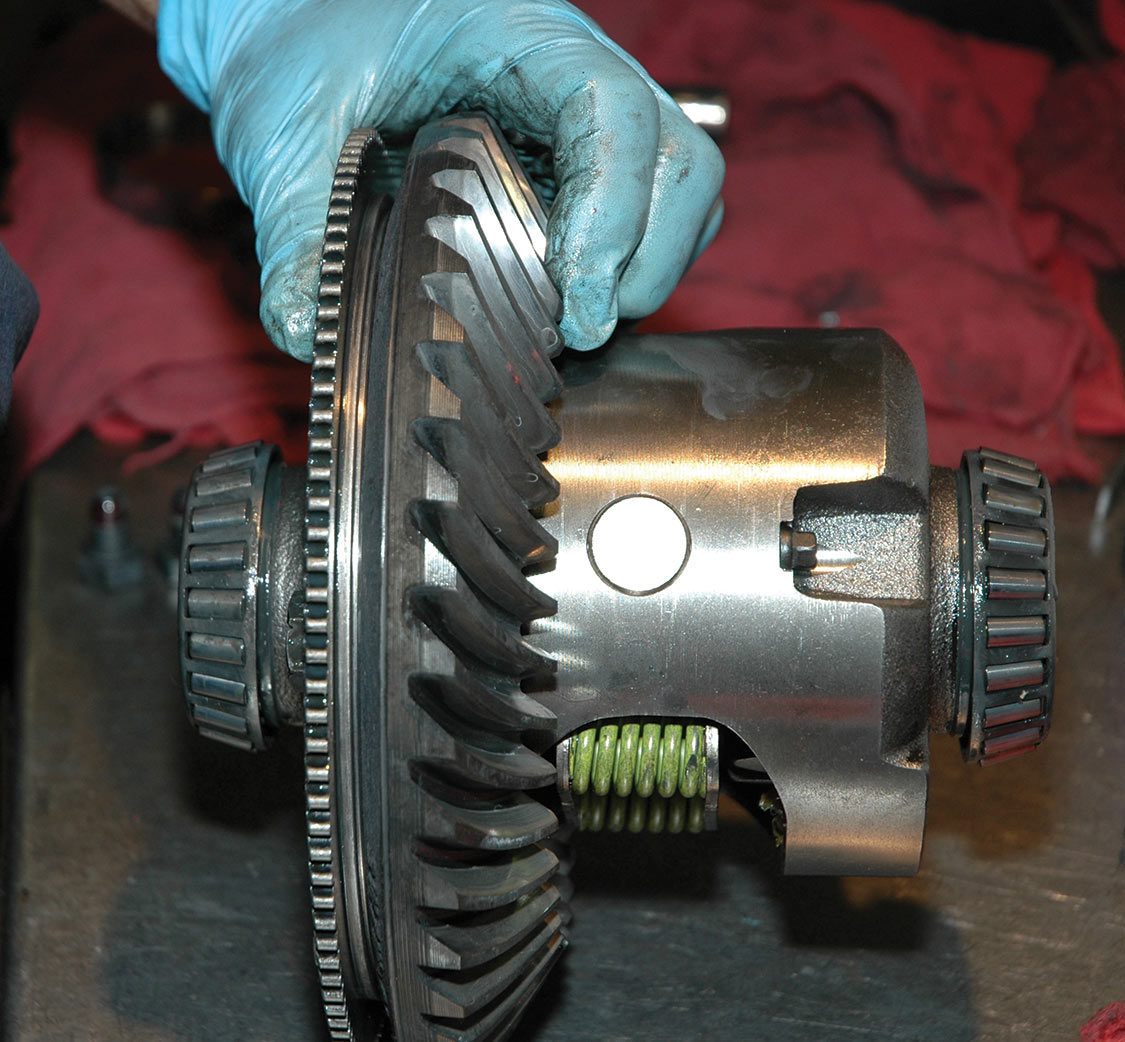
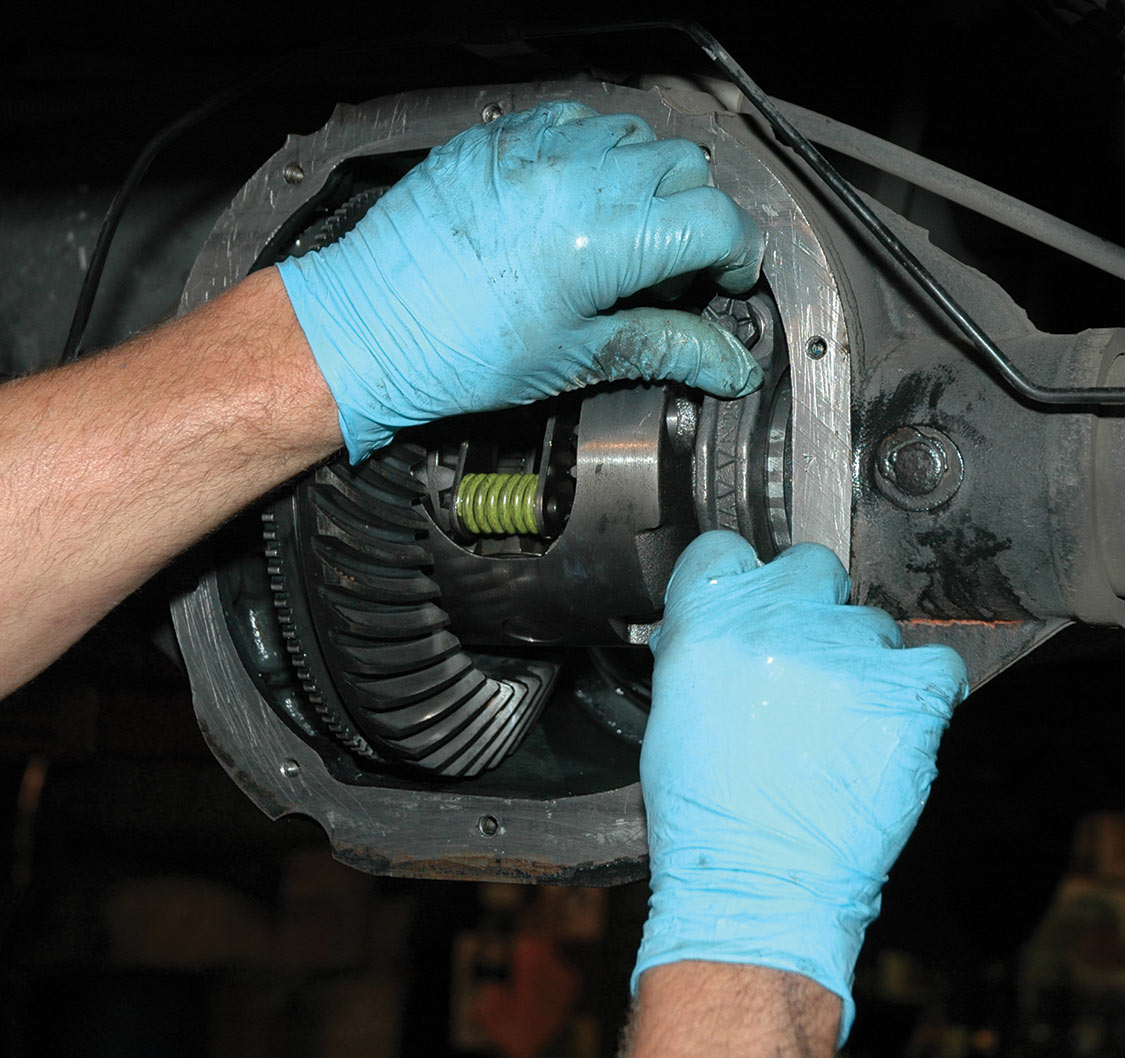
So, with a limited-slip unit, when high torque is applied to the differential and transferred to the axle, a spring-loaded clutch pack clamps the gears to the differential case. This clamping action is in proportion to the torque delivered, which means that the higher the torque, the higher the clamping force.

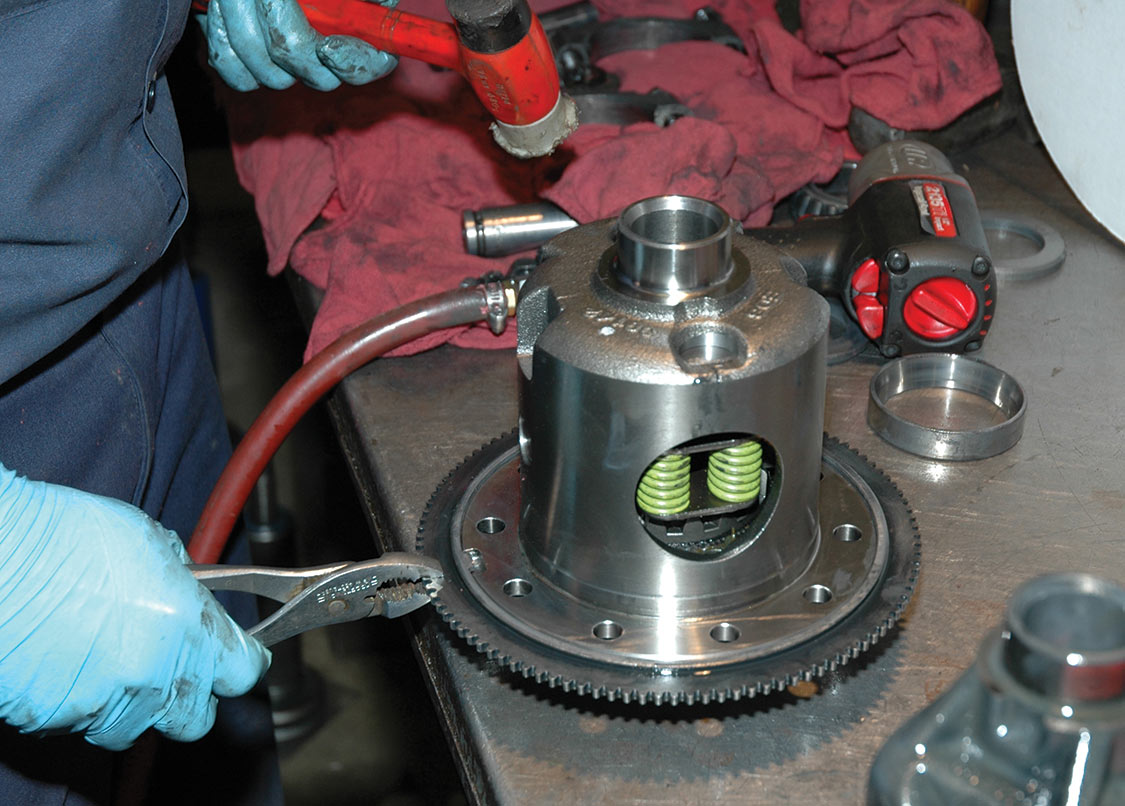
The idea is to prevent wheel slip at either wheel. If one wheel starts slipping before the other, the clamping force drops in proportion to the amount of torque delivered to the slipping wheel. So, when one wheel loses traction, the Eaton positraction automatically kicks in, locking the rear wheels together and sending power to both. The whole point of the torque-sensing limited-slip differential is to reduce the likelihood of wheel slip.
Eaton Posi Performance Differentials feature a patented carbon-friction material originally designed for racing brakes and clutches. Made from high-temperature carbon fiber wrapped with a carbon anti-wear coating, the discs are virtually indestructible, Eaton claims. And despite repeated hard use, there is no loss of performance. Eaton’s warranty says that the patented carbon material provides smooth, quiet operation over the life of the vehicle.


We were very impressed with the new limited slip. After installing it in a 1967 Mustang with a built 302 engine, we took it out on both dry and wet pavement and the unit worked perfectly. It really made a big difference in the performance with both wheels hooking up when the power is applied.
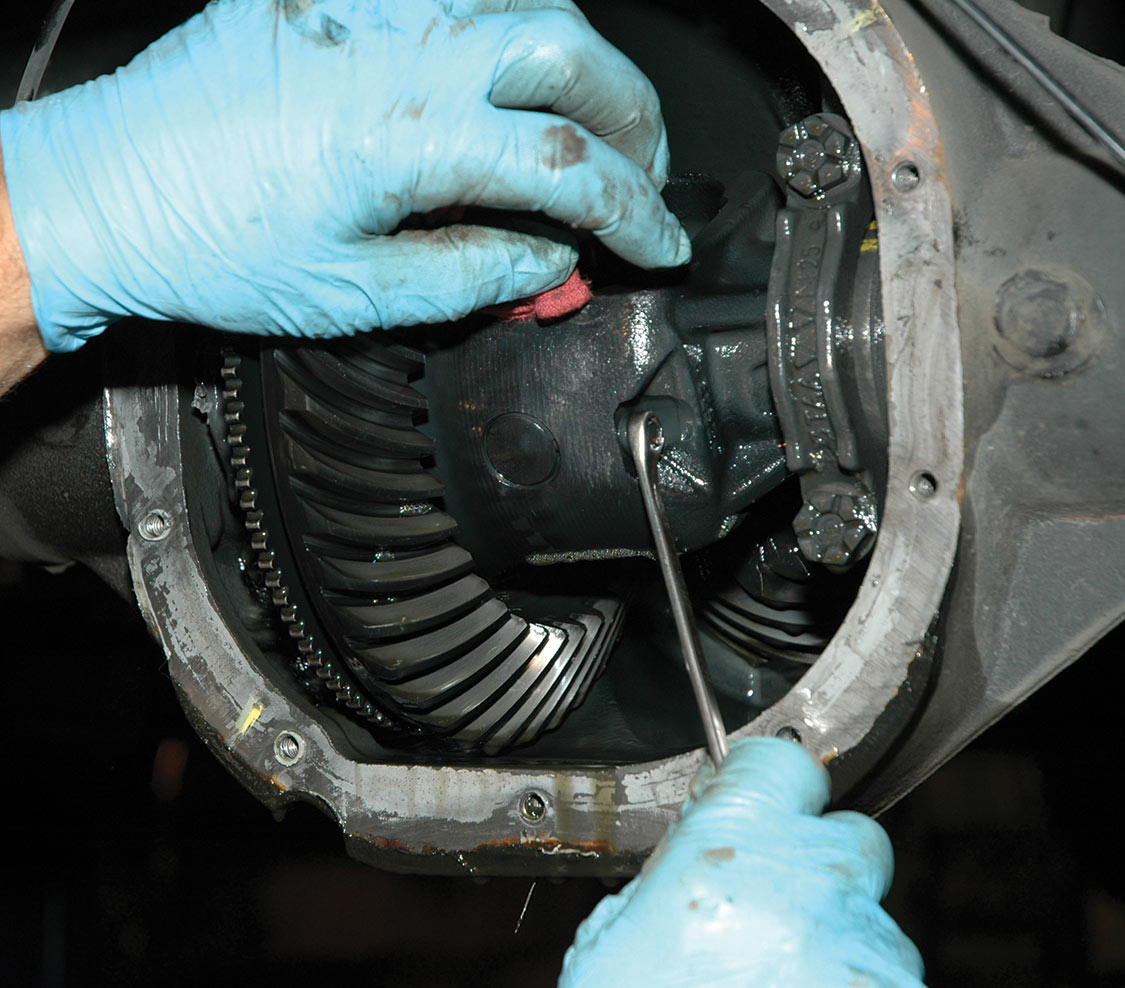
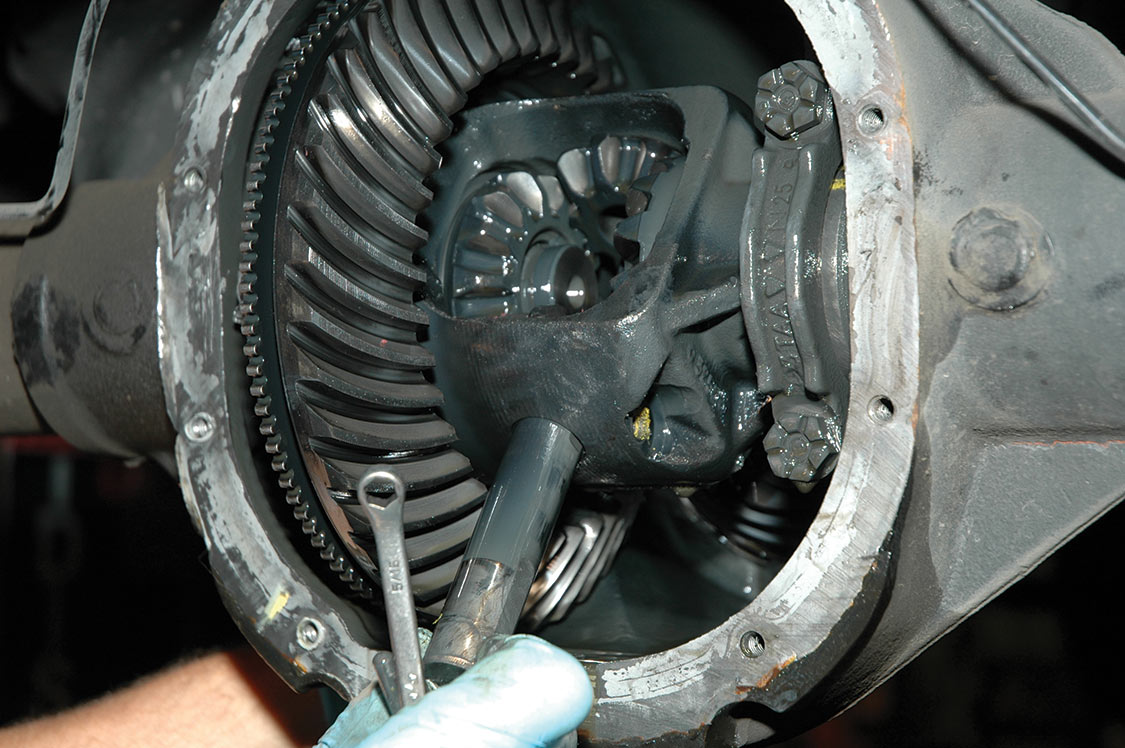
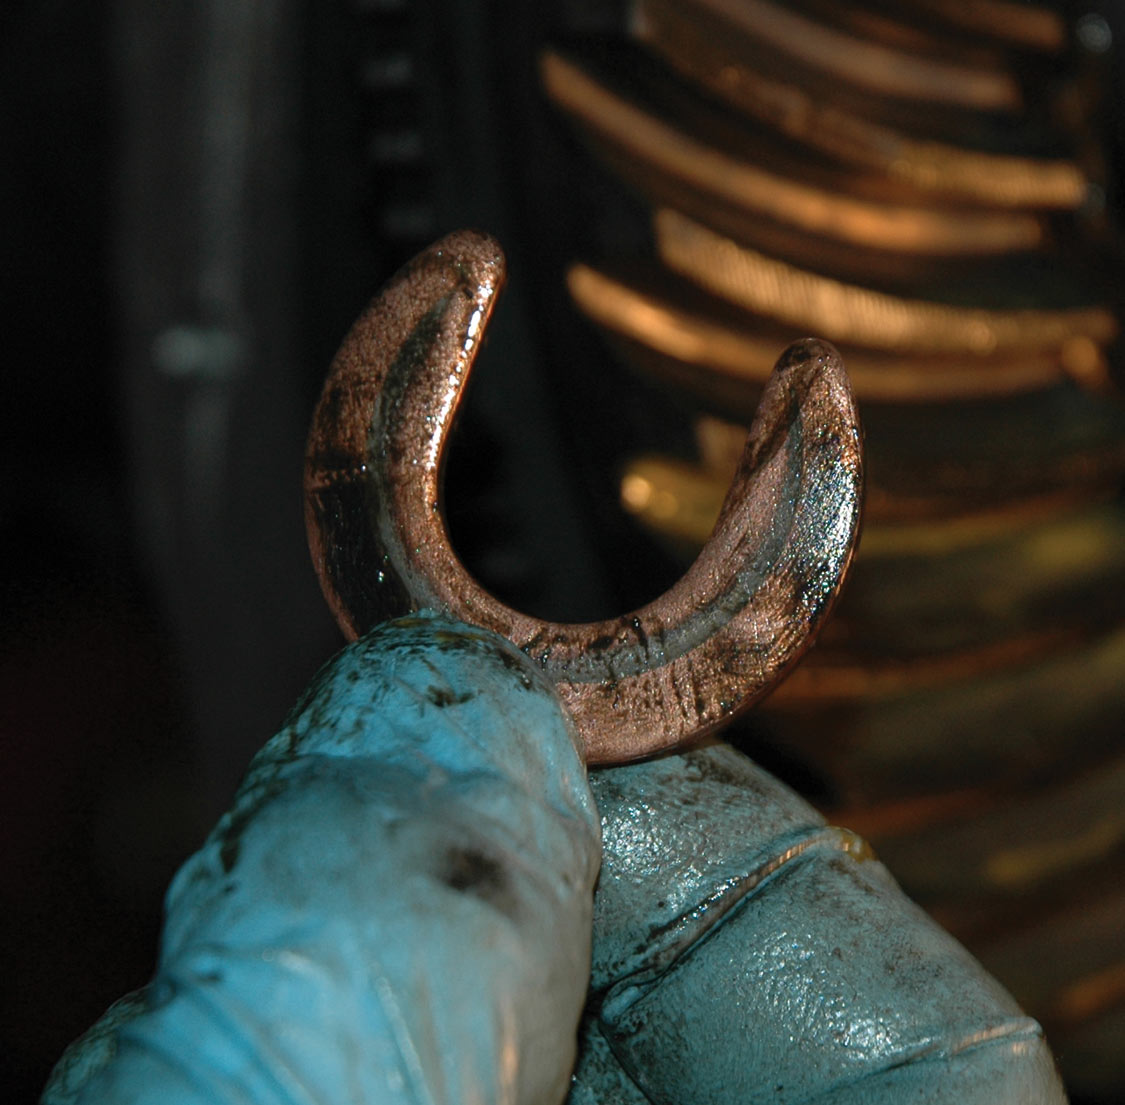
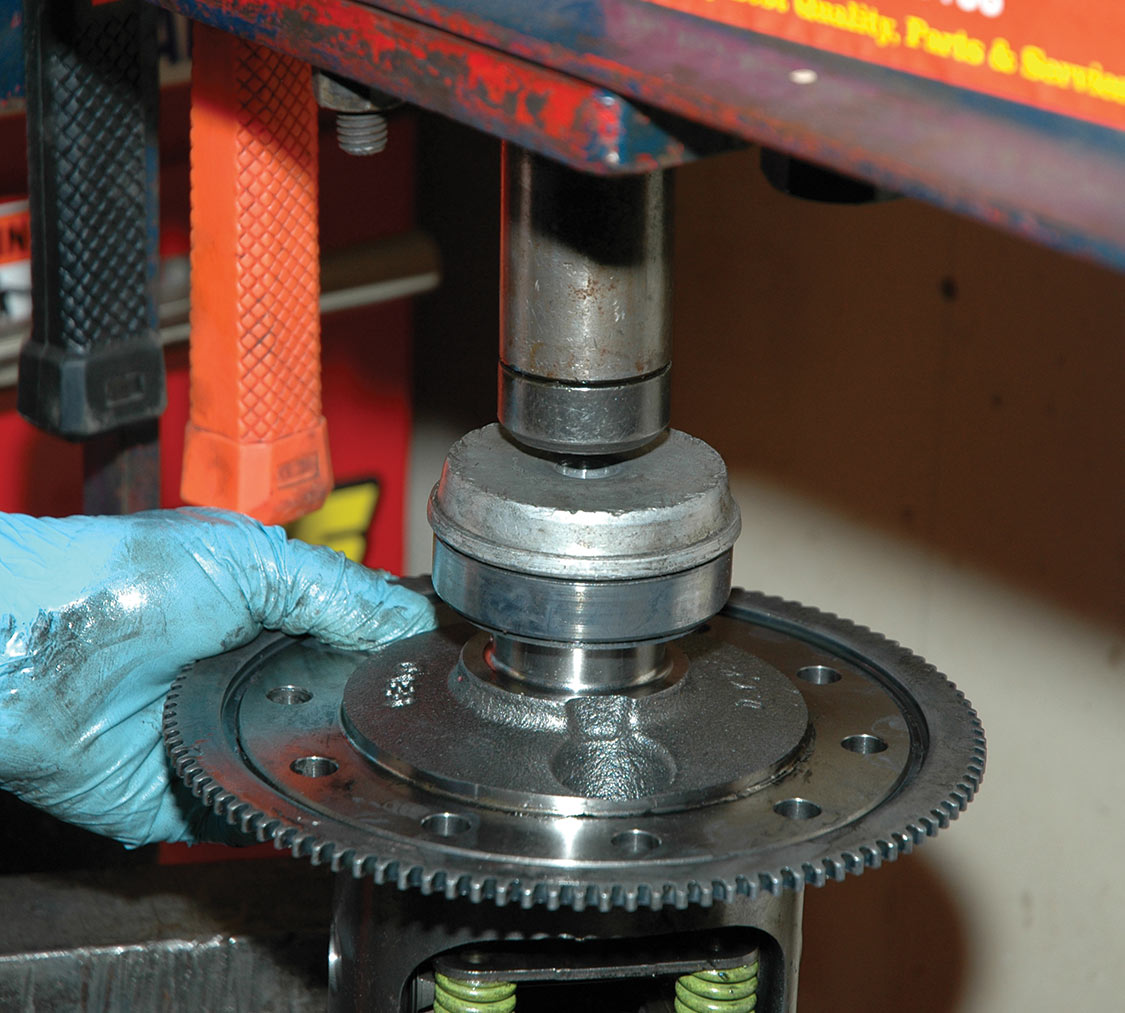
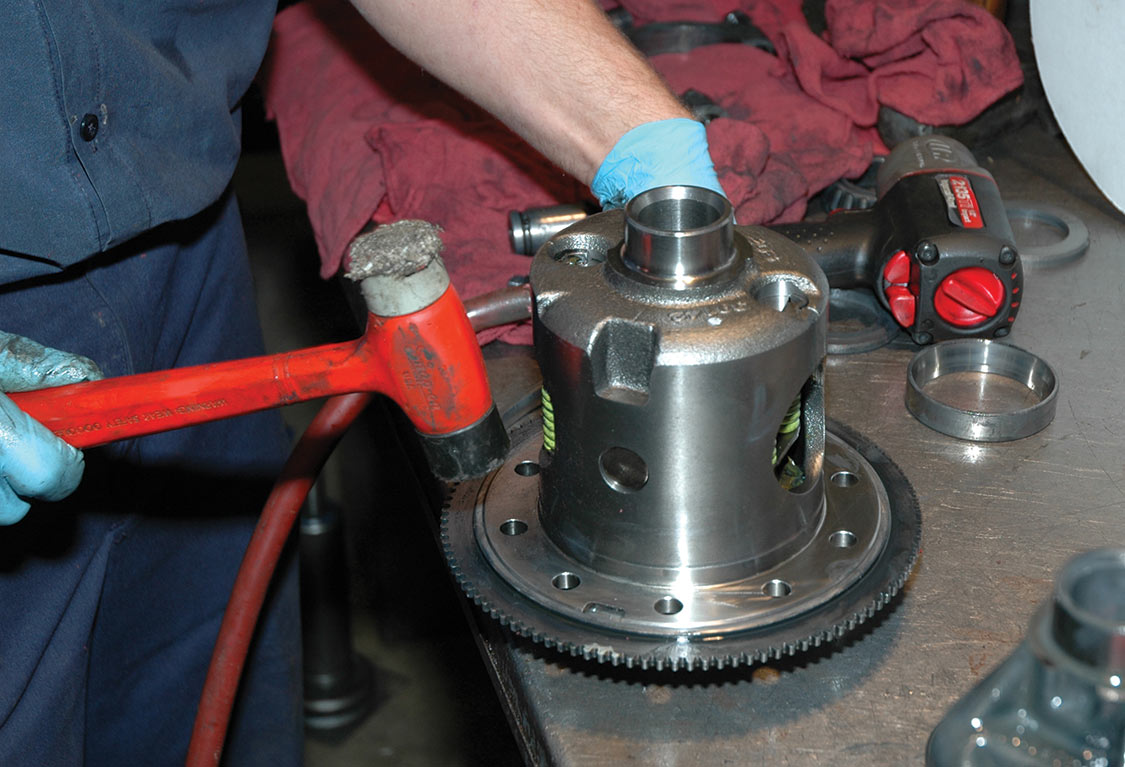
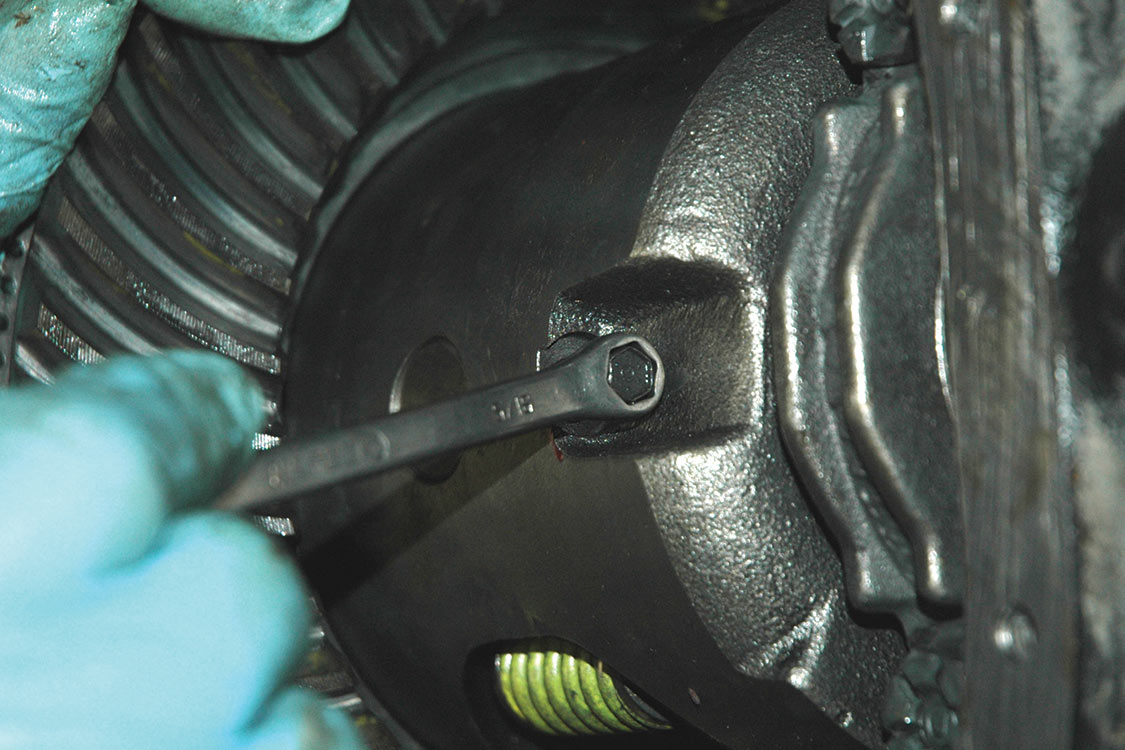
Dan Sudul of Dan’s Gears usually completes this type of installation in just over two hours, but with us “helping,” asking questions, and taking photos and notes, it took about twice the time. With a bit of experience, you can probably install a Posi quicker than that.
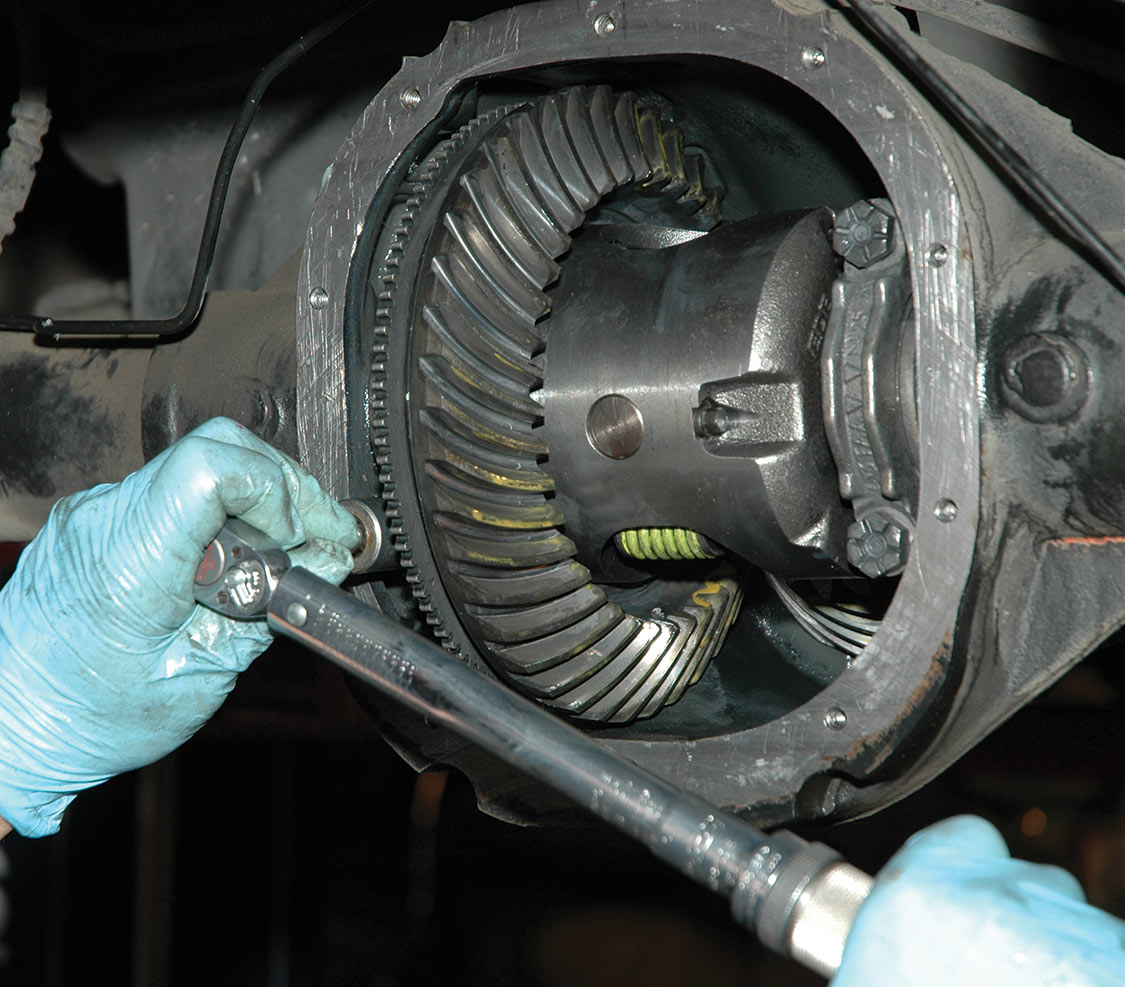


The Ford 7.5-in. rear axle has always been considered the “small” Ford rear end. The 7.5-in. unit was used in the Mustang until it was replaced by the sturdier 8.8-in. in 1979. The 8.8 is easily distinguished from the famous Ford 9-in. axle because it has a 10-bolt inspection plate on the back that measures about 10-in. from the center of the top bolt to the center of the bottom bolt.
The Ford 9-in. is larger and stronger than either of the smaller units. Later models have bigger axle tubes and stronger housings. The 9-in. axle was introduced in 1957 and was produced through the mid-1980s. The 9-in. rear has a removable “hogs-head” center carrier and measures about 10-in. from the bottom to the top stud. This center carrier comes out of the front of the housing.
The 9-in. was available as an option from 1968 through 1971, when Fastback Mustangs were ordered with the big-block V-8 (390 through 428-cu.-in. Cobra Jet engines). There were very few of these produced in relation to the total annual Mustang production.
To make things just a little more confusing, Ford also used the standard 8-in. rear axle in many Mustangs built with smaller engines after 1972. The bottom line is that the 1987 through 1993 Fox-body Mustang 8.8-in. rear axle is the best to use for early Mustangs because they are cheaper to buy, are the correct width to fit under a 1965-’68 Mustang and come with disc brakes.
There are lots of 8.8-in. rear axles available at a salvage or recycle yard. They run about $200; the Eaton limited-slip differential costs about $800 including installation. For approximately $1000, you can have a newer rear end with a limited slip that will stand up to anything you can throw at it, and it will deliver great traction as an added bonus.
Tech Tip: While an experienced wrencher with the right tools can do this job at home, if you lack the tools or experience to properly measure and adjust the fit of your parts, it doesn’t cost much to have a differential specialist install your Posi, and can save you a world of trouble later.

All Feature Vehicles
Uptown Whittier is very picturesque, with historic buildings, some of which are brick from way back. The city’s unique style is eclectic and vibrant, like… Continue reading
Roger Rohrdanz . November 03, 2022

All Feature Vehicles
Funny Car Driver and Clutch Master Paul Lee Builds the Car of his Dreams The 1970 Plymouth Barracuda was a third generation E-body and was… Continue reading
BOB RYDER . December 28, 2021
All Feature Vehicles
The 49th Annual Event is a True Classic At the crack of dawn, vintage, classic and hot rod cars started arriving at Potter Junior High… Continue reading
Roger Rohrdanz . October 11, 2022

All Feature Vehicles
What do a Buick Wildcat, Pringles Potato Crisps, an erupting volcano, and laser spectroscopy have in common? The “gear-head” fix that is My Classic Car… Continue reading
MICHAEL ECKERSON . February 15, 2023

All Feature Vehicles
The Spirit of Lions Event: A Tribute to the Drag Legend The Price Automobilia Collection is a museum that Rick Lorenzen created to honor the… Continue reading
Richard Parks . January 25, 2023

All Feature Vehicles
We Visit The Don Garlits Museum of Drag Racing There’s a place in central Florida that should be on the bucket list of every race… Continue reading
Scott Ross . June 21, 2022


Goodguys 35th Speedway Motors Heartland Nationals Presented By FiTech Fuel Injection
Iowa State Fairgrounds 3000 East Grand Avenue, Des Moines, IA 50317
Goodguys 28th Summit Racing Nationals Presented By Grundy Insurance
Ohio Expo Center 717 East 17th Avenue, Columbus, OH 43211
Stray Angels Show & Shine
Stray Angels Show & Shine at Melrose Vineyards 885 Melqua Rd. Roseburg OR. 97471
43rd Annual Stray Angels Show & Shine
Melrose Vineyards, Roseburg, Oregon
Firecracker Car Show
Pioneer Park, Ferndale, WA
We use cookies to enhance your browsing experience, serve personalized ads or content, and analyze our traffic. By clicking "Accept All", you consent to our use of cookies. Visit our Cookie Policy for more info.

 Please wait...
Share Link