 Motortopia Staff
.
March 31, 2026
.
News
Motortopia Staff
.
March 31, 2026
.
News
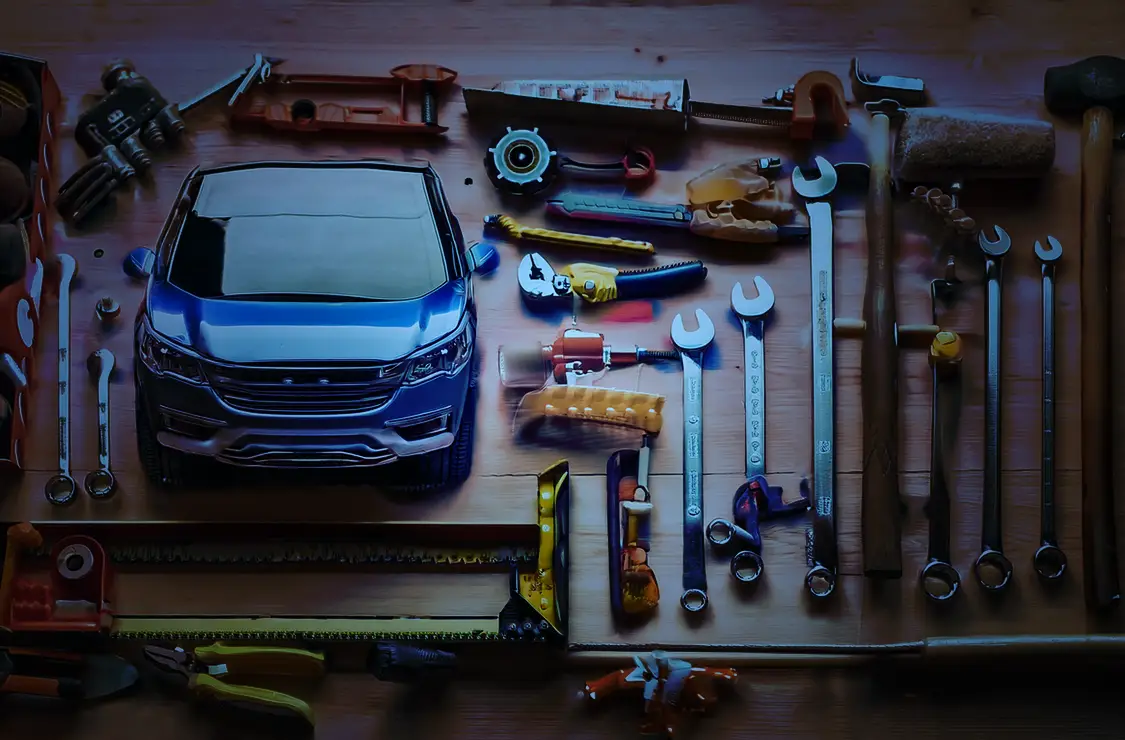
Buying a project build can get you further down the road than starting from scratch, and a seller who’s put hard-earned money into paint, bodywork, and upgrades can make the car genuinely appealing. The problem is that a finished exterior tells you almost nothing about the quality of the fabrication underneath, the condition of the systems you’ll depend on, or what the car looked like before the most recent round of work.
Glossy paint, fresh upholstery, and a smooth idle at the curb are the easiest parts of a project build to get right, and they’re also the easiest parts to use as a distraction. Weak fabrication, unfinished brake or fuel work, and old damage buried under newer bodywork don’t announce themselves on a short test drive around the block.
A restored car that presents well and performs poorly on the road is a problem that falls entirely on the buyer once the title changes hands.
Before you spend time inspecting the car itself, spend time on the story behind it. A seller who can document the build has less to hide, and gaps in that documentation tend to point to gaps in the work.
Ask for receipts and invoices that cover the major work. What to look for:
A seller who can produce receipts matching the parts on the car gives you a starting point for verification. A seller who can’t is asking you to take their word for work you can’t see.
Ownership history and build documentation don’t have to be perfect, but red flags in either one deserve direct questions:
Paint and body repairs are where prior damage gets buried, and a professional finish can cover frame work, floor patches, and pulled sections that the buyer never sees. Getting under and around the car before any money changes hands is the only way to catch it.
Uneven panel gaps, paint overspray on rubber trim or glass edges, and waviness in quarter panels or doors are all signs that bodywork happened. Additional areas to check:
Rust repair ranges from correct to dangerous, and a car that looks straight may have patches that don’t restore the structural capacity of the original metal. Specific concerns:
Fabrication work is where a skilled builder and a careless one separate, and welds don’t lie. Get the car on a lift if you can, and look closely at every structural joint, bracket, and added crossmember. Problem areas to check:
Seat and belt hardware on a project build may have been moved, replaced, or modified during interior work, and a mount that looks secure may not be anchored to anything structural. Check for:
Lighting and visibility problems are among the easiest defects to confirm during an inspection, and they should be checked before the test drive:
Brake and steering problems tied to incorrect or unfinished work can stay hidden through a short seller demo and surface the first time the car is pushed on the road.
A brake system that was assembled but not properly sorted will communicate through the pedal. Watch for:
Steering problems tied to geometry, alignment, or suspension work tend to emerge at speed, and a short neighborhood drive won’t expose them:
Electrical problems on project builds frequently trace back to added accessories, modified lighting, or ignition work that wasn’t finished with proper protection. Look for:
Fuel system work that looks finished in a cold garage can develop problems once the car reaches operating temperature on the road:
Front-end and rear-end repairs done after a collision don’t always restore the car to its original geometry, and a professional paint job can make serious prior damage nearly impossible to spot on a casual inspection.
Structural concerns tied to prior crash repair:
Hidden crash damage may not get full scrutiny until a future wreck leaves you dealing with injuries, insurance disputes, and the need to consult a personal injury attorney about the condition of the vehicle at the time of purchase.
Treat the inspection and test drive as a single process, not two separate steps. Work through this before committing:
A project build that presents well deserves a buyer who looks past the presentation. Paint and trim help sell the car, and the decision to buy needs to rest on welds, repair quality, mounting points, brake response, steering behavior, and any signs of prior crash damage.
Get it inspected at the structural, mechanical, and safety level, and buy with confidence — or walk away with yours.
News
So you’ve decided it’s time to get your truck sitting lower. Maybe you want that slammed street stance, better aerodynamics, or just the satisfaction of… Continue reading
Motortopia Staff . April 06, 2026

News
Photo source: Unsplash Travelers come to the Pearl of the Gulf for various reasons. Some visit for business, while others only want to relish the… Continue reading
Motortopia Staff . July 01, 2025

News
Image source: trinityrental.com Dubai is a real center of luxury cars. Here you can often find exotic vehicles that attract attention from the first minutes.… Continue reading
Motortopia Staff . June 23, 2025

News
Electric bikes have greatly facilitated daily travel, making it easier and more cost-effective. However, similar to any other vehicle, they require proper care. The battery,… Continue reading
Motortopia Staff . April 16, 2026
News
Car tracking without the owner’s knowledge is technically possible using various modern technologies. The following paragraphs explain how it is done, the legal risks, and… Continue reading
Motortopia Staff . April 10, 2026

News
Whenever you see those flashing blue lights in your rearview, your heart jumps. You’re getting pulled over. Maybe you were speeding. Or perhaps your tail… Continue reading
Motortopia Staff . December 10, 2025


Goodguys 28th Summit Racing Nationals Presented By Grundy Insurance
Ohio Expo Center 717 East 17th Avenue, Columbus, OH 43211
Stray Angels Show & Shine
Stray Angels Show & Shine at Melrose Vineyards 885 Melqua Rd. Roseburg OR. 97471
43rd Annual Stray Angels Show & Shine
Melrose Vineyards, Roseburg, Oregon
Firecracker Car Show
Pioneer Park, Ferndale, WA
72nd Annual Long Beach Model T Club Swap Meet
Long Beach City College Veterans Stadium 5000 Lew Davis St.
We use cookies to enhance your browsing experience, serve personalized ads or content, and analyze our traffic. By clicking "Accept All", you consent to our use of cookies. Visit our Cookie Policy for more info.
 Please wait...
Share Link