Motortopia - EVERYTHING Automotive!
Exciting News! Motortopia App Now Available on Apple App Store!  
Close Ad

How To Bag Your ’88 -’98 Chevy Truck?

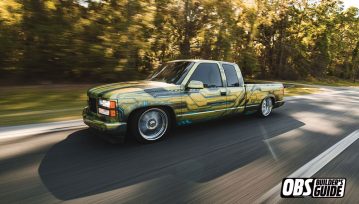
A Step-by-Step Guide to Adding Air Suspension on ’88-’98 GMT400 Chevy Trucks

In the first-ever OBS Builder’s Guide, (March ’20) we focused our attention on swapping out the factory installed 4.3-liter V-6 engine for a Blueprint Engines 383c.i. stroker motor. Additionally, we added an American Powertrain transmission, along with a full Ridetech coilover suspension system and 22-inch American Racing wheels. It was an impressive truck that was built right from Day 1 and driven hard like it was intended.

So now, we’re going to turn our attention to the OBS Builder’s Guide V2 donor truck, a 1997 GMC Sierra dubbed Project Artemis that’s sporting a 5.7-liter V-8 with the third door option and only 125K original miles. She’s a completely clean—and 100% stock—extended cab OBS GMC that’s just begging for a new life, and we have a goal to give her one.

For this build, we will focus on adjustable suspension and bolt-on options for bagging your ’88-’98 OBS truck. Using a very well-engineered Ridetech air-ride suspension along with Ridetech’s patented air management system, we will simply cut off the old suspension mounts and bolt this complete system to the factory frame rails. No welding, no fabricating and, best of all, no cutting the bed!

With a new suspension in place, the factory wheels and tires will kill the new look of the truck. We didn’t want to make this truck unrelatable to the average consumer, so we went with an extremely affordable wheel from U.S Mags called the Bullet, and wow, they are nice! Toyo Proxes STIII tires will surround the rims and a new set of EBC Brakes will tuck nicely behind them. Once the suspension is complete, we will show you guys a super cool new product from BedWood and Parts called a retroliner. Yes, you can now put a wood bed floor in your OBC truck, too!

For this new suspension special, we will be working with the amazing crew SaltWorks Fab in Myakka City, Florida. They are experts at metal fabrication and suspension setups, and the work they put out is second to none. Producing Concours d’Elegance builds to compete at Pebble Beach is the daily grind for this team, so dropping the welders and bagging our OBS will be a cake walk for Thom Ophof and company.

Before we jump into the tech, we wanted to lay out the plan, show you the parts and ideally inspire you to follow along on your own OBS.

THE PARTS

We just picked up this ’97 GMC Sierra Ext Cab with a goal to get on the ground. The factory installed 5.3-liter V-8 is all stock with only 125K original miles, and the optional three-door is going to come in handy when we want to load the crew up and ride out to an event.

    • This Ridetech air suspension system for two-wheel drive, ’88-’98 Chevy/GMC C1500 trucks includes front tubular upper and lower control arms, drop spindles, bolt-on wishbone rear suspension, front HQ shocks, rear HQ Shockwave airbags, as well as a front sway bar. The benefit of buying a complete suspension system is that it takes all of the guesswork out when purchasing a new suspension.

System Highlights:

    • Ride height that is approximately 4 inches lower than stock in the front and 6 inches in the rear. Fully deflated will net an additional 3-inch drop.
    • Front CoolRide setup includes HQ Series shocks and bolt-on upper shocks mounts to allow more ground clearance and maximum suspension travel.
    • The upper StrongArms control arms feature corrected ball joint angles for the lowered ride height, and the length has been altered to create more camber adjustment.
    • The lower StrongArms feature a double sheer lower shock mount for increased strength and have a lowered shock mount to increase suspension travel as well as more camber adjustment.
    • The front MuscleBar sway bar reduces body roll and includes the Delrin liners to minimize suspension bind.
    • Ridetech’s drop spindles greatly improve suspension geometry and bump steer.
    The rear bolt on three-link does not require any welding or major modifications to the bed floor.

The AirPod RidePro-X air management control system is an all-in-one integrated solution that mounts in your vehicle as a single unit and comes pre-wired. It includes an aluminum 5-gallon tank, two Thomas Compressors, a Big Red high flow air valve solenoid block, RidePRO-X pressure based digital leveling system, 3/8-inch air lines, and all the fittings and wiring you will need. This complete AirPod system eliminates hours of installation time!
US Mags new Precision Series wheels are machined from a single 6061 T-6 aluminum alloy forging and available in multiple sizes. We went with a 20-inch wheel with a staggered width. This Bullet design is offered in a chrome finish or you can order an options graphite machined face. Both look amazing and they only weigh 30 pounds each!
For tires, we are working with Toyo to test out its new Proxes ST III tire. The size options we have are 275-40-20 for the front and a 275-45-20 for the rear. The Proxes ST III is the perfect balance of dynamic looks and sport-oriented performance for trucks and SUVs. With a wider tread and a silica-based tread compound, the Proxes ST III stops up to 6 feet shorter in wet conditions while delivering superb handling, excellent all-season performance, consistent wear and a smooth, quiet ride. Now backed by a 40,000-mile warranty!
These EBC Stage 3 Truck/SUV brake kits boast GG rated friction for better stopping with fully shimmed edges and slotted rotors for silent running. Being an upgraded pad, these may have a shorter life than other hard aftermarket pads but the performance makes up for it ten fold.
BedWood and Parts RetroLinerX kits include the ash BedWood, polished stainless bed strips, polished stainless hardware, aluminum channels and end piece to tie it all together. The wood is pre-finished using the company’s H2X Exterior Wood Finish. The contents of the kit are neatly packaged in a single box, eliminating the mishaps and additional costs that often occur with kits requiring multiple packages. RetroLinerX is a complete kit ready to install right out of the box.

THE FRONT INSTALL

Stage one for this multi-stage resto-mod is to replace the front and rear suspension. We don’t want to be cutting and grinding the frame with the custom wrap we have planned, and we definitely don’t want any greasy mechanics getting in and out of our nice new interior. So, we called up Ridetech, told the crew our goals, and they helped us order a complete, turn-key air-ride system designed to fit ’88-’98 Chevy and GMC C1500 trucks.

Once the complete kit arrived, we packed everything up and headed out to SaltWorks Fab in Myakka, Florida, for the install. Chris Hagerty and Telly Violleto were excited to break away from their high-end fab work for a couple days to bag our OBS, and we were there pestering them throughout the whole process.

Our project this year is to build a custom, bagged OBS Chevy truck that is reliable and ready to cruise with the whole family. So, meet Artemis, a 1998 GMC Sierra that has been female owned since it came off the lot. She’s been well maintained, and she’s ready to be reborn!
This running-driving, three-door GMC has only 124,000 original miles and absolutely no mechanical issues that we know of. She’s a perfect project truck!

All the equipment from Ridetech came packaged with such great care that not a single piece was scratched or missing. We unboxed and laid it all out nicely so the crew can get to work.

With the truck on the lift, we took the time to inspect the rest of the chassis and engine to make sure we didn’t miss anything while buying this 23-year-old truck.
The OEM front suspension is all still in great shape, but it’s completely covered in grease. It’s going to make for some messy hands!

First to come off is the bed. A few bolts from the bottom and some plugs for the taillights are all you need to remove before taking off the bed. Better ask a few friends for some muscle assistance.

The next thing to be removed were the wheels and front sway bar. Ridetech provides a new sway bar so this one can be tossed out.
Safety first! Telly wrapped chain around the spring so it doesn’t fly out when he removes the spindle. Pretty smart!
The tie-rod end is carefully removed so to not damage the threads. The Ridetech kit comes with new inner tie-rod ends, but these otters will be reused.
A nice big pile of parts in the corner is a sign of progress! Now, it’s time to bolt on the new Ridetech suspension components.

For the upper control arms, we installed these StrongArms that are designed for ’88-’98 Chevy C1500 trucks. They are developed by Ridetech in Jasper, Indiana, on an actual running, driving vehicle, so you know they fit.
The front kit includes these CoolRide airbags designed to be used with the Ridetech lower arms. Everything comes with the kit including air springs, brackets, HQ Series shocks, bolt-on shock mounts and hardware.
Before the bag can go in, the press-on style air fitting needs to be installed on it. Don’t skip this step or you will regret it!
With the top hat mounted to the air spring, it can be bolted into place using the factory shock hole to secure the top of the bag mount.
To get as much drop as possible, Ridetech provides these 2-inch drop spindles that allow you to slam your ride and increase ride quality. They are forged from heavy duty steel and will increase the track width by a quarter inch per side.

With the upper bag mount loosely bolted in, the lower control arm can be installed, and the bottom of the air spring can be tightened.

Moving on, the shock needs to be relocated since the air spring takes the location of the OEM one. So Ridetech engineered this perfectly fitting shock relocation kit that bolts to the frame and the lower control arms.

With the suspension components in place, the brake can be reinstalled. We once again ordered a set of EBC rotors and pads as we have had nothing but great experiences with this brand.

To finish up the front, the new Ridetech MuscleBar needs to be bolted up. Using precision CNC tubing benders, Investment cast steel bar ends, and Delrin lined mount bushings, Ridetech can produce sway bars with unheard of dimensional and rate accuracy.
For Artemis to sit at the correct level anytime she’s cruising down the road, we ordered these RidePROx. These height sensors digitally measure your vehicle’s exact suspension movement to provide accurate and repeatable vehicle height adjustment. Even when the vehicle has a heavy load, it will sit perfectly every time.
The completed front is a thing of beauty. Modern engineering meets good old fashioned American metal.

THE REAR INSTALL

Next up, we tackle the rear of our 1998 GMC Sierra 1500 SLE with a C-notch install and a lot of sweet looking, well-engineered suspension parts. The final piece to the new suspension puzzle is picking a wheel and tire package.

For project Artemis, we wanted a setup that would allow us to have a super low stance without cutting anything and a decent ride on 40-series tires. If you have any experience with air suspension, county roads and 35-series tires, you will more than likely understand our desires for this driver. The wheels are staggered fit, 20-inch aluminum wheels from US Mags with a width of 8 inches up front, and 9.5 inches in the back. Having a wider wheel in the back not only looks cool, but it also stretches the 40-series tire just a bit to give up some extra clearance out back when cruising low and slow.

Now let’s check out the steps to installing the rear of this extremely well engineered air suspension system for GMT400 trucks.

With this Ridetech suspension system, the only major modification you need to make to your ’88-’98 Chevy or GMC truck is to add a C-notch to the rear frame rail. This is a simple yet tedious process that must be done in order to get as low as possible by allowing additional clearance for the axle to travel up, while bringing the body of the truck down.

Lots of guys have their own technique for cutting a notch, and generally they all work great, but the way the team at SaltWorks performed the task made it look basic beyond belief. Trace the pattern, drill some relief holes in the corners, grind down the gunk so you don’t ruin your blade, and simply use a grinder to remove the piece. (Editor’s note: Be sure to properly support both sides of the frame to avoid any drooping or sagging.)

With the Ridetech provided C-notch in place, they drilled all the bolts and bolted it onto place. You may be surprised by just how much additional strength these give to the chassis.
Next, the lower bag mount brackets are installed on the rear axle using a set of U-bolts provided in the kit.
With the bracket in place, the front of the parallel link bars can be bolted into the factory leaf spring location.

Now the rear of the link bar can be bolted to the lower bag bracket mounting point.
The upper wishbone bracket is installed next. This piece bolts into the C-notch on both sides and eventually ties to the differential.

This differential bracket easily bolts to the rearend and the upper crossmember. It’s a very, very well-engineered design and fits absolutely perfectly.

The Ridetech shockwave airbag is next to be installed. It simply bolts into place behind the axle and allows for plenty of wheel clearance.

The final pieces to the mechanical parts puzzle are the ride height sensors. These digital do-gooders keep the truck height in check by maintaining pressure to your pre-desired setting.
Here you can see the complete rear suspension installed and ready to be covered by the bed—but before that we need to coat that frame!

KBS Coatings is our go to source for frame and fuel tank coatings. This spray-on rubberized undercoating not only prevents rust and corrosion, but it also helps with sound deadening which is great for a 20-plus-year-old truck!
Before the bed can go on, we snipped off the back of the exhaust pipe so it doesn’t clank on the axle while driving. We will be replacing this in the next issue with an all new Flowmaster exhaust from Holley Performance.

With the hard part done, the bed can be bolted back into place and the fun part begins—ruining electrical wires and airline! But that’s after they mount the air tank.

Organizing and planning are a big part of any major modification, and this one is no different. Deciding which way to route the black airline and which wires need to go where is not a task for the tired. So, if you’ve been working long hours with no sleep, hold off on this step until after your nap.

When attaching the hose to the frame, be sure to give it some slack in case you need to trim the ends a few times. The last thing you want is to have to replace an entire airline for a few missing inches. Once it’s all complete, the battery power can be connected and tested. Time to turn the key!
You can’t hear it in the picture, but this baby is buzzing with energy from the dual compressors filling up the air tank.

Our choice for wheels is this ultra-bright chrome Bullet design from US Mags. These are staggered fit, 20-inch aluminum wheels with a width of 8 inches up front and 9.5 inches in the back. If you have any experience with air suspension, county roads and 35-series tires, you will more than likely understand our desires for a 40-series tire. Having a wider wheel in the back not only looks cool, but it also stretches the 40-series tire just a bit to give up some extra clearance out back.
Before we bolt up that new shiny chrome, we need to coat the bed and there will be over spray. We put the factory wheels back on for now and man this truck is low! Impressive since we didn’t have to cut anything major away from the original truck.

Before we can take it for a test ride, we need to coat the bed with a real bedliner. This will prevent it from rusting near the drill holes and will look amazing next to the new wrap. We also welded up the stake pockets on top of the bed rails for a smoother look.

THE Finale

For project Artemis, we decided to venture into the world of wraps. The body isn’t great, we don’t have time for a color change, and a full custom paint job was never in the budget. So, some digital graphics printed on vehicle wrap material will cover up the factory coating.

With Artemis looking good on the new 20-inch US Mag wheels, it’s time to address the exterior of the truck. Step one in our complete re-cover of the faded OEM paint is to call We Print Wraps. We let them know what kind of vehicle we’re working with and our idea of a wild design that would cover up some paint and body imperfections. Whether you’re looking for a solid color or something completely custom like we are, We Print Wraps can handle the job and ship it directly to you.
We explained the concept behind the idea and some inspiration for the design. A combination of “Ready Player One” and “CyberPunk” is the direction we pointed artist Ryan Sandoval and, as you should with any great designer, we gave him total freedom and let him loose with no supervision.

Ryan had one trick up his sleeve, and we were blown away when he explained how this bioluminescent panel will sit behind the wrap in certain locations, lighting up with the push of a button. So exciting!
With the adhesive backing removed and the wheel wells cleared and cut, the install team from Tate Designs in Ft. Lauderdale, Florida, start to carefully lay down the vinyl, keeping it straight and free of air bubbles or debris.
Once the body panels are completely smooth and free of air, they can trim the windows without cutting any of the factory rubber. Again, another reason to contact a professional installer for your vinyl wrap.
Now they can lay down the vinyl knowing everything lines up perfectly. Trim all the edges and move onto the next panel.
Now you can see what the wrap looks like during the day and at night.
And here it is! Project Artemis with her new suspension and one-of-a-kind wrap. We couldn’t be happier.